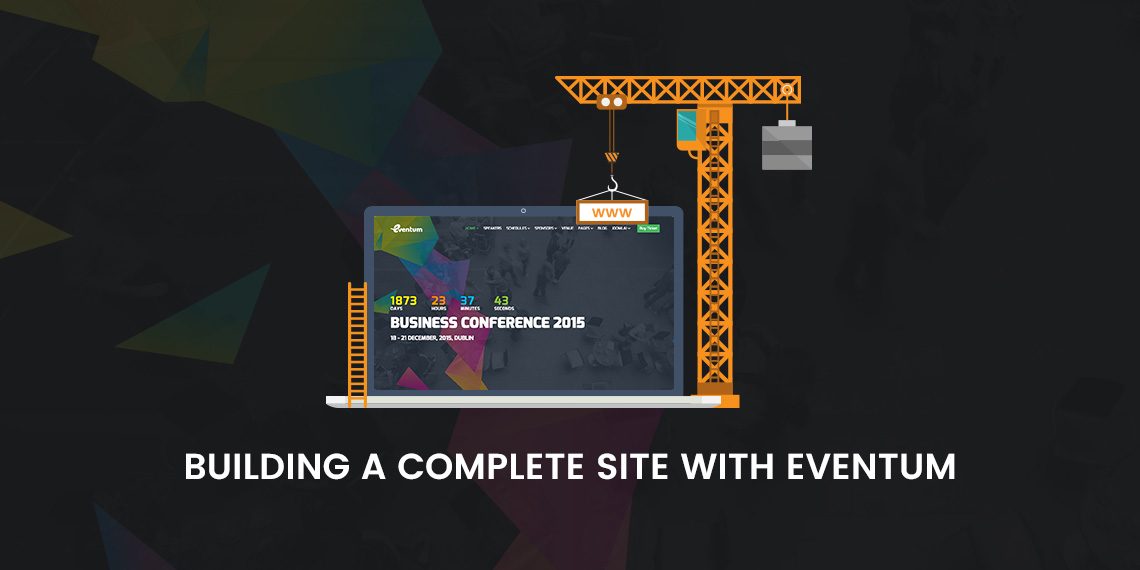
Welcome to the world of Eventum. This theme is dedicated to event and conference sites. You can present your event schedule, participants, location and every other details beautifully with Eventum. We’ve prepared some videos to show how you can create a complete event site with Eventum. Let’s see!
Preparing the Site to add Contents
After downloading and installing the theme, you can start building the site. We have a video on how to install the theme. You can watch that here. Assuming that you’ve already installed and activated Eventum, now we need to create a page called “Home” and set that as our homepage. Then we will edit that page.
Adding a Countdown Timer
A countdown timer is very important to communicate the event date. It will show how many days are left until the event date. Login to the site and visit dashboard. Open and edit the “Home” page.
Adding Visual Descriptions
You can add images, texts, buttons and more on any page easily. Let’s see how to do it.
Adding a ‘BUY TICKET’ Button on the Top Menu
Assuming that you can and have already added a menu bar on the top of the site, let’s see how to enhance its functionality. You can add a highlighted ‘Buy Ticket’ button on the top menu easily. At first go to Dashboard > Appearance > Menu. Open the target (top) menu in editing mode. Click ‘Screen Options’ found on the upper right corner of the screen. Mark the ‘CSS Classes’ option to show advanced menu properties. Now create a new custom menu item and add it to the top menu bar.
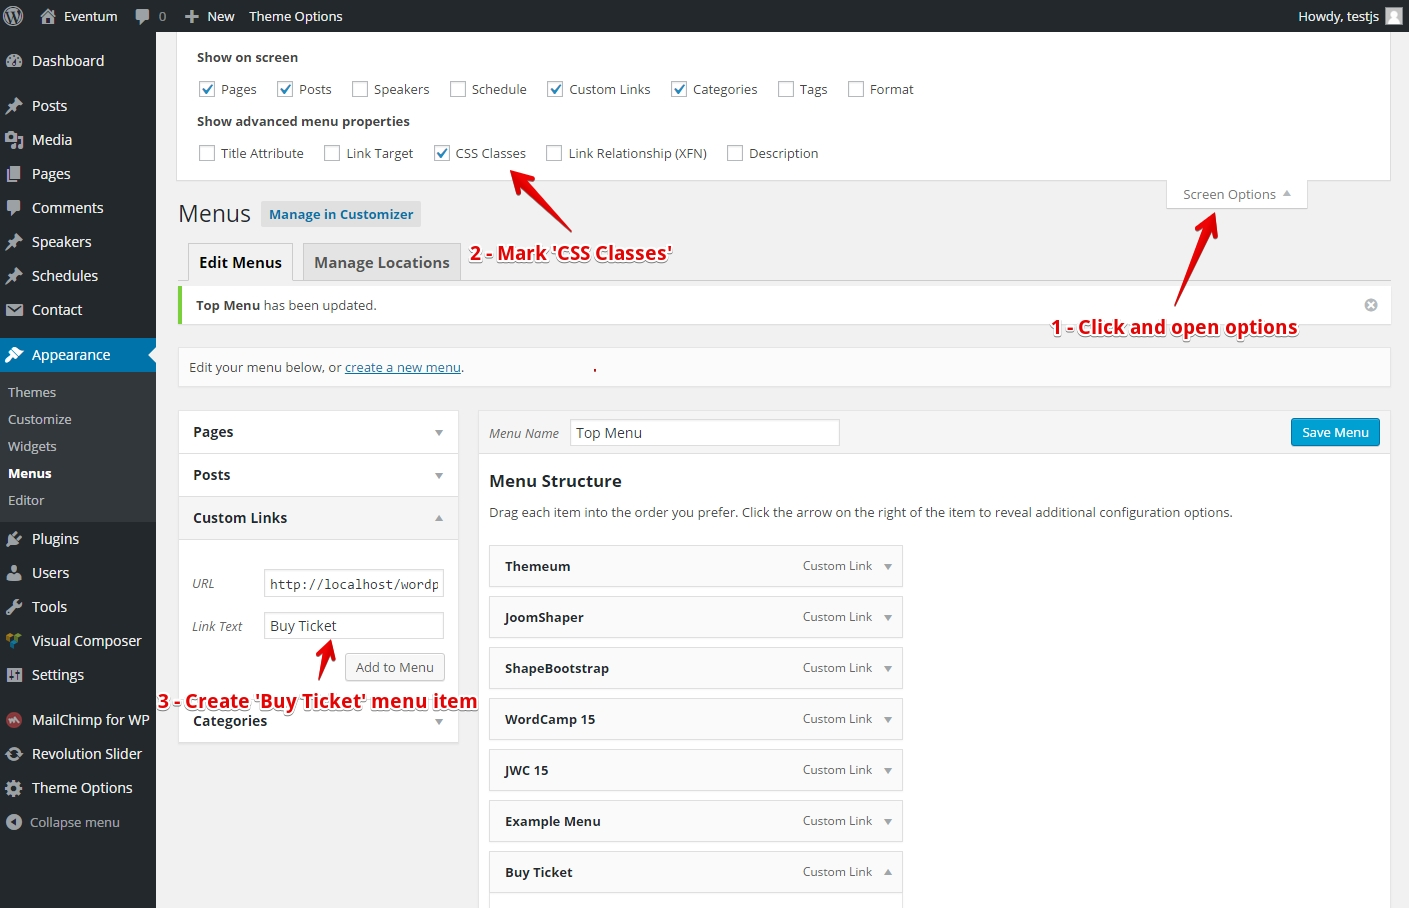
After adding the menu item to the menu bar, edit this individual item. Put our custom class ticket-menu inside it. Save changes.
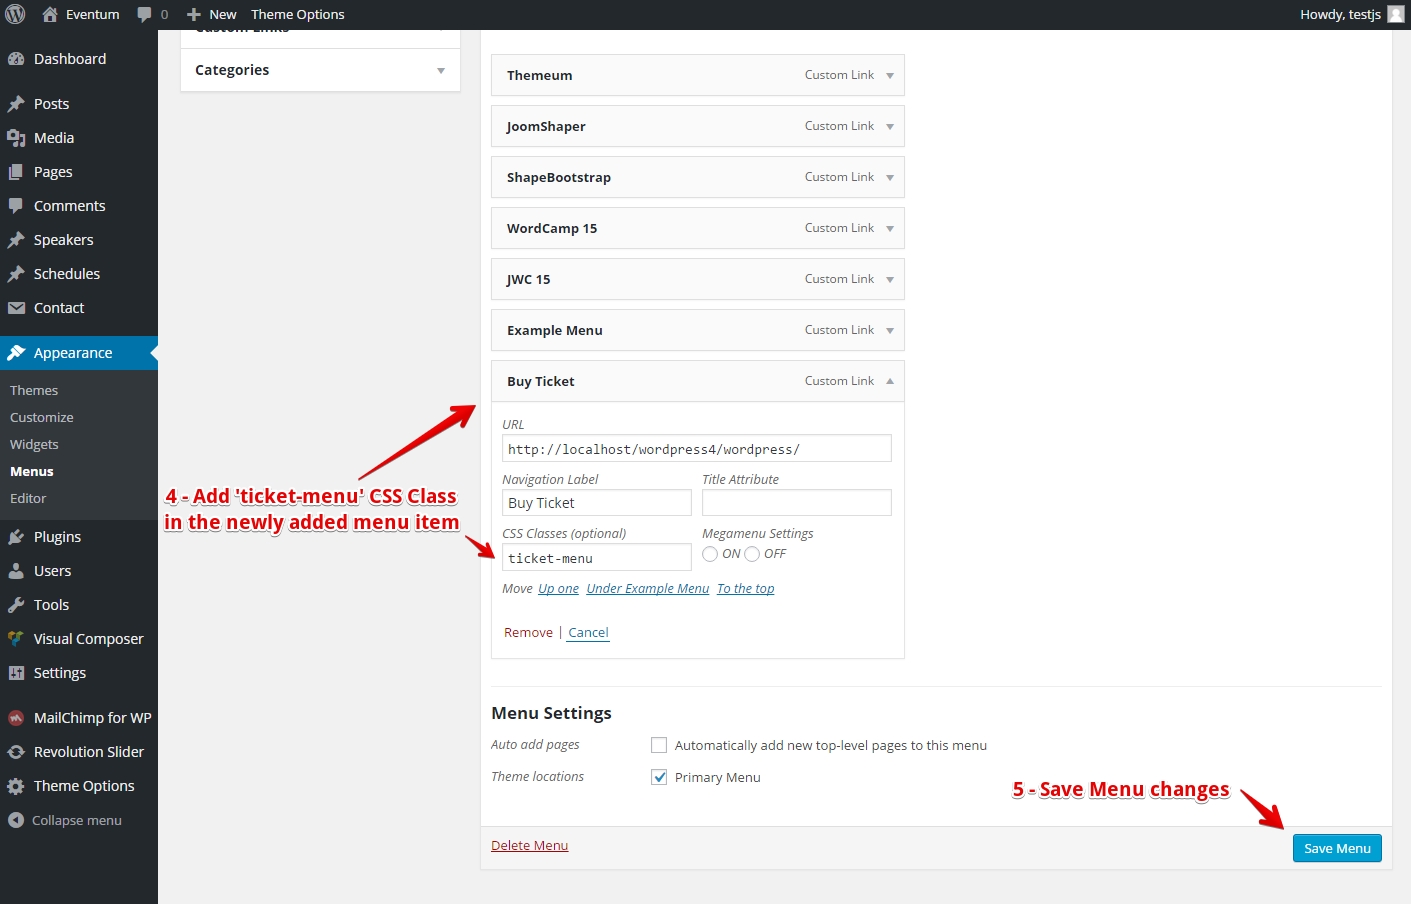
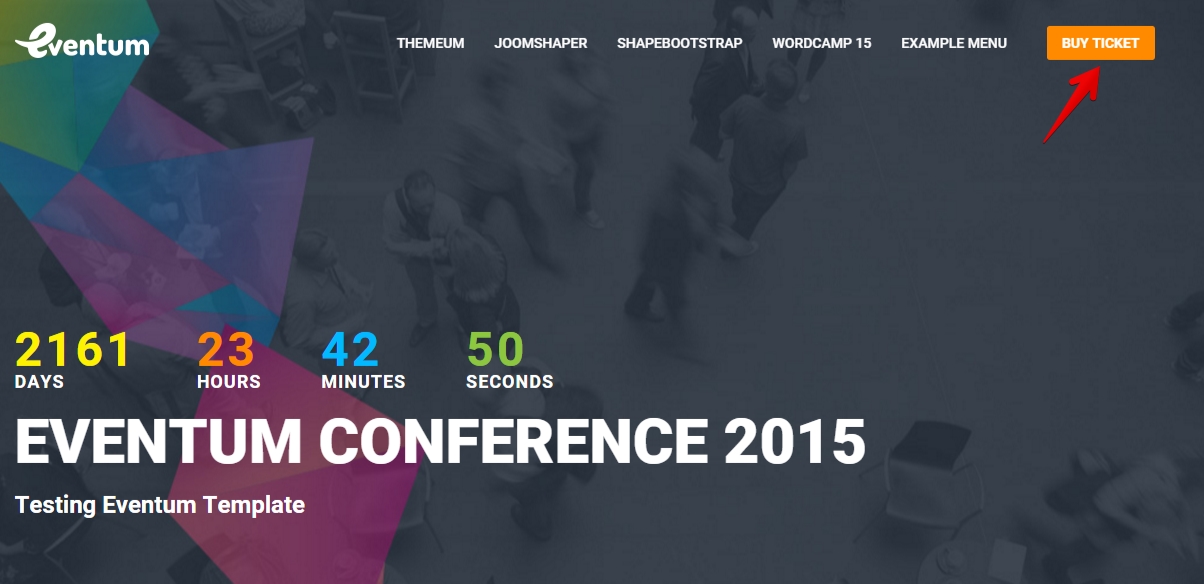
This will render a highlighted ‘BUY TICKET’ button on your event site’s top menu.
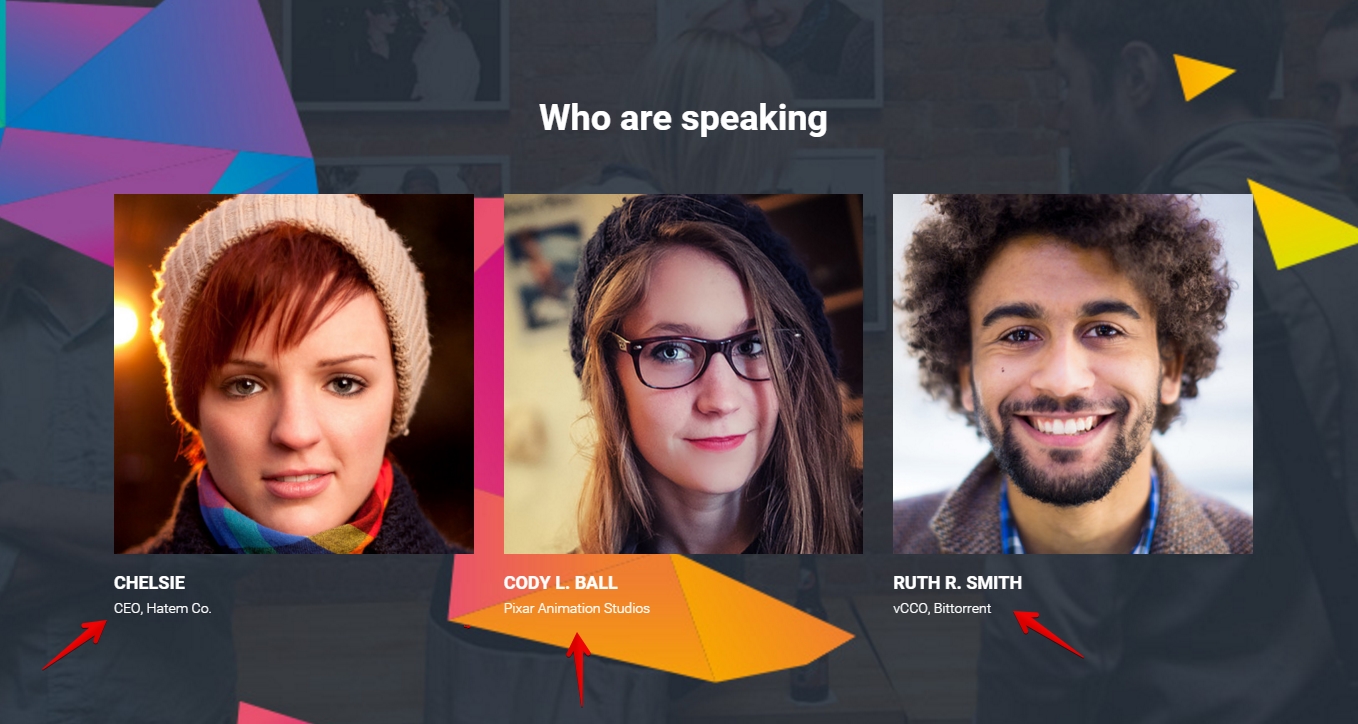
Adding Speakers
We can add speakers list on the homepage as well as create a dedicated page to list the event speakers. To add a speaker, first go to the dashboard. Create a new speaker by going to New > Speaker. You can also use the left-side Speakers menu option on the dashboard.
Adding Schedules
To add a schedule, first go to the dashboard. Create a new schedule by going to New > Schedule. You can also use the left-side Schedules menu option on the dashboard.
Adding Speakers on the Homepage
Open the default (static) home page in editing mode and put speakers list on the homepage using Visual Composer.
By default, the speakers’ names may be shown in black fonts. You can make it transparent by adding our custom class into the ‘Speaker Listing’ element. At first open the element’s settings dialogue box. Enter our custom class speaker-transparent inside it and save settings. Update the page.

Now you will see transparent fonts on the speakers listing.
Adding Schedules on the Homepage
Open the default (static) home page in editing mode and put schedules on the homepage using Visual Composer.
Adding Sponsor List, Blog Headlines, Map and Email Newsletter Form on Home
If you want to show a list of event sponsors on the site’s homepage, you can do it easily. You will just need to add a new row and then place a title along with sponsor organizations’ logos.
To add blog headlines, at first you need to publish some blog posts on the site. Then use Visual Composer to place some headlines on the home.
Adding a map is very easy. Just place our custom Google Map shortcode (or element) on the desired place of a page. Provide necessary map frame information like latitude, longitude, color, address etc.
To add an email newsletter form on your site, you need to put two things on the desired page using Visual Composer. One is the title. Another is a text block which contains Mailchimp short code.
If you don’t like the default newsletter form, you can use our customized form too. Go to the site dashboard and paste our custom code into MailChimp’s specified form. The code is given below:
<p class="eventum-form"><input type="email" name="EMAIL" placeholder="Your email address" required /></p> <p class="mailchip-submit"><input type="submit" value="Subscribe" /></p>
We hope you’ve enjoyed this series of Eventum video tutorials. You can see all of these videos in this playlist. Please let us know your thoughts and questions via comments. Thank you.