Having an eLearning website made through WordPress is one of the easiest ways to have your desired site up and running. WordPress makes creating an eLearning course site effortless through the use of top-of-line LMS plugins, like Tutor LMS for one.
To make sure our website is operating at its best we need to perform regular backups. In the world of technology, we all know the importance of having regular backups for everything. Having a backup of data is fundamental to tech, and your website is no different. Let us get started and see how we can back up our WordPress eLearning course site most efficiently.
Where and When Should You Back Up
There are many ways to create a backup for a WordPress eLearning site. We can do this process manually through your web hosting service. If your web host uses the cPanel dashboard then you can backup the site quite easily through that. Contact your web host inquiring about the backup process details. Alternatively, we can use one of the many plugins WordPress has to make this process much easier and that is the way we are going to go.
Before we look into how to install our plugin and set it up, we must talk about a couple of things:
- Backup Frequency
- Backup Storage
Backup frequency refers to how often you should back up your website. The general rule of thumb is to have it backed up at least once a month, if not every week. For a more active site like an eLearning website, there are a lot of updates happening. Because new students are registering and courses are being added often, a more frequent backup is recommended. While the decision rests with you, we suggest doing it at least once every week. Additionally, a backup must be done before any site update goes through as a bug might cripple your website.
Backup storage must also be kept in mind, WordPress support themselves recommends having your backup stored safely in at least 3 separate locations. Some backup storage locations could be:
- Your computer hard drive
- CD/DVD
- A USB pen drive
- Online storage locations eg. Google drive, etc.
- Email accounts
This ensures that your data is as safe as it can be. Even if one of your backup files somehow becomes corrupt, you have a quick fix. You know what they say, good to keep backups for your backups.
What Datasets You Need to Backup
Backing up a website simply put is to take a snapshot of your data in case a change/problem crashes your website. In the event of any mishap, you should always have the ability to restore your website to a previous version. Essentially when we talk about backing up our site what we are backing up. Your WordPress eLearning course site consists of:
- WordPress Core installation
- WordPress plugins
- WordPress themes
- Images and files
- JavaScript, PHP, and other code files
- Additional files and static web pages
These are essential materials to having your site up and running at all times. No need to be intimidated by this list, we have a pretty smooth road ahead of us to back up all the elements. Lucky for us WordPress is chock full of useful plugins. We can have everything saved with just a few clicks.
Which Backup Service Should You Opt For
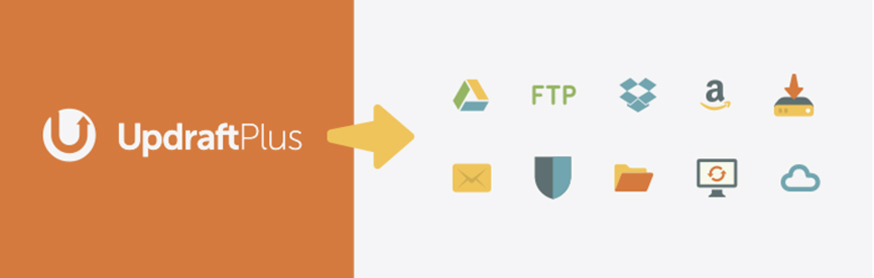
In this post, we look at one of the most popular WordPress plug-ins used to back up websites, UpdraftPlus. With over 3 million active installations and 5000+ reviews, we can comfortably suggest UpdraftPlus to our readers, and best of all, a bulk of the features are available with the free edition. Let us now take a look at how to set up UpdraftPlus to backup our site.
UpdraftPlus Installation
Installing UpdraftPlus is as simple as installing any other WordPress plugin, simply navigate to Plugins>Add New and search for “Updraft”, you should now see this screen come up

Go ahead and click “Install Now” followed by “Activate” after which the plugin should now be available on the list of your installed plugins. From there find the UpdraftPlus plugin and hit the “Settings” button

Simply click the “Next” button and it will guide you through its options.
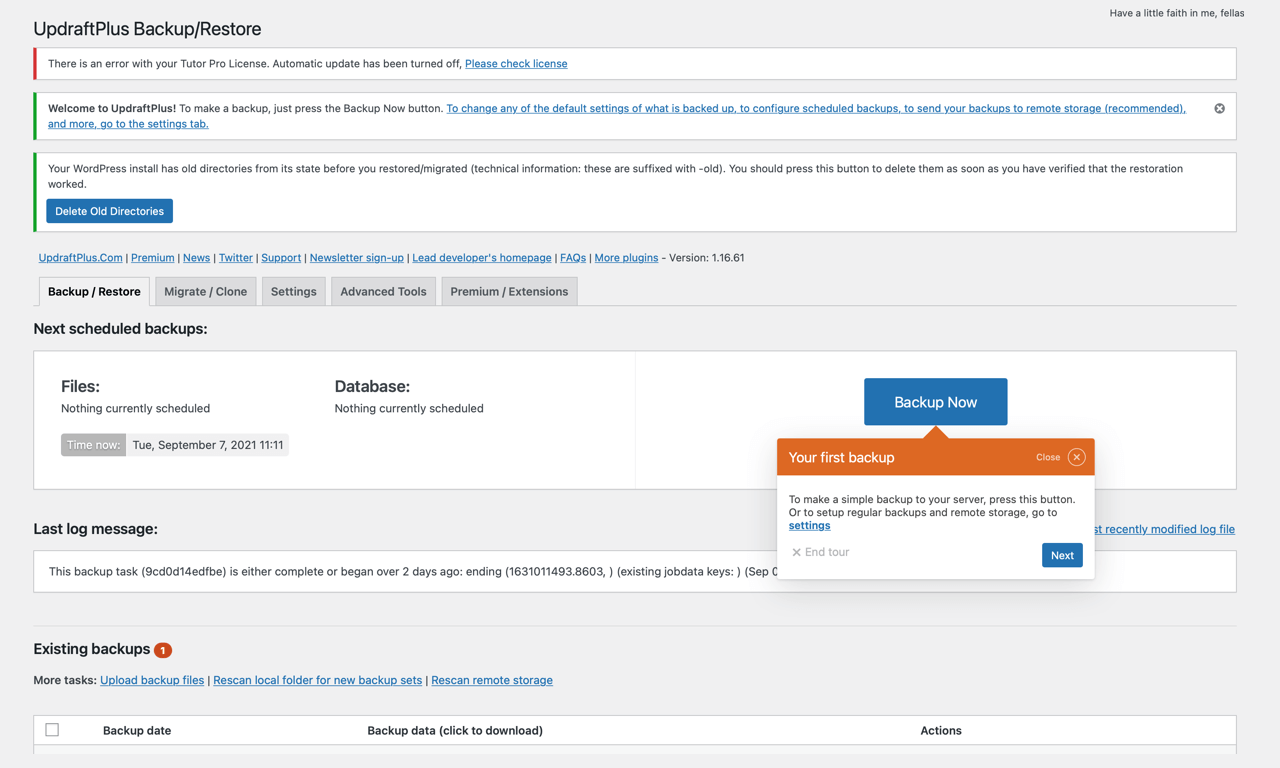
Creating a Backup
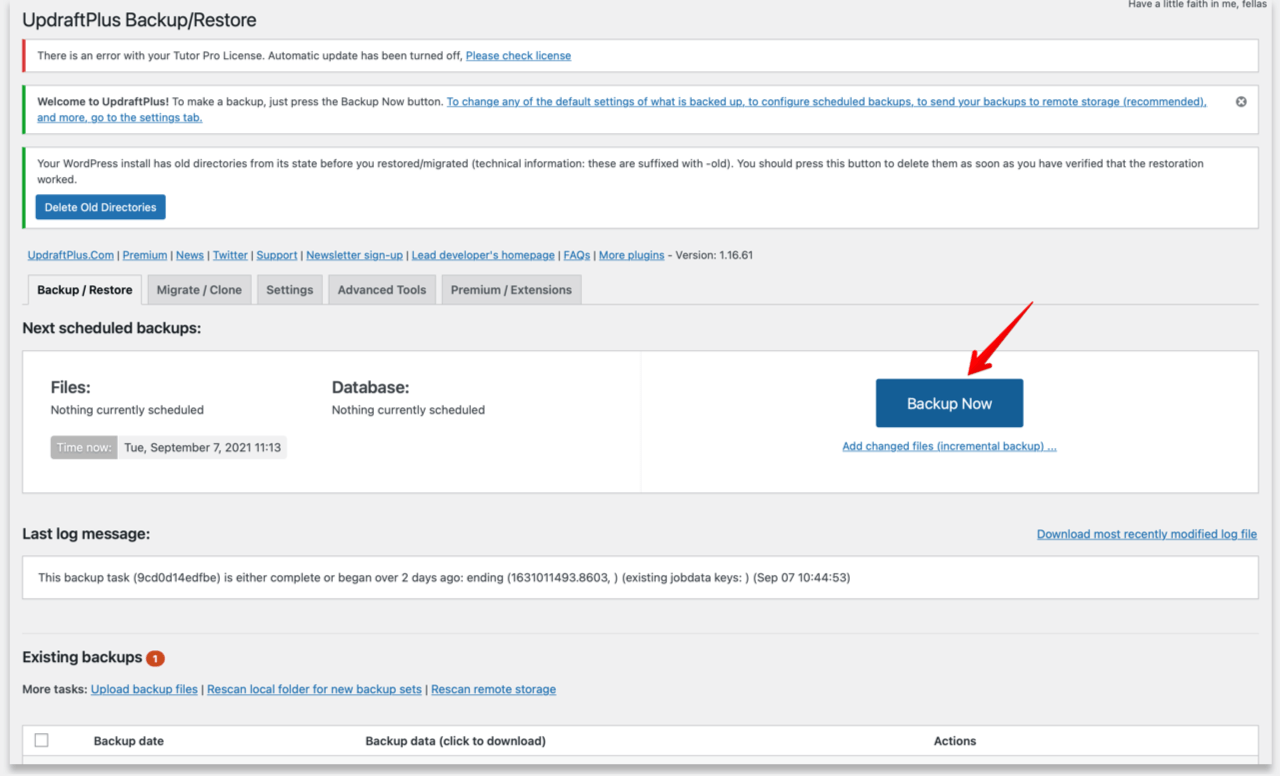
From the Backup/Restore settings tab, a click on the “Back up now” button will start the backup process.
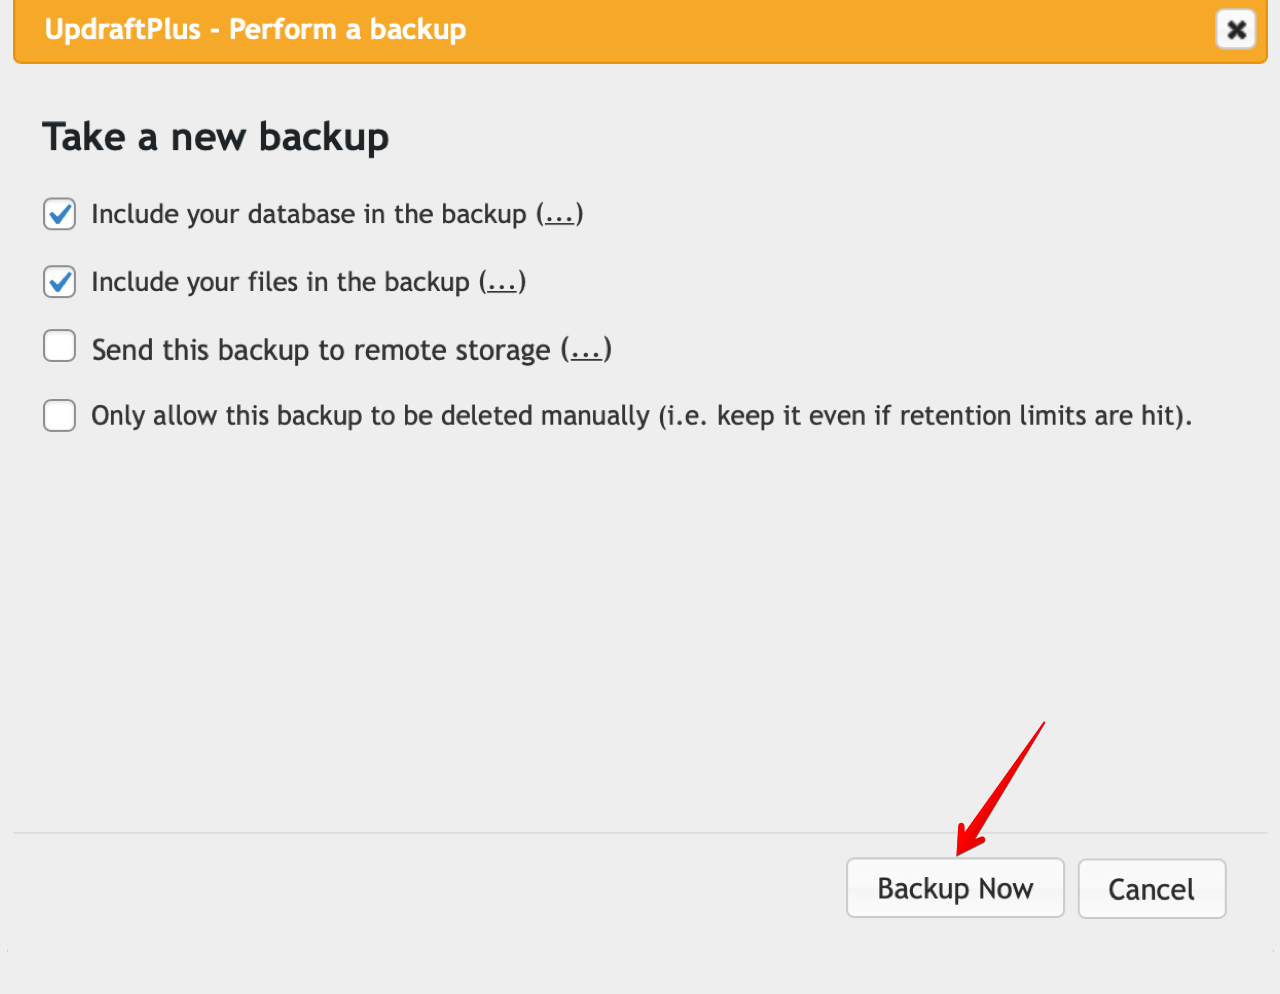
Make sure to check the boxes from this popup and hit “Backup now”.
Once the backup has been completed you can find your backup under the “Existing backups” section.
Scheduling Backups
Manually creating a backup each time is tedious and inefficient, thus we must set up an automatic backup schedule. Make your way to the settings tab for UpdraftPlus. There you can see a dropdown showing different interval options for creating backups. Set both dropdowns to “Weekly“.
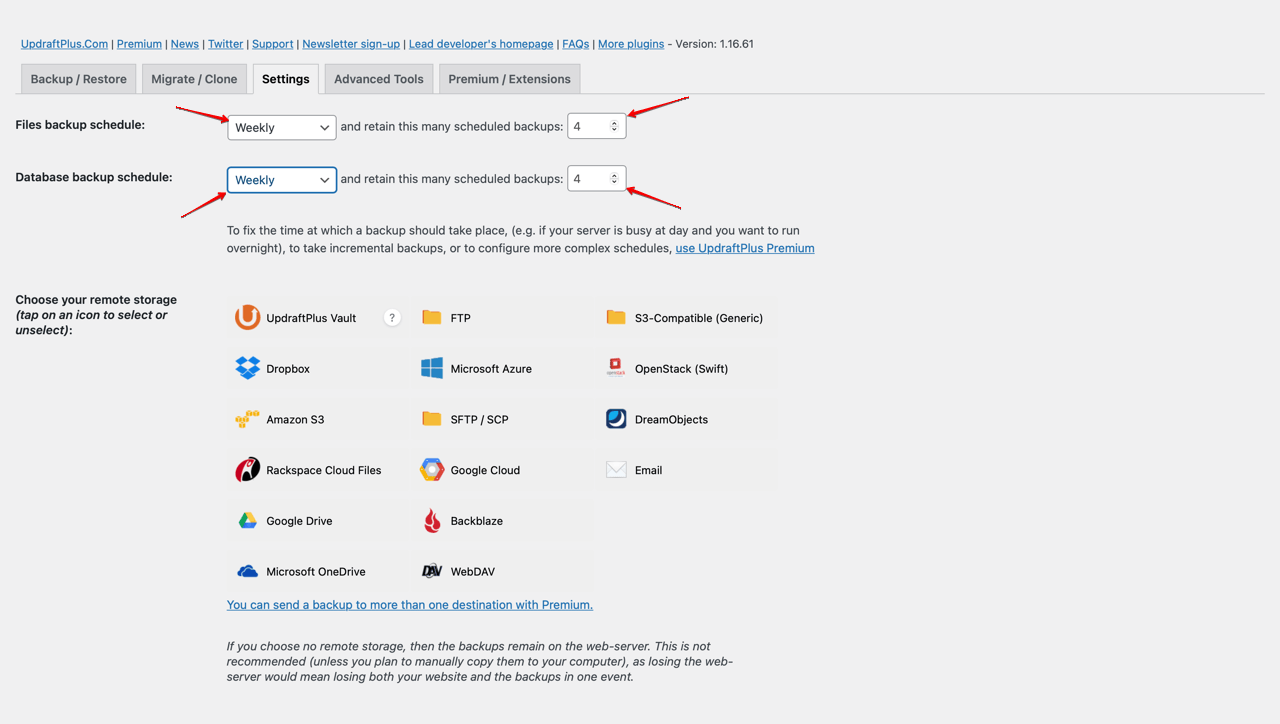
We also select how many backups we want UpdraftPlus to retain, we recommend setting this number to “4“. This means that it will take backups every week and store only the last 4 most recent backups. This way you have a month’s backup at hand always.
Backup Storage Location
There are several options for where you want the backup file to be saved. By default UpdraftPlus stores the backup files locally. You can navigate to the files at “wp-content/updraft” of your WordPress installation folder to find all the backup files if need be.
UpdraftPlus offers other cloud storage options as well if you wish to upload to a cloud drive. Setting up cloud storage is recommended as this allows the files to be secure in multiple locations. The free version allows upload to many locations including google drive and more.
Restoring the Backup
Having done all the prerequisites we must now take a quick glance at how we can restore our backup. If our site was hacked or corrupted, we should know how to have our site to go back to a previous version we can fix whatever problem we faced.
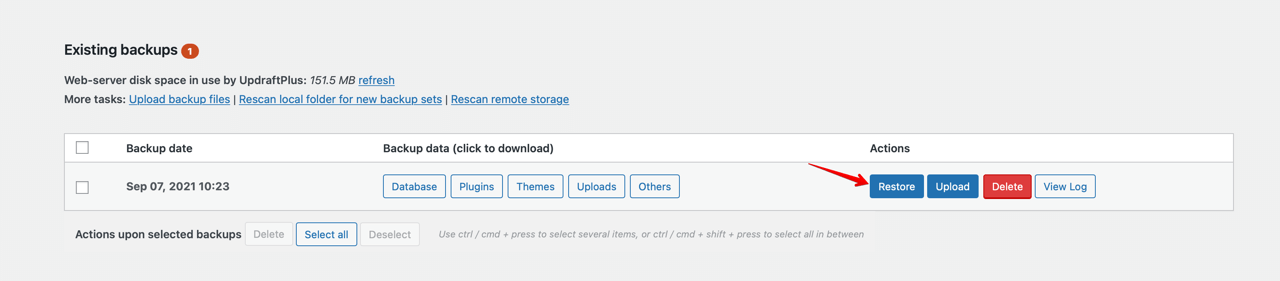
Navigate to the “Existing backups” section and find your most recent backup, simply click on “Restore” to begin the restoration process.
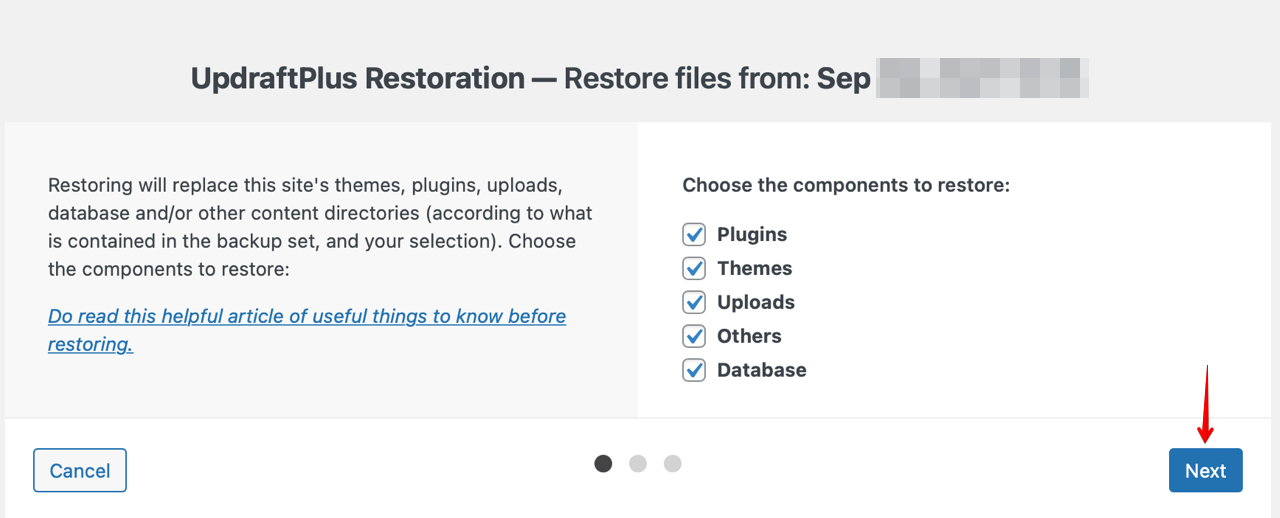
If you want the full course site to be restored to its previous state we must restore all the elements we had backed up.
In order to do that, from this screen select all the boxes to ensure complete recovery of our site and hit “Next”.
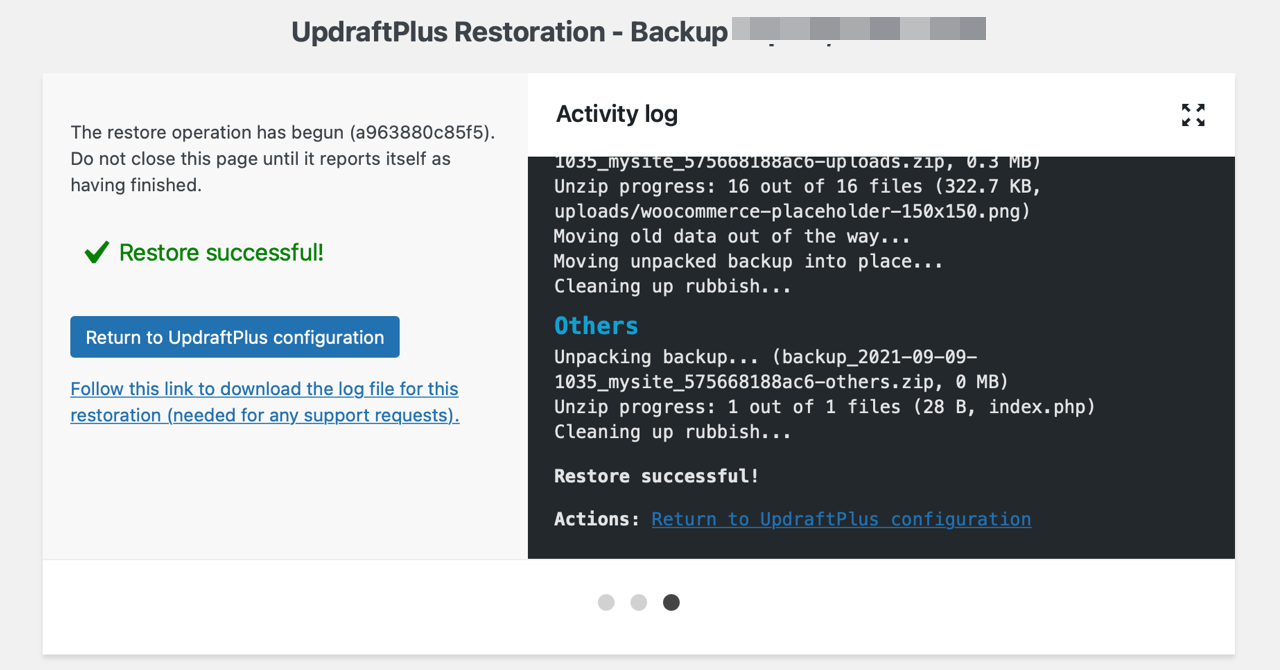
The backup should successfully restore shortly depending on how heavy the site was without any hiccups. The completion should look something like this. Et voila we have set up everything we needed.
Wrapping Up
While we have shown the process using the free version of UpdraftPlus, one could opt-in for the paid pro version and enjoy all of the features the plugin has to offer. You can check out the details of the pro version here. If you are using Tutor LMS for your eLearning website UpdraftPlus will work seamlessly with the steps we went through. Tutor LMS is also compatible with many other backup plugins, an example being Blogvault. To find out more on Tutor LMS and its integrations check out the extensive documentation.
And as always if you have any queries, do comment down below.