The world is becoming more and more globalized. In this day and age of technology, language is no longer a barrier for the world to come together. Non-native foreign speakers all understand the importance of spending resources to pick up a language skill. Furthermore, remote jobs are on the rise due to the shift in the world post-covid. This means that more and more remote job seekers are also looking to take their skills further and close the language gap they have with potential employers. So what does that mean for us, educators?
A window of opportunity now exists for instructors to put their valuable skills out on the table. Instructors who wish to create a business off of teaching languages to students around the world should be on the move.
The best method for maximum outreach is to have an online language learning site. This way anyone from anywhere can choose to enrol on one of your courses. Online accessibility ensures the growth of your site, marketing your content is easier with a site. We now understand we need a site, what’s the next step?
There are several ways to go about having our language learning site up and running that does not put a hole through the wallet.
The easiest way to do this would be to use WordPress. For the less tech-savvy of us, WordPress is what is known as a Content Management System or CMS. WordPress is the most popular CMS tool out there. Not much has to be said about the benefits of WordPress so let us dive right into the next stage.
Our Choice of Plugin
WordPress comes with a massive library of plugins that we can use to set up almost every aspect of our site. So to start off with our language-learning site, we need to first use an LMS plugin.
LMS or Learning Management System helps us set courses, quizzes, payment gateways and a lot more for our site. For our purposes, we are going to be using the Tutor LMS plugin. Tutor LMS has an intuitive design, ease of use and a ton of customization options that let us recommend it to our readers with ease.
In this article, we are going to be taking a look at the free version of Tutor LMS. Tutor LMS comes packing with a tonne of features on the free version. While the free version is enough to get us going, the pro version truly gives the premium features that make life all the easier for you. Give a look to find more about Tutor LMS Pro.
Installing Tutor LMS
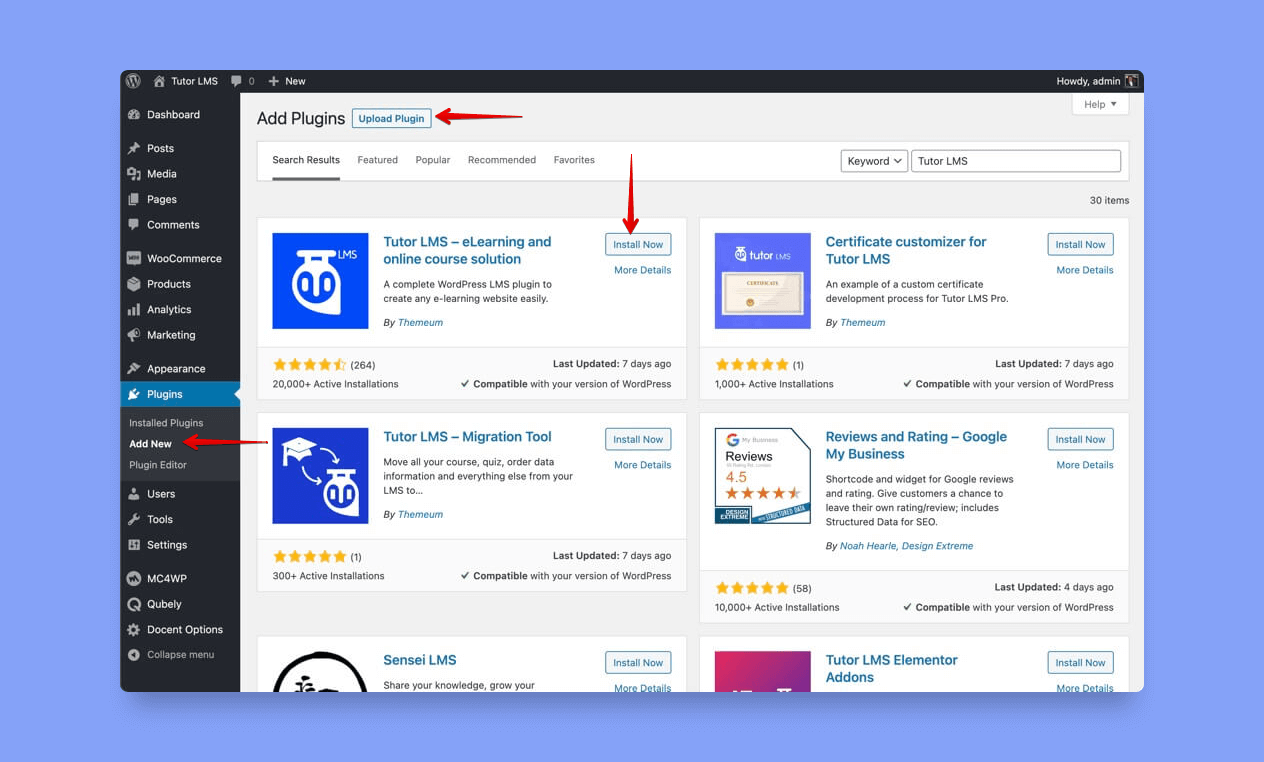
To install Tutor LMS we need to first go to our WordPress admin dashboard. Once there navigate to Plugins > Add New and search for Tutor LMS.
Hit install and activate to finish the installation.
Designing Your Site
With the plugin for our site decided on, we now move on to which theme we are going to use to beautify our site. A theme can help us get a starter pack and make the setup process for our site that much easier.
Since we are recommending Tutor LMS Pro, our prime option for themes would be Tutor Starter. A free and “all in one” Starter pack for Tutor LMS.
To get started with Tutor Starter, from the WordPress admin panel we go to the Appearance tab.
From there we click on Add new and search for “Tutor Starter”. Go ahead and hit Install and Activate. Then you’ll get a notice about installing TutorMate. You will get the demo sites as well as a lot of customization options.
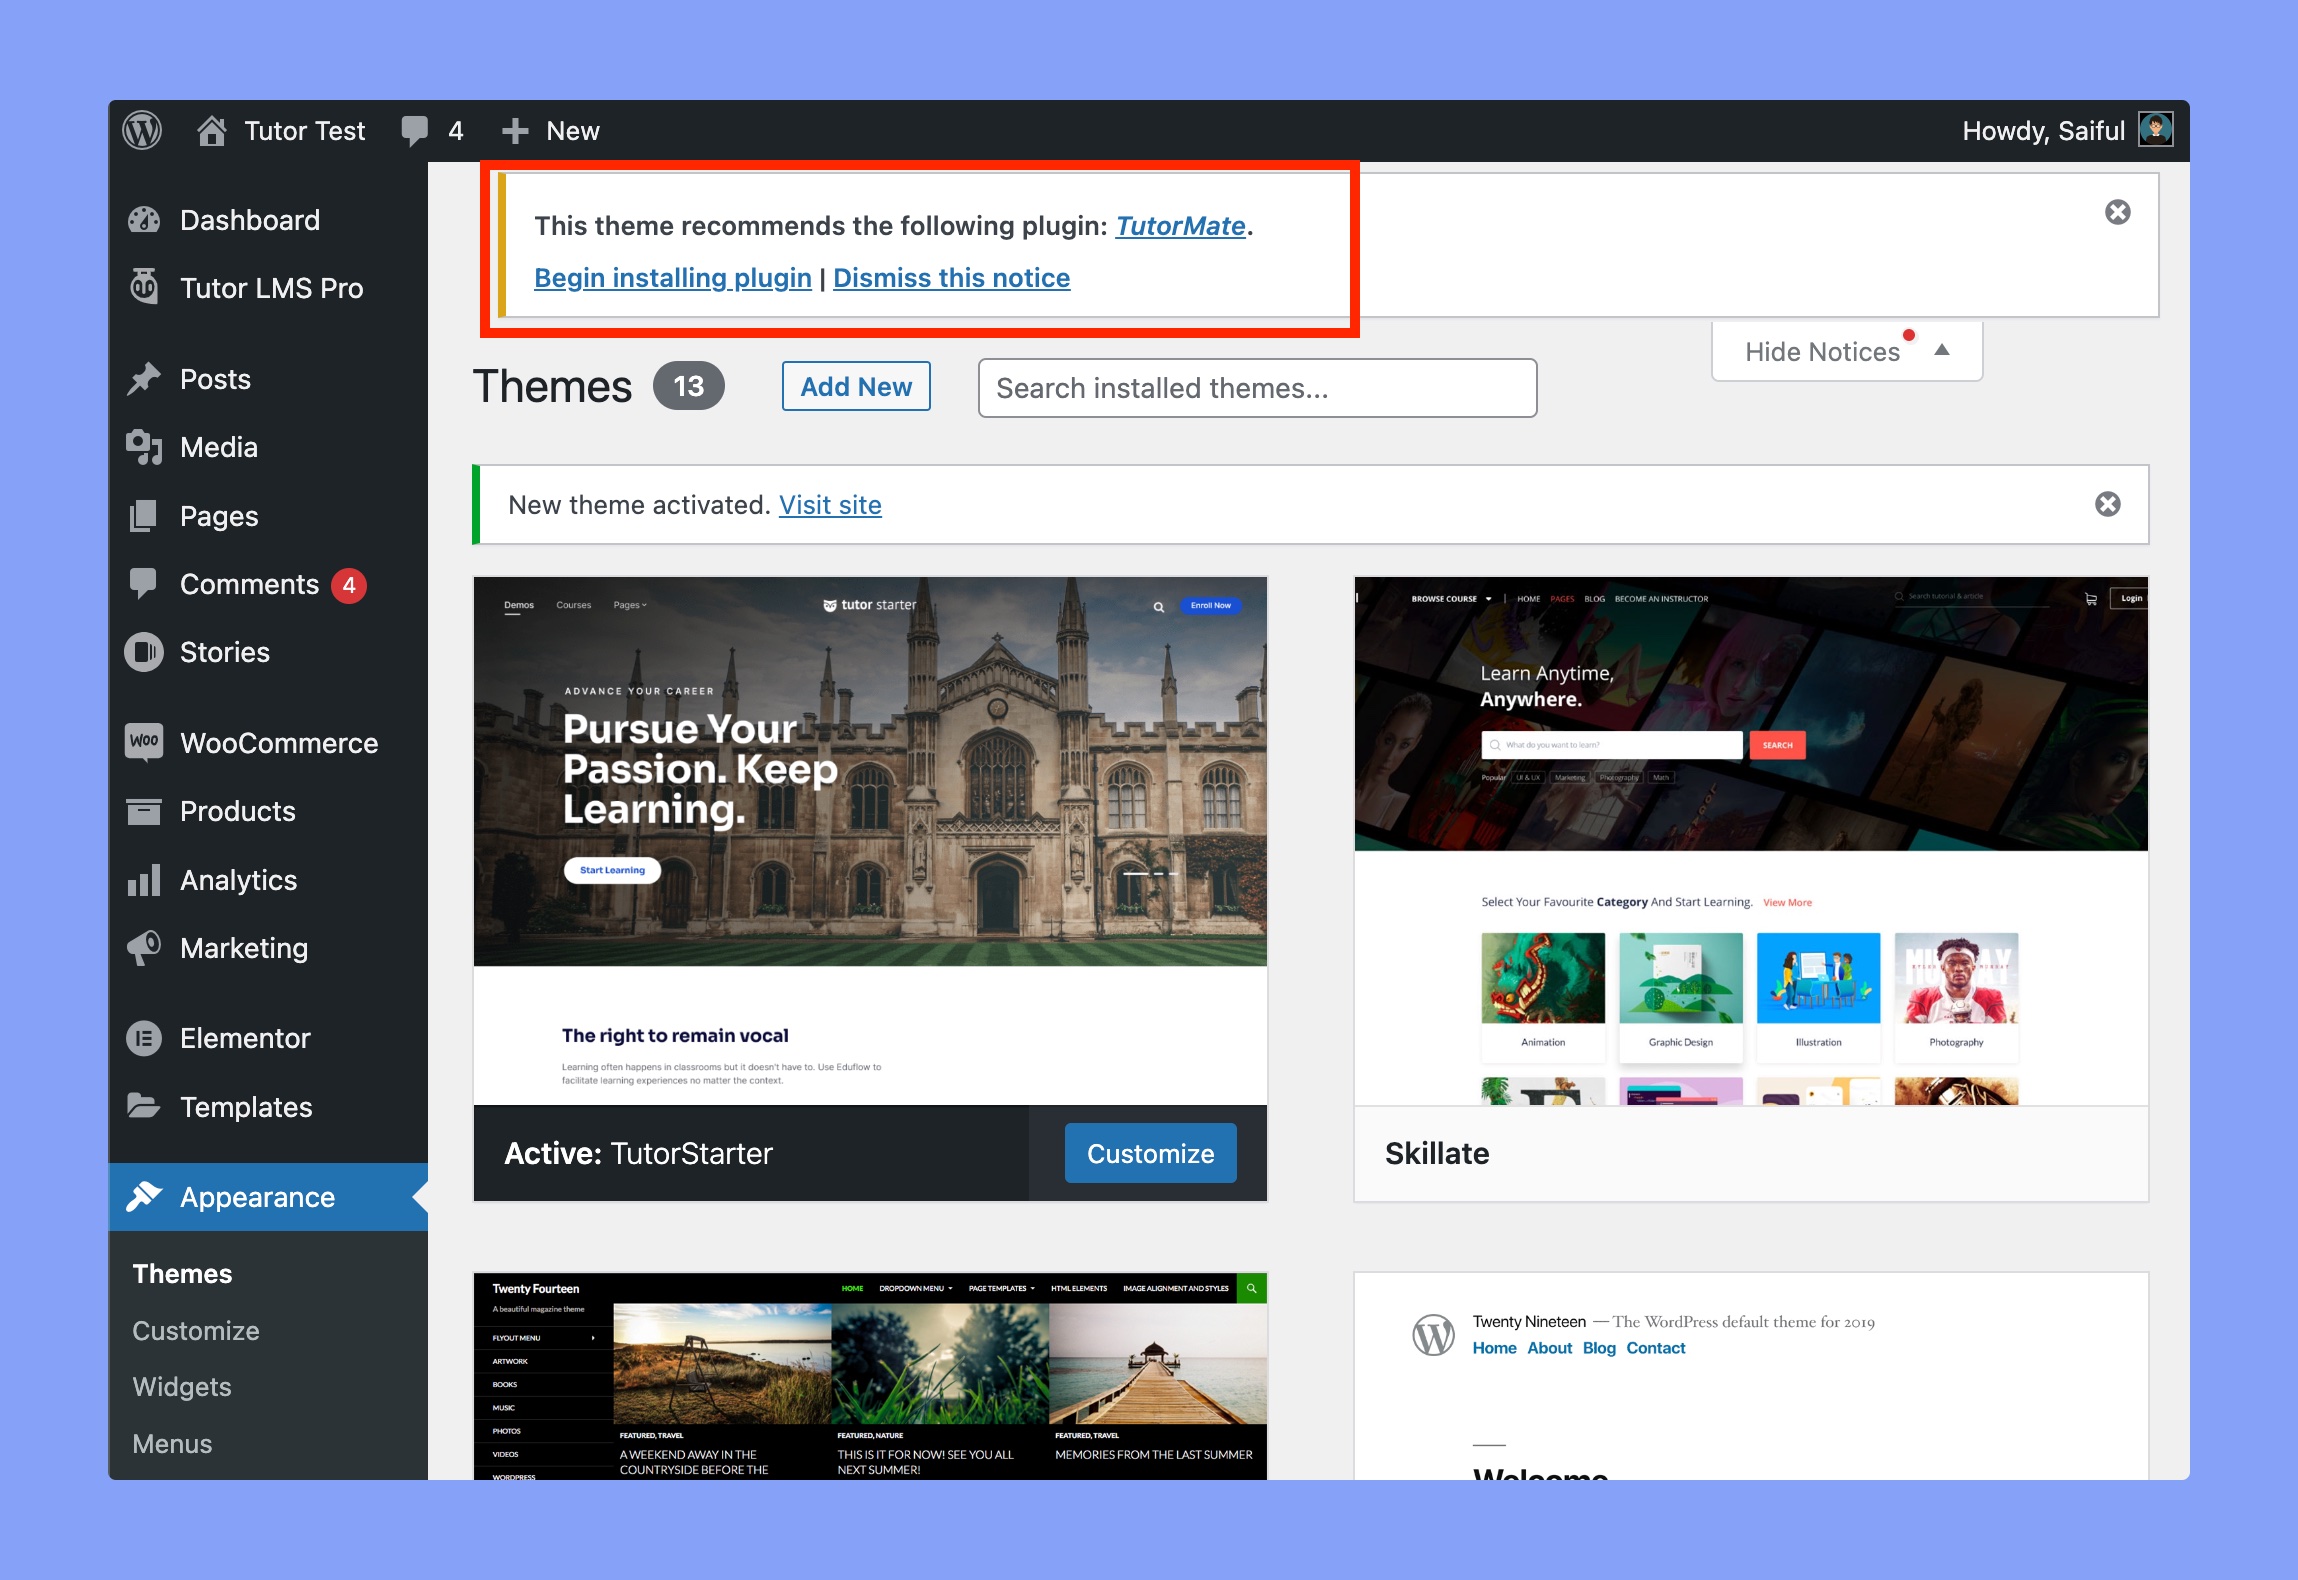
Besides, Tutormate can be downloaded like any other WordPress Plugin. Simply navigate to Plugins > Add New, and search for TutorMate. Install and activate to have Tutormate set up.
Adding a Starter Site
Once we have finished all the initial setup it is now time to get started with our site. Let us first add a starter pack from Tutor Starter to our language learning site. Since we have installed and activated Tutor Starter, we should see a new tutor starter menu come up on our WordPress admin panel.
From there navigate to Tutor Starter > Starter Sites to find the starter sites that Tutor Starter comes with.
For the sake of this article, we are going to be using the Instructor demo site.

Of course, you are free to use whichever one suits your purpose the best. You can also preview the site before you choose to import it, once ready just click Import and it should bring up this popup.
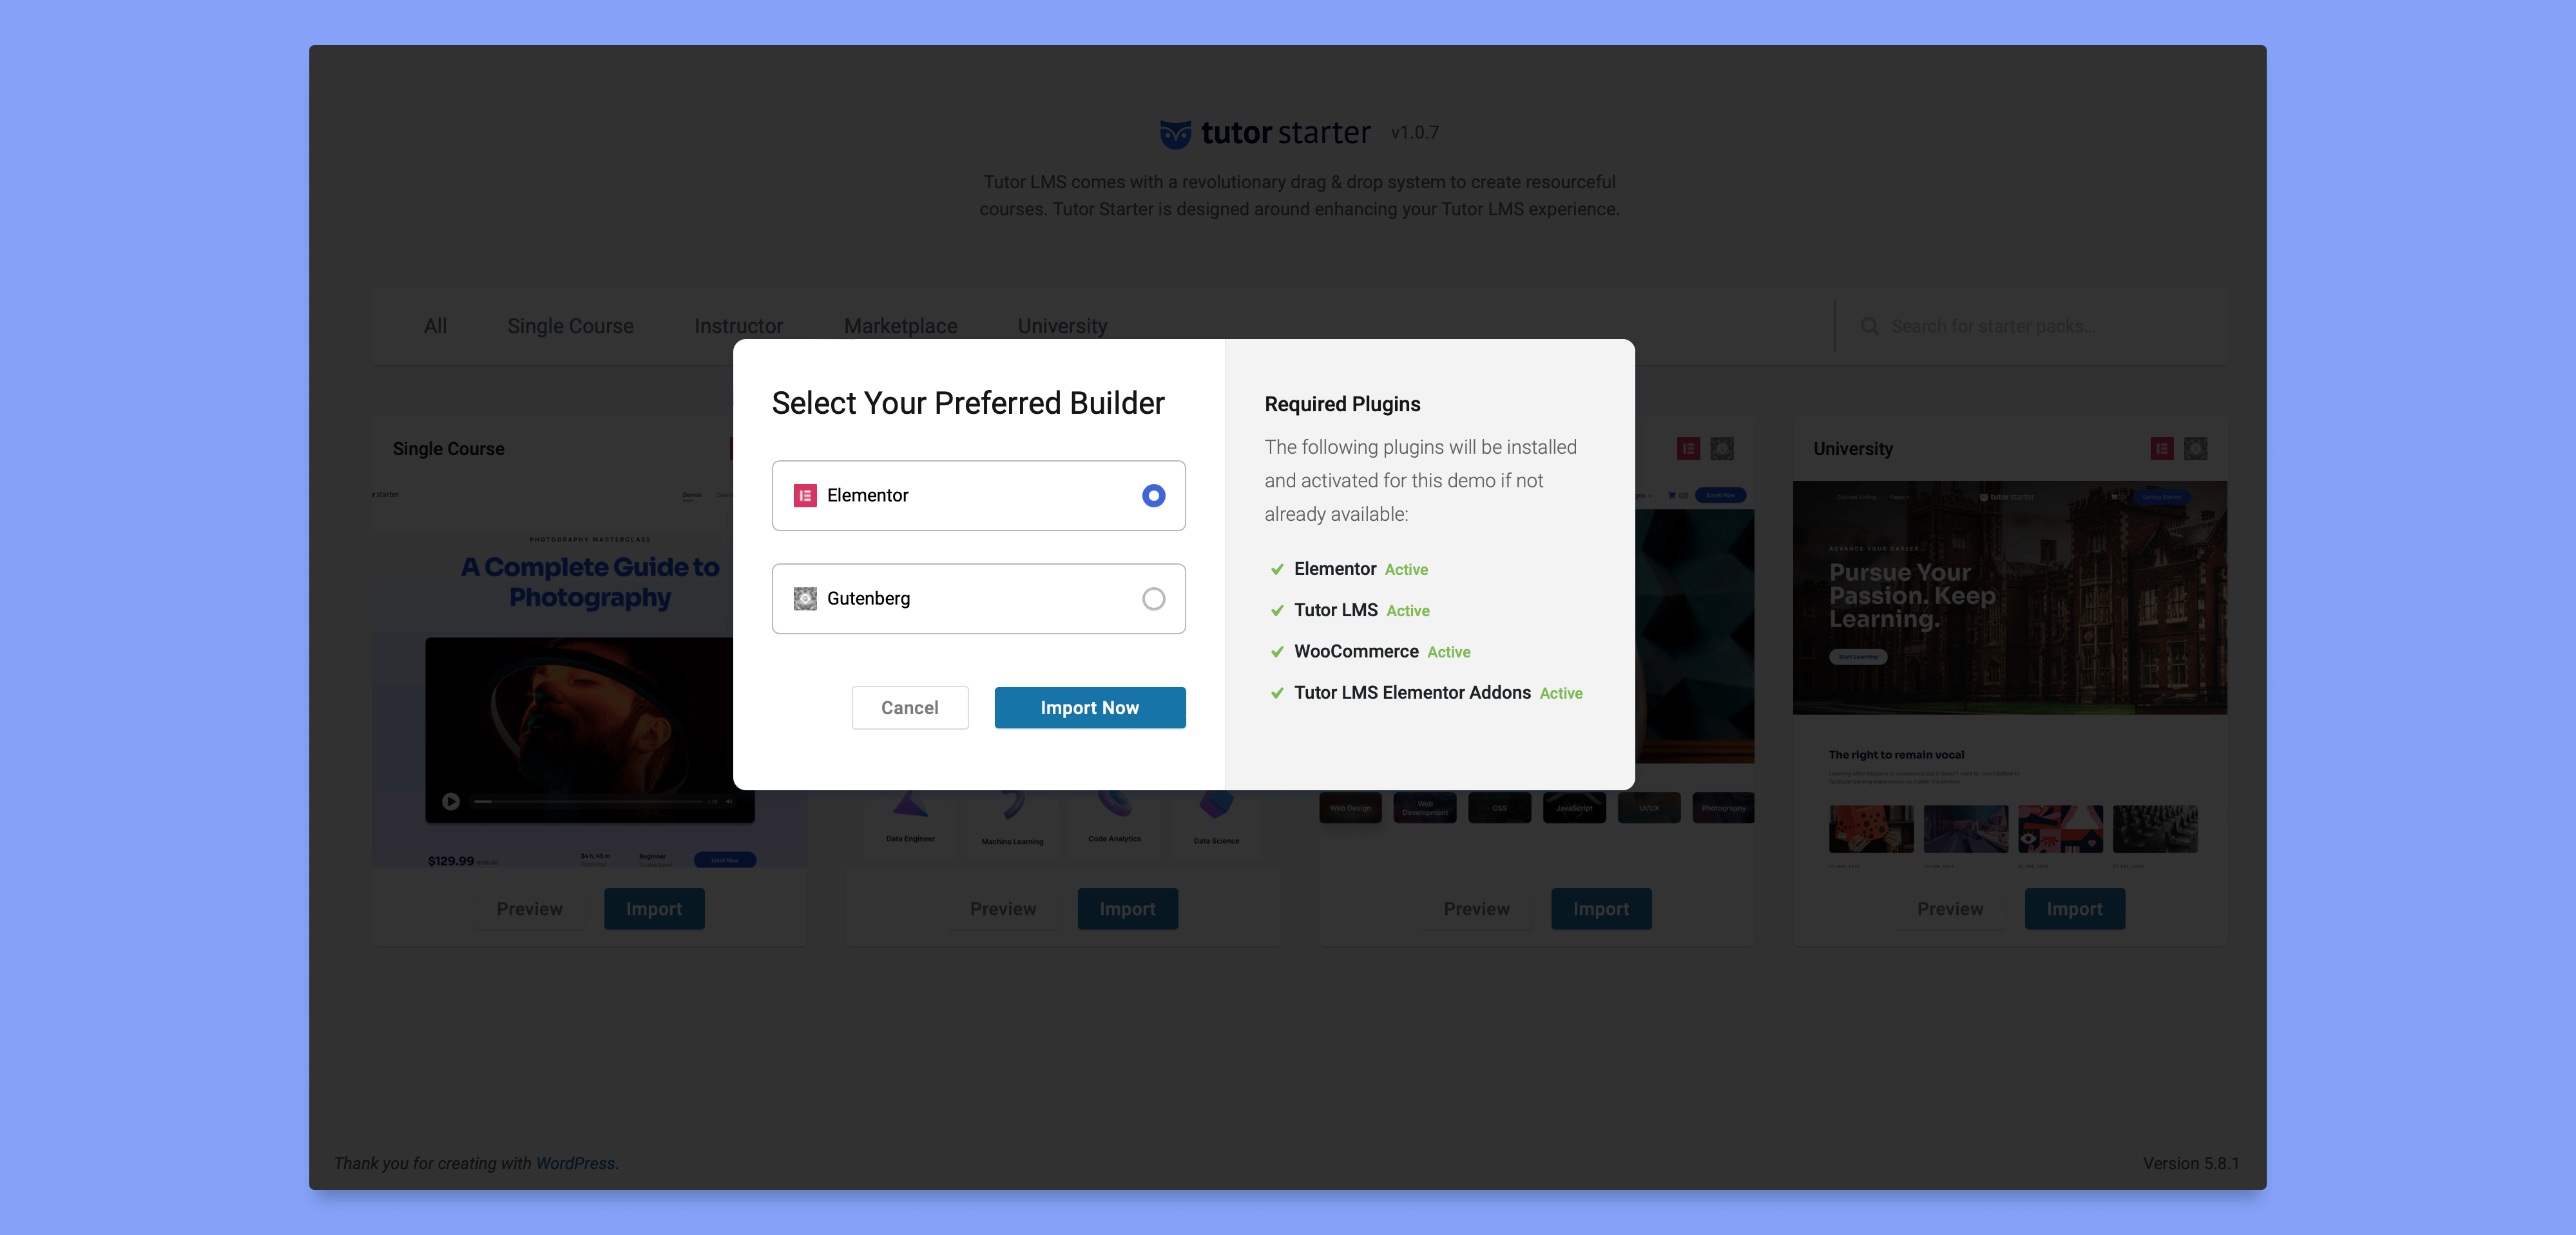
You get to select which builder you want to use, for the sake of this article we are going to be using the Elementor Builder. Notice that on the right, we have a list of required plugins to run this demo site. If you do not have any of these plugins not installed, they will automatically be installed for you.
Once the import is complete we click View Your Site and that takes us to our starter site.

A new tab should open up for you. From this editing page, we click on Edit with Elementor. This will open up the Elementor editing tab where you can design your site to your heart’s desire.
If you scroll down on the elements of Elementor, you will find a Tutor LMS section with over 24 elements to be added to your course site. But of course, for this, we need to first create a course. Let us look at how we can get about doing that.
Creating a Course
To set up our courses we navigate to WP Admin > Tutor LMS > Courses. From the courses menu, we select Add new to add a new course to our site.
We are then taken to the main course menu. Here we input the course name, add a course description, add a video that is most beneficial for a language learning course. There is also a featured image section that we can utilize to make the course more appealing to students.
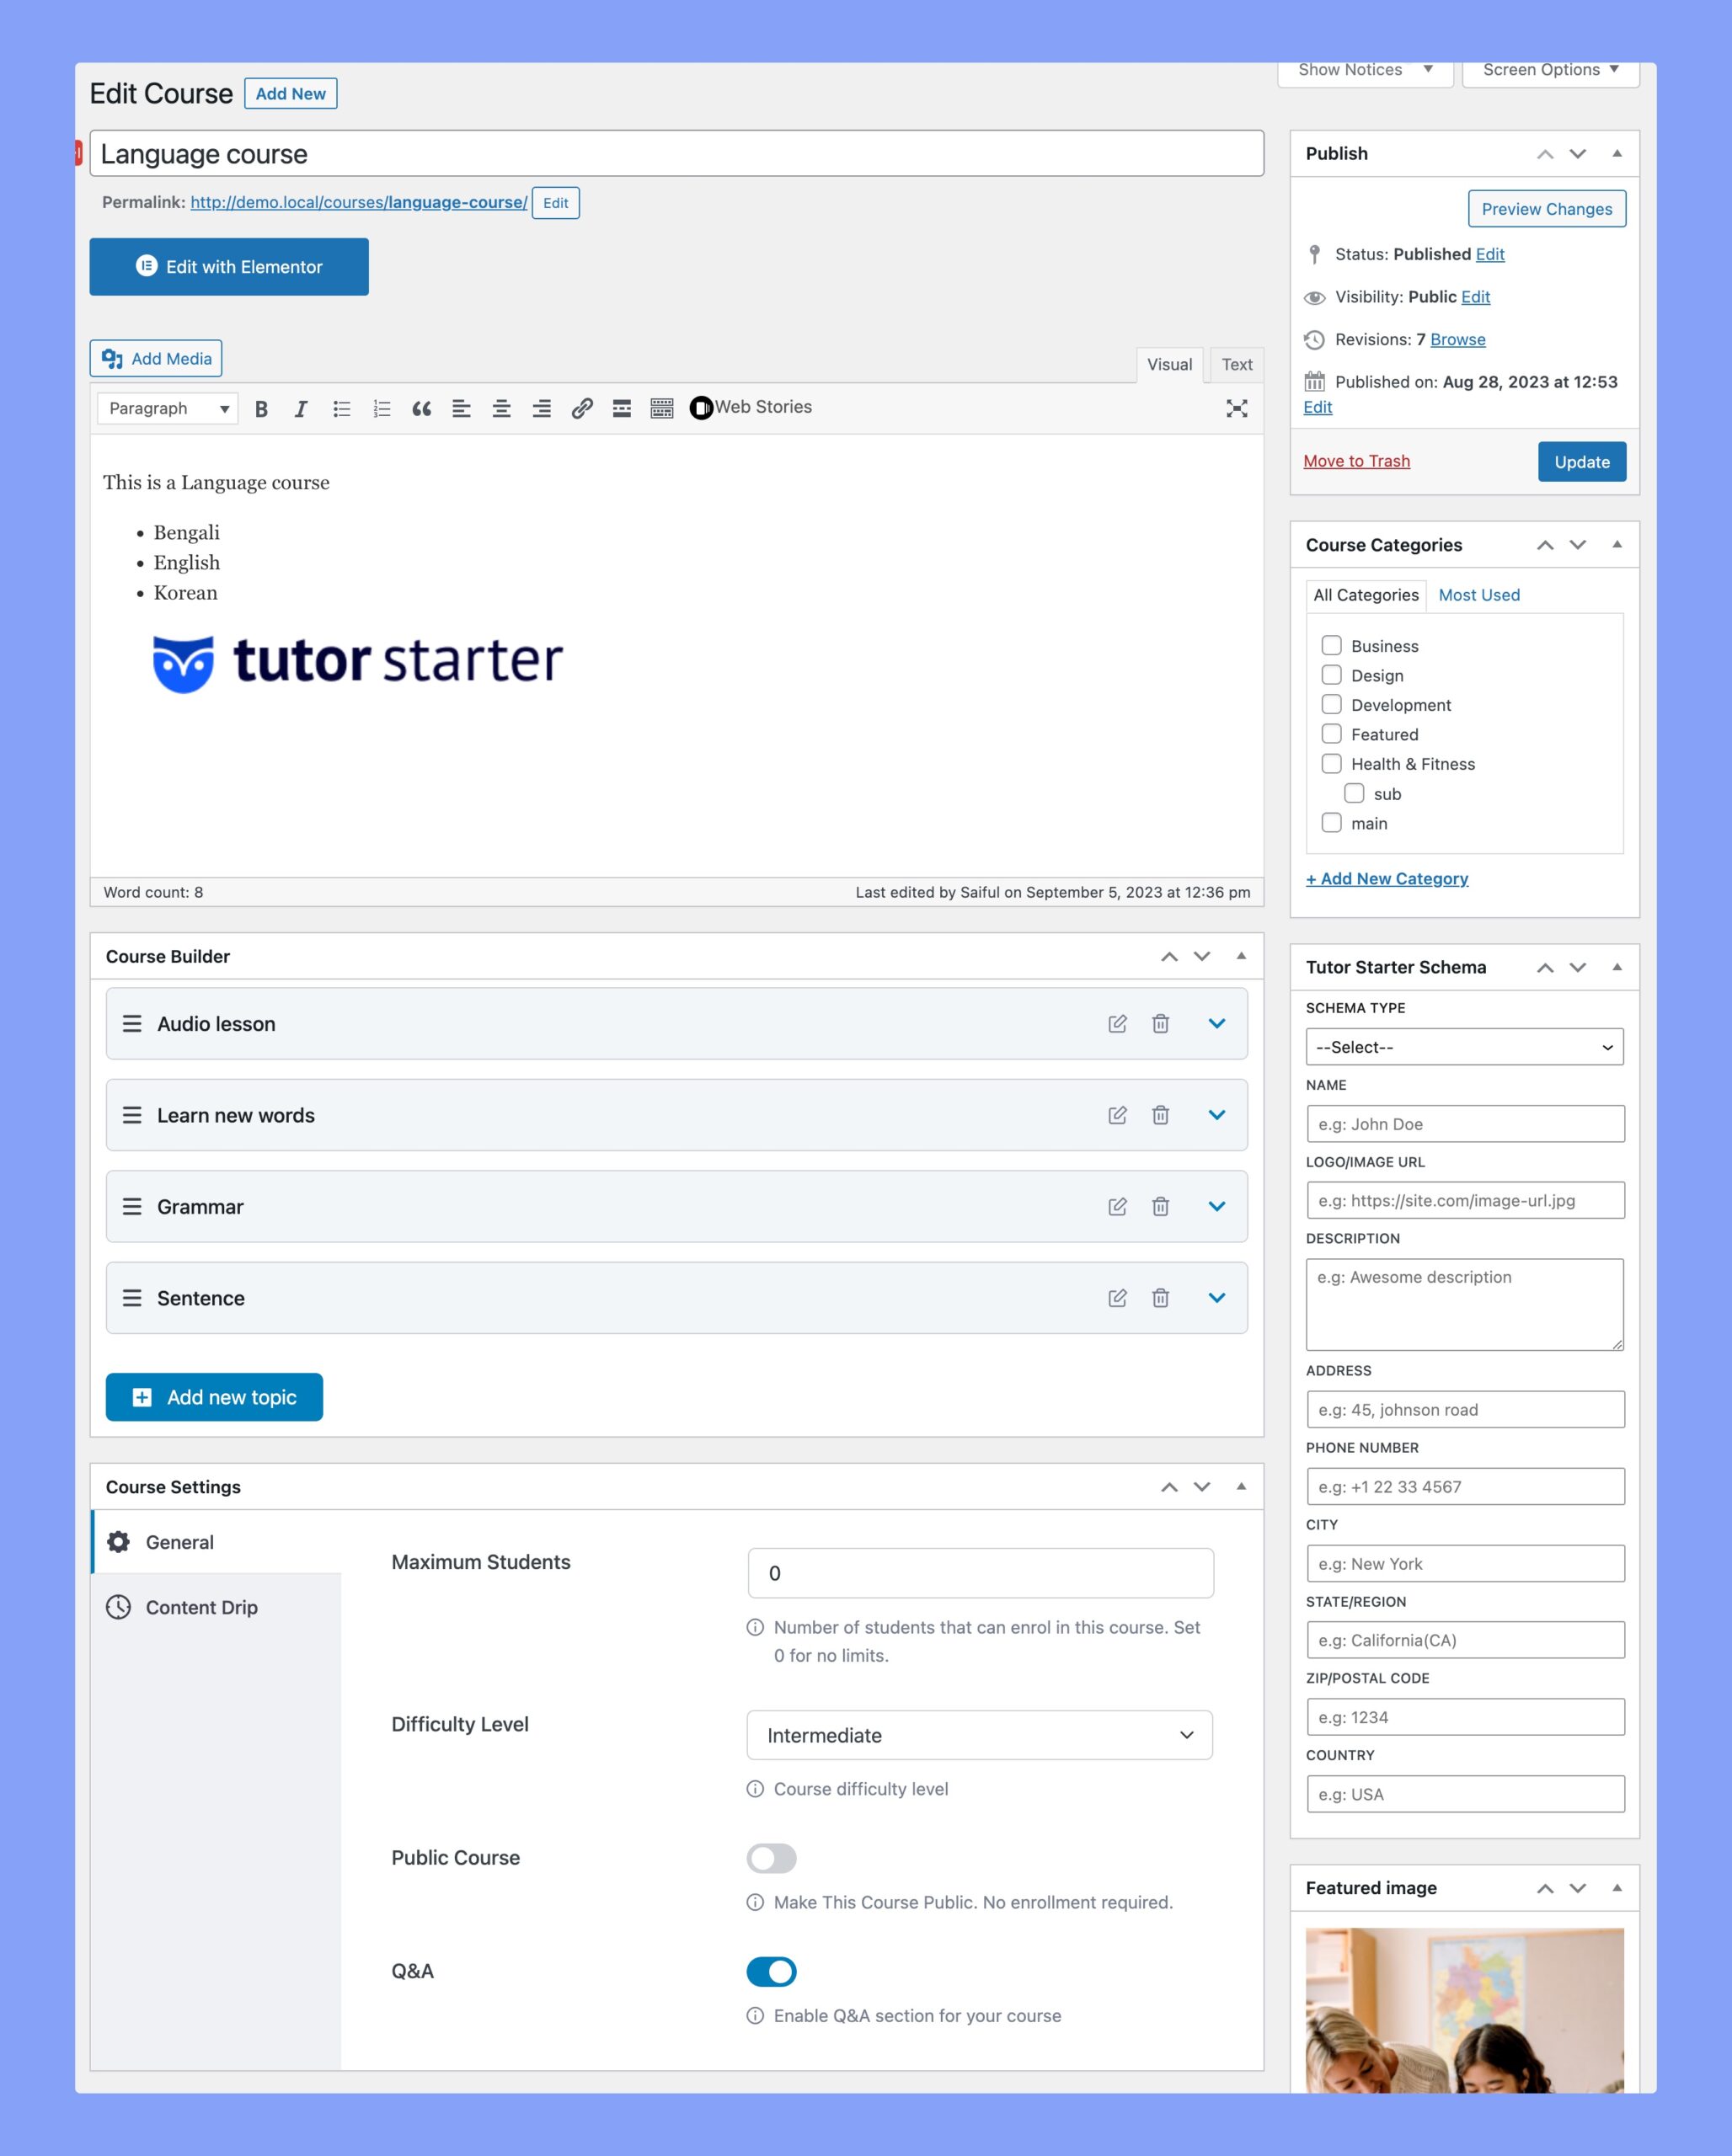
We can also set a difficulty level for our course and determine the maximum number of students we want to allow for a course should we choose to have a limit.
The most crucial task now is to bring our course to life by adding topics and quizzes. To add a quiz, you must first create a topic. On the course menu, scroll down to the course builder section, where we’ll see an option to add a new topic. Set a topic name and a description that defines your topic. A topic is essentially a module for your course.
We can now add a lesson followed by a quiz to a new lesson that you have created.
Adding a Lesson
Our course now with a topic needs a lesson for it.
Clicking the lesson button brings up the pop up that lets you configure the lesson. We add the lesson title, the actual lesson text and the lesson video should it be required. We can even add attachments to the lesson.
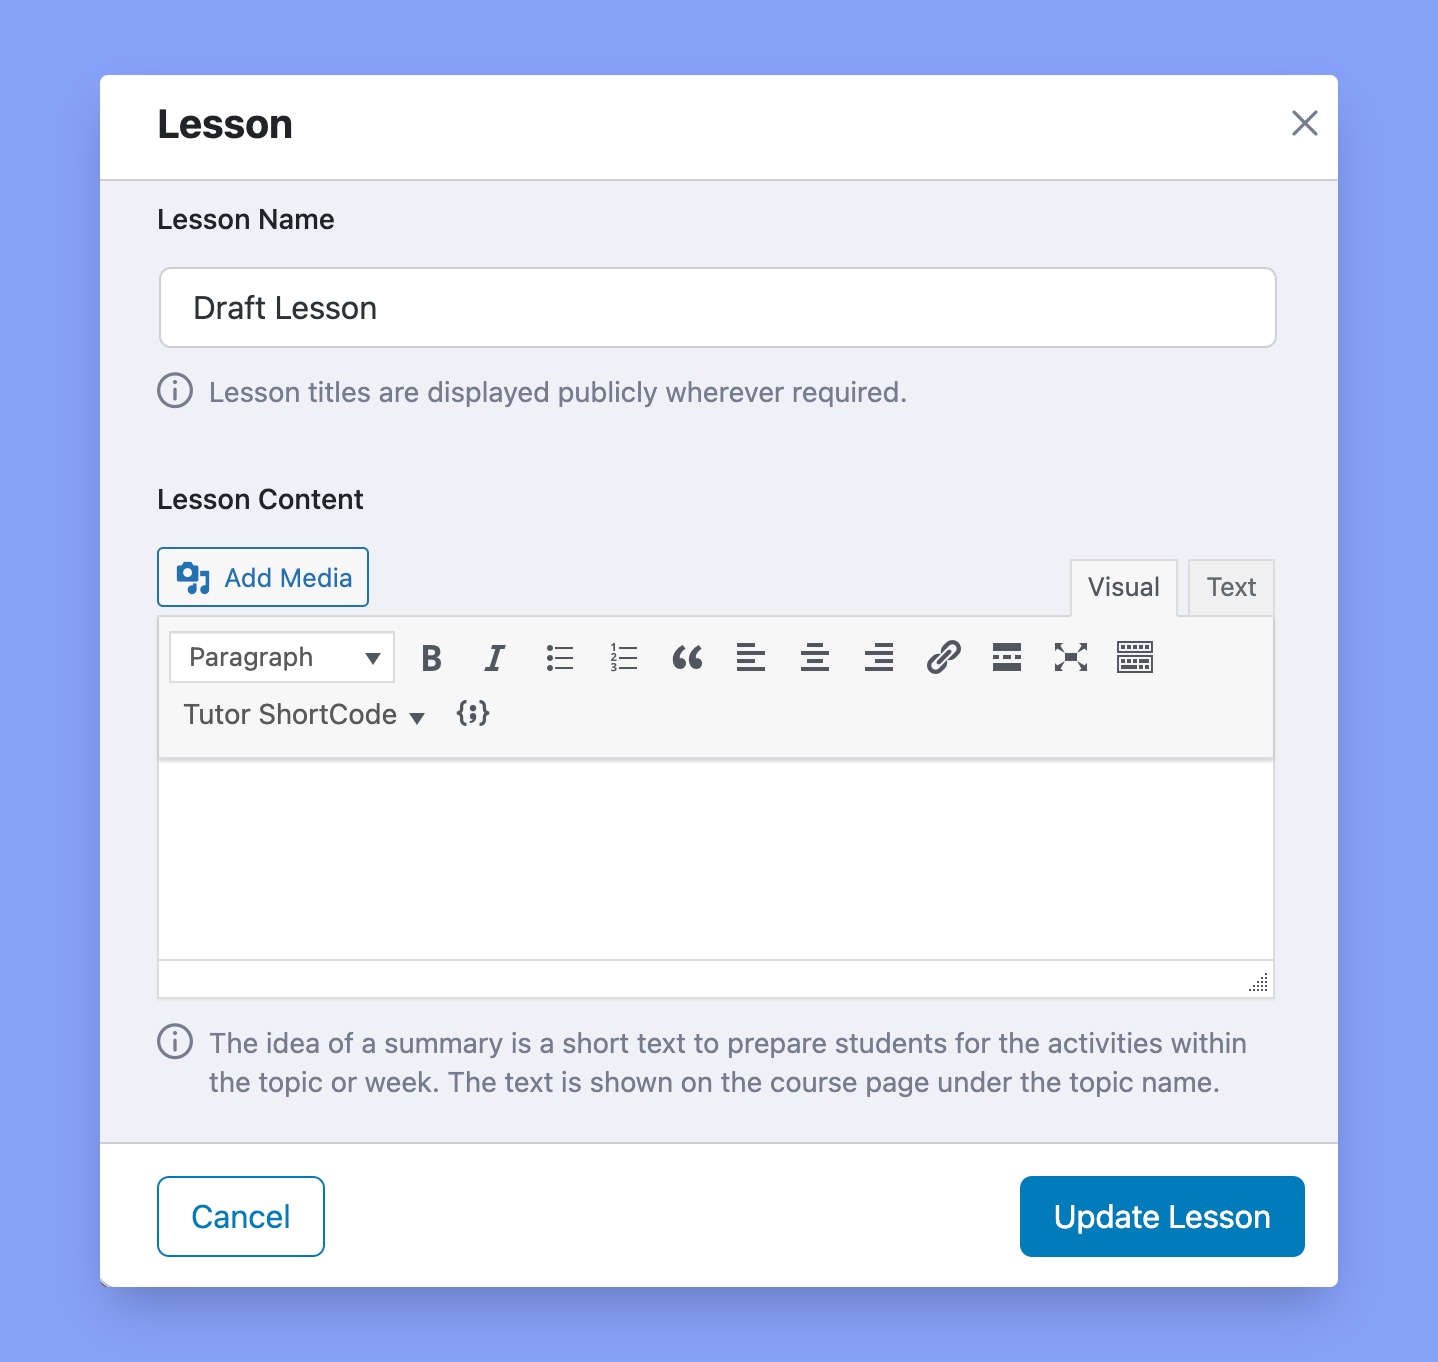
In our recommendation videos would be a great idea when it comes to teaching languages to students. Watching and hearing someone speak makes understanding a new language much easier.
Take a Quiz
Naturally, after you provide a lesson you must quiz your students to check their progress with the material. This lets you analyze if your students are truly understanding what you are teaching. Tutor LMS has an intuitive quiz builder that makes life all the easier for you.
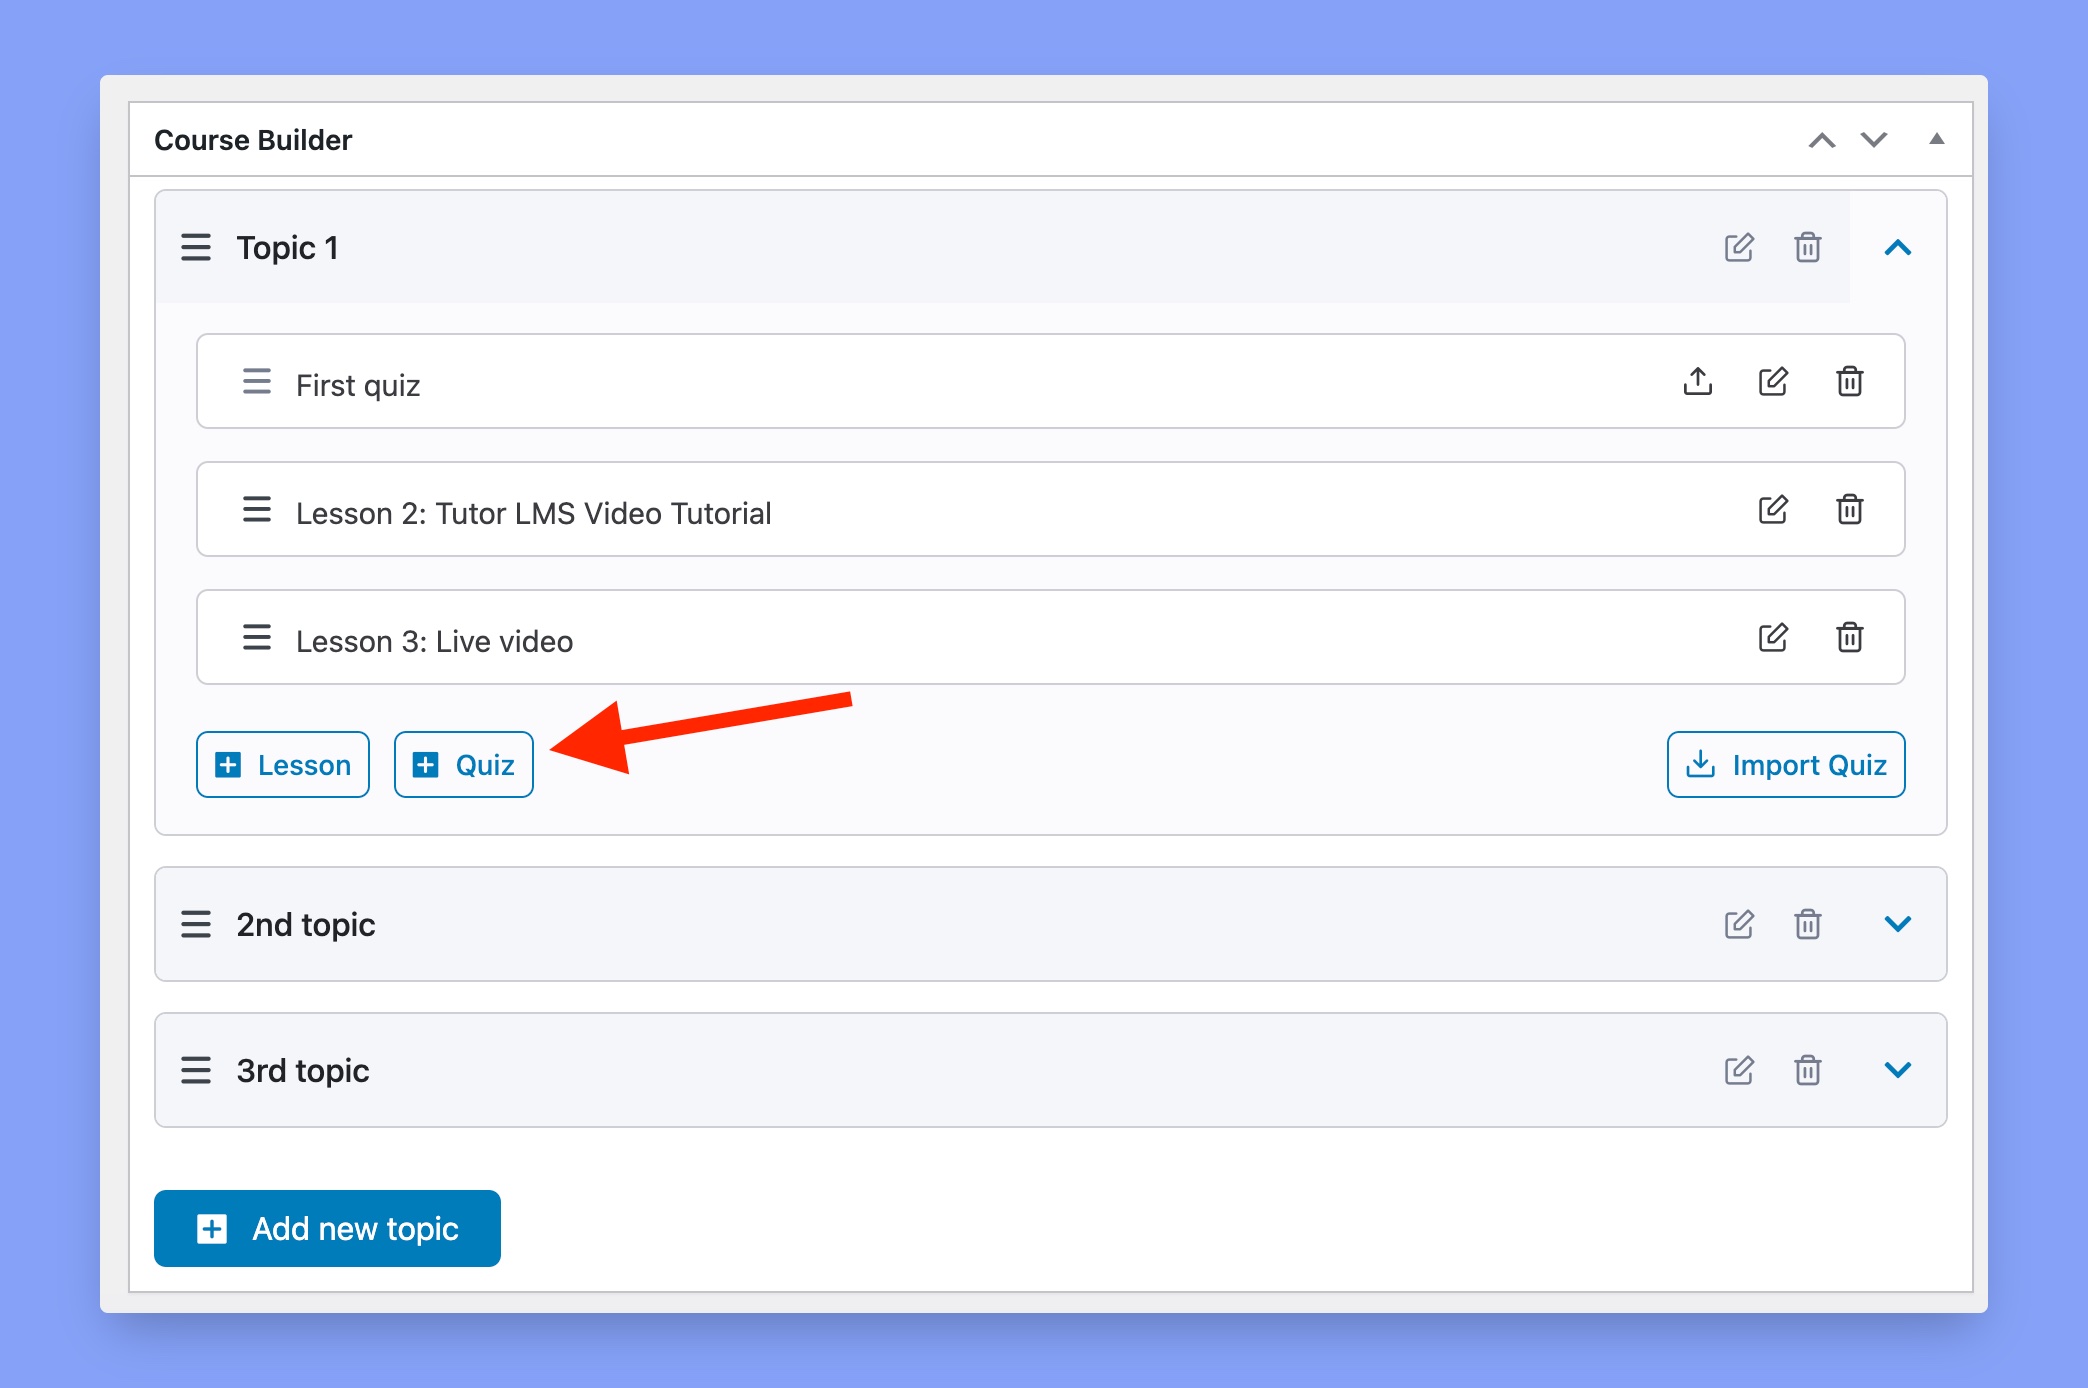
To start with quiz building we needed to have at least created a topic first. If you have been following this article so far you should have a topic and lesson both added.
Now we click on the Quiz button and it brings up a pop up for us.
First, we add a quiz name and hit Save & Next.
The next tab gives the quiz question option where we configure what type of question we want to set for students. We then select the name of the question and access the drop-down Question Type menu that shows us all the different types of questions that we can set. Here are the available question types of Tutor LMS:
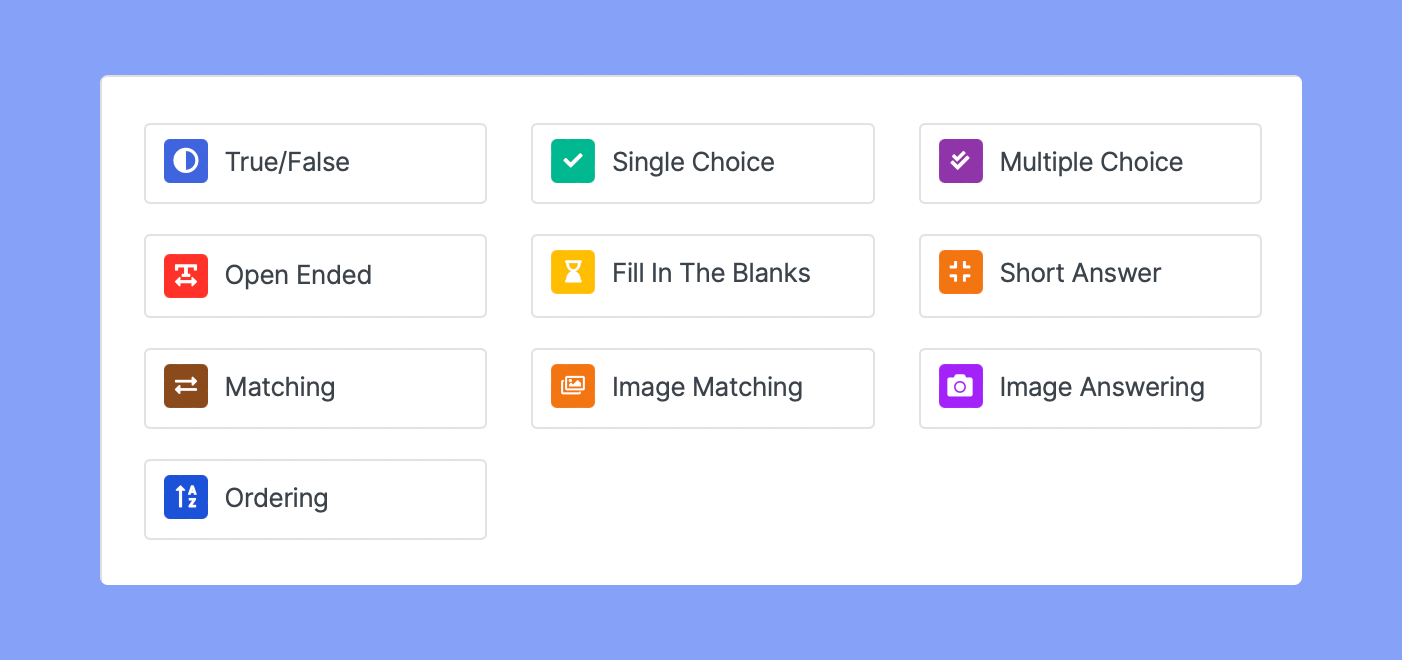
For a language learning focused course making interactive test material might prove to be beneficial. Setting multiple-choice questions or fill in the blank type questions will engage students the most. Alternatively, for more advanced courses you could set open-ended or essay type questions to test the aptitude of your students.
The options on this pop up are easy to navigate and self-explanatory, so setting it up is a breeze regardless of what type of question we select.
Some quiz types are locked behind the Pro version of Tutor LMS. But the free ones are enough for us to get the job done.
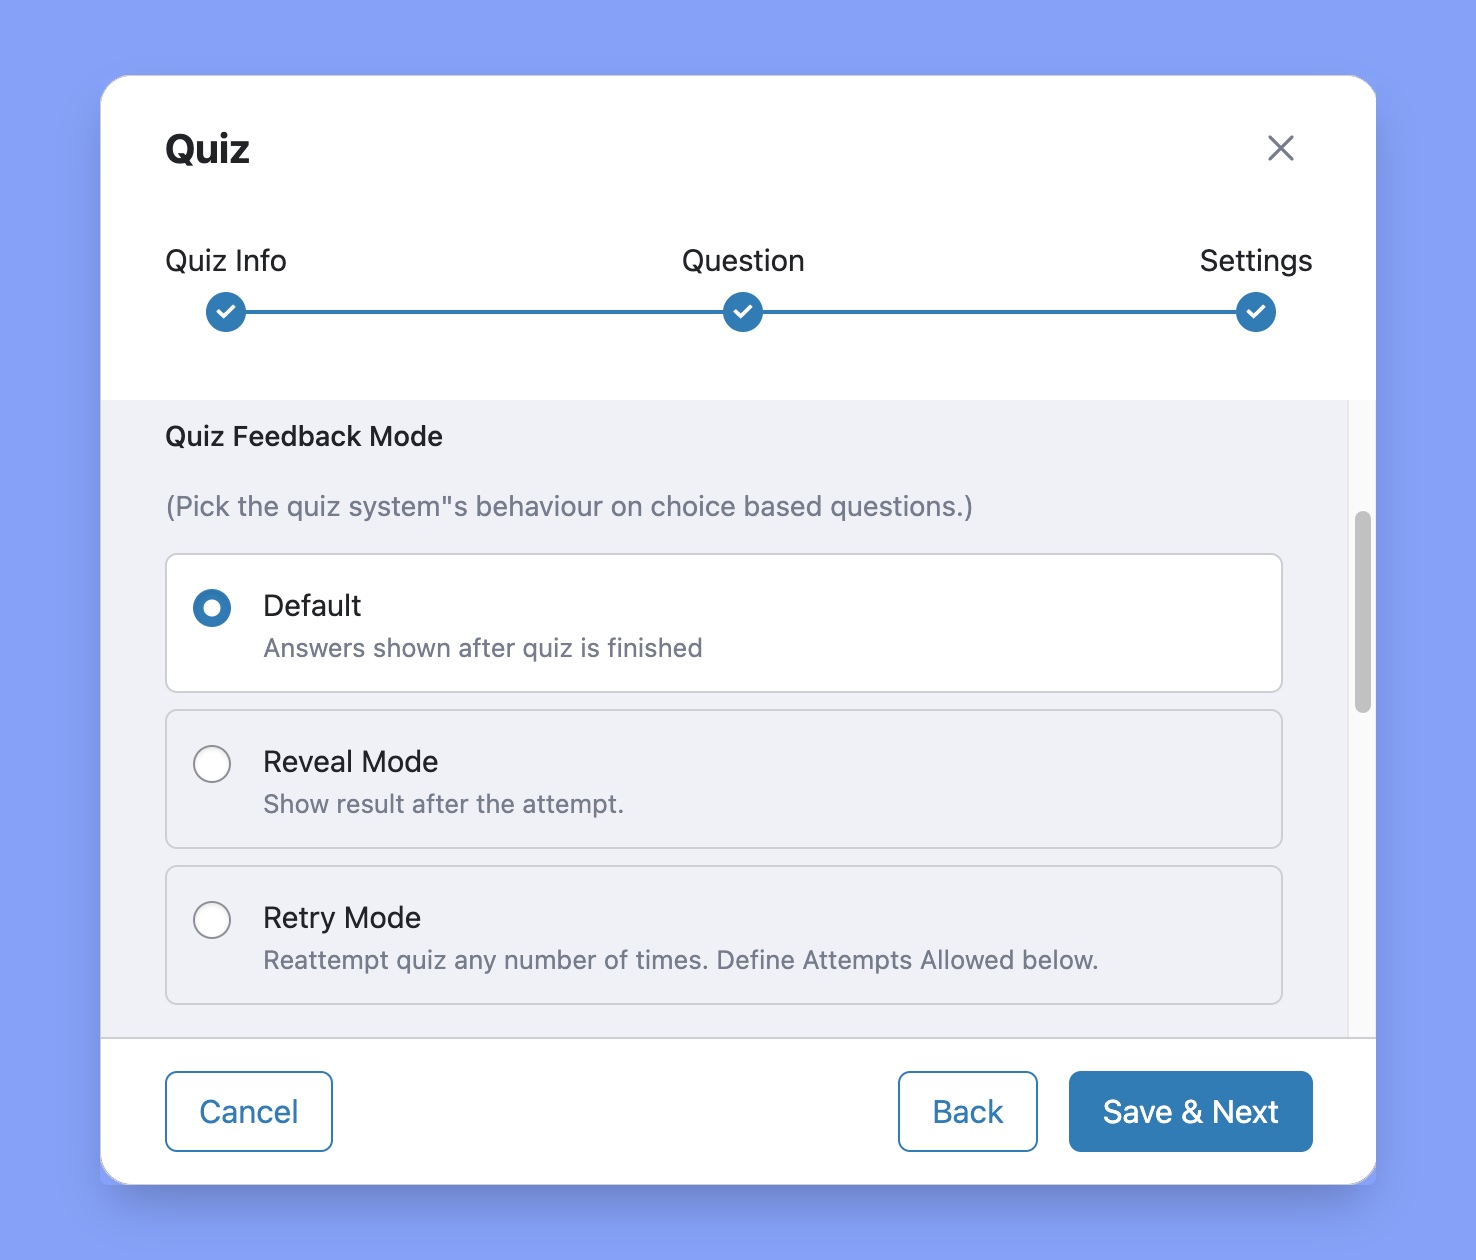
The quiz builder has a lot of extra settings as well for added customizability.
You can set a time limit to make sure your students feel urgency when taking the quiz. We even have the number of attempts a student can take for a quiz. Set whether you want the quiz answers to be displayed just as someone finishes a course or if you want the results to be hidden. Feel free to play around with them until you’re completely happy.
Monetizing Your Courses With WooCommerce
So we have finished setting up the basic elements of our language learning site. But we now need to make sure that we can make monetary gain from our efforts. We need to monetize our courses and the simplest and one of the most reliable plugins for that is WooCommerce.
To start with WooCommerce we first need to install the WooCommerce plugin. Same for any other plugin we go to the Add new from the plugin page of WordPress and we search for WooCommerce.
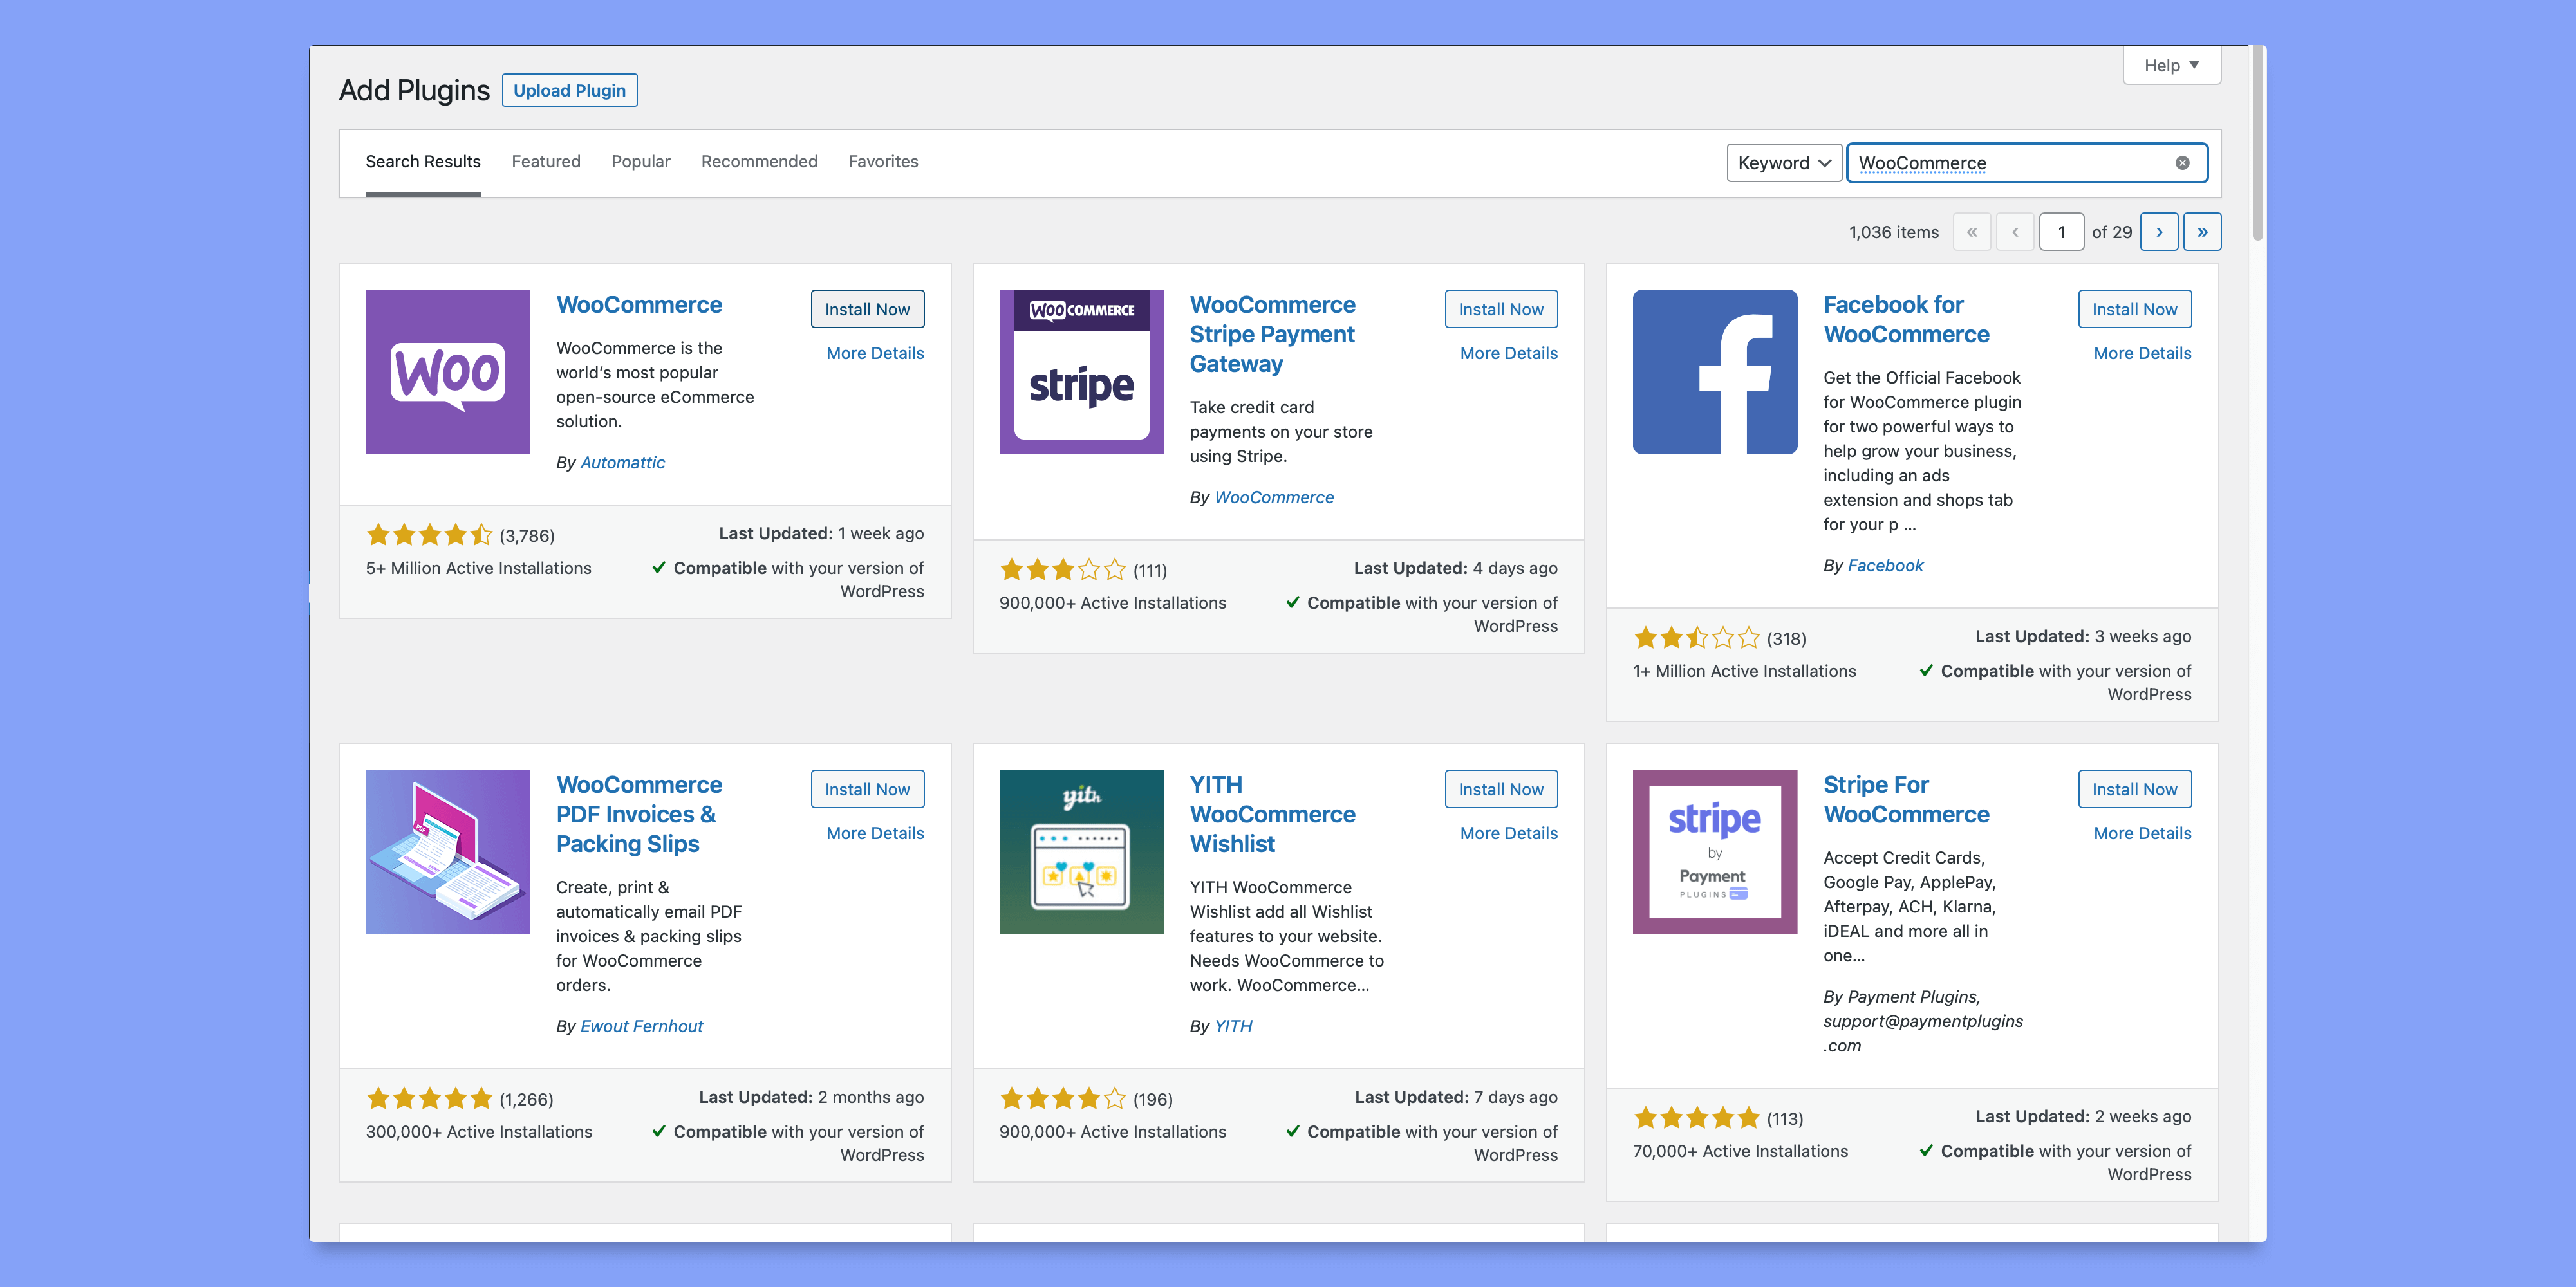
Hit Install and Activate and we can go on to integrating WooCommerce with Tutor LMS.
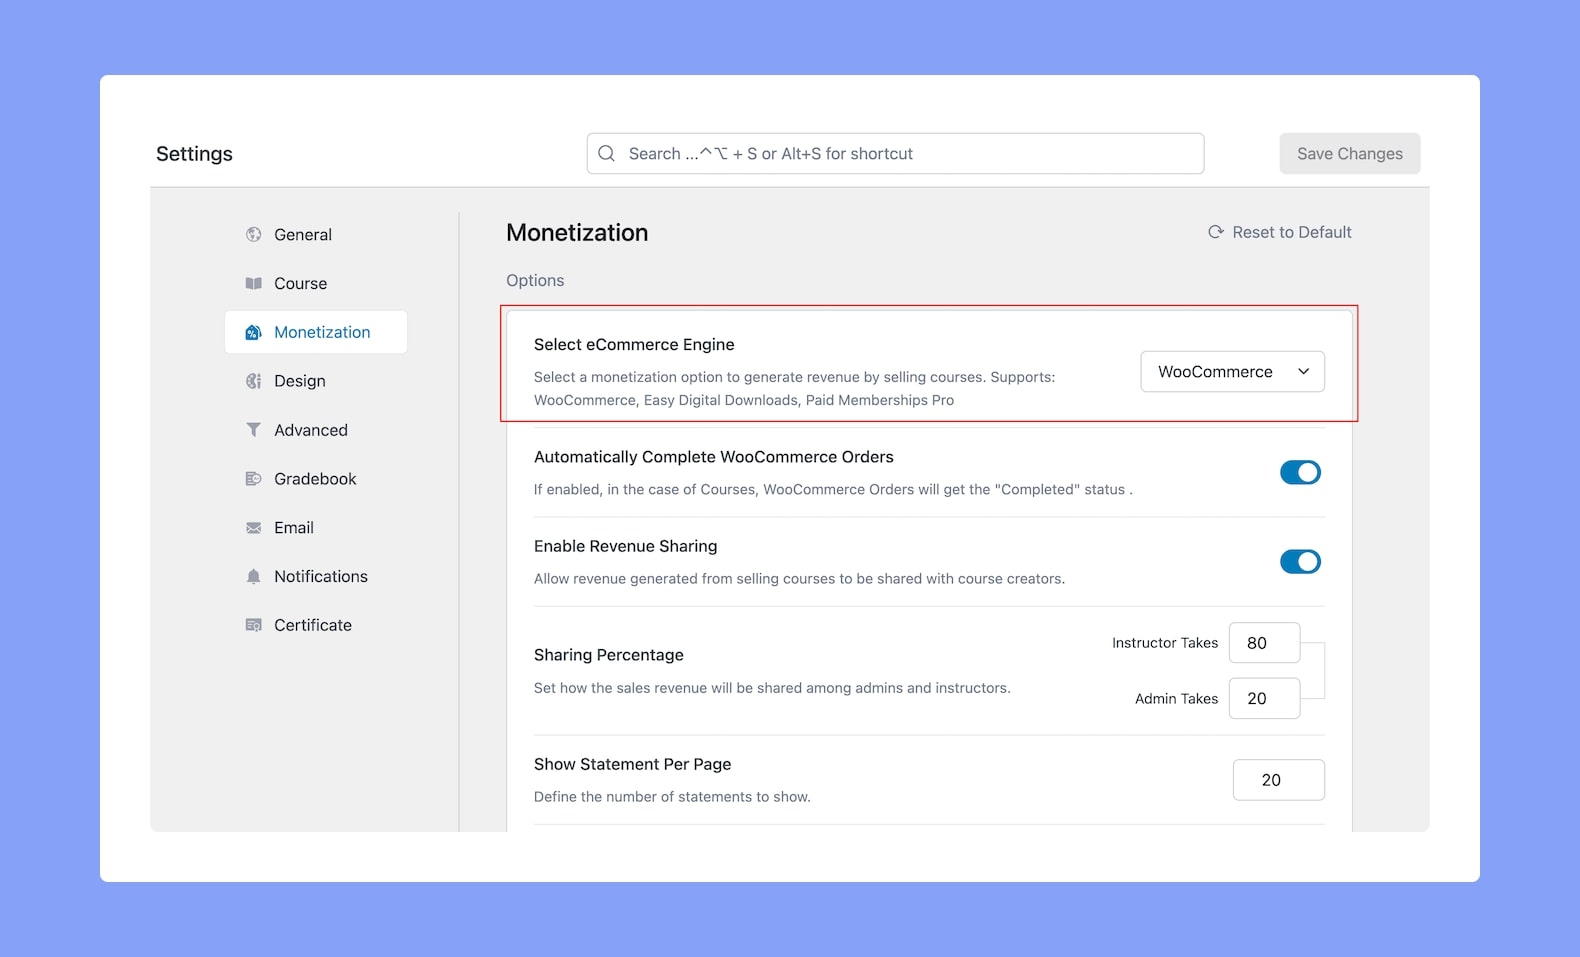
Navigate to Dashboard > Tutor LMS > Settings > Monetization (Tab) > WooCommerce (Enable). We do this to enable monetization for our courses and essentially activate WooCommerce for us.
Adding a Product
How do we now earn from our courses? We need to have a Product to sell through WooCommerce. And the product then has to be linked to the course we want to sell.
To create a product go to the products tab now in your WordPress admin dashboard and click on Add new.
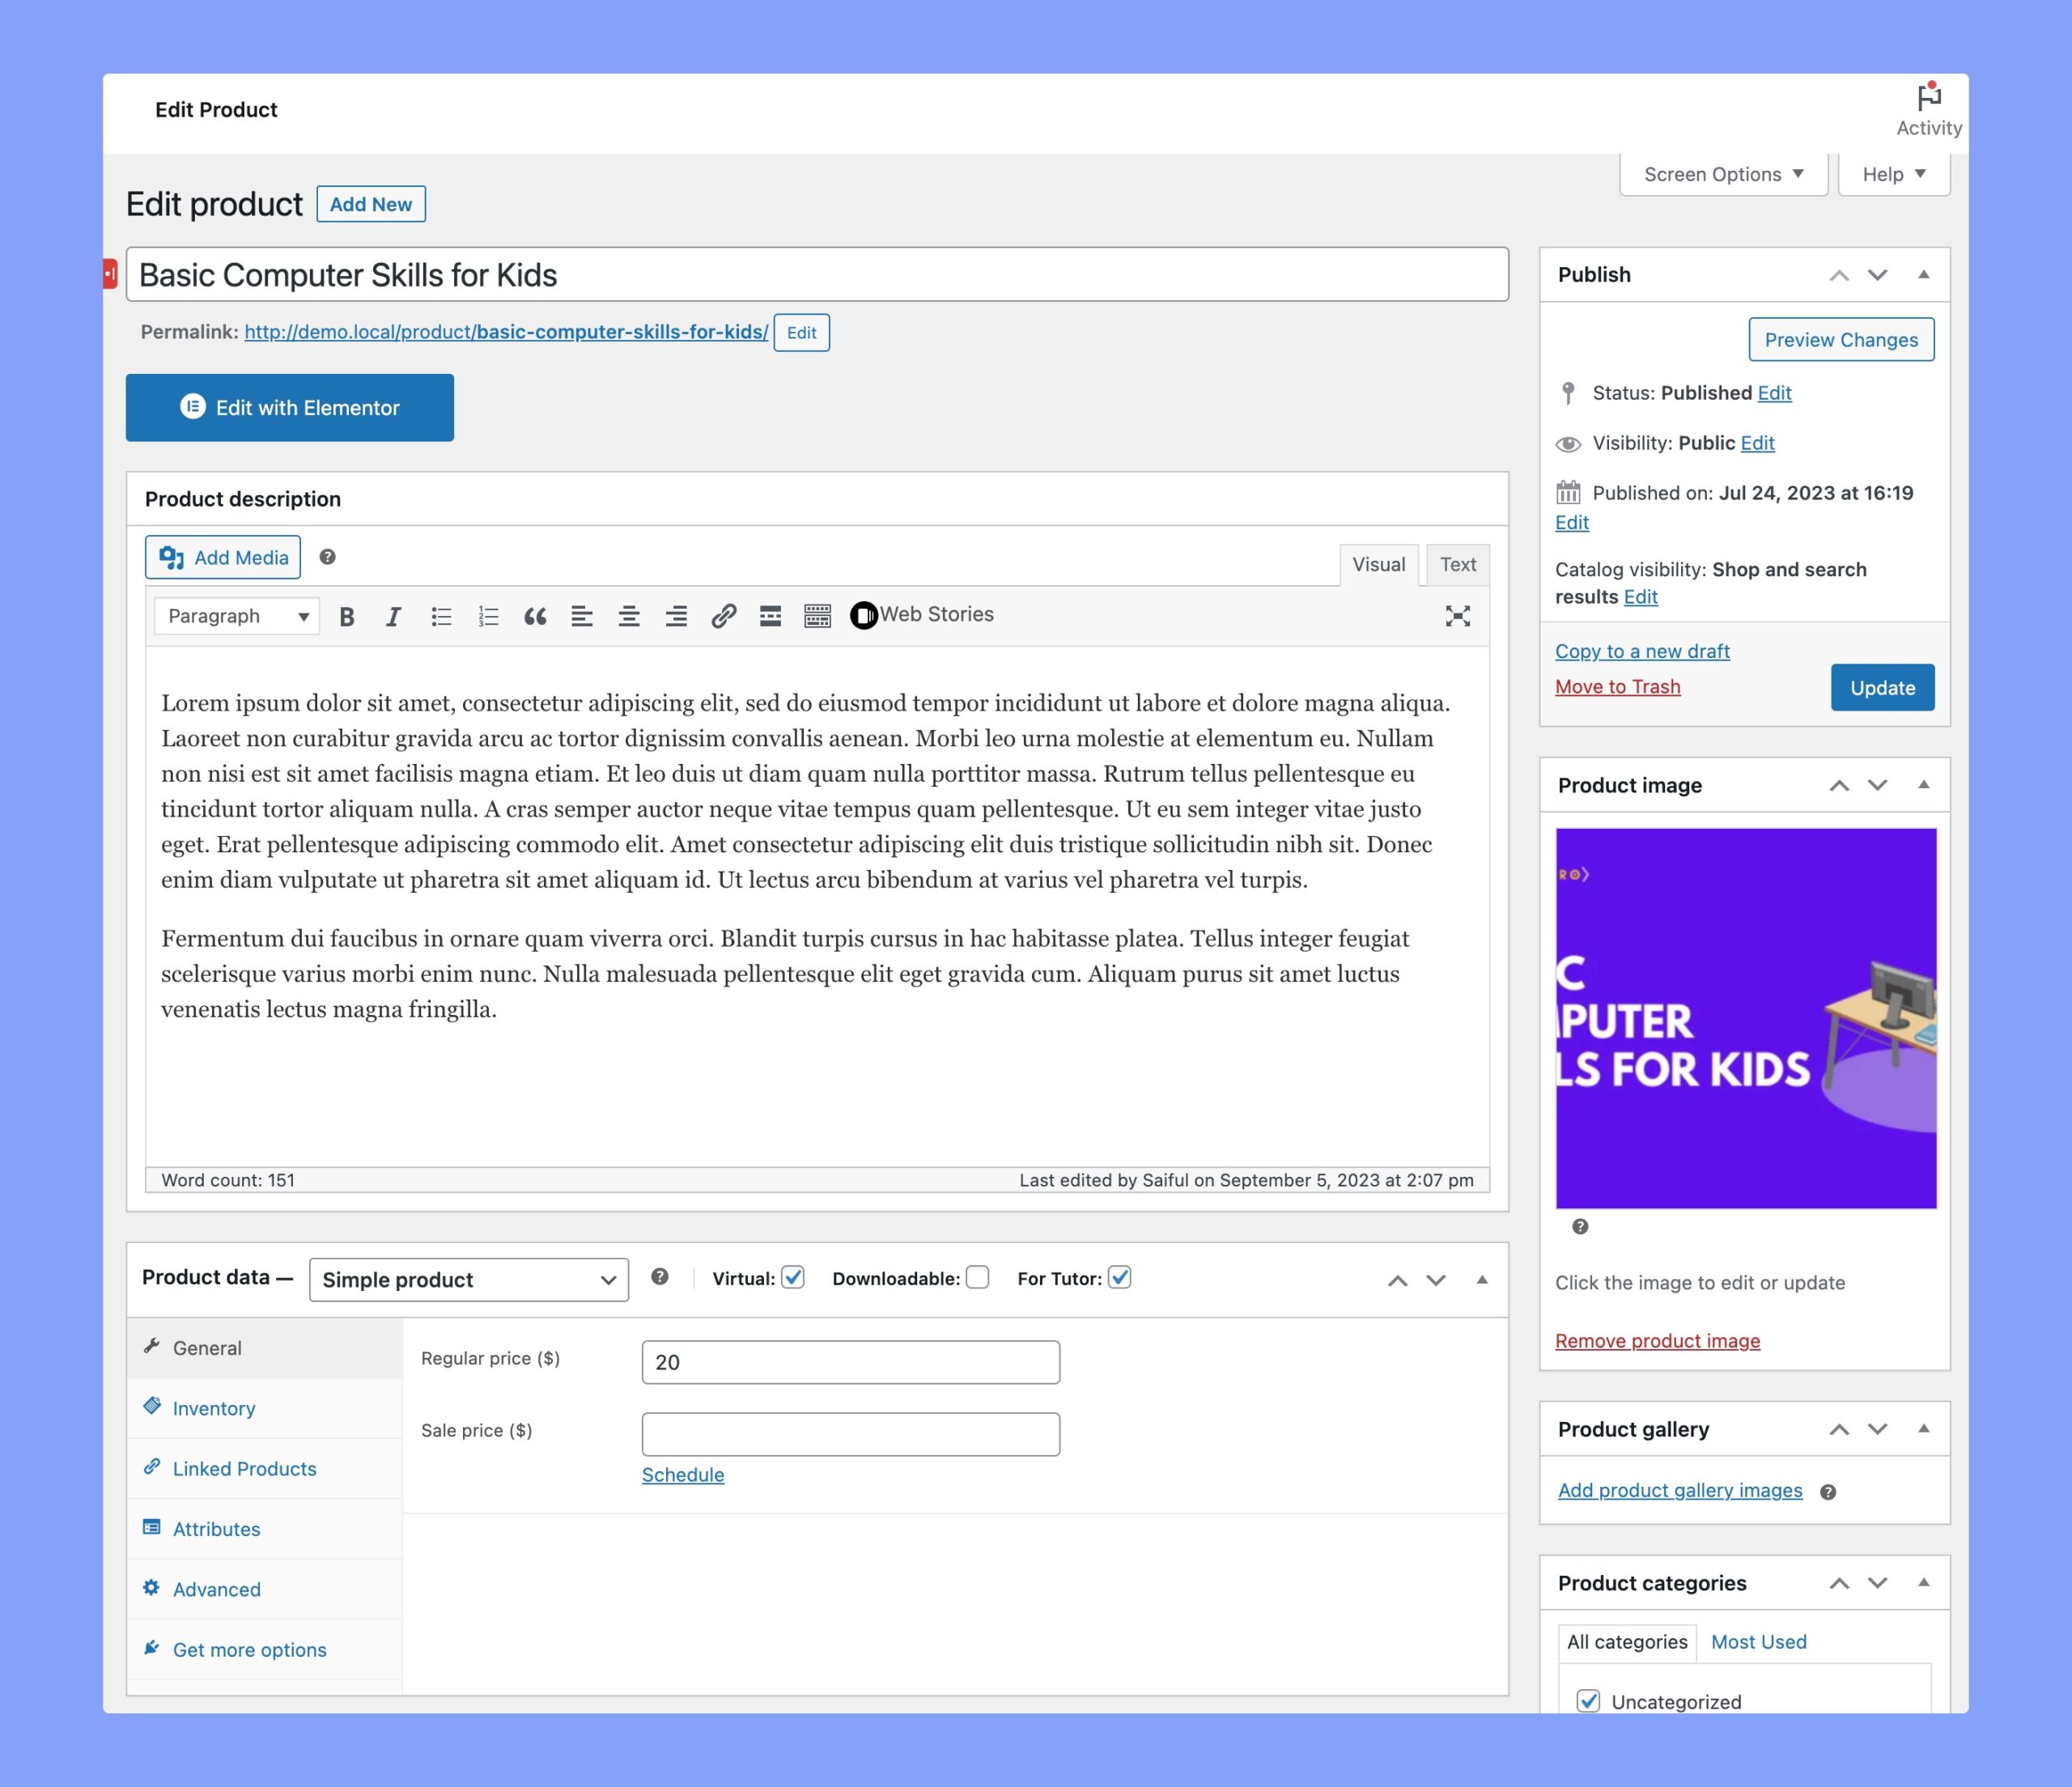
Here we can begin to create a product for our course so that we sell the course. To keep it easy for us we should name the product with the same name as the course we wish to link the product to.
We check the Virtual & For Tutor box and set a normal and discount price for the product. Once you are happy with everything go ahead and click Publish.
One last task for us to do now. We need to go to the back end of the Tutor LMS course page and click on Edit Course for the course we want to monetize.
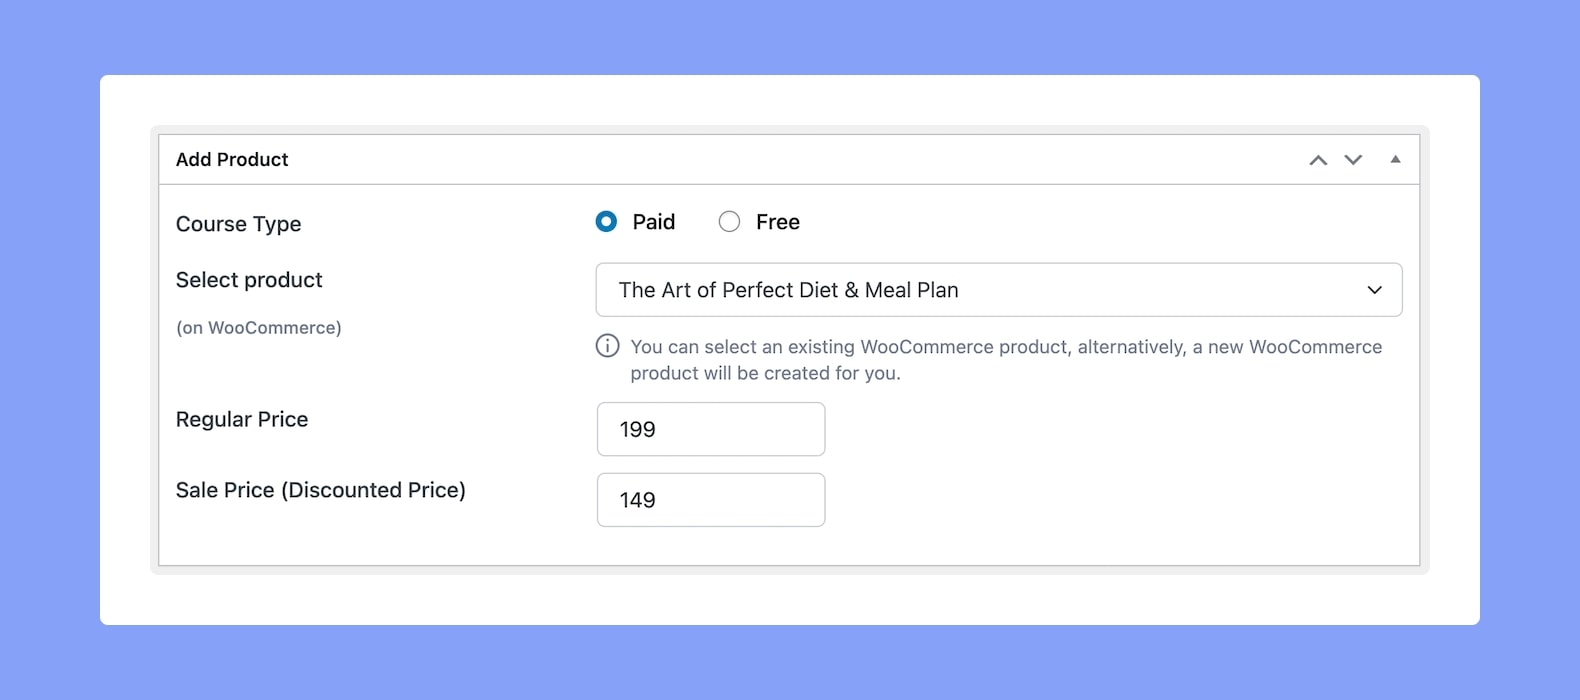
Scroll down and find the Add Product section and add the product you just created.
This tags your course with WooCommerce, select Paid in the course type and you can start generating revenue. With this done students can now purchase your course and start learning.
Setting up a Payment Method
The final step to monetization is to configure a payment method for your products. A very simple process, go to WooCommerce settings and navigate to Payments. This page shows us all the payment methods we can use.
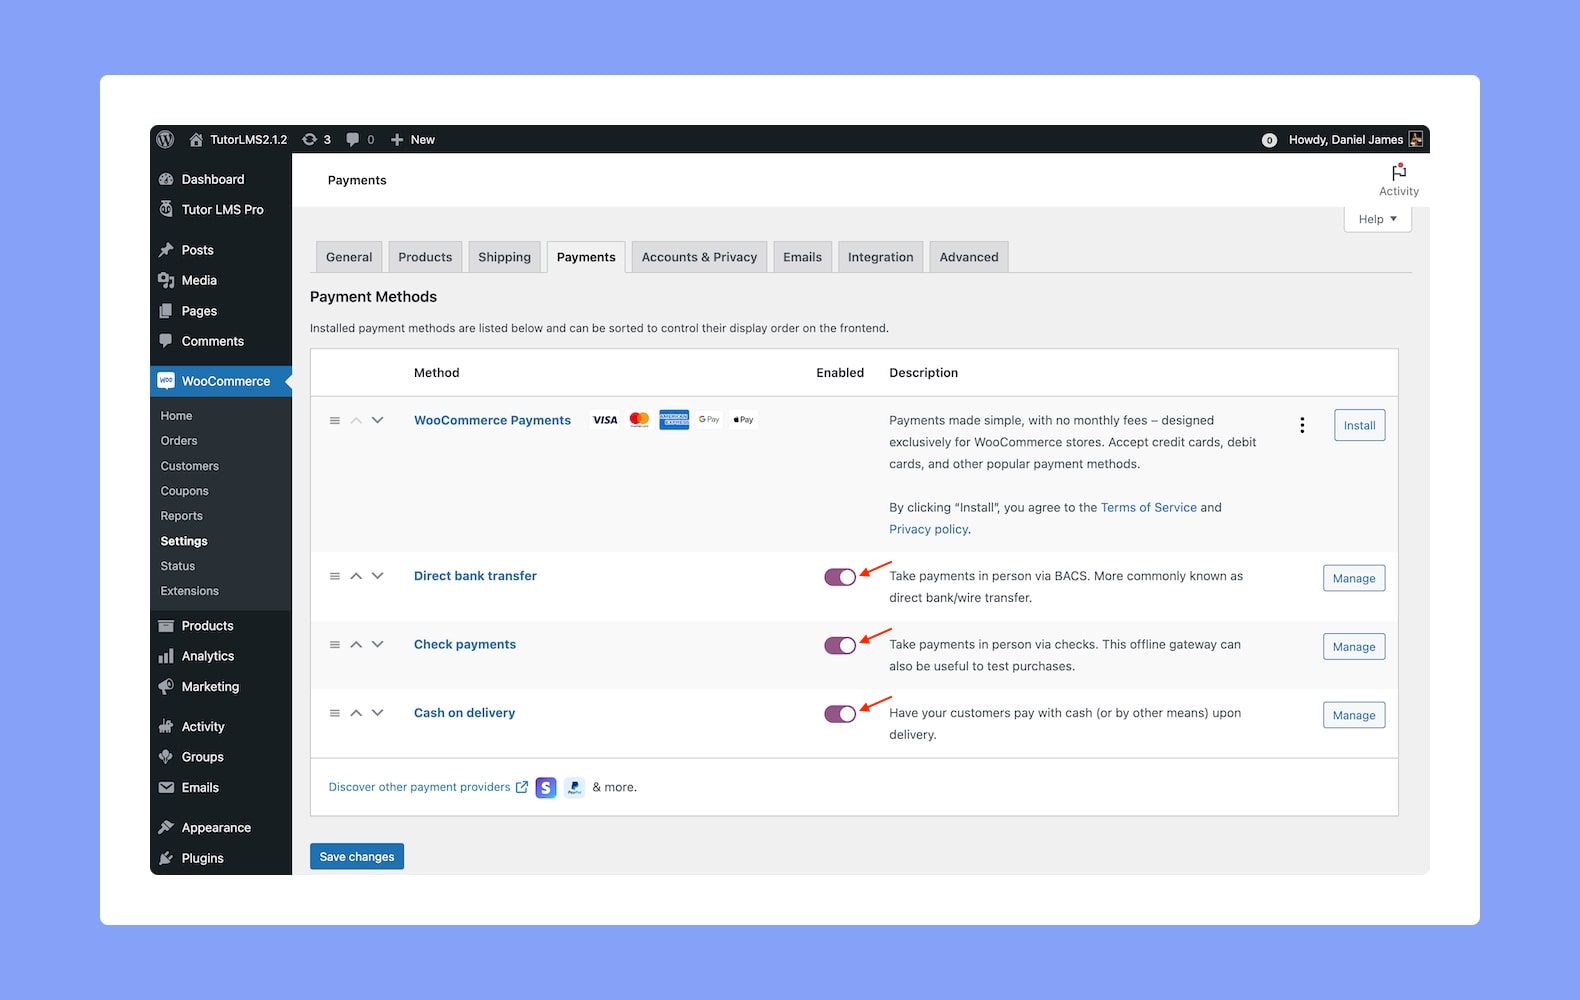
Whichever option suits your needs the most, go ahead select those options and save the changes.
For any other course you want to monetize the process remains the same. Set up the course and the product and link them together. The payment method setting is universal across all courses that you have made paid.
An extra tip for instructors who plan to have multiple instructors onboard their site. Sharing commission with instructors might seem like a tedious task, but Tutor LMS makes this quite straightforward.
Just go to Tutor LMS > Settings > Monetization and enable the required settings.

You can also determine and configure each instructor commission percentage.
Final Thoughts
Well, that was easy enough right? But we actually still have a long way to go to take our Language learning site to success. Employing different marketing plans and promoting your courses to students is the number one way to get the word around.
We have showcased the free versions of the tools we used. The free versions come with more than enough features to have us up and running.
If you want some more tips on improving your Language learning site be sure to check this article out.
As always, be sure to let us know your experience with building an eLearning site and reach out to us if you need any support. Have a good one!