
There was a time when online educational content was sparse, but that time has long gone. These days, you can find free resources on YouTube, blogs, and even on social media. Popular eLearning sites also offer self-paced courses that are both informative and affordable.
But while these courses are abundant, stats prove that they’re not as effective as they should be. Students find it difficult to retain information, and they often abandon such courses halfway through.
What is working though, is a concept known as Cohort-based Courses. It encourages peer interaction and has proved to be highly effective. Those who have adopted it definitely stand out from the rest.
Keep on reading if you want to learn how to create cohort-based courses too.
What Exactly Are Cohort-Based Courses
Cohort-based courses are similar to traditional classes because they focus on a small group of students studying synchronously but online. Course enrollment is open only for a limited time, and the course itself is time-bound.
Live classes are the norm, and students get a dedicated space to communicate with each other. It’s also common for the same course to have multiple sections due to the limited number of placements.
Cohort-Based Course Benefits
Cohort-based courses encourage engaging class discussions and group projects which allow students to absorb the topics through analytical thinking and application. The team spirit encourages students to feel more motivated to continue and results in a higher completion rate.
Instructors benefit from constant feedback through class discussion, which helps them fine-tune their teaching methods. Additionally, the live sessions help build confidence, unlike pre-recorded content. The courses can also be priced higher because of the added functionalities and the extra effort that goes into them.
Some Successful Cohort-Based Websites
Nothing proves the effectiveness of something more than its success stories. That’s true for cohort-based courses as well. A great example is Seth Godin’s AltMBA. It’s a 31-day workshop that boasts over five thousand alumni in over ninety countries.
Next up is Stanford University’s MBA Program. A renowned institution, offering a traditional course with both online and offline elements. Other than classes, students also benefit from seminars and projects.
On the other side, we have Marie Forleo’s B School Program, which does things a little differently. Pre-recorded content is still used but made for the students to consume in their own time while live classes are left for things like real-time demonstrations, Q&A sessions, and more.
Creating a Cohort-Based Course
Tutor LMS is a WordPress LMS plugin that you can use to create cohort-based courses. Let’s take a look at the steps involved.
Installation
To start, you have to install and activate the latest version of Tutor LMS on your WordPress site. Do this by navigating to the WordPress dashboard and clicking on Plugins. On the plugins page, click on Add New. Search for Tutor LMS and click on install. Once that’s done, click activate.
For more guidance, please refer to our installation documentation.
Community Interaction
For cohort-based courses, peer interaction is key. Using BuddyPress, you can integrate social media aspects into your eLearning site. Some notable features are peer-to-peer messaging, creating course-specific groups, activity feed, and more.
Integrate BuddyPress by installing and activating the latest version of the plugin. Next, visit the Tutor LMS add-ons page and enable the BuddyPress add-on. Then go to WordPress dashboard > Settings > BuddyPress.
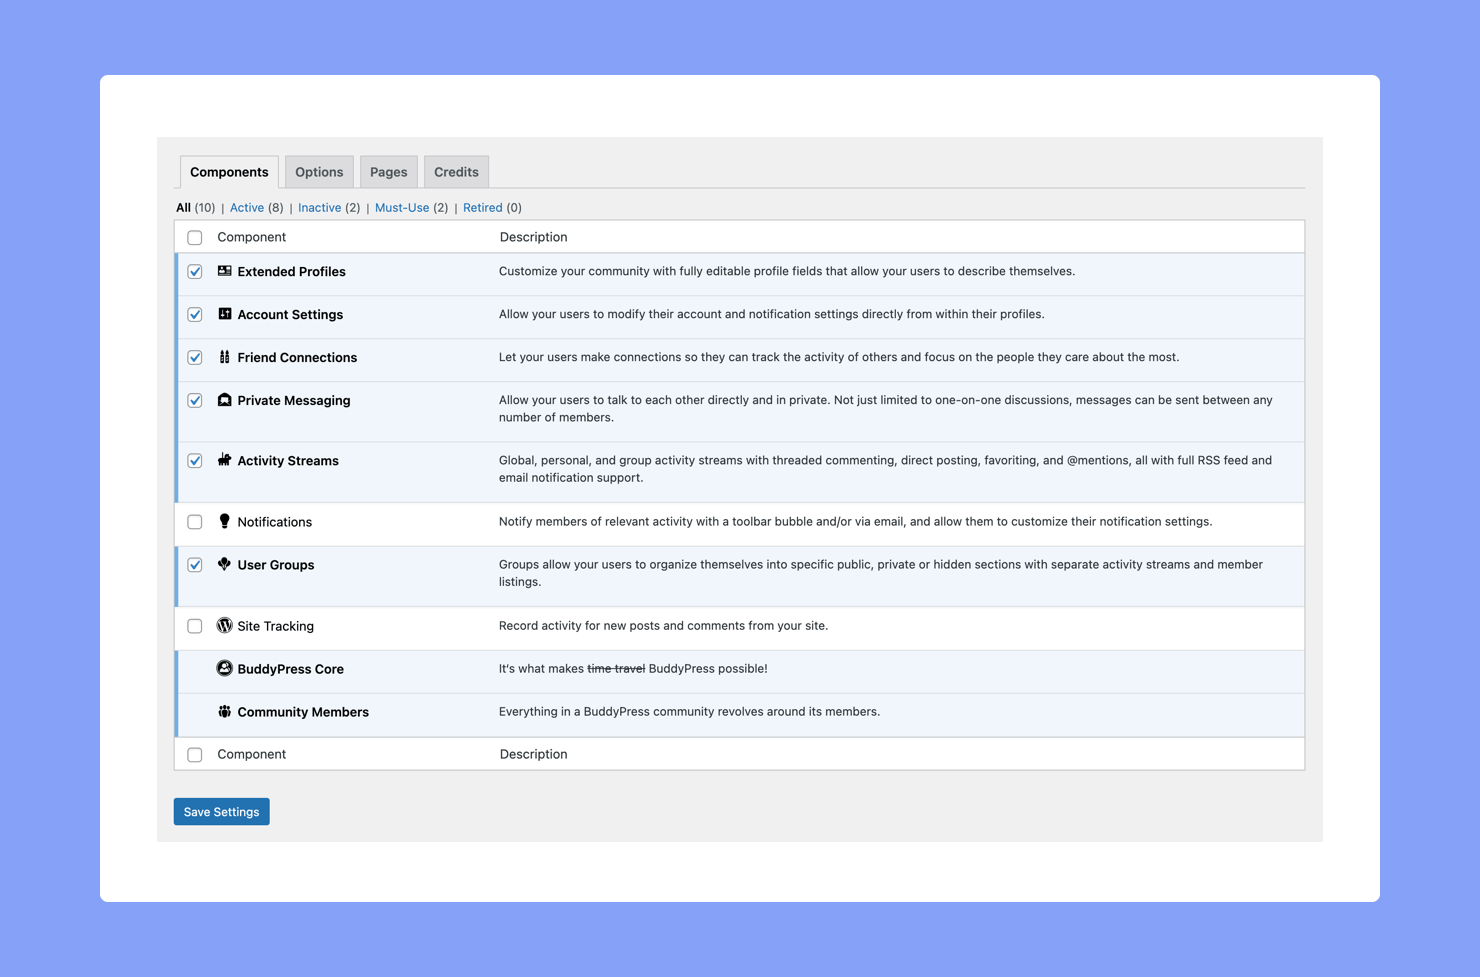
Here, you’ll see a Components tab that lists the BuddyPress features. Private Messaging and User Groups are the two main ones that you require with Tutor LMS. The others you may select based on your needs. For instance, if you want users to post and comment on their profiles and groups, you’ll need the Activity component to be enabled.
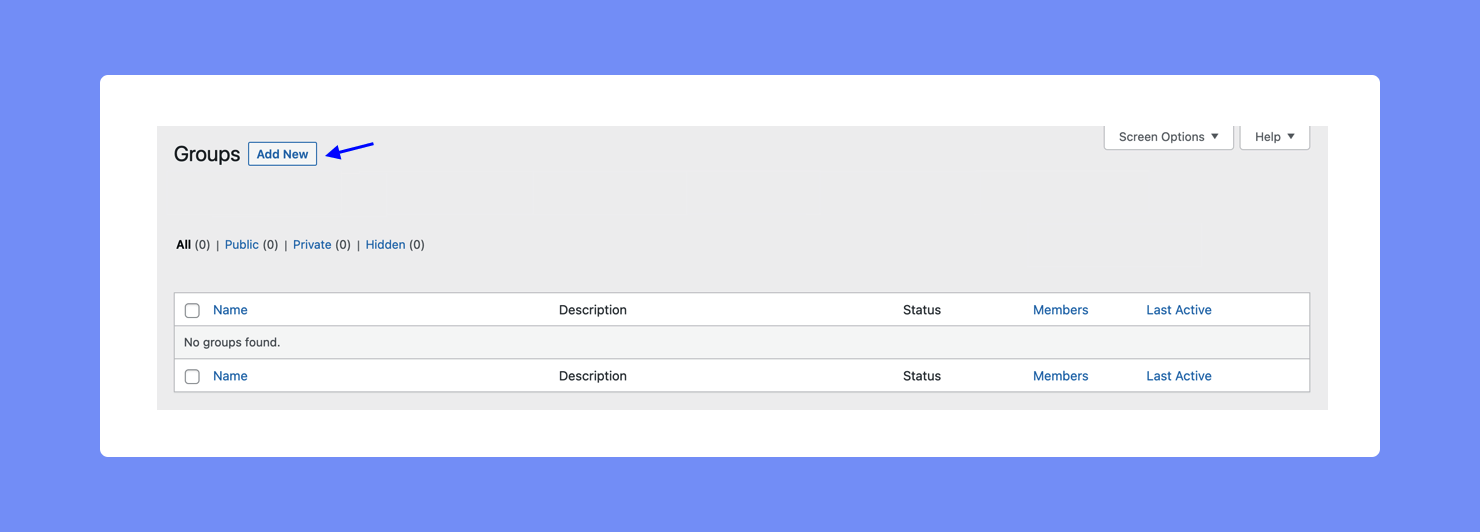
To create a group, navigate to the WordPress dashboard. Click on Groups from the sidebar and select Add New.
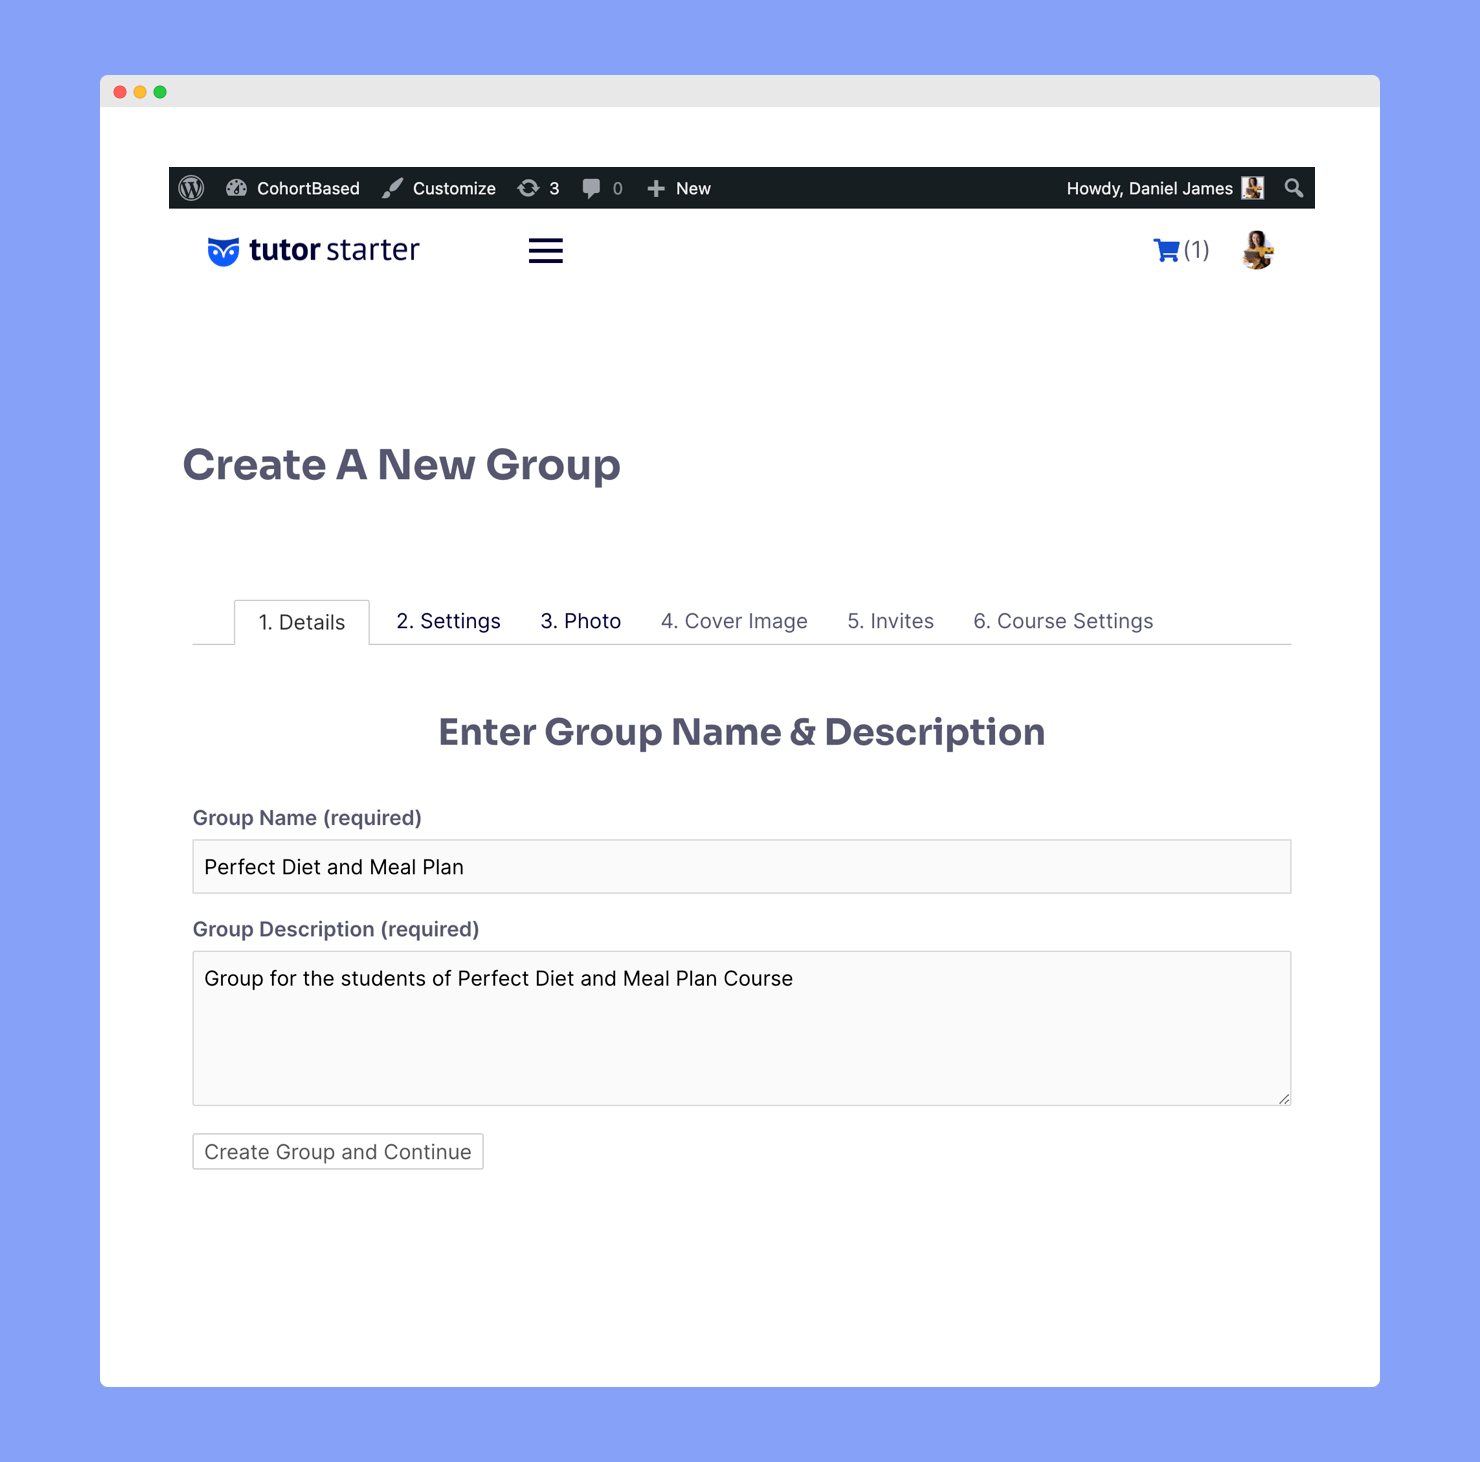
Next, enter the group name, description, and click on Create Group and Continue.
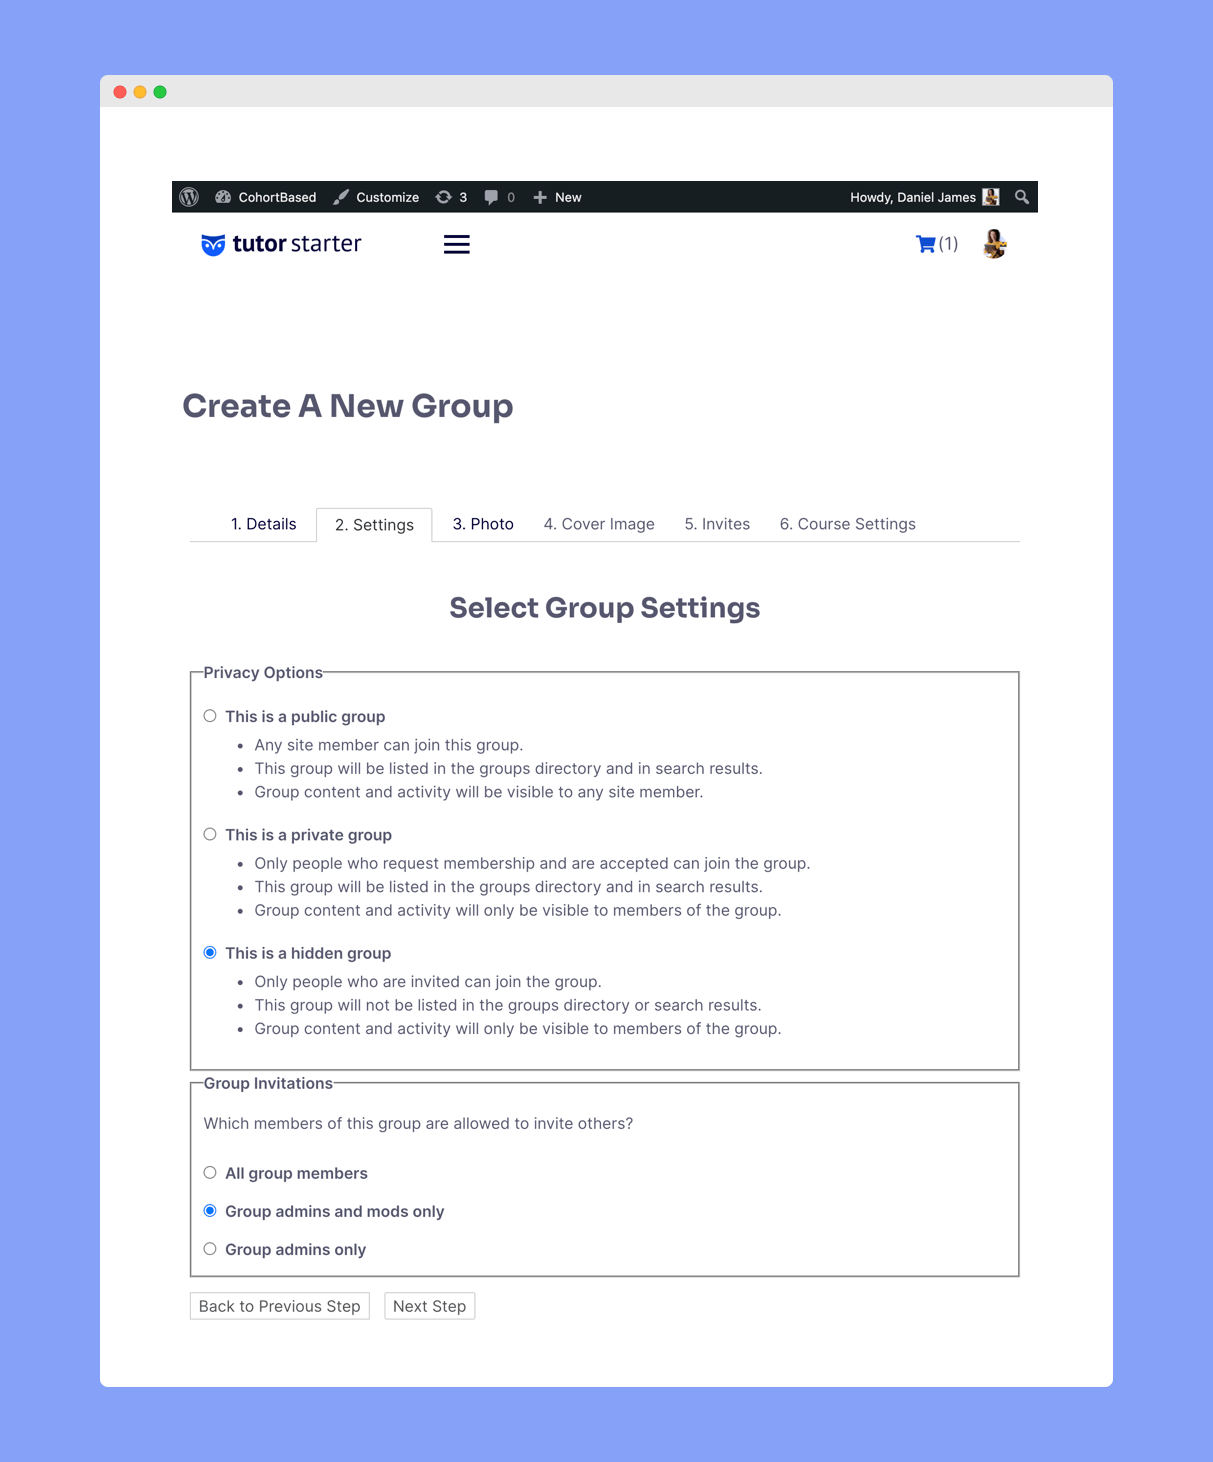
Since this group is for a specific course, it’s best to set the group privacy as Hidden and only allow group admins or mods to send invites. Then, upload the group avatar and banner image. Finally, select which course activities should be shared with the group and click Finish.
To add this group to a course, go to that course’s edit page. Under the Course Settings section, there should be a BuddyPress Groups tab. Here, enable the feature and specify the group name. Lastly, click on Update to save the changes.
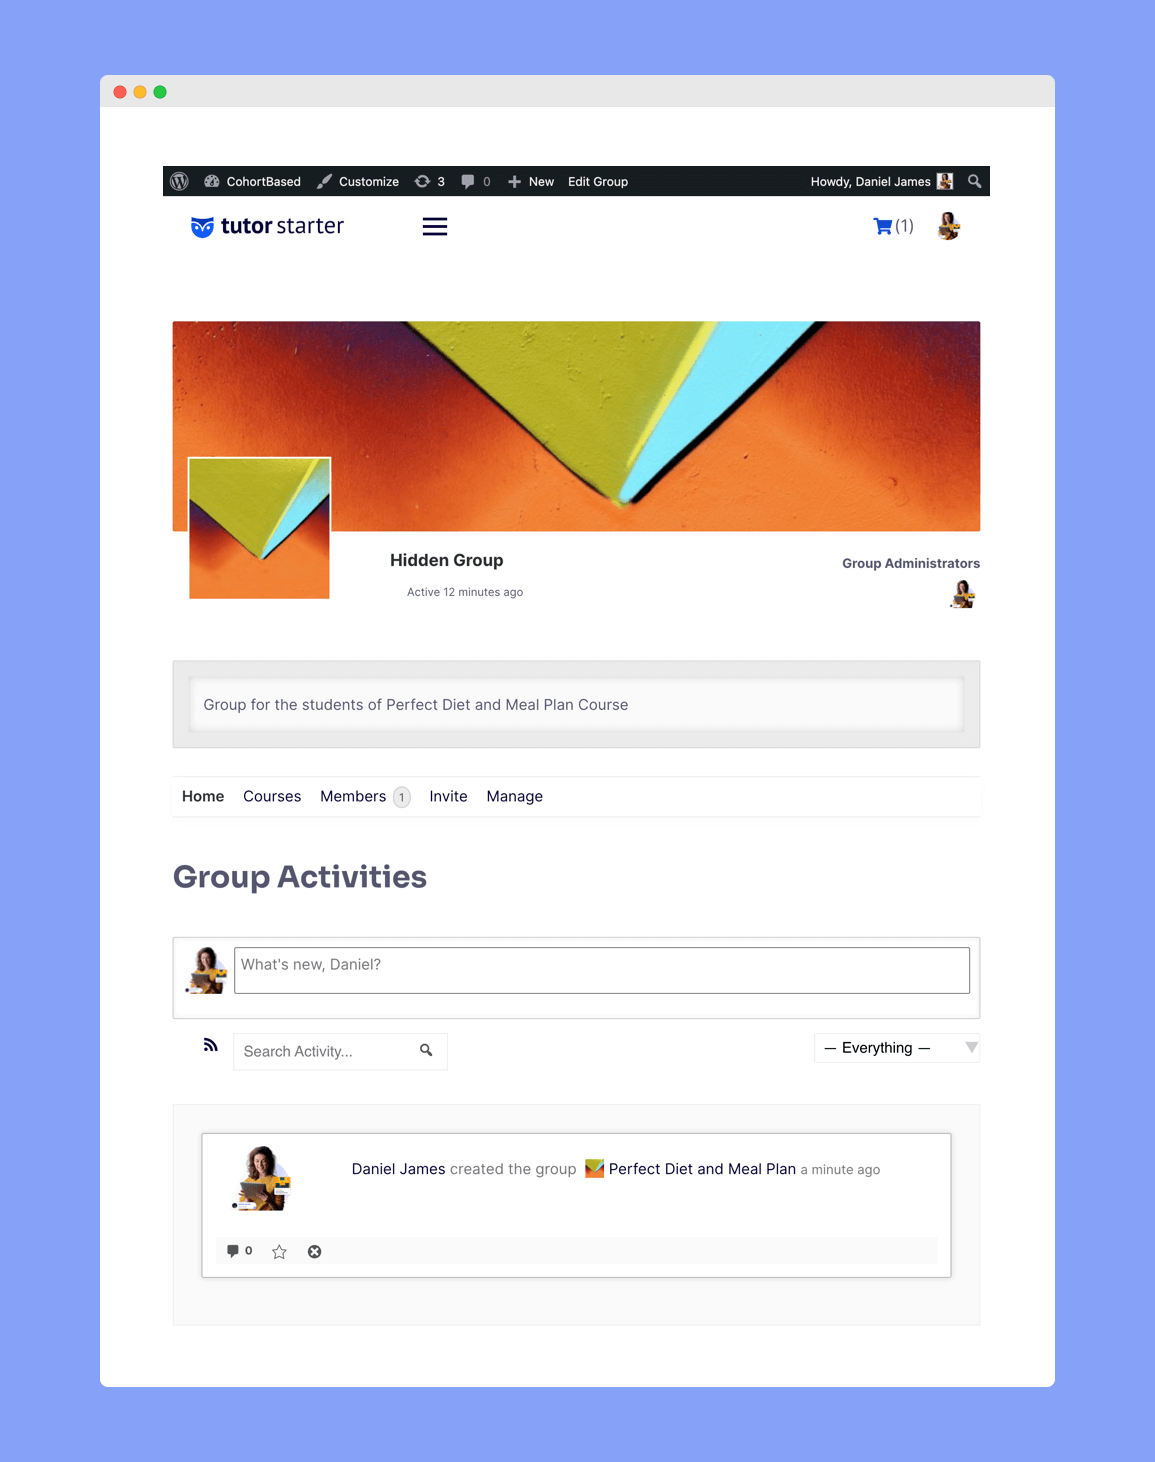
As the group is hidden, you as admin must send invitations to your students to add them to the group. To do this, go to the group’s page from the frontend and select the Invite tab. Head over to the All Members list and select the students who are enrolled in this course.
Finally, make sure to add the BuddyPress links to your site’s main menu for the user’s ease of use.
Live Classes
Live classes are the heart and soul of cohort-based courses. It facilitates lively discussions that really help get the point across to the students. You can also use meeting schedules to set a fixed time for your course duration.
The Zoom Integration add-on of Tutor LMS is your solution to hosting such meetings. To add this feature, go to WordPress dashboard > Tutor LMS > Add-Ons. On the add-ons page, scroll down and enable Zoom Integration. Next, create a Zoom account if you don’t have one already.
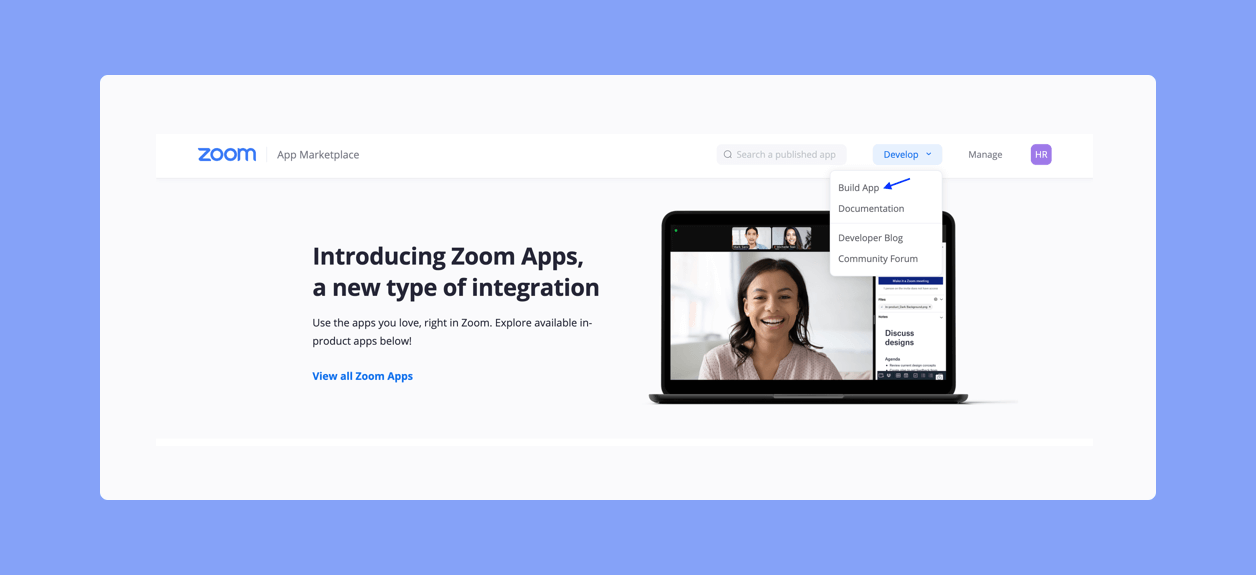
Once you have an account, go to the Zoom Marketplace. Here, hover over the Develop option found on the top right and click on Build App.
Then create a server to server oauth app from there and get the API credentials.
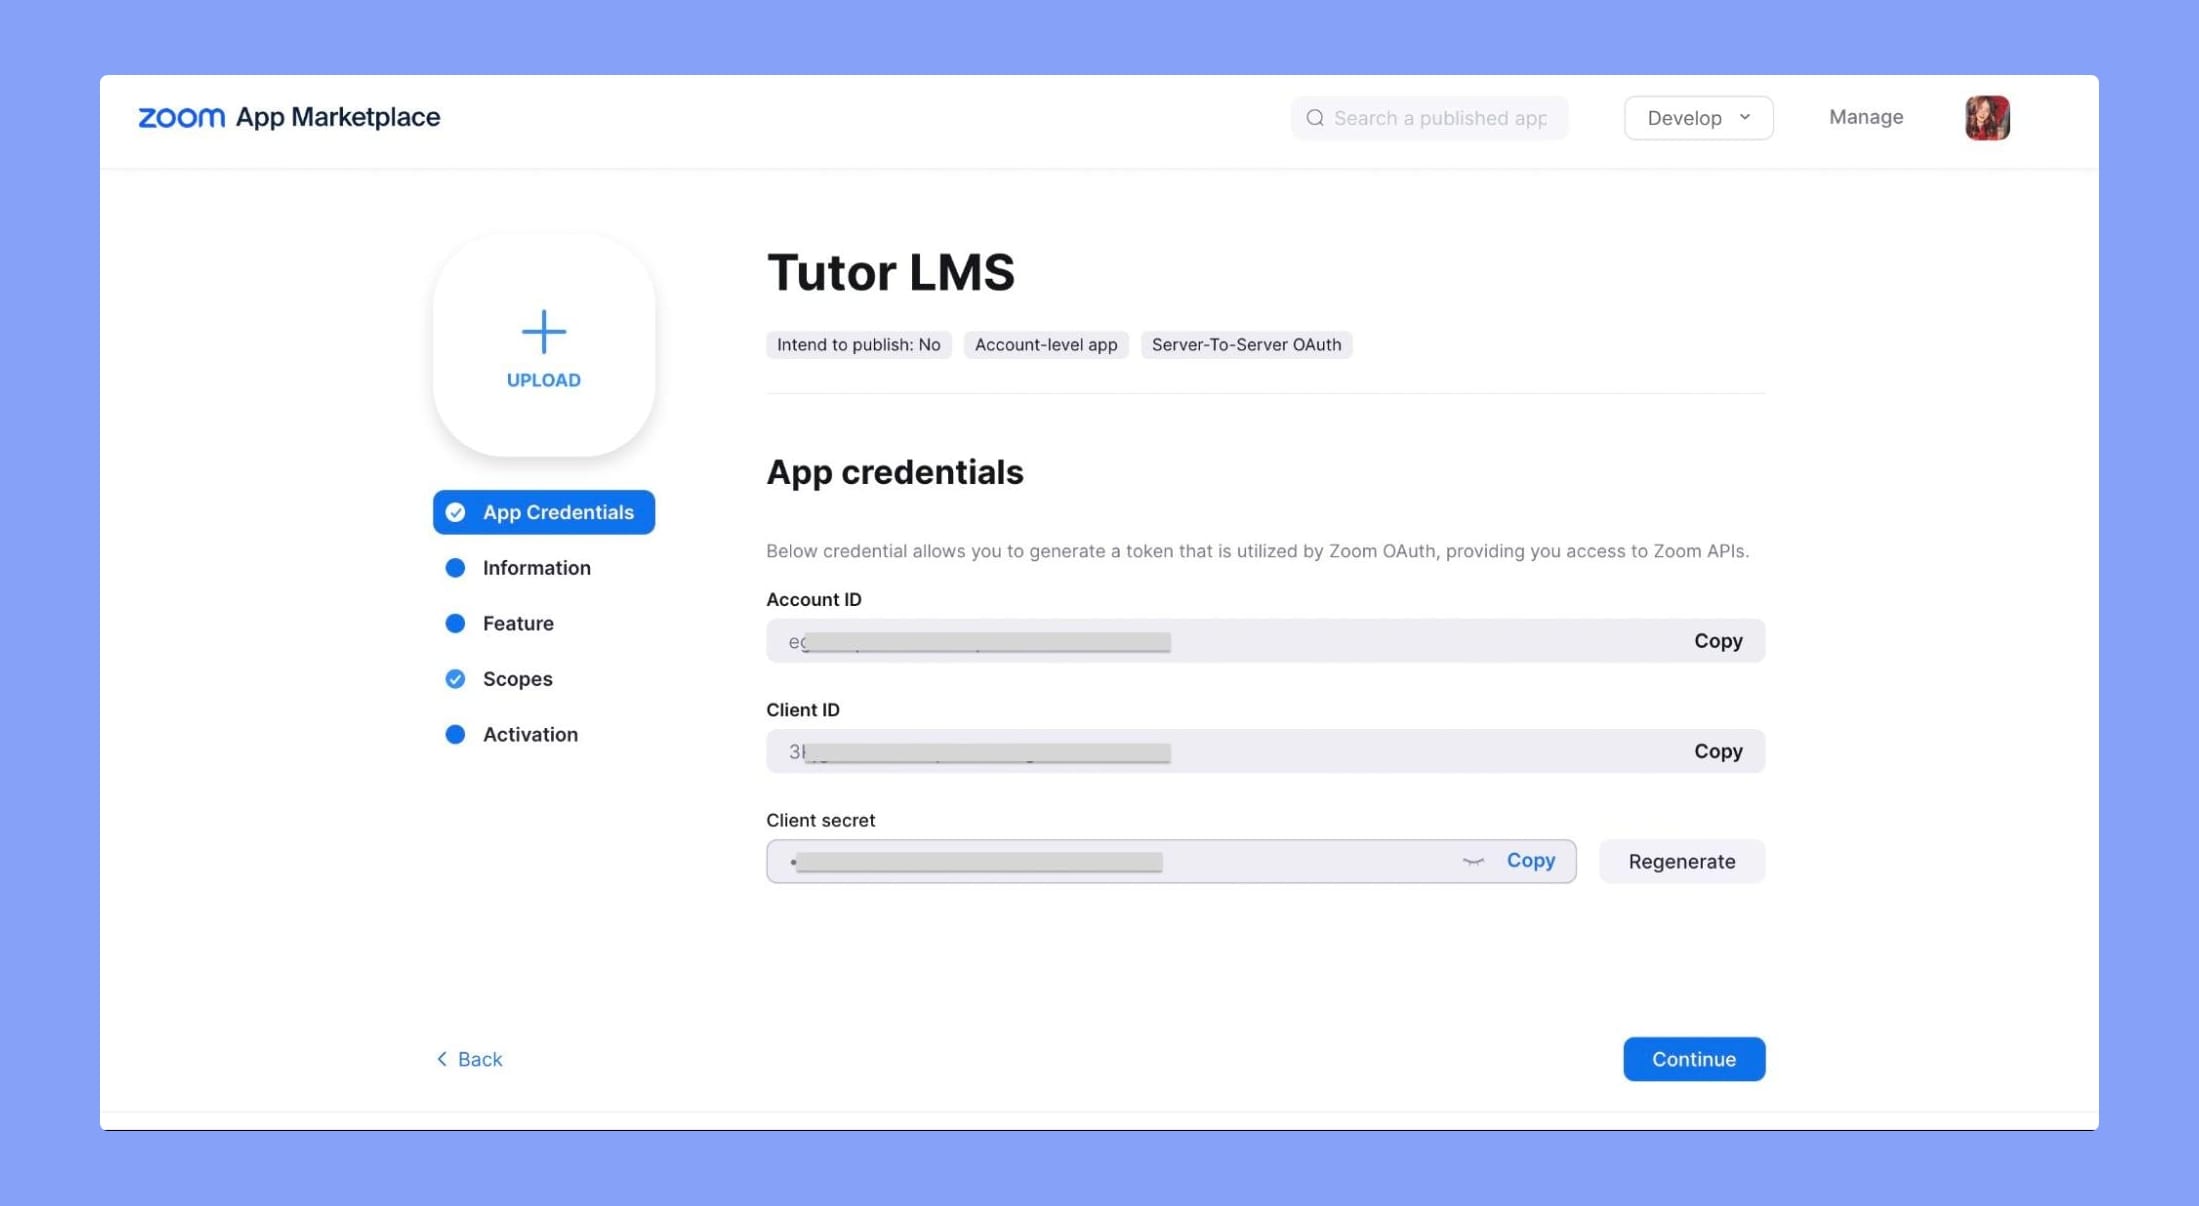
Then go to Tutor LMS Pro > Zoom > Set API tab. Here, you have to enter the Account ID, Client ID, and Client Secret key.
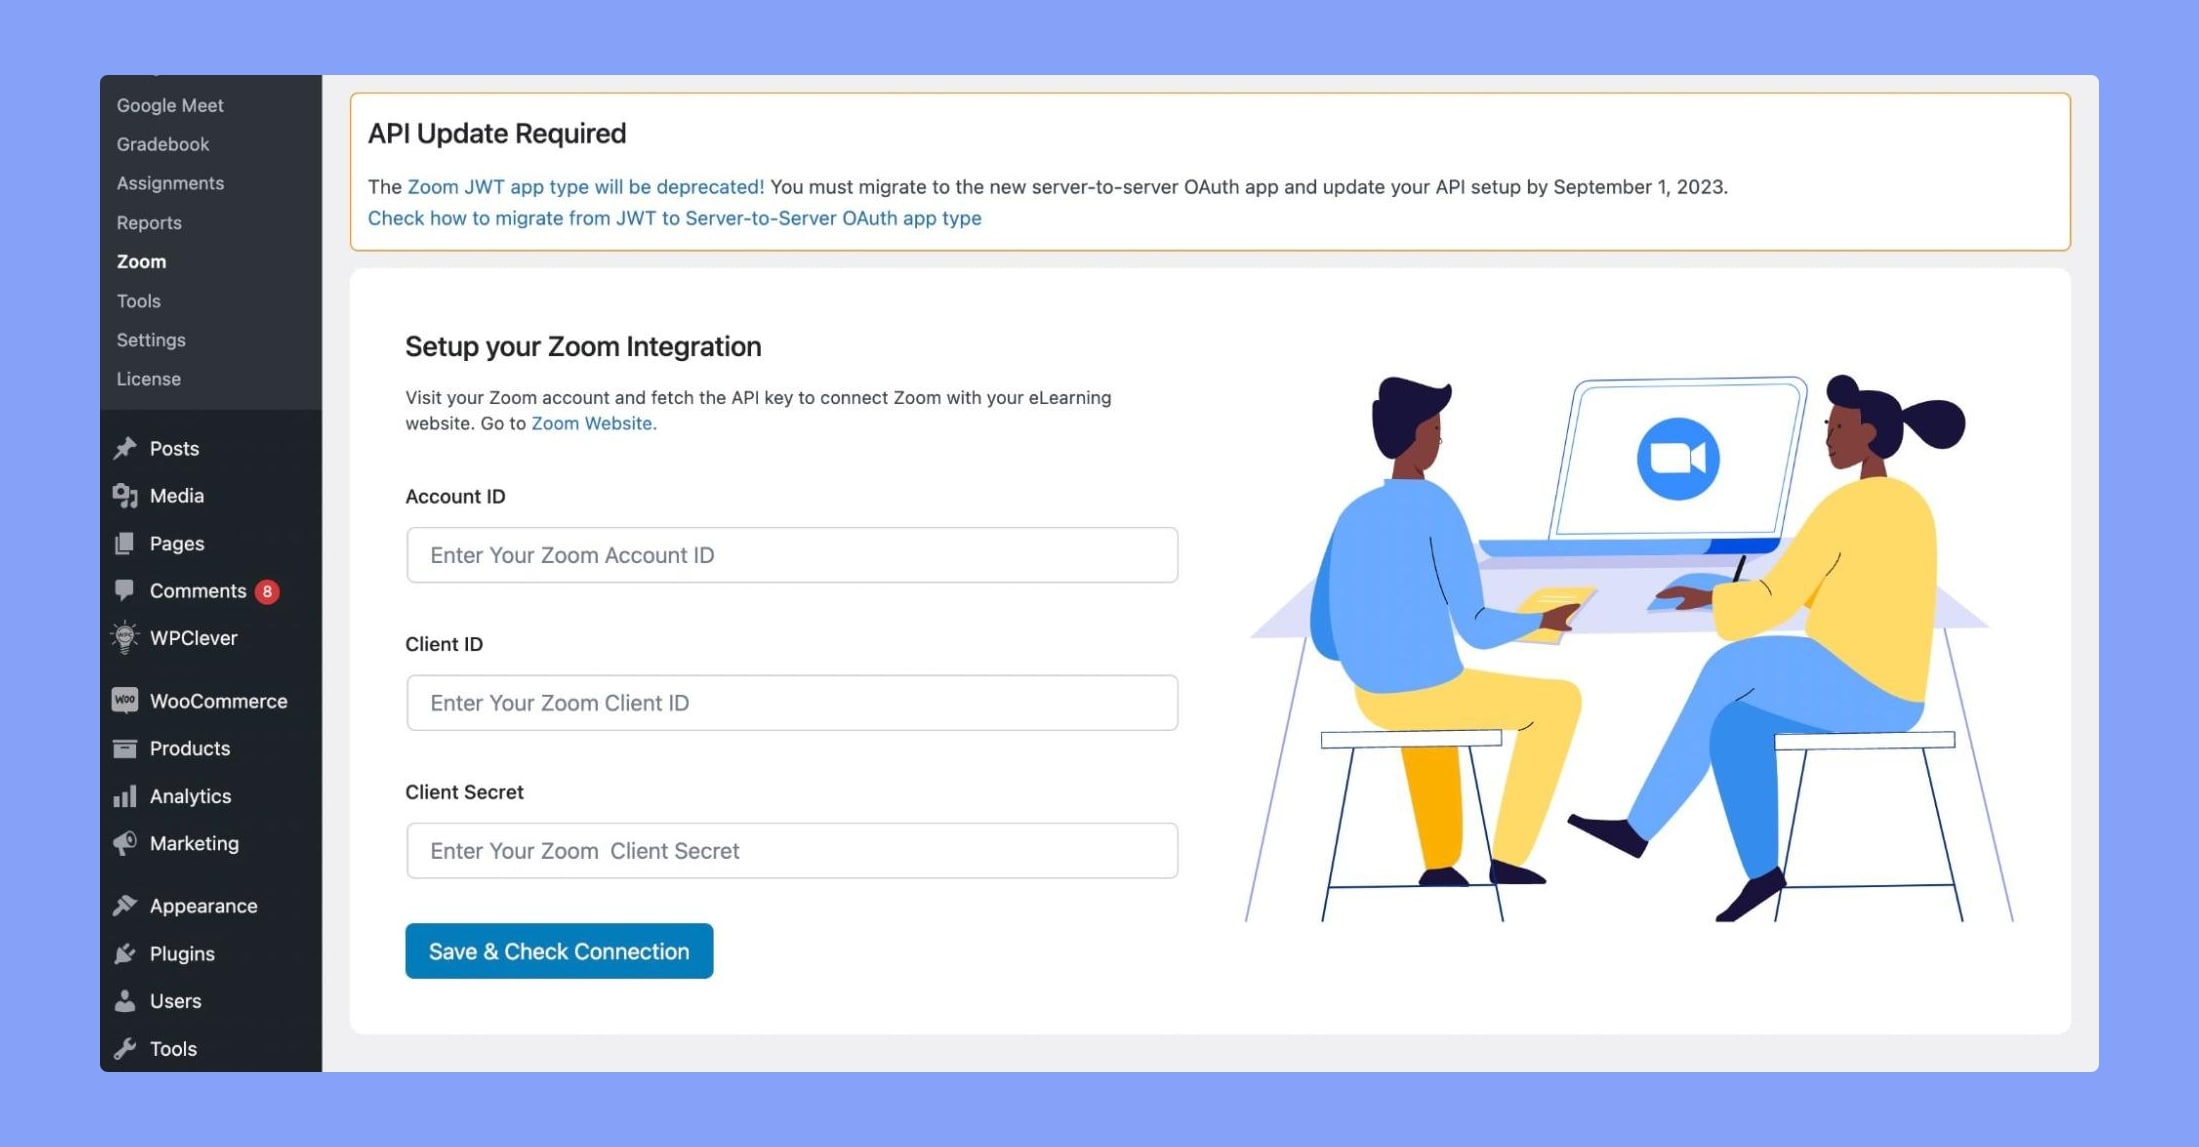
You should now be able to see the option to schedule Zoom meetings on your course creation page. If you need to adjust zoom settings, then you can do that by going to Tutor LMS > Zoom > Settings.
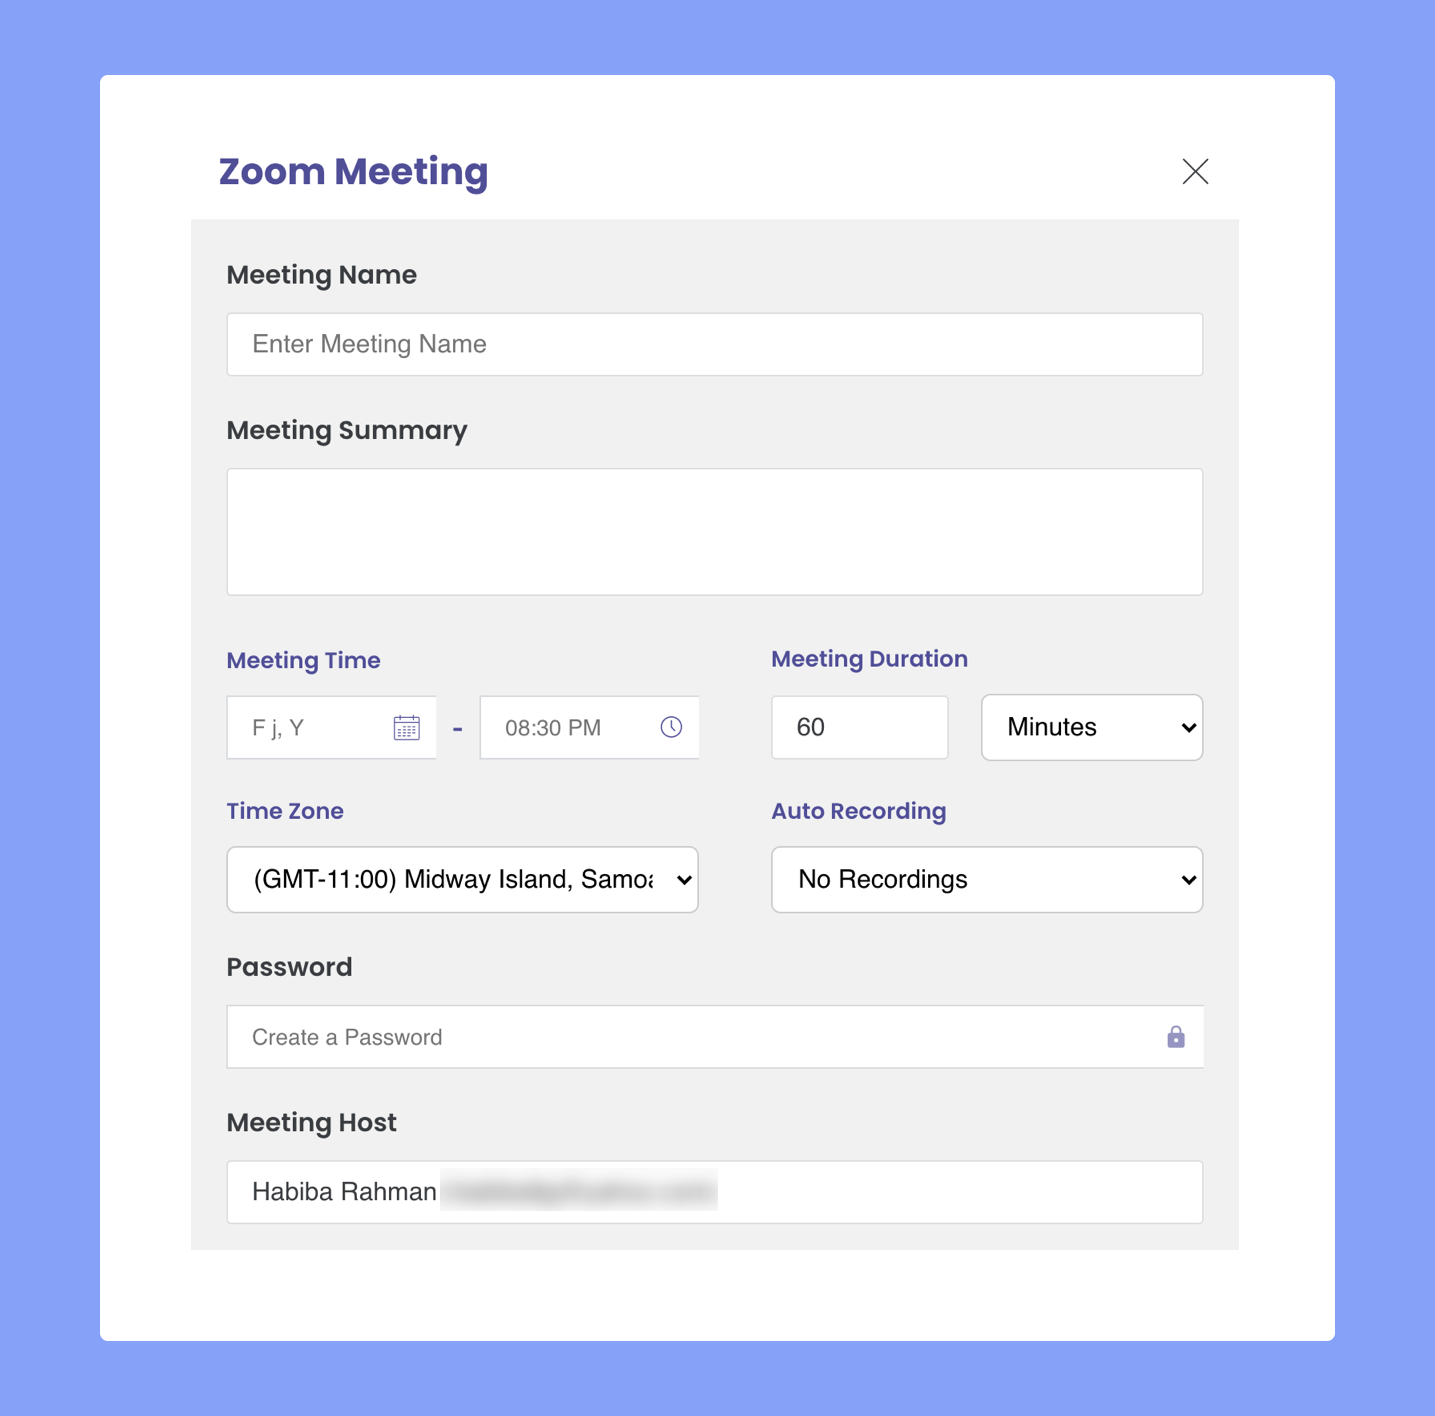
To schedule a zoom meeting visit your course in edit mode. Scroll down and select your target topic. Next, click on the +Zoom Live Session option. On the Zoom Meeting section, enter the meeting details and set the date and time. Finally, click Save.
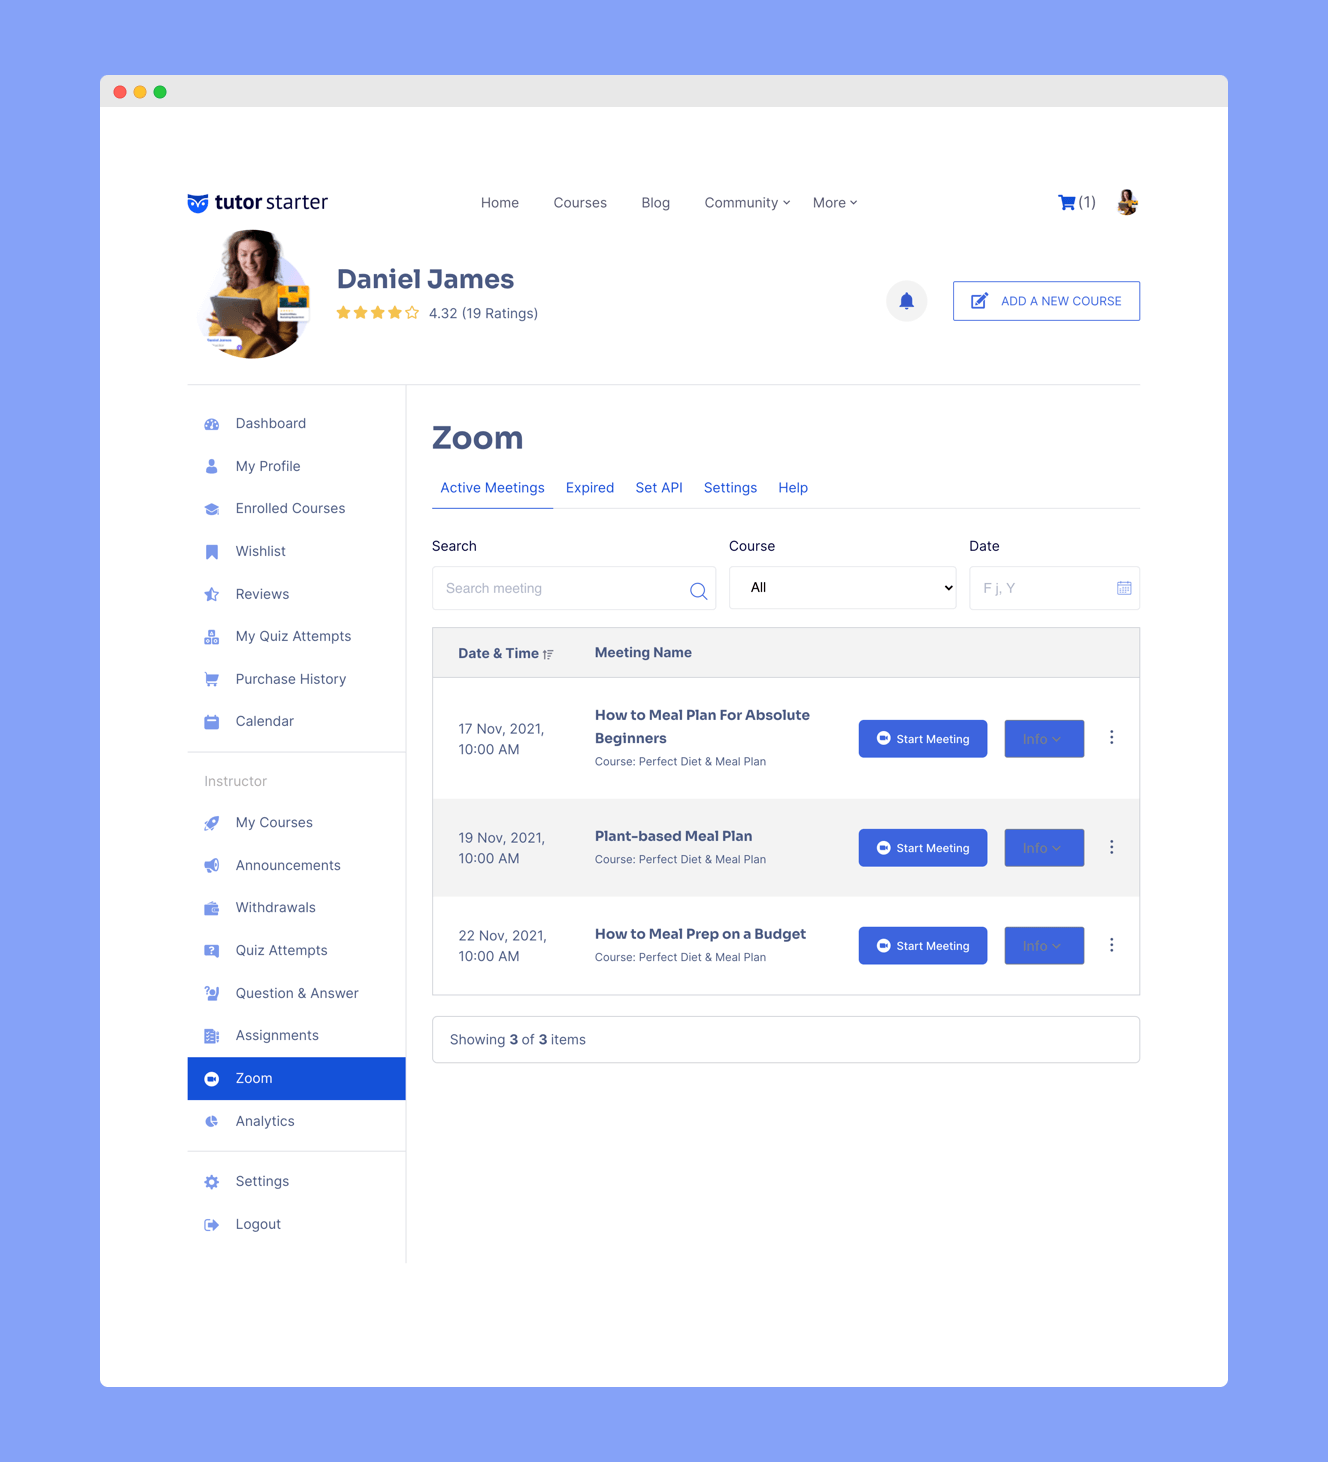
Instructors can also manage their meetings from the frontend dashboard. To see all your scheduled meetings, navigate to your Frontend Dashboard > Zoom. From here, you can also access the zoom settings tab to adjust the meeting behavior.
If Zoom’s not your thing, then worry not. Tutor LMS also offers Google Classroom Integration as an alternative to Zoom.
Synchronous Learning
Usually, course content is available to students right after enrolling. They’re also able to take lessons out of order and even skip some altogether. These actions are some of the reasons why self-paced courses are not as successful.
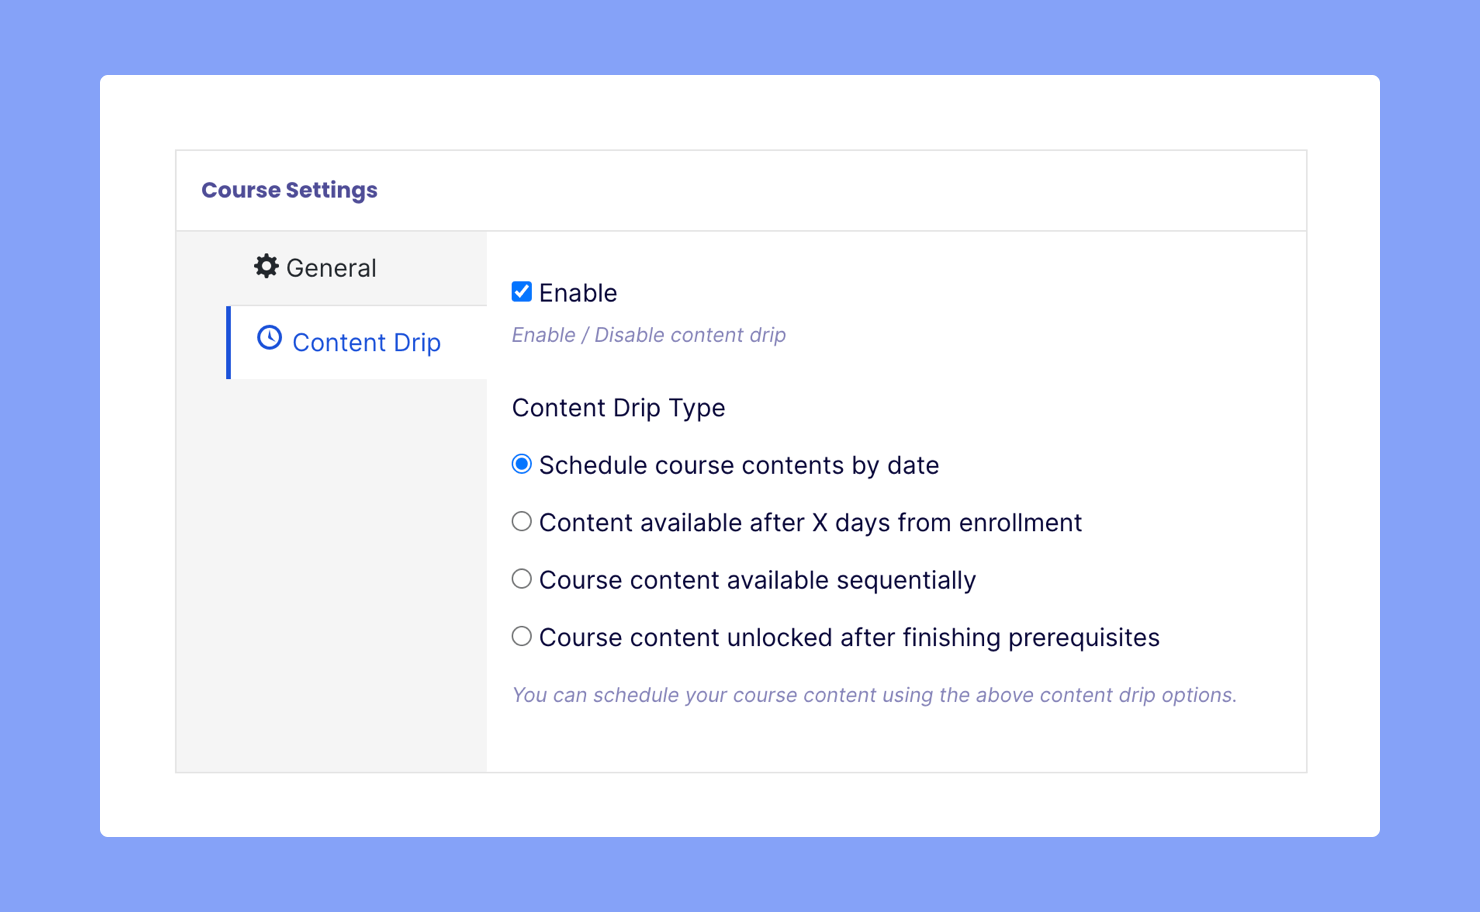
To prevent these actions, you can enable a nifty add-on called Content Drip from the add-ons page. Then you’ll find a Content Drip tab under Course Settings on the course edit page. Here, enable the feature and select your content drip type.
To ensure your courses are consumed in order, select the option Course content available sequentially. To specify prerequisites for each lesson, you can choose Course content unlocked after finishing prerequisites instead.
After selecting a content drip type, you have to update your course. Only then will content drip options appear under lesson, assignment, etc.
Fixed Enrollment
Cohort-based courses are usually limited to a small number of students aiming to create a close-knit group of individuals that can learn and grow together. To add this feature, visit your course in edit mode.
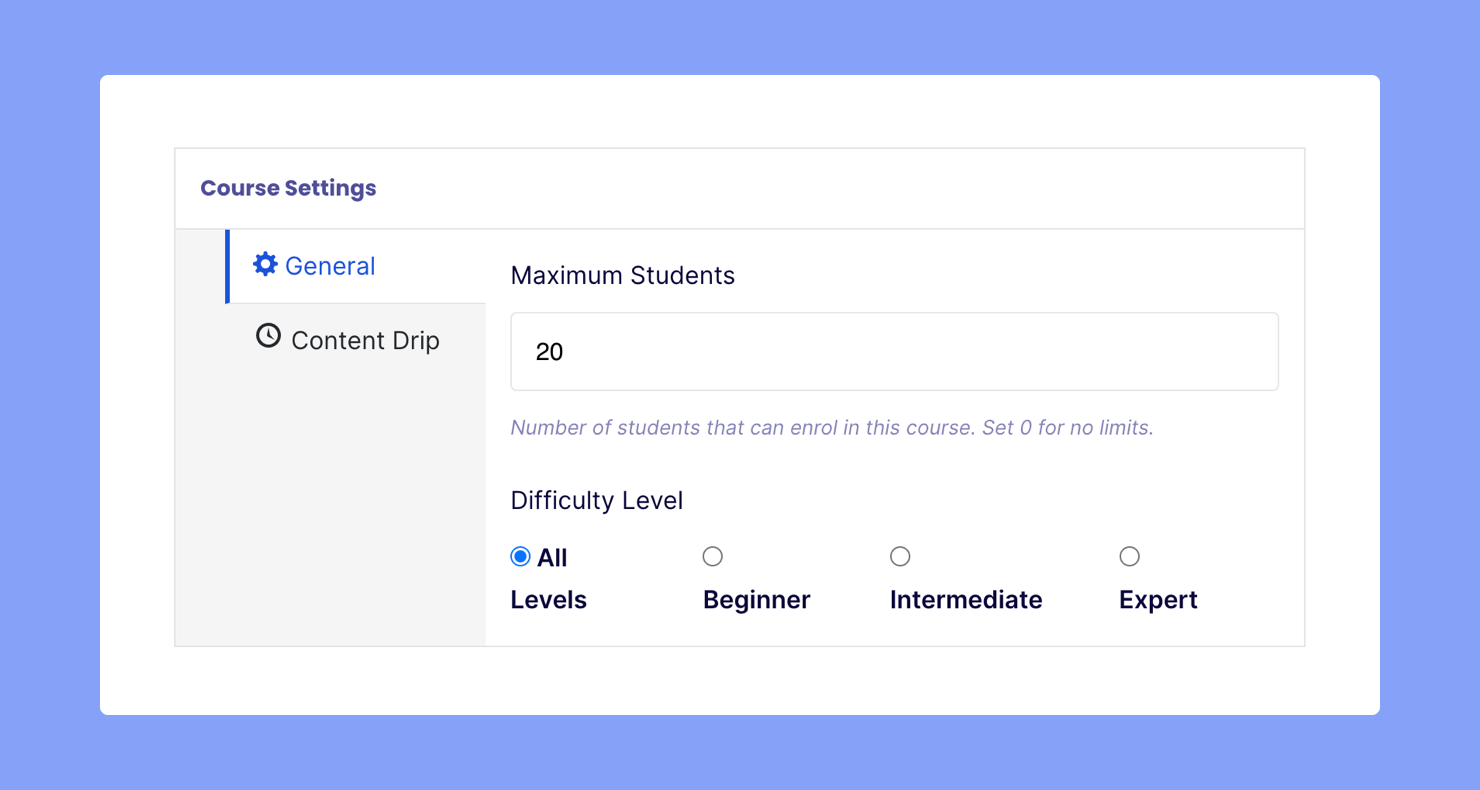
Under the course settings sections, you should see a field where you can define the maximum number of students allowed at a time. Enter a number into this field and update your course.
Bonus: Student Calendar
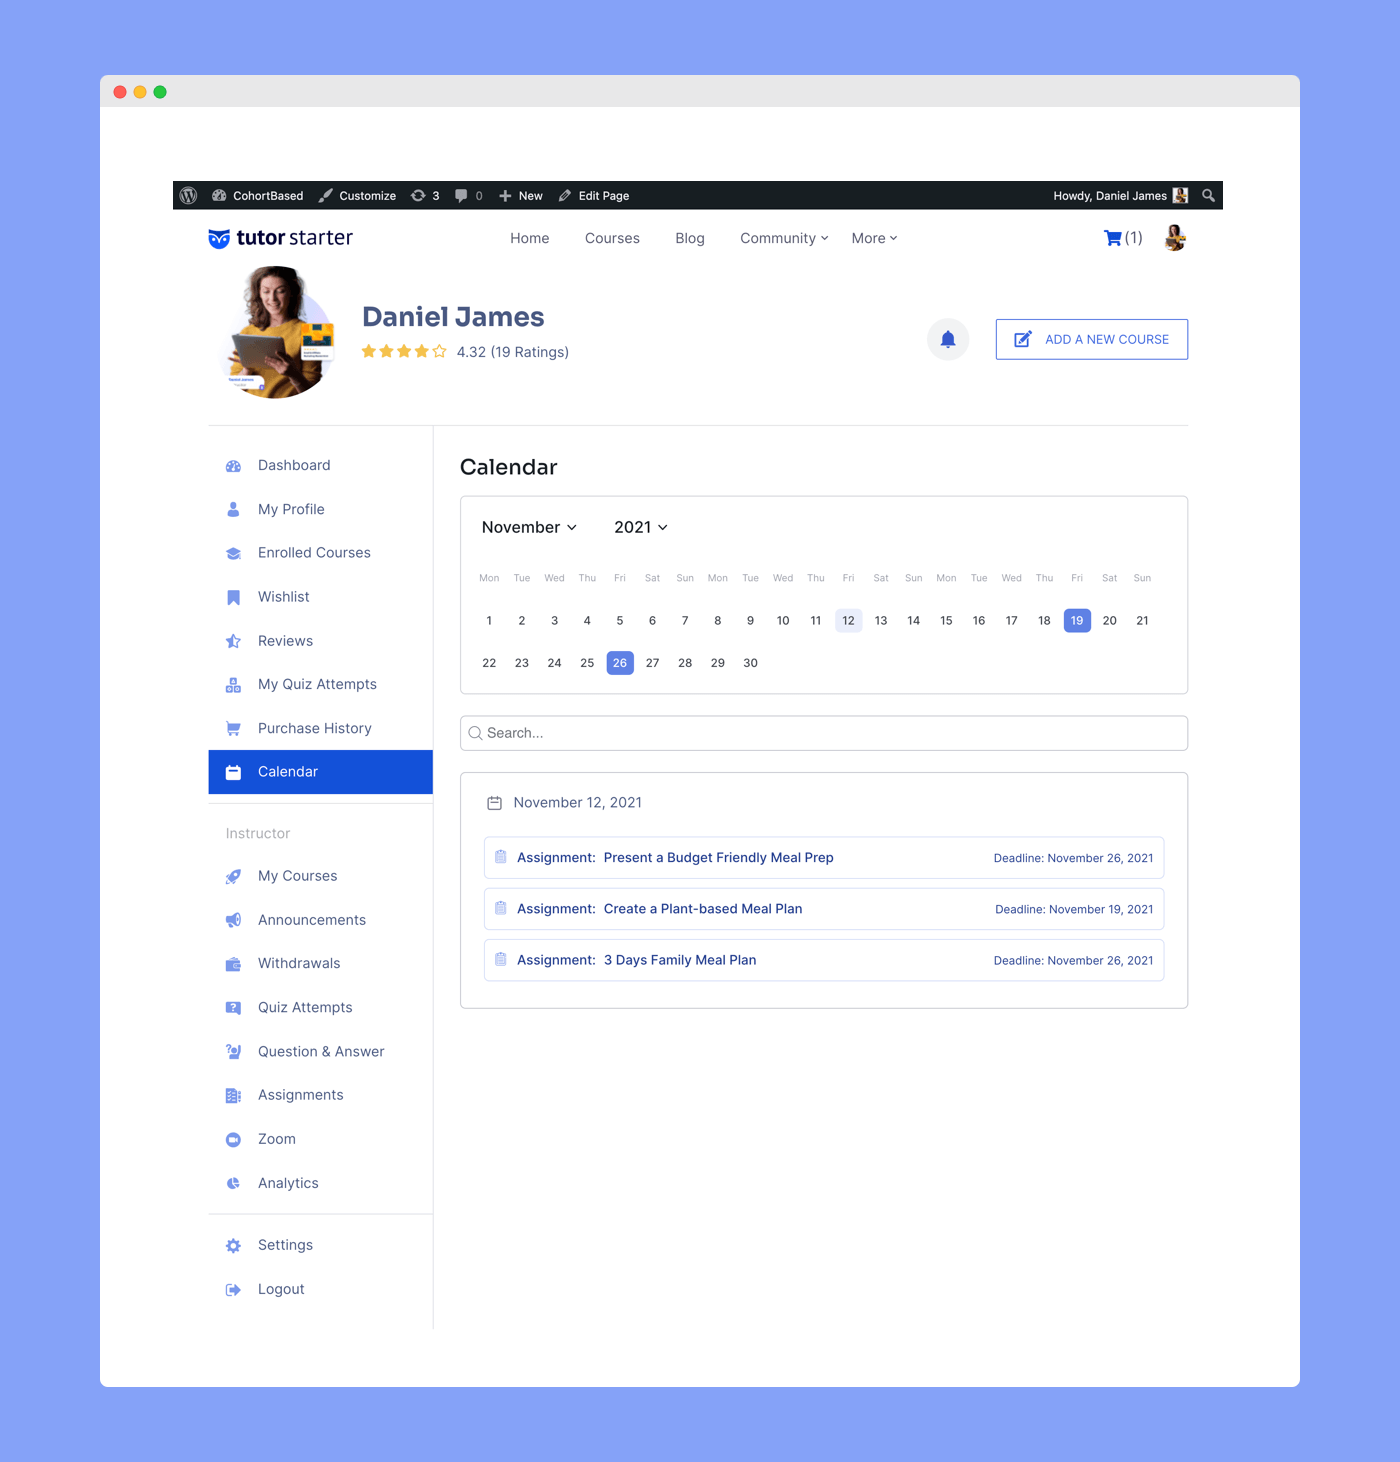
A student might be enrolled in multiple courses at a time, each with its own upcoming assignments. Giving them a calendar to track all of this will be life-saving. Enable the feature from the Tutor LMS add-ons page. Students will see a new Calendar section on their frontend dashboard. This will help them keep track of all their deadlines.
Final Thoughts
And voila! That is all you need to do to create cohort-based courses. Because of its advantages, this concept is really grabbing people’s attention. If you want to join in the fun, then get cracking with Tutor LMS now.