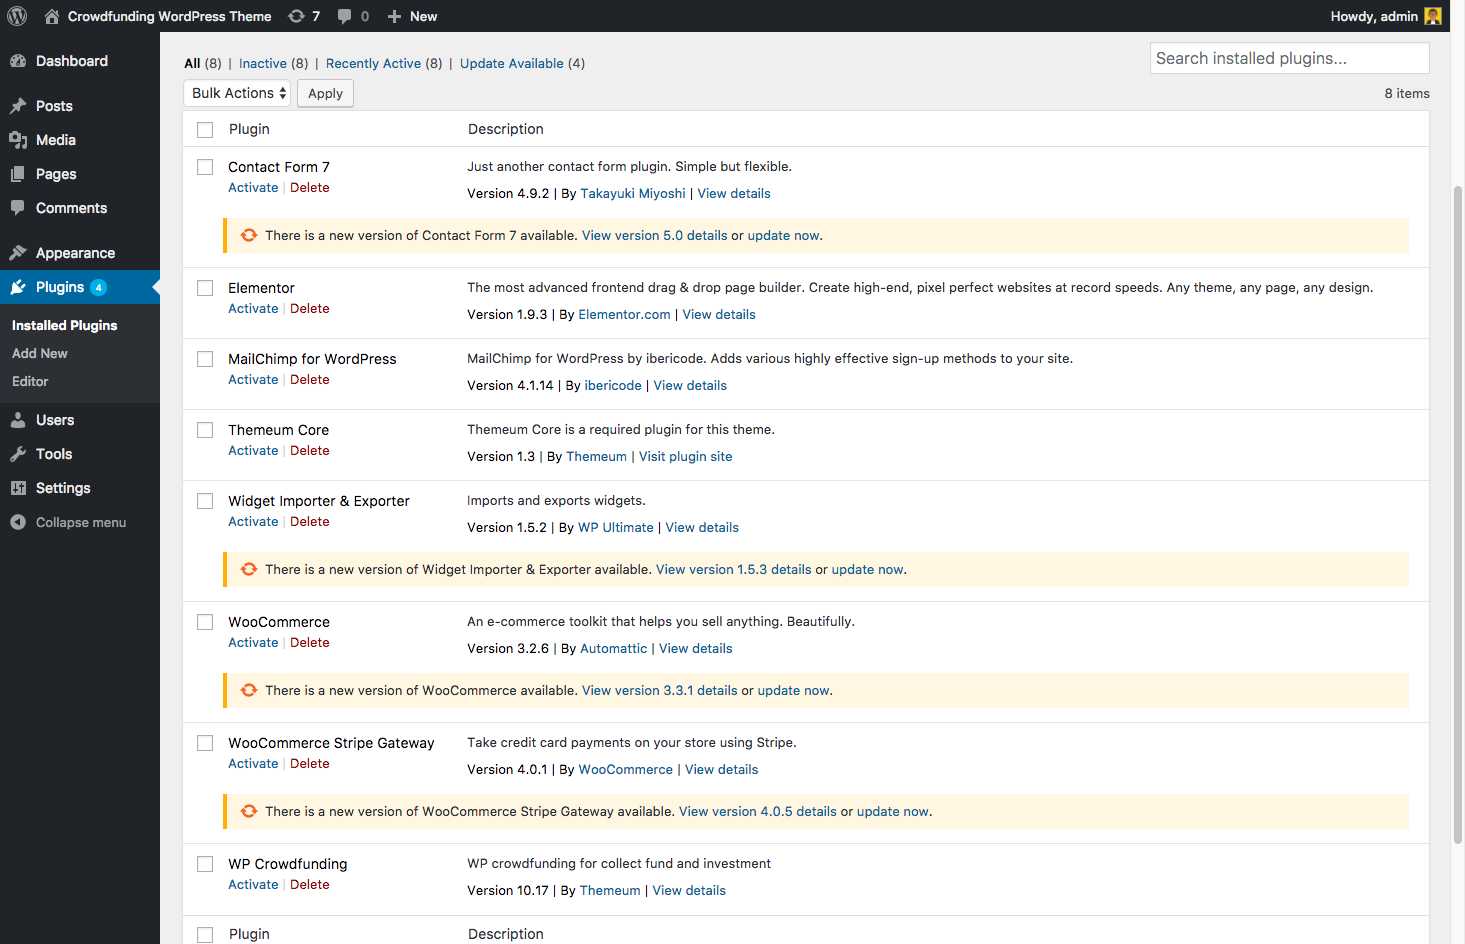
Backnow Essential Plugins and Installation
To have all features with your site install and active all required plugins. All essential plugins are included in the Backnow theme.
- Elementor Page builder
- Contact Form 7
- WooCommerce Stripe Gateway
- WP Crowdfunding
- MailChimp for WordPress
- Themeum core
- WP Mega Menu
- Themeum Demo Importer
- WooCommerce
- Widget Importer & Exporter
Install above essential plugins in 2 easy steps.
Step 1: In Dashboard, click on Dasboard => Appearance Menu => Install Plugins Menu
Step 2: Then click on Install link under plugin title and enjoy the plugins.
One Click Demo Import
One Click demo Import Sample Data: Once you install the theme’s required plugin “Themeum Demo Importer”, you will get an option to import the demo contents in just a single click. After installing and activating the “Themeum Demo Importer” plugin, go to Dashboard > One Click Demo Install option (to the bottom left side). The following page will arrive.
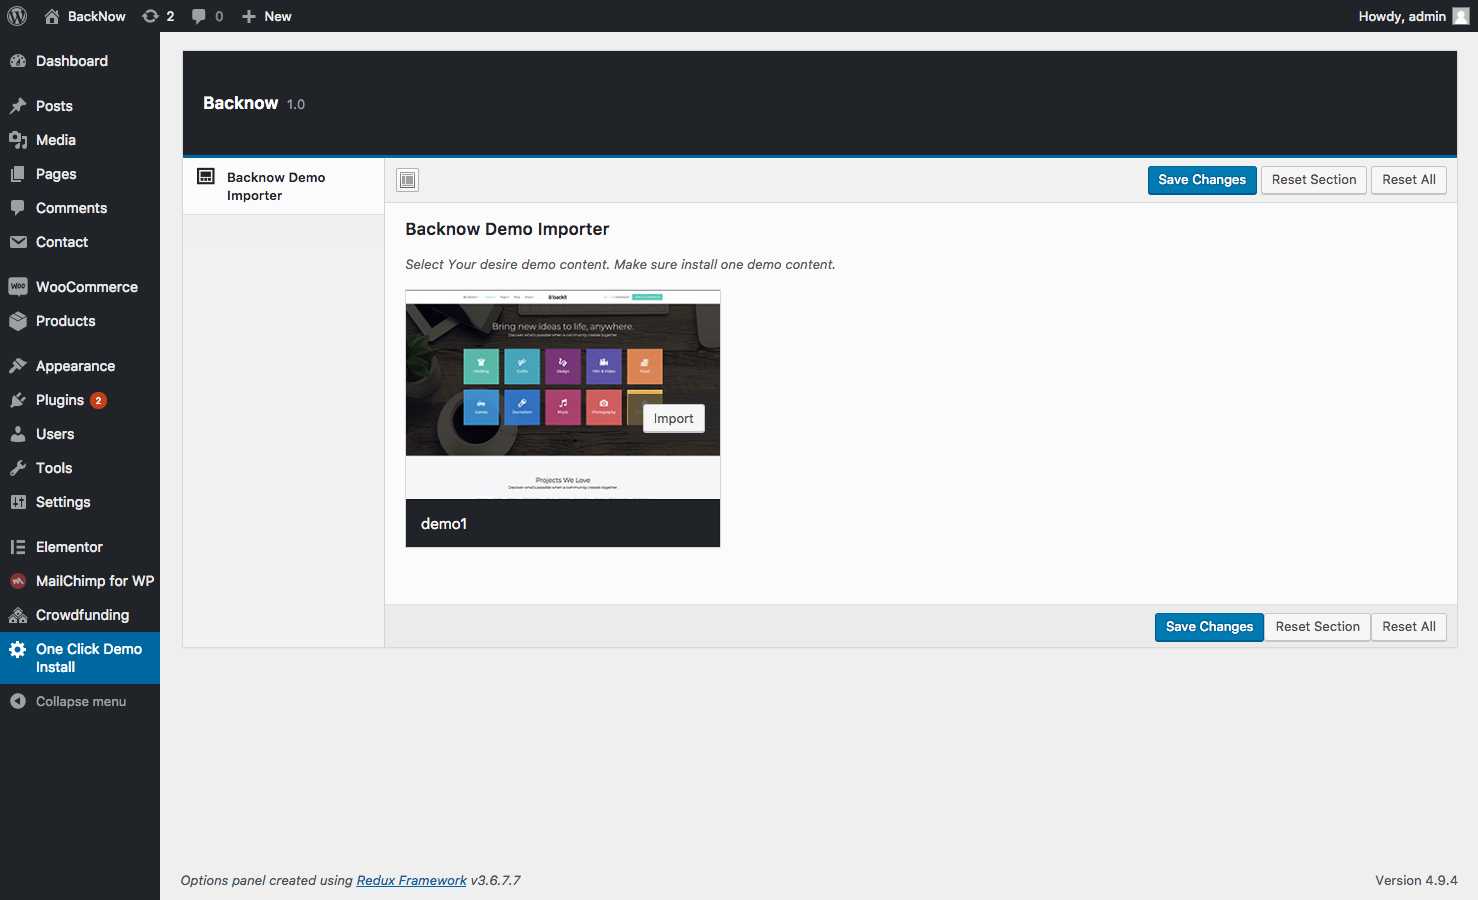
Then you can import any of the available demo variation(s) from the appeared ones by clicking the “Import Demo” button inside each of the demo thumbnails. Importing demo will take a while, so be patient.
N.B: Make sure your PHP is well configured also your PHP version is 5.6 or PHP 7+.
Example:
memory_limit = 256M
upload_max_filesize = 100M
post_max_size = 64M
max_execution_time = 900
max_input_time = 900
If in any case you want to import the demo content manually. Follow the process below.
Import Demo Manually
Import Sample Data: If you want to experiment with the demo data on your website then you need to import the sample data. From menu, choose Tools > Import > WordPress, then you will see the “Import WordPress” option which allows you to upload a .xml file from / Demo Content folder found inside the extracted folder that you get from the download theme package (a zip file). If this tool is not installed on your site, you have to install the “WordPress Importer” plugin to enable the functionality.
N.B: Upon importing demo manually you need to set the following things up. In case you imported demo with our One Click Demo Import (via Themeum Demo Importer ) you don’t need to do the following.
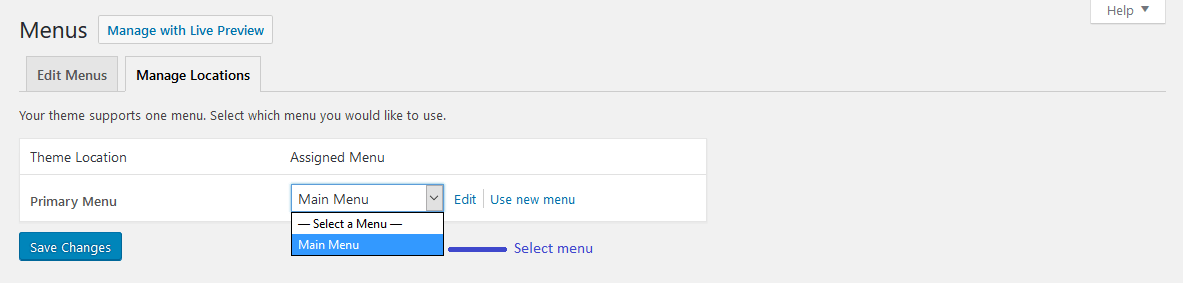
Menu Settings
It’s an important part of the Tixon theme Installation process. At first you need to set your menu for the Primary Menu location. Go to Dashboard > Appearance > Menus, then click on Manage Locations and select/create your menu for the Primary Menu location. You can follow the below screenshot.
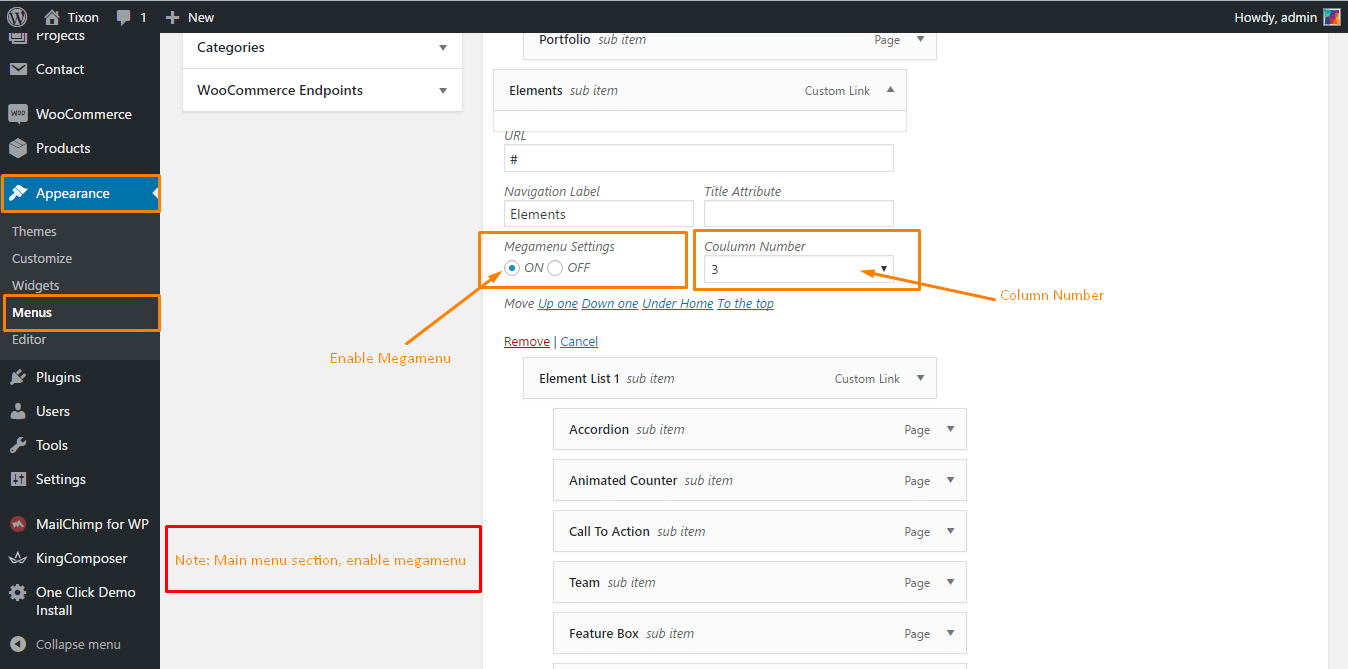
To enable the Megamenu feature for any menu item on the navbar, go to Dashboard > Appearance > Menus. Then click any menu item you like and configure the Megamenu. See the following screenshot.
Set Static Home Page (Required)
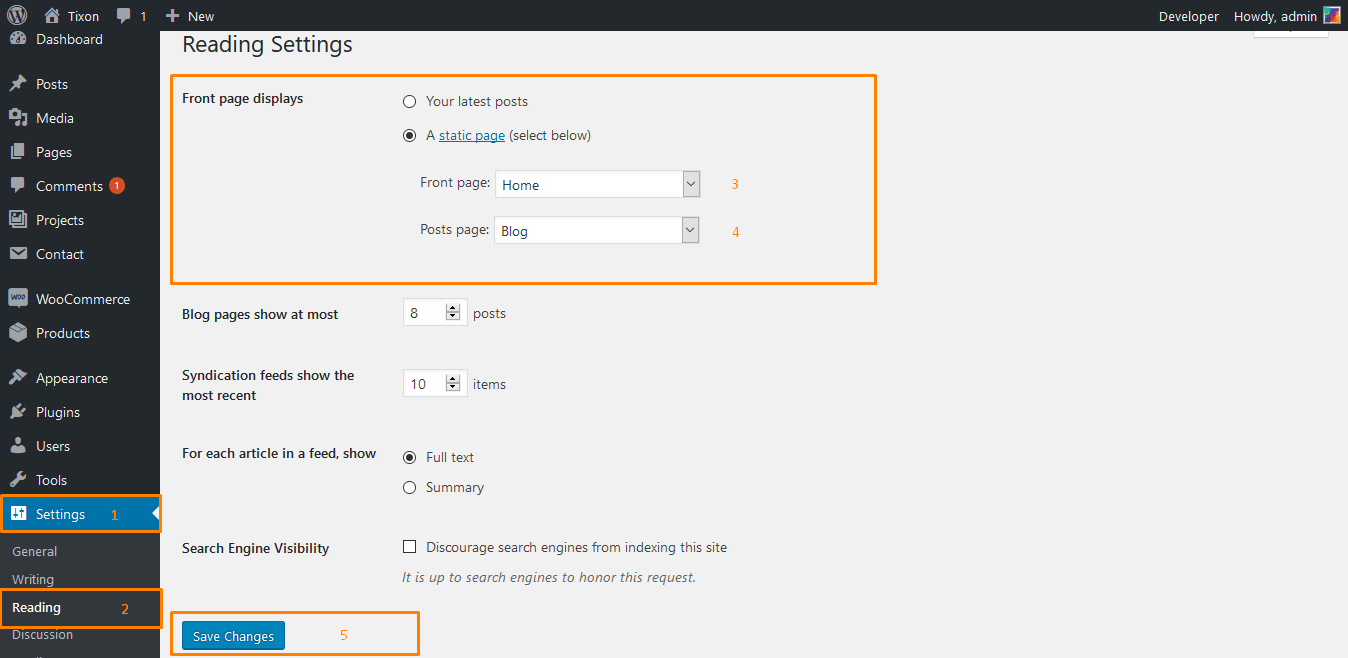
WordPress shows the latest blog posts by default on the front page. If you want to make it look like the demo Tixon site, then you need to set a static Home Page. To do it, navigate to Dashboard > Settings > Reading. On that page, choose static page in the Front page display section. From the dropdown menu, select the page called Home (if you have already created the page) as the Front page, and save changes.
Setup Permalink (Required)
Make sure to configure the permalink structure. By default, WordPress generates web URLs having question marks and lots of numbers in them; however, WordPress offers you the ability to create a custom URL structure for your permalinks and archives. This can improve the aesthetics, usability, and forward-compatibility of your links. From WP admin panel go to the following path Settings > Permalink then select “Post name” as the permalink structure of your WordPress site.
Widgets Settings Import
Import Widget Setting Data: If you want to use the demo site widget settings on your website, we recommend to install and activate “Widget Settings Importer/Exporter” plugin which gives you the ability to import the demo widget settings, saved as a .json file type. The import will not overwrite any data currently within the sidebars, but will increment the widgets and add a new instance of the widget. Choose Tools > Widgets Setting Import then select widget_data.json file from Demo Widget Settings folder directly from the demo content folder (found inside the Tixon theme package you’ve downloaded). Then click on Show Widget Settings Button. Select all or those widgets which you really need and use “Import Widget Settings” button. All widgets with registered sidebars will be imported.