
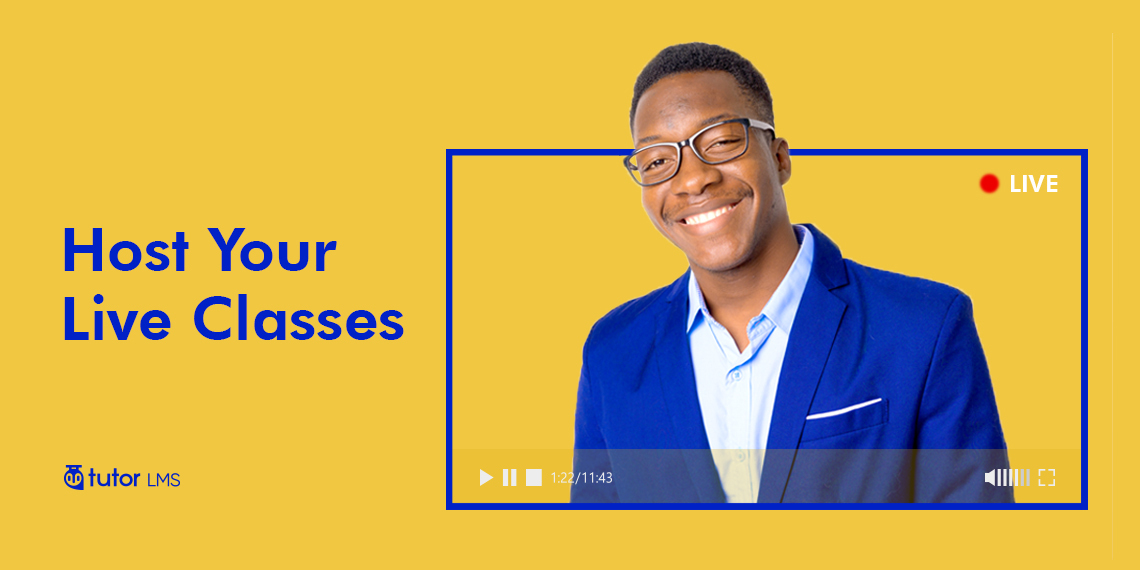
Hello tutors! Hope you’re being productive and staying home. These are very troubling times but rest assured that we’ll find a way to get through this! As all educational institutions come to a halt, we must find a way to spread knowledge other than the physical means.
Hosting courses on your eLearning platform is excellent, but they lack the interactivity of a classroom. If I want to ask a question to the teacher, I would have to post it in the Q&A forum, and then wait for the teacher to respond. Quite an arduous process if you’re the kind of student that asks a lot of questions!
Using Zoom With Tutor LMS
So, we figured it’s best to give you an easy way of creating hosting and managing live classes online. To start creating live online lessons, you will need a few tools as well as configuring some of them to your liking.
So let’s take a look at the tools you will need:
Step 1: Create a Course
To create a course optimized for live classes, first, create the general structure of the course. Add all the other necessary text and image content along with the course preview video. Then you can create a course for your students. You may follow this course creation process if you need any help with designing.
Step 2: Create a Zoom App
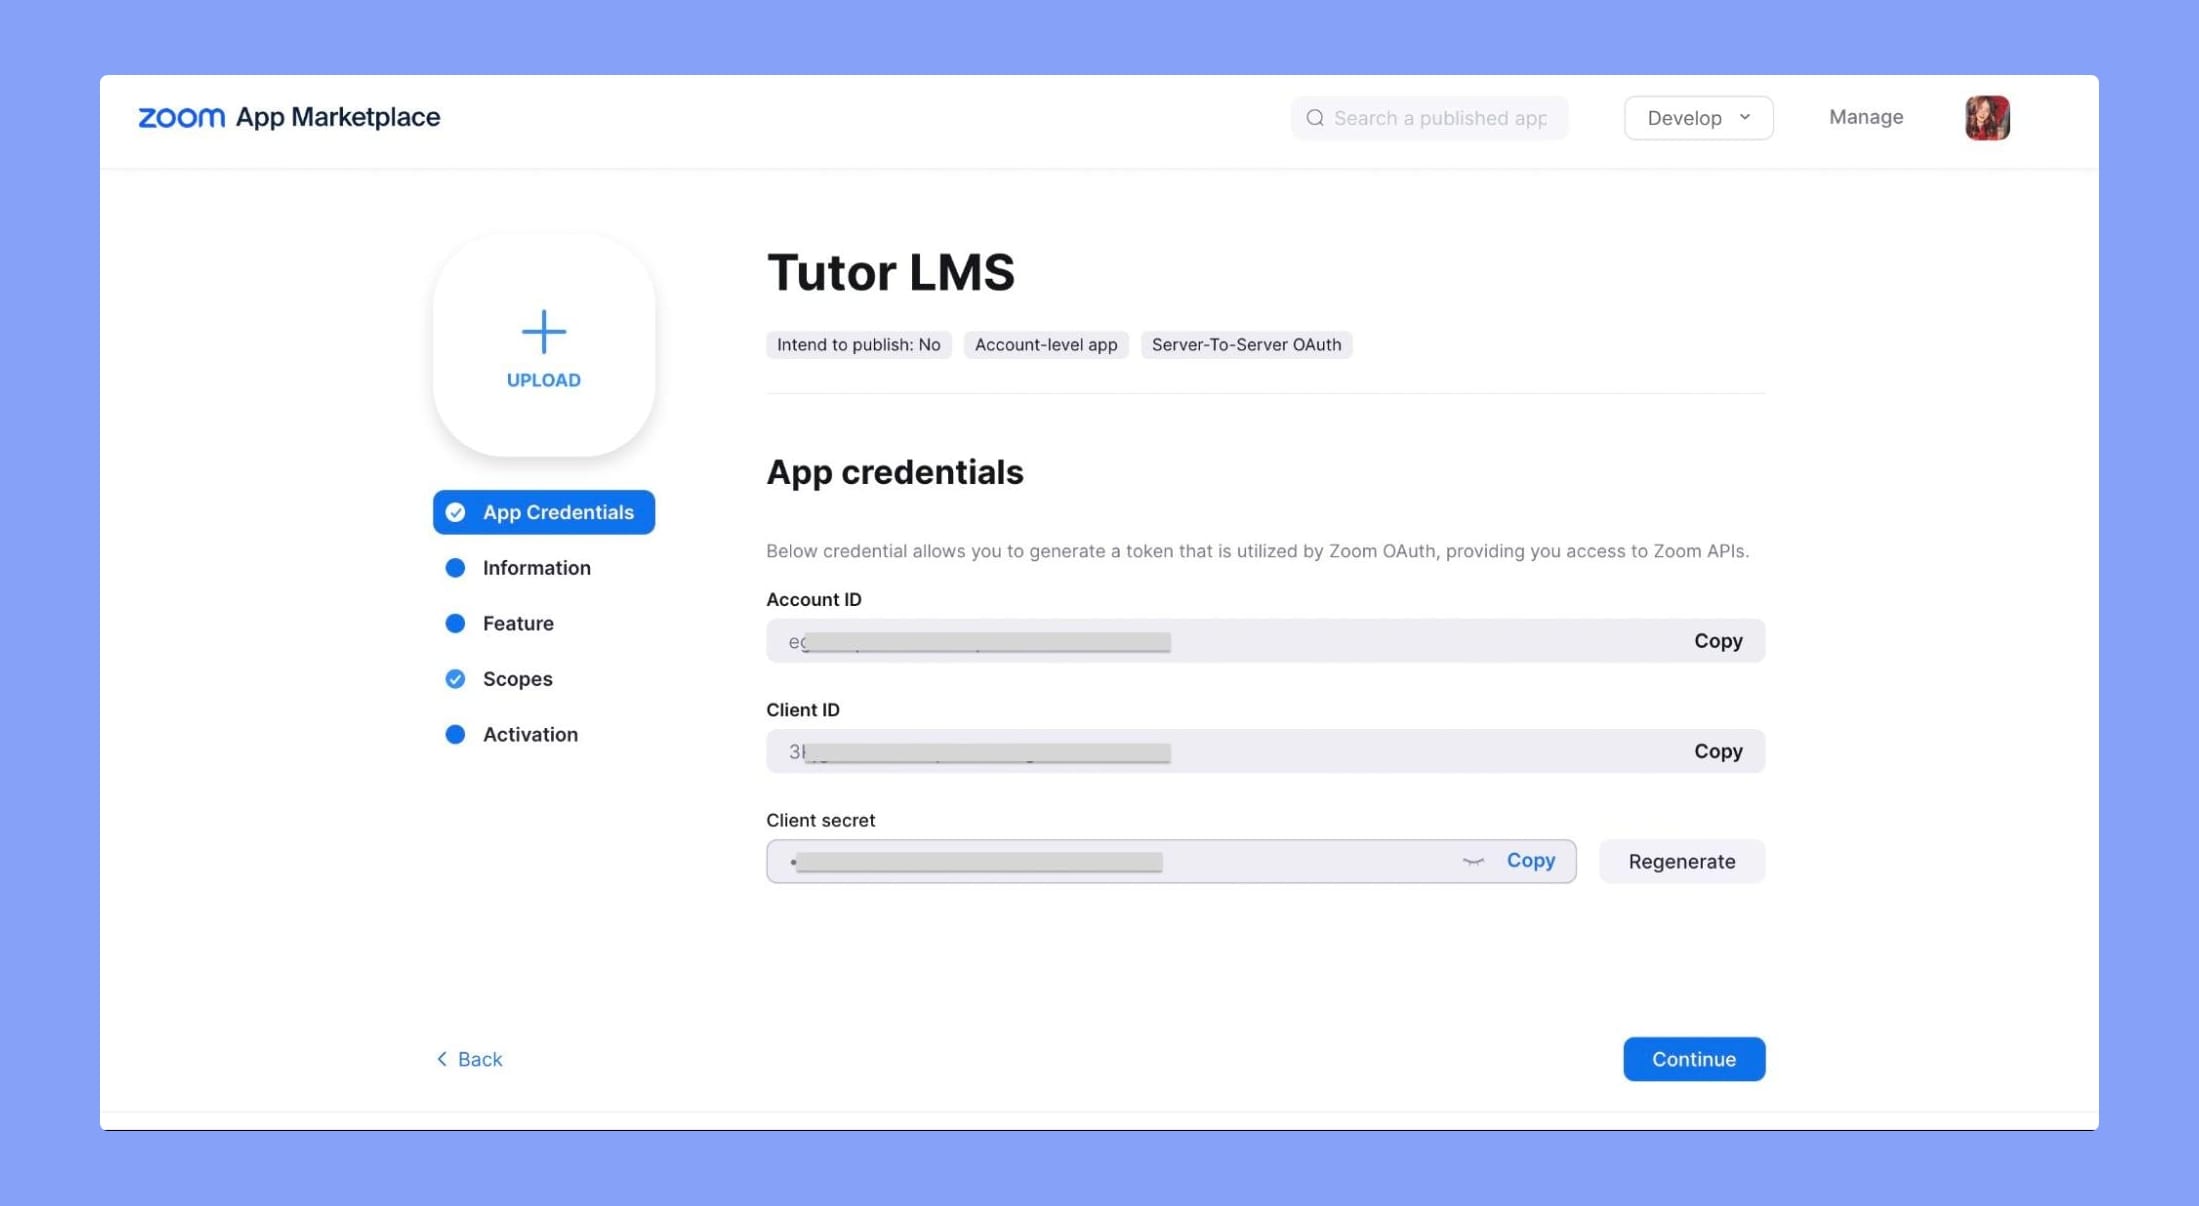
In order to conduct live classes with Zoom, instructor’s must create a Zoom Server-to-Server OAuth App. Here’s the process of creating that Zoom app.
- Login to your Zoom account and access the Zoom App Marketplace Developer Dashboard.
- Scroll down to find Server-to-Server. Click on “Create” under the Server-to-Server OAuth app type.
- Set the app name and click on the Create button.
- Set App Credentials, Information, Feature, and scopes. We recommend you select all the scopes for Meeting, Webinar, Recording, and User.
- Go to the Activation page and activate the app.
If you need more information about this app creation process, please visit our Zoom integration documentation.
Then go to the App Credentials page and collect Account ID, Client ID, and Client Secret from there.
Step 3: Connect Zoom to Tutor LMS System
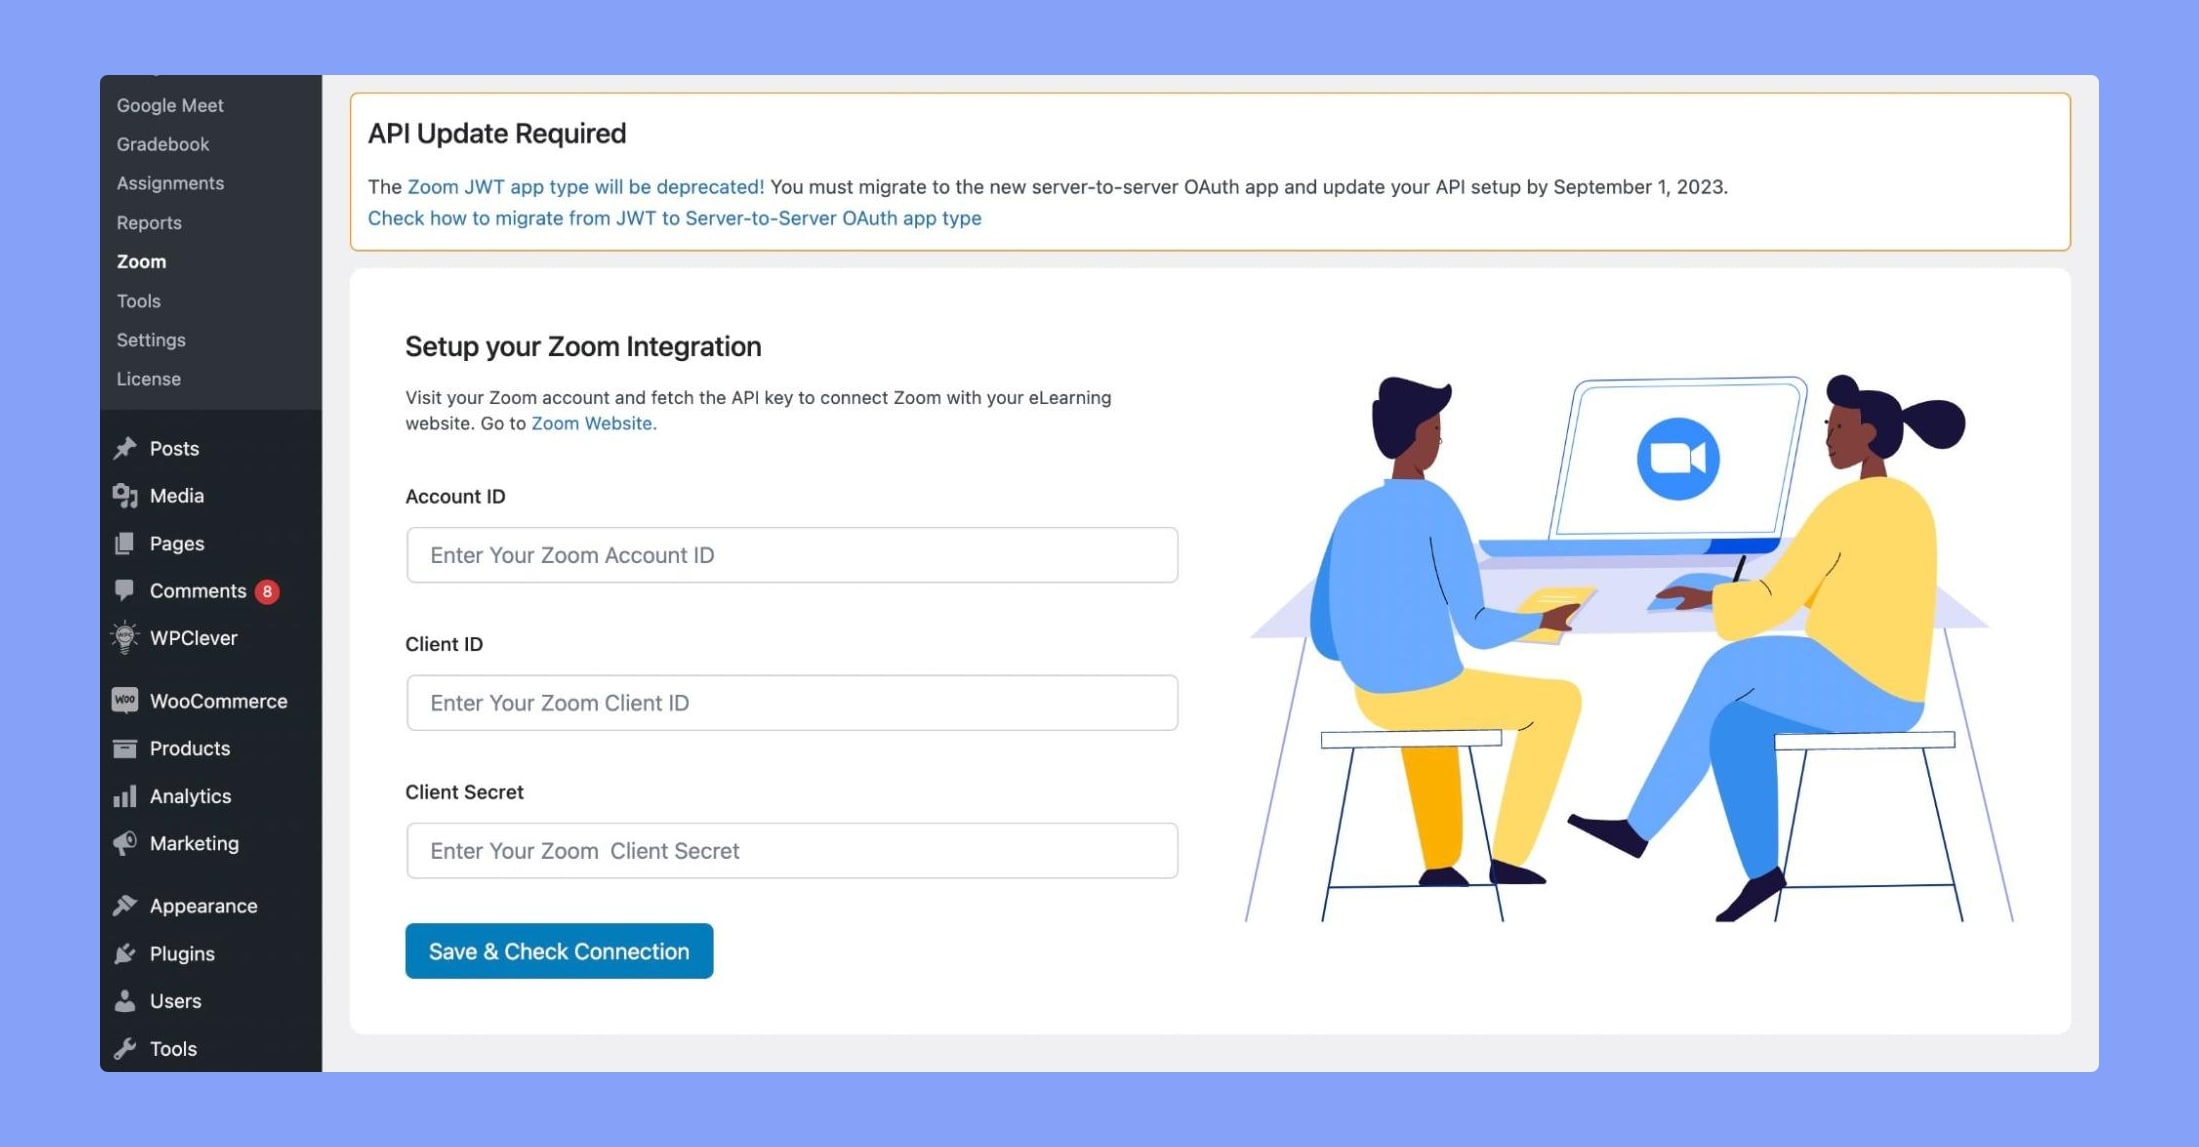
From there, we’ll head to the back end of our WordPress website, and navigate to Tutor LMS Pro > Addons from the sidebar. Scroll down and activate the addon named Zoom Integration.
Then, we’ll head back to the Dashboard and then navigate to Tutor LMS Pro > Zoom > Set API. Fetch the necessary API information from step 2 and place on the required fields. First press Save and then Check API Connection to to see if everything is correct. And that’s that, we’ve successfully connected Zoom with Tutor LMS!
You should also take your time to configure the integration from the Settings tab. Your added meetings can be viewed, edited, and deleted right from the All Meetings tab.
Add the new Server-to-Server OAuth app credentials (Account ID, Client ID, and Client Secret) obtained in the previous step. Click on Save & Check Connection to update the integration settings.
Instructors can also go to the Frontend Dashboard > Zoom > Set API for the same purpose. If you get any error there, simply update your permalinks to “Postname” and the issue will be fixed. You can access the permalink settings from WP Admin > Settings > Permalinks.
Note: Since Zoom Integration is a pro add-on, be sure to enable this from WP Admin > Tutor LMS Pro > Add-ons to access the Zoom menu in the WordPress dashboard.
Step 4: Create a Zoom Live Lesson
Live lessons can be created just like regular Tutor LMS lessons. To add a new one, navigate to any course, and head into the course builder. There you’ll get the option to add a Zoom Live Lesson.
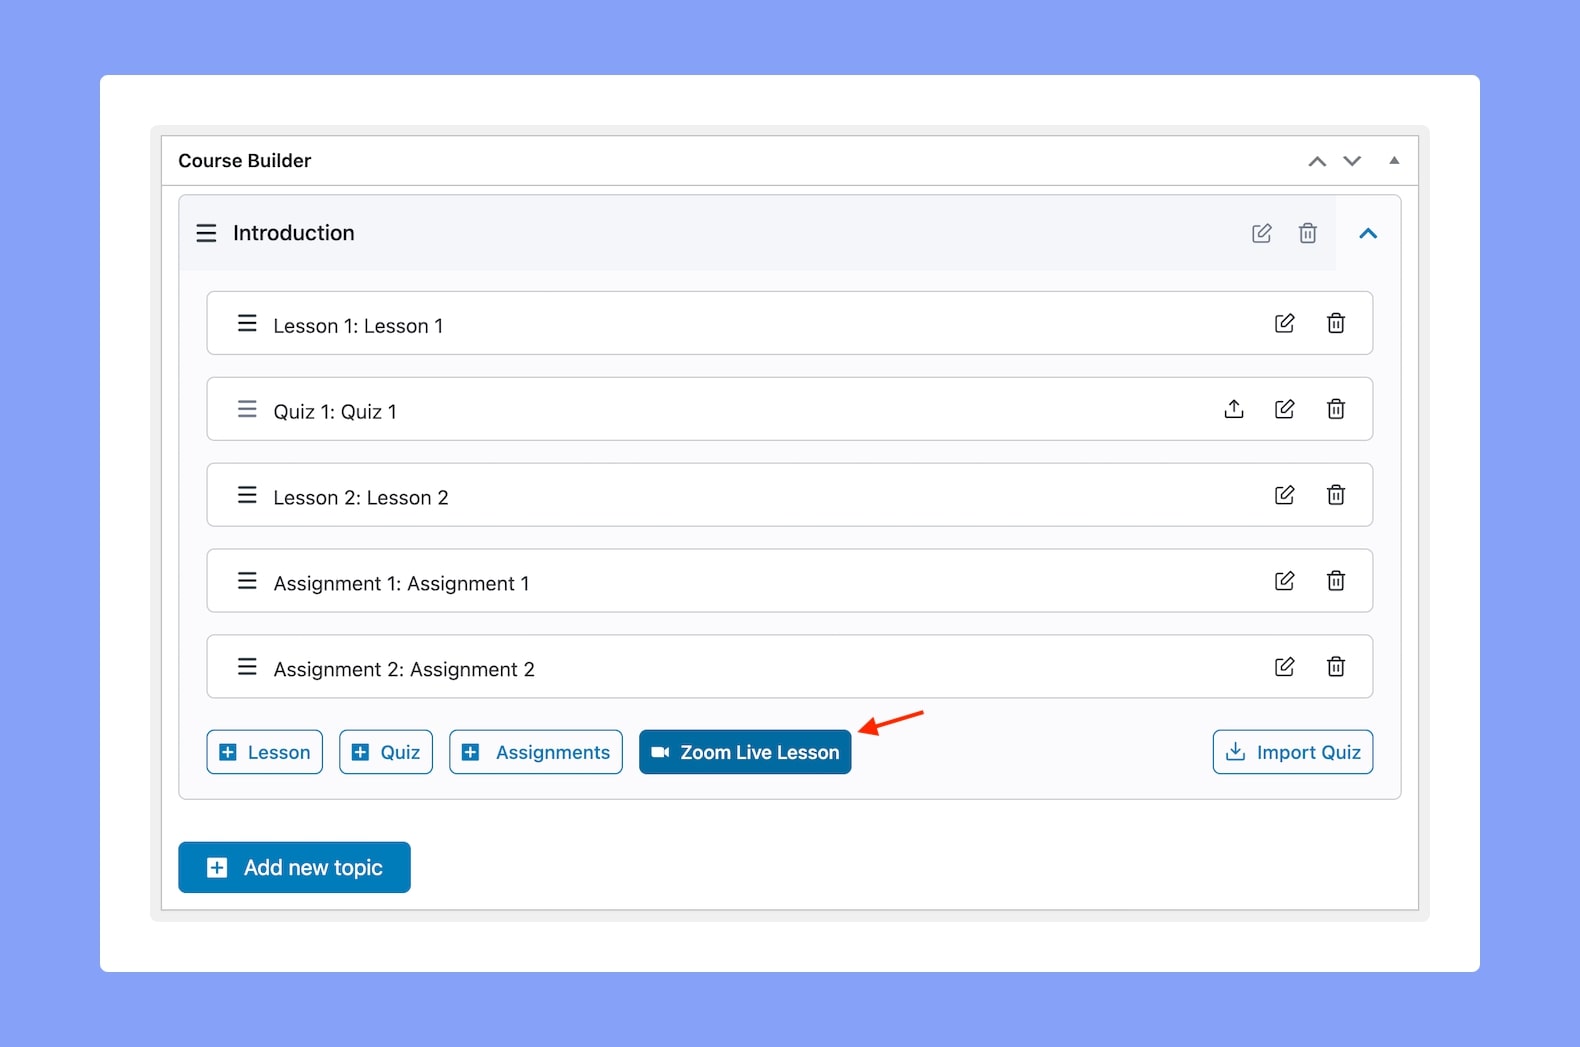
Click on it to start creating your first live class using Zoom as the platform!
Step 5: Host Live Class
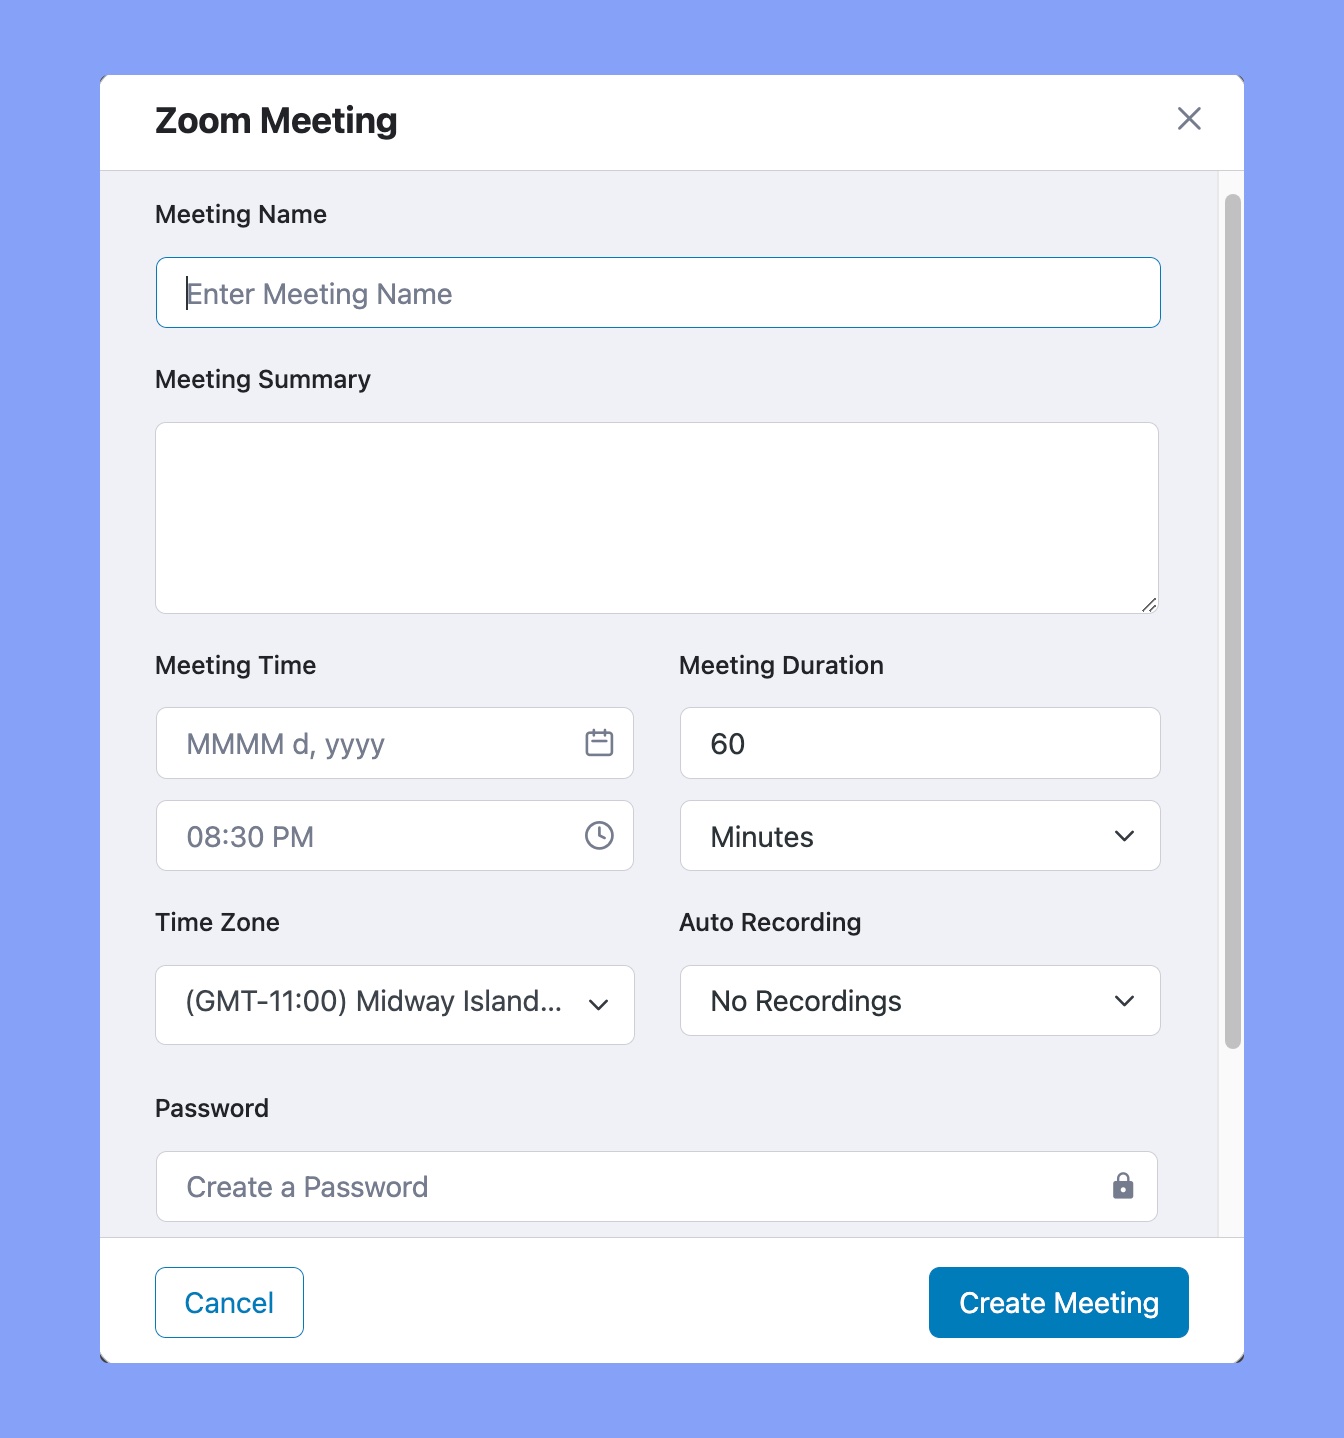
From here, you will be able to configure the meeting’s information. Give it a name, summary, a password and set the correct date and time. Make sure to set the correct Time Zone and also set Auto Recording settings. These settings will be used to create a Zoom meeting under your Zoom account and you can access. To start the Zoom class, we highly recommend using the app as it is much more capable at holding live classes.
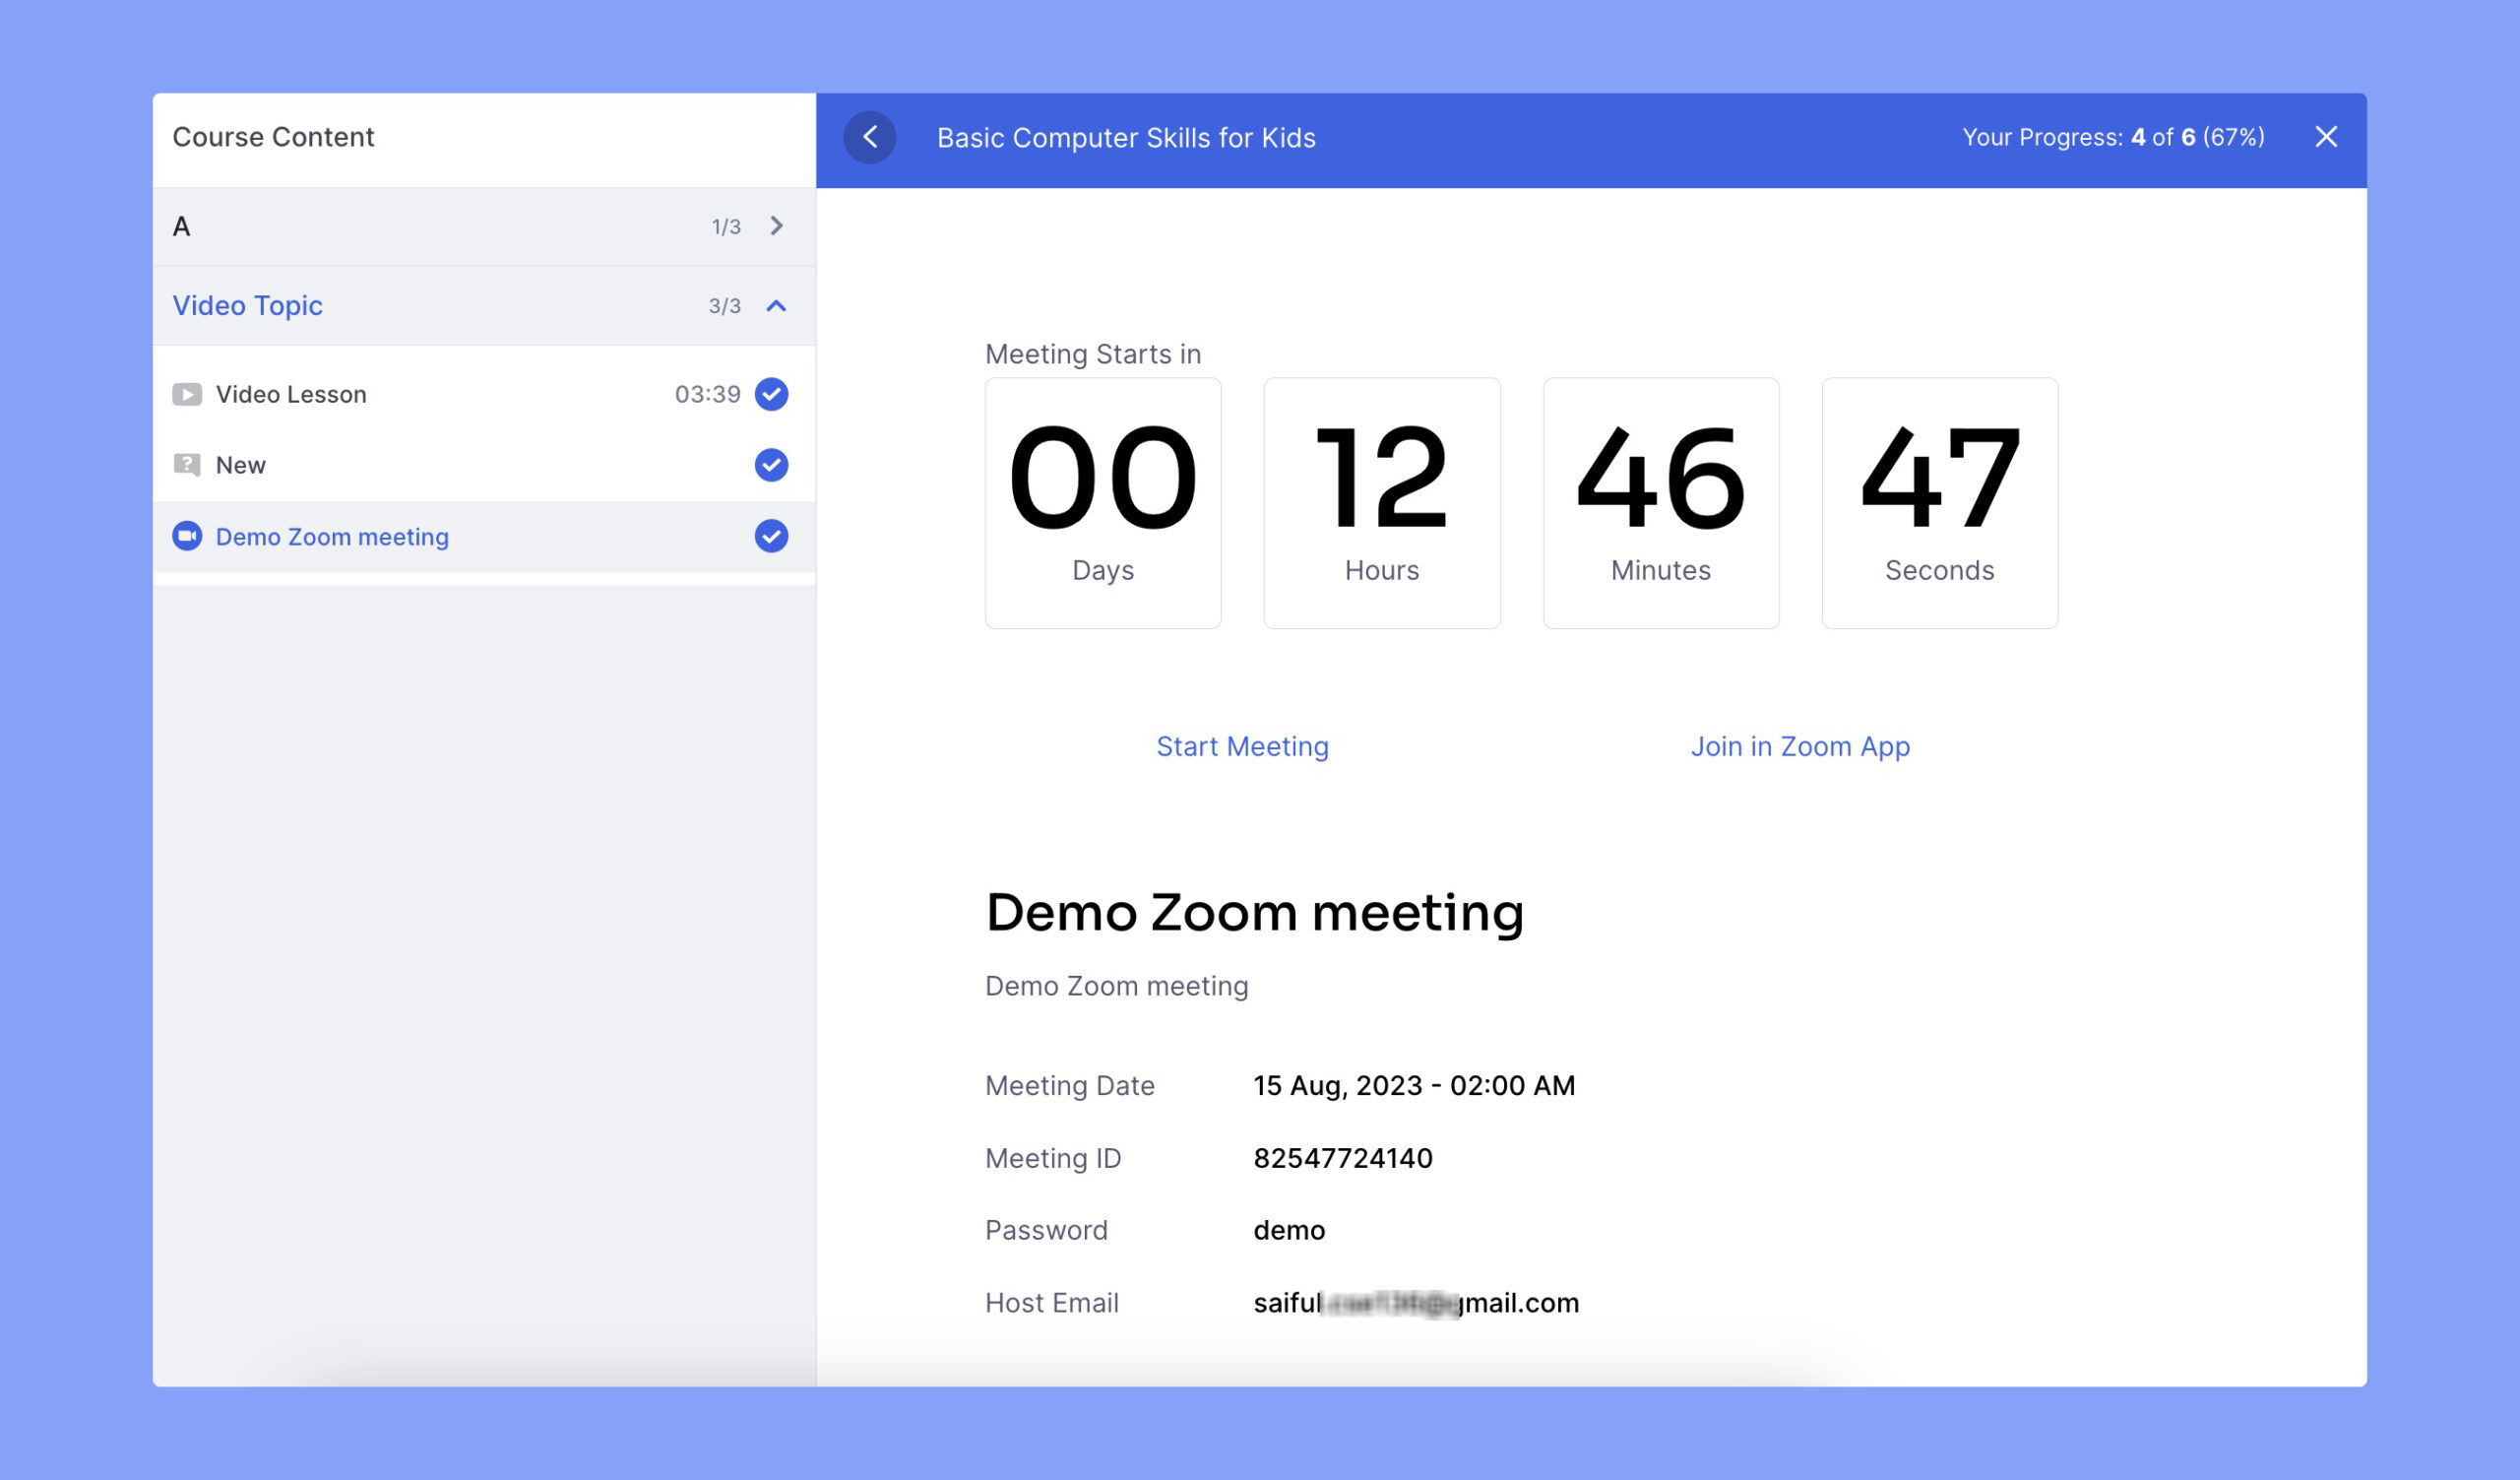
After setting up the Zoom meeting, the students will get that meeting information in the lesson section. The interface will be like this:
When the time is right, start the meeting from the zoom app. Students can join from the course’s landing page if they are enrolled. They can directly join from the browser or launch the app.
It’s that simple! If you need more information, please visit our documentation on the integration here.
Using YouTube
But what if you want to do it for free? There’s also a way, and although it’s not the cleanest or the easiest way to do it, it can still get the job done. Follow along, and we’ll see how you can host live classes on Tutor LMS for free!
- Tutor LMS – for organizing your courses
- Verified YouTube Account – for hosting live videos
- OBS Studio – for screen record and streaming
- Facebook groups/Email Chains/BuddyPress – for announcements
Step 1: Create a Course
Just like we explored before for the Zoom integration, we’ll also create a course here first.
Step 2: Configuring Your YouTube Account
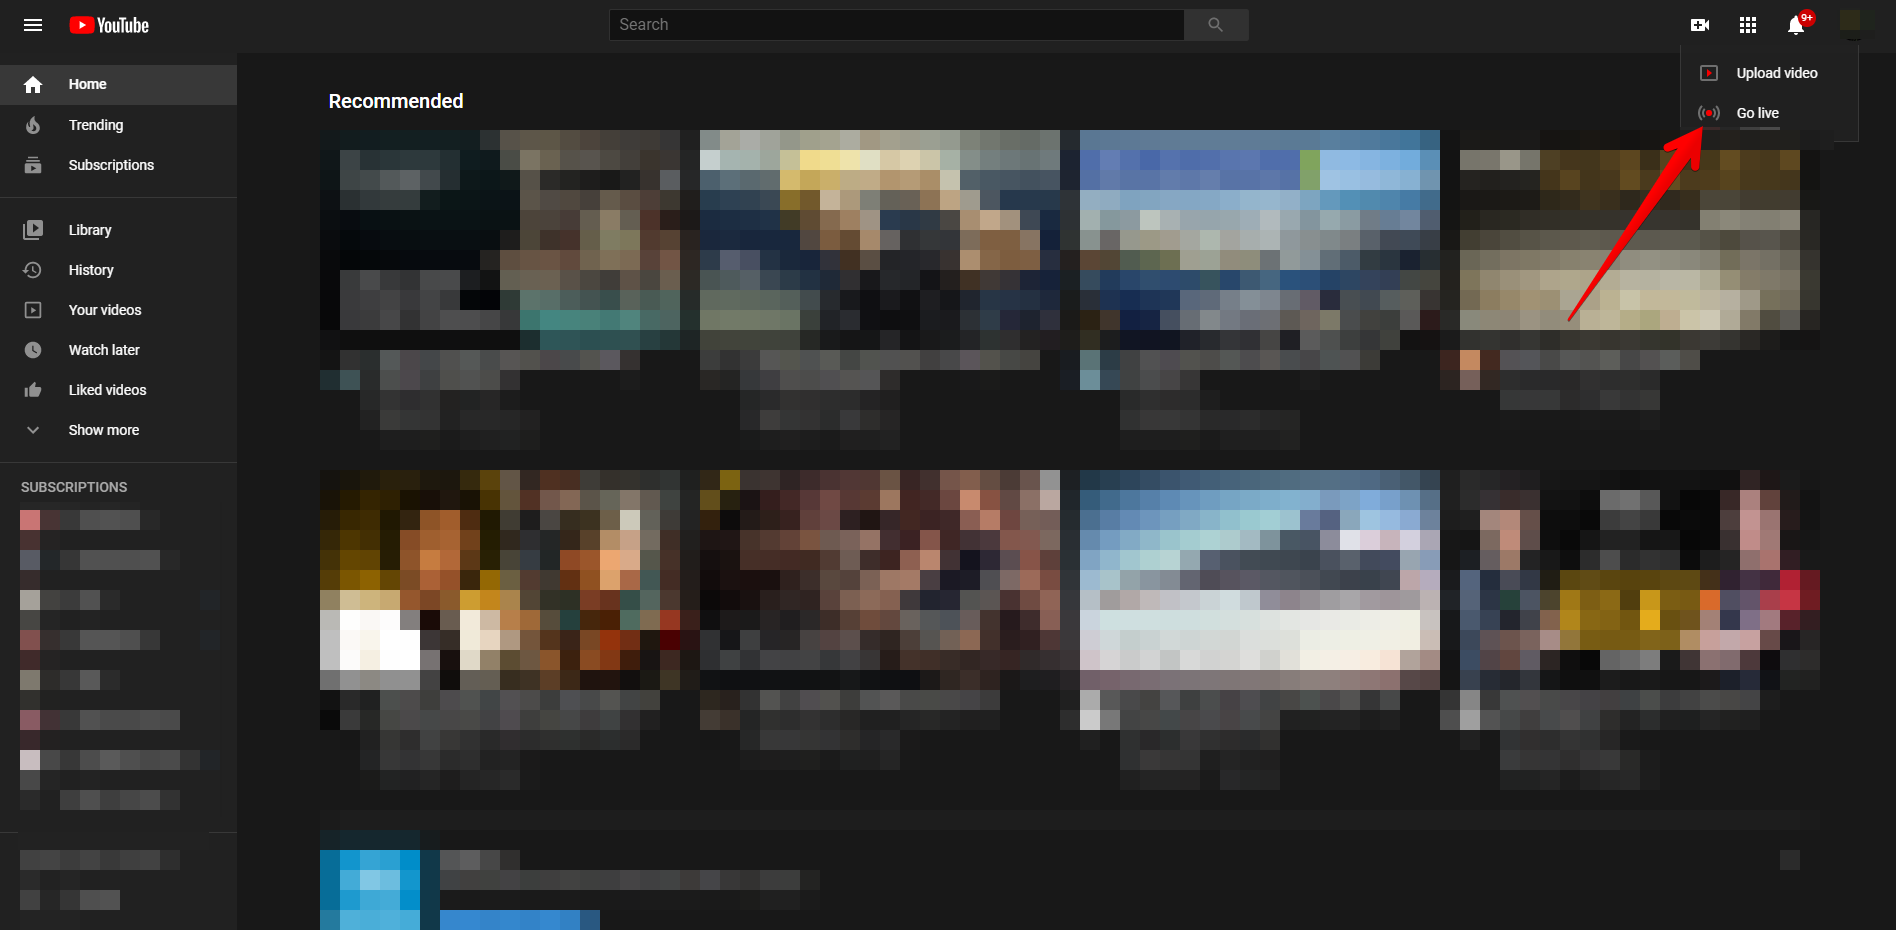
To host live videos, you must have an eligible YouTube channel. This will need you to verify the YouTube account using a valid phone number (usually through an SMS) from your respective country. After that, you can start tinkering with the live video settings by clicking on “Go Live“.
Step 3: Initiate the Stream on YouTube
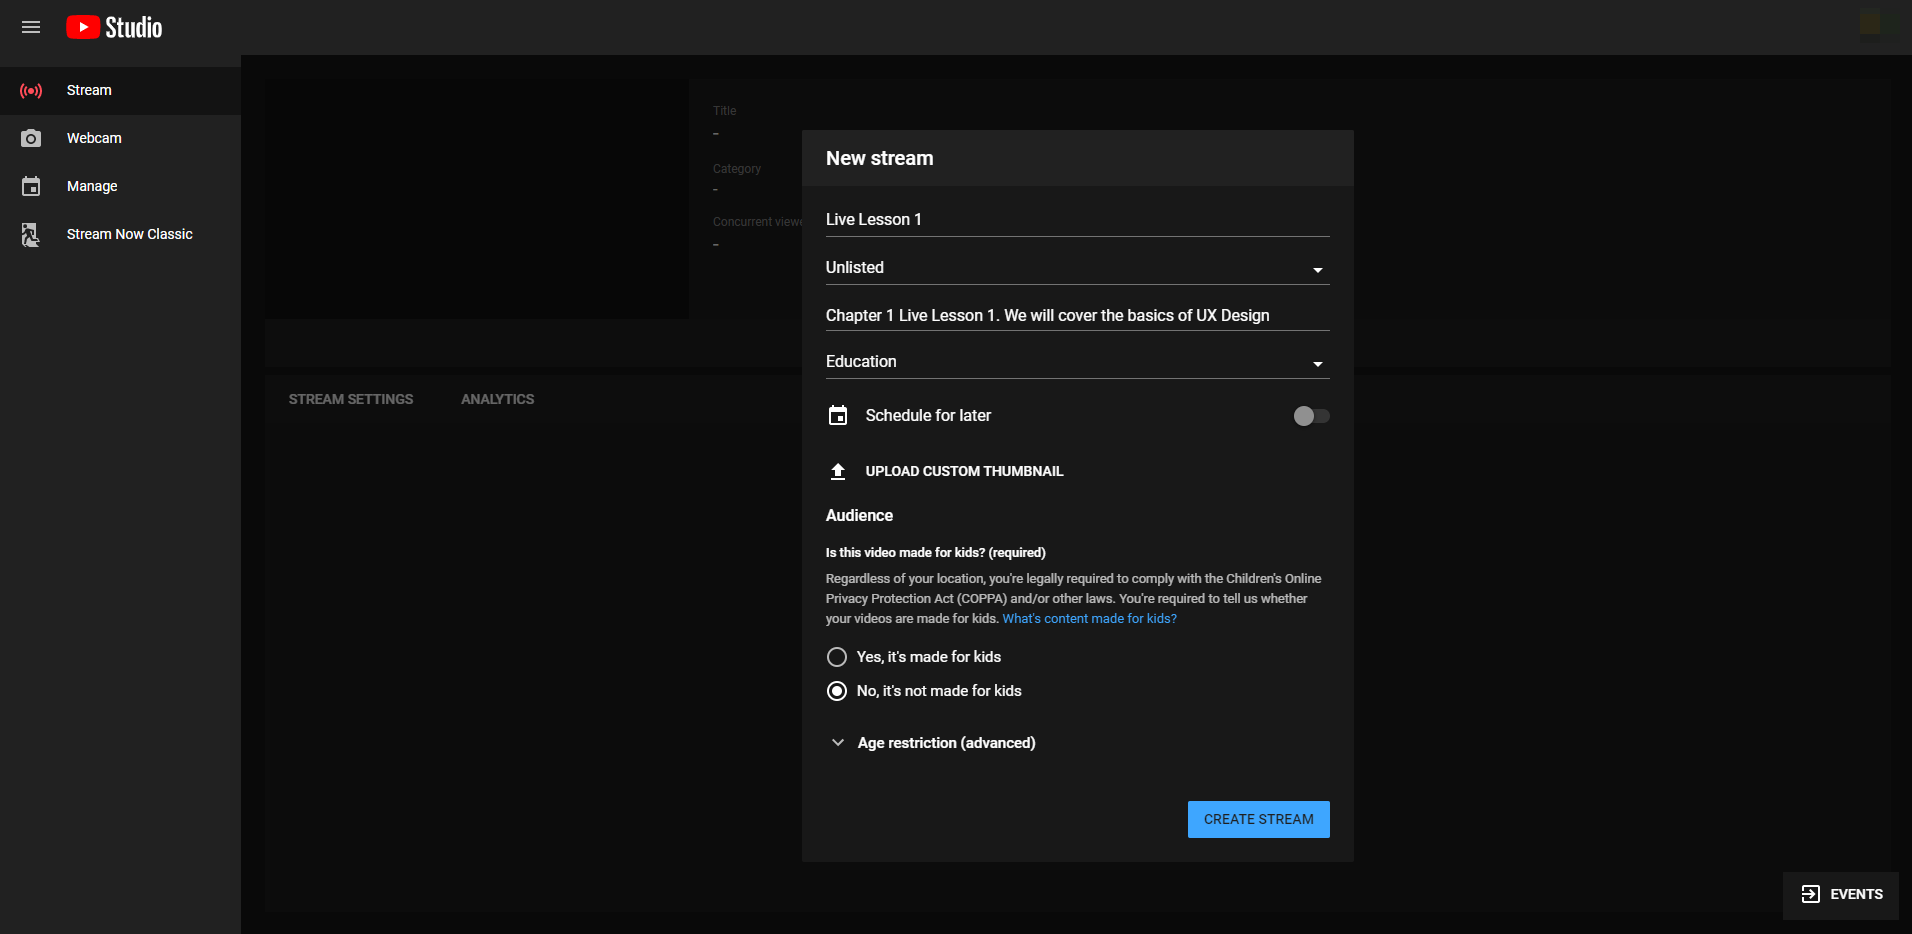
Let’s give the lesson a relevant name, description, and set the video as Unlisted if you’re creating premium or paid content.
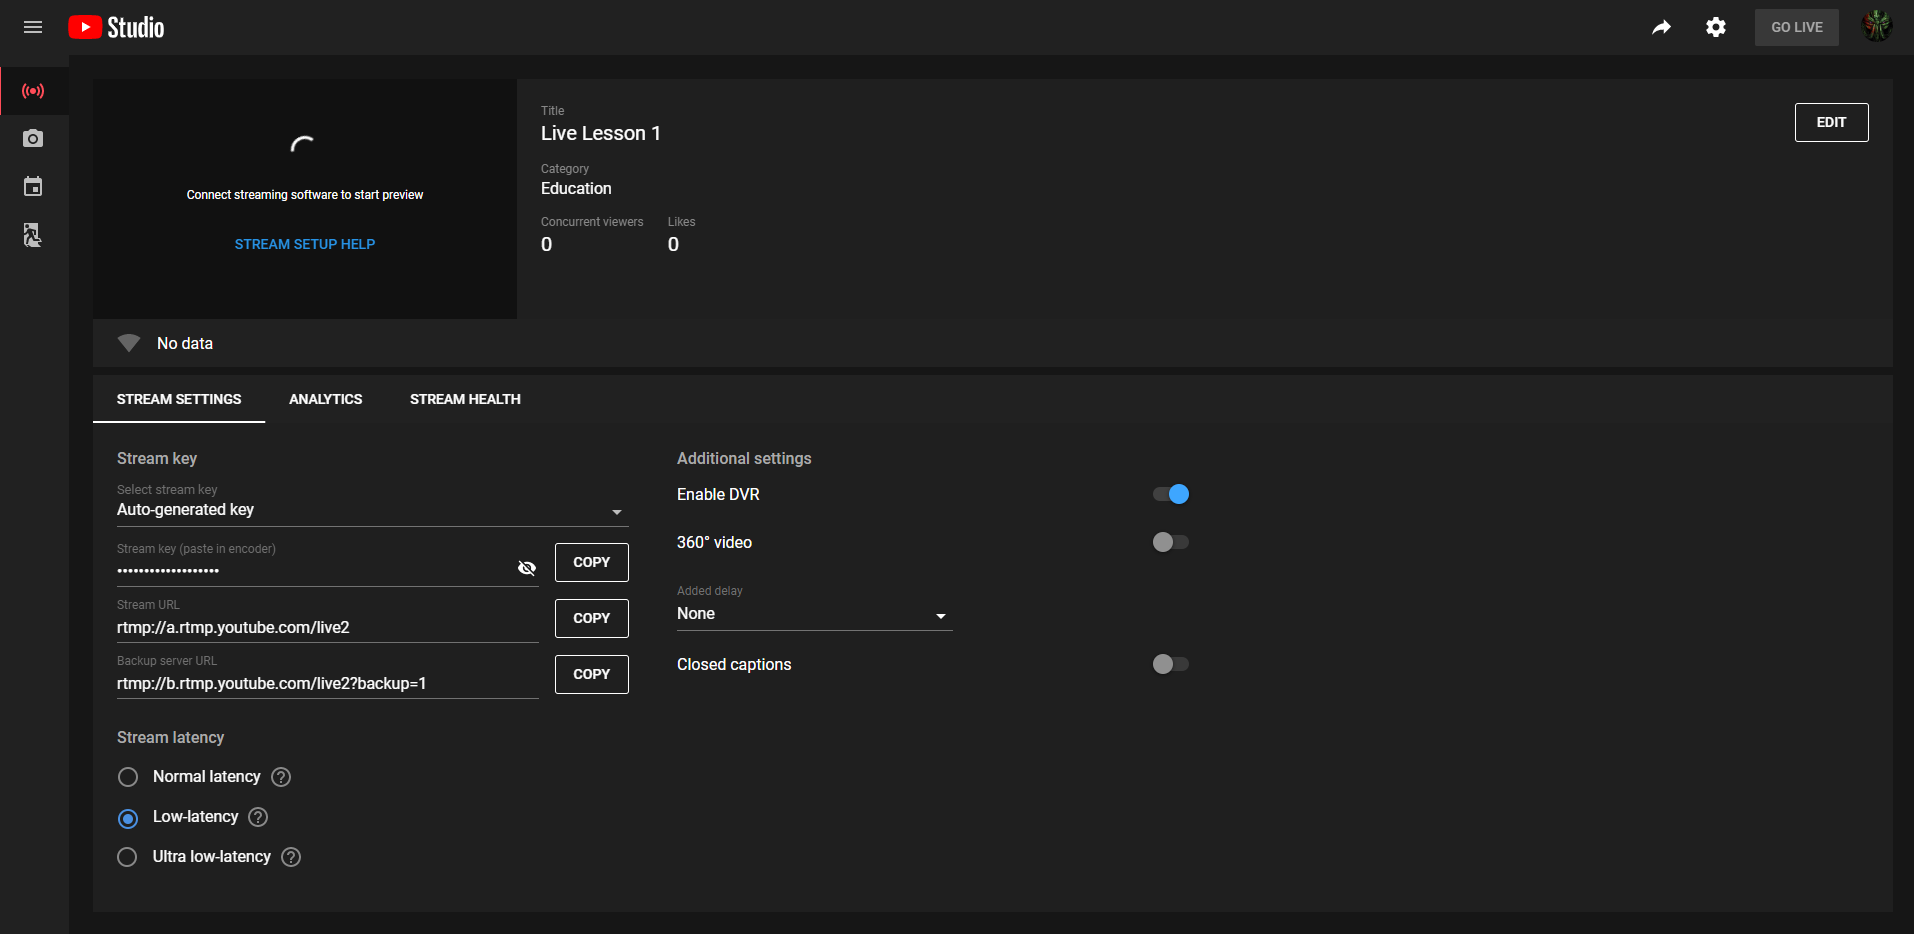
After that, you will be greeted by the live streaming dashboard of YouTube. This is where all the magic happens! Change the latency settings to Low-latency, and copy the Stream key.
Step 4: Basic OBS Studio Configuration
OBS Studio is an open-source streaming software that you can use to stream to YouTube. This application can practically do anything when it comes to live-streaming, and although it might seem difficult at first, you can use the Auto Configuration wizard to go through the basic settings. Make sure you’ve selected “Optimized for streaming” followed by an FPS of “60“.
Then you will have to copy the stream key (probably copied already?) from YouTube Dashboard and paste it in OBS’s Stream Key field. Bitrate is a more nuanced setting and you should do some internet speed tests to find out your stable upload speeds so that your live lesson does not lag during the session. The default bitrate is 2500kbps, and it is fine for most teaching content, but if you have a good internet connection, I recommend going as high as 5000kbps. Then, on the Audio Mixer, make sure both your microphone and desktop audio levels are healthy.
Step 5: Setting the Scene
After that, we need to add at least one source to OBS. A source is what OBS will “see” and broadcast to all your students. To add it, right-click on Sources, or click the “+” icon. Then select Display Capture. This will capture the contents of your whole display.
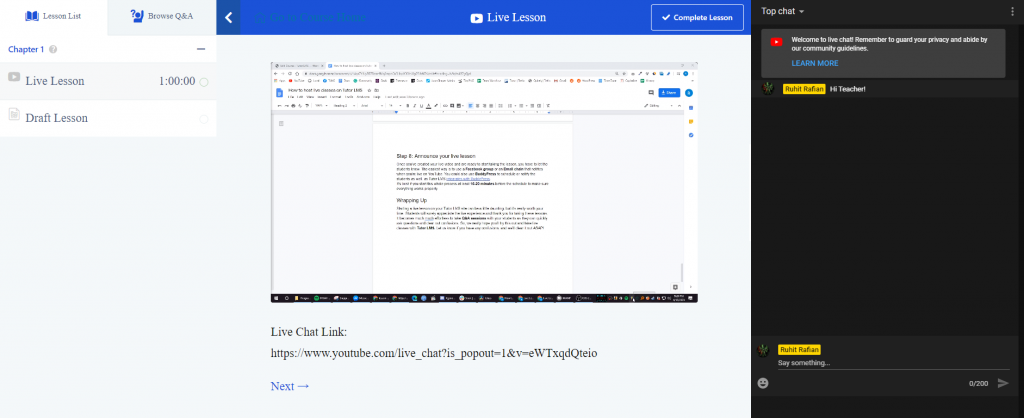
Step 6: Add the Live Video Link to Your Tutor LMS Course
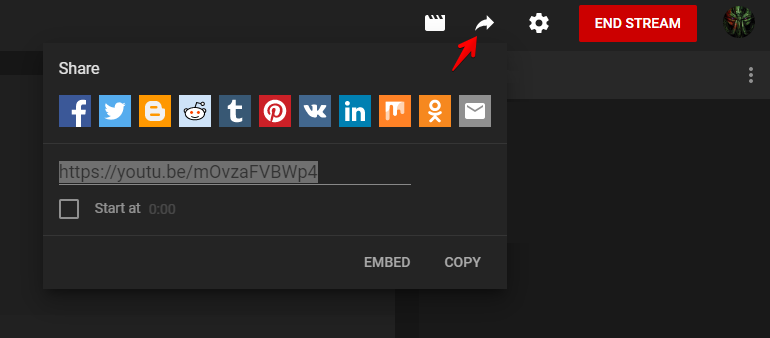
Click on “Start Streaming” to start the stream, and then check your connection health on both OBS and YouTube Dashboard. If everything looks okay, you’re ready to click “Go Live” on YouTube. After you are live, click on the share icon to find the URL for this live video session. Paste this URL to the corresponding lesson, and then click on update lesson.
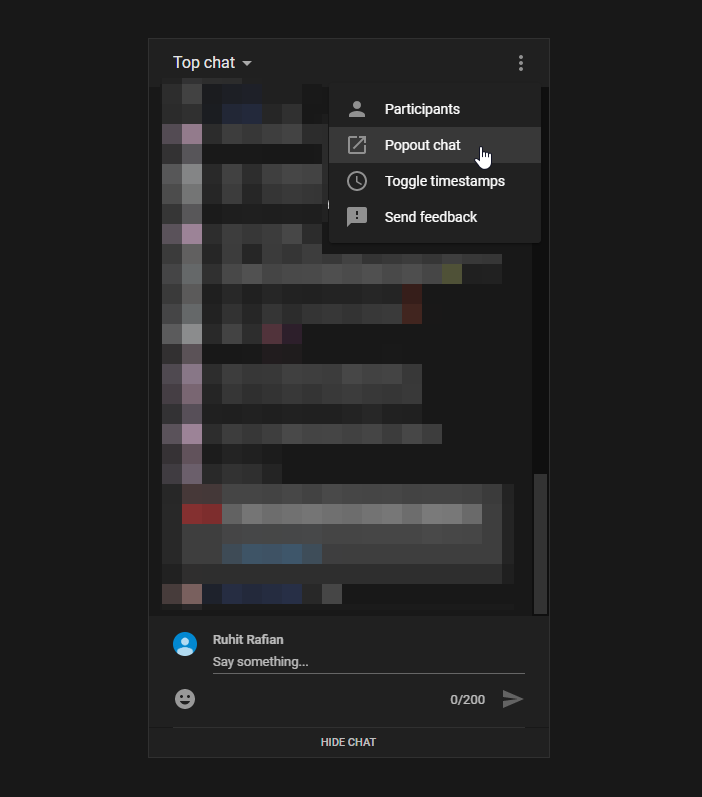
Step 7: Give Students Access to Live Chat
Go to the live video link and click on pop-up chat, and then copy the window’s URL. Then paste it in the lessons description and the students will be able to chat with you using this URL.
Now you’re pretty much set to start taking your first live lesson online! Let’s go and fetch all our students for an exciting new frontier.
Step 8: Announce Your Live Lesson
Announcements
Once you’ve created your live video and are ready to start taking the lesson, you have to let the students know. The easiest way is to use a Facebook group or an Email chain using Announcements that notifies when you’re holding a live session. You could also use BuddyPress to schedule or notify the students as well, as Tutor LMS integrates with BuddyPress.
It’s best if you start this whole process at least 15-20 minutes before the schedule to make sure everything works properly.
Wrapping Up
Starting a live lesson on your Tutor LMS powered site can be a little daunting, but it’s really worth your time. Students will surely appreciate the live experience and thank you for taking these lessons. It becomes so much more effortless to take Q&A sessions with your students as they can quickly ask questions and clear out confusions. So, we really hope you’ll try this out and take live classes with Tutor LMS. Let us know if you have any confusions, and we’ll clear it out ASAP!
Note: This post was updated on 12th October, 2020 with the release of new features of Tutor LMS.

amir2814
I want to have an online course (one session, 5 sessions and 10 sessions) where each session is held at a specific time according to the student’s request. The problem is that lms plugins generate one product for each training in WooCommerce and I need to have at least 200 courses and 200 products after one month. If I have only one product to sell. Can you guide me how to do this? The process of creating content for the course and the process of producing the product must be repeated for each course or something else can be done for it. Thank you for your help
wasun
After create a zoom meeting, single course zoom meeting countdown & single lesson zoom meeting countdown defference.
Sekander
Hi,
Sorry to know that you’re facing issues with the Zoom feature. I would request you to contact our support team for diagnosis and rectification 🙂
Christian Vernize
Live from youtube woudnt be protected because anyone can share de link, right?
Sekander
I apologize for the late response. Yes, you’re correct.
kaquna
step 7 of youtube…
then students must be logged into the course and also have a google account to be logged, at the same time, into youtube…
another way to add a chat to the courses?
many thanks for your time
Ruhit Rafian Prinon
No, unfortunately, if you want to use YouTube for live courses, there is no way to integrate chat to the course. The only workaround is to use Zoom and disable the “Enforce login” option from its settings
Dannatutor
Can I use second option “youtube” with multiple instructors?
Ruhit Rafian Prinon
Yes! You can use multiple instructors with the YouTube option.
knowhome2020
At the LMS tutor I can set a date for a live course.
Sekander
You can use our content drip feature to publish a lesson on a specific date. You can post the live class timing on the announcement section.
Here is the documentation link for content drip https://docs.themeum.com/tutor-lms/addons/content-drip/