Lists are a great way to express a lot of information in a concise format. But sometimes they can be a little too basic. If you want to add more advanced features, then the basic ordered/bullet lists won’t be able to help.
But don’t worry, today we will show how you can create beautiful lists by adding icons, customizing the styling of the list items, tweaking the typography, and other such advanced features. Since Gutenberg is the future of WordPress page building and content publishing, we will do this on Gutenberg.
In a glance, by adding these advanced features to your list you will be able to:
- Attract visitors by making your simple lists more interactive
- Convey messages better by changing your list icons
- Provide a better content UI for your users
- Add styling for your boring lists to make them interesting
- Create better understandable checklists, feature lists, etc.
Currently, using the Gutenberg editor, you already can create ordered and unordered lists. But, these are very basic ones. We need something more to style lists the way we want. Today we will introduce the best approach for you to add advanced options to your lists with the easiest to understand features. We will use Qubely for this purpose. So let’s dive in.
Getting Started
To get started with adding advanced features to your lists, you need to make sure that you are using the latest version of Qubely, the versatile Gutenberg block toolkit, in your WordPress site. You can find Qubely from the WordPress.org plugin directory.
? The latest version of Qubely
Step 1: Add the Advanced List Block
Once you make sure you have Qubely installed & activated on your site, go to the block list section in the editing mode of a post/page.
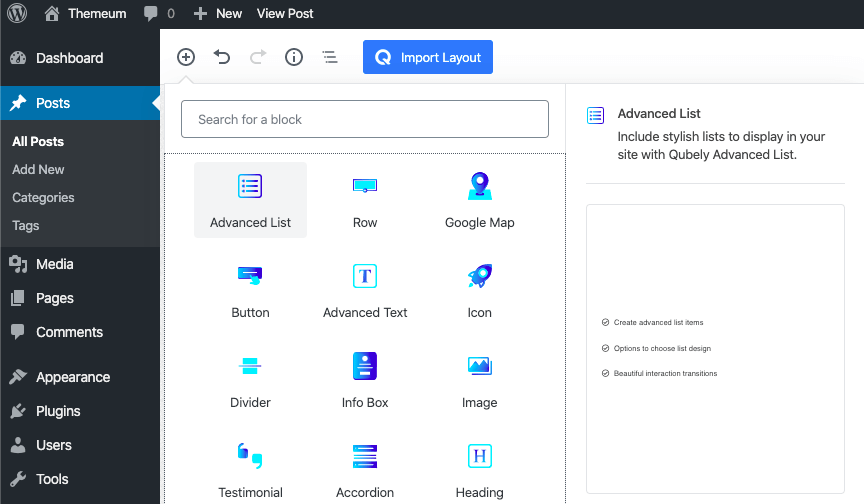
Choose Advanced List and add the block to your desired section in your post/page. After you add it, click on the block to see all the available settings for the configuration of your list content.
Step 2: Select Your List Layout Type
In this configuration setting, you can choose a layout from some preloaded designs. You can either go for the fill type layout or choose the classic layout. Both of them are fully customizable with the rest of the configuration settings.
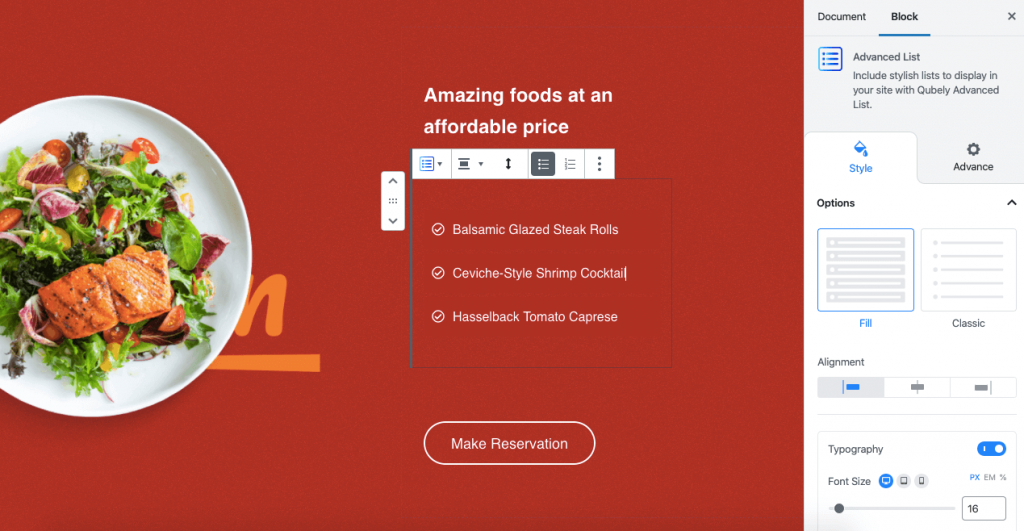
Step 3: Define The List Alignment
There are three alignments you can choose from. You can either choose the middle, left, or right alignment depending on your preference. Different website designs require different alignment options. Just hover over the alignment that you want to apply.
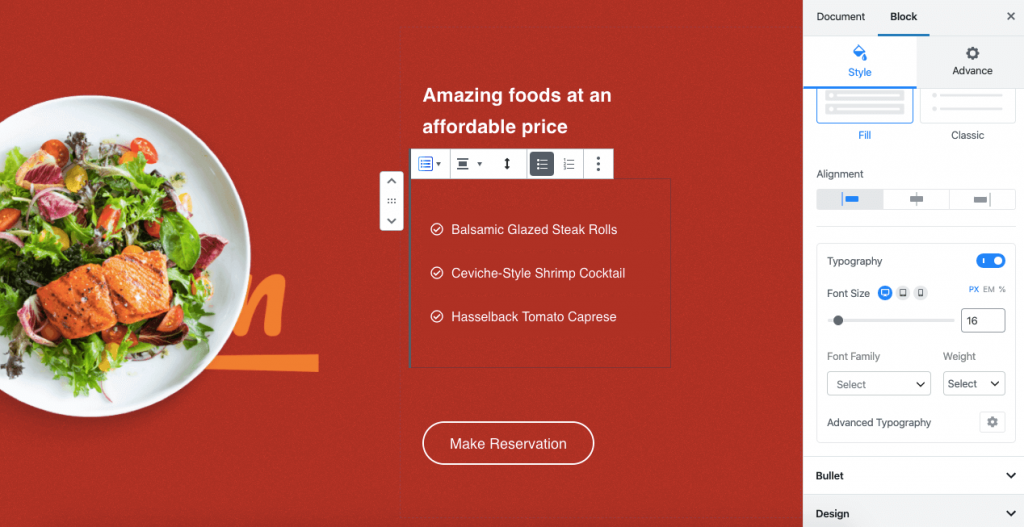
Step 4: Adjust Typography for Better Visuals
Typography is an essential part of web design. Even it has psychological advantages compared with the rest for conveying a message.
In the Typography section of the Advanced List block, you need to enable it to see all the available options. After enabling, you will be able to set the font size, font family, font-weight, etc. from a wide range of options.
If you want more customization options, there is also an Advanced Typography section. From the Advanced Typography option, you can set the line height, letter spacing, etc.
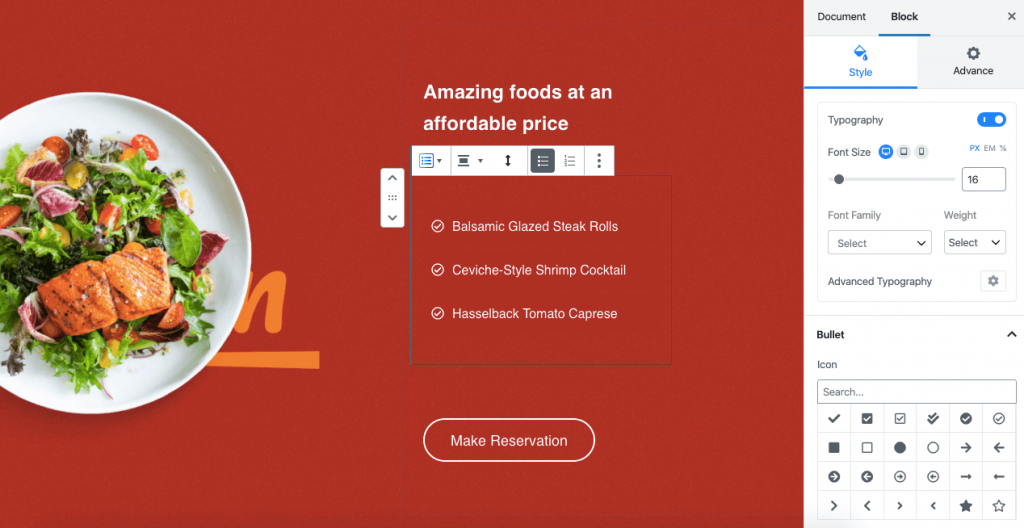
Step 5: Customizing the Bullets
With the default List block of WordPress, you are stuck with some basic bullet points for your list. But with the Advanced List block in Qubely, you are not limited to these only.
In the bullet customization section, you can select the icon for your points from a large icon library. The icon library is built in Qubely, so you don’t need to install anything separately. You can also set different sizes for the icons themselves. After you have set your preferred size, you can set spacing values for your icons.
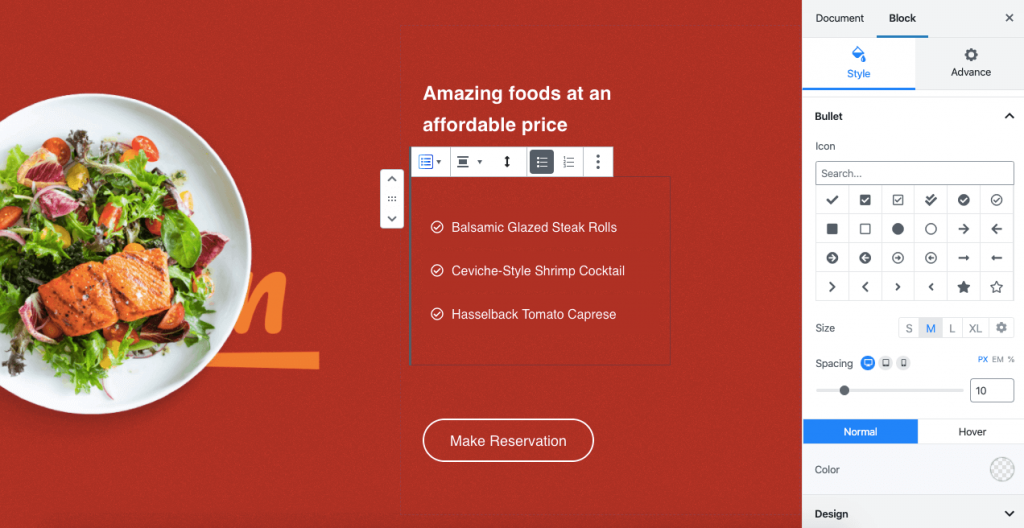
From the color settings, you can set different color options for different conditions. Such as you can set a specific color for normal state and a different color set when a user hovers their mouse over the icon in your Advanced List block.
Step 6: Beautify Your List With Design Options
To set your list apart from the rest, there is a design section in the customization settings. From here you will be able to adjust the spacing between each of the list items, padding values of the highlight color of the list, the radius of the highlight color, etc.
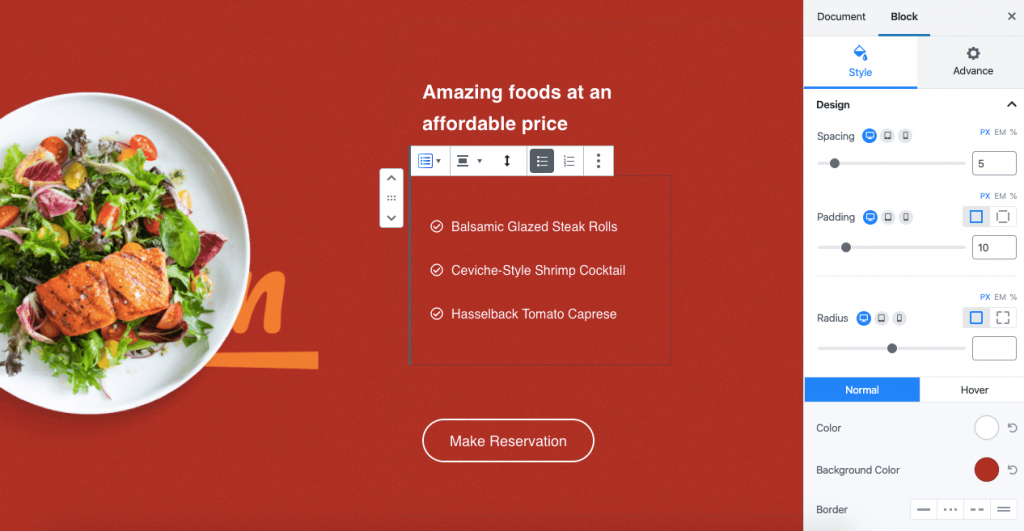
From the color section, you can choose your desired text color & list highlight color. Different colors can be set from here for normal state & when a user hovers over your list. You can also set different box-shadow properties for both the states.
Bonus: Advanced Customization Features
This section comes default with every Qubely block. It enables you to add advanced features to your page elements. You can set animations for your block from the library. Apply effects such as fading animation, sliding animation, bounce animation, etc. All without any additional plugin!
Also, you can enable interactions from the advanced configuration panel. Choose exactly how your list items interact with the users’ mouse movements. There are other options like custom positioning, enable/disable to hide in tablets or phones, add block row CSS along with additional CSS classes, etc.
The Final Output
Congratulations on creating your advanced list. After you are done with creating an interactive list with the Advanced List block, you can save your page/post. Once you update it, you can view it from the frontend. Below is a look at what we’ve built in this tutorial.
Start Creating Your Own Advanced List Today
We want to empower you to do amazing things with the new WordPress editor. The implementation of Gutenberg to WordPress made it clear that it is the future. And we are here to help you take full advantage of it.
Keep an eye on our blog to get more such useful tutorials. And please share your thoughts in the comments below. Hope to hear from you soon.