We all love to hear beautiful stories about our works from our clients. And in this regard, the single most significant yet influential part can be the testimonials. Reputation has a powerful impact on any type of business to grow. If you too want to showcase your reputation on your website and grab the attention of more probable clients through your past references then you shouldn’t ignore this important aspect.
While you can certainly create a simple testimonial page using the WordPress editor, Qubely Pro is there to let you lead the game with a visually attractive yet converting testimonial solution.
Today we’ll walk you through the step by step process of creating a fabulous testimonial section. So, without taking any more time, let’s check out the process below.
Steps Involved in Creating Testimonials with Gutenberg
The Gutenberg editor doesn’t offer any built-in block to create testimonials. So we need a Gutenberg block toolkit to get our task done on Gutenberg. The “Testimonial Carousel ” block of Qubely Pro is here to ease the job. So, let’s begin the process.
First, install and activate Qubely Pro on your WordPress site. Then follow the processes below!
Step 1. Place the Testimonial Carousel Block on the Target Page
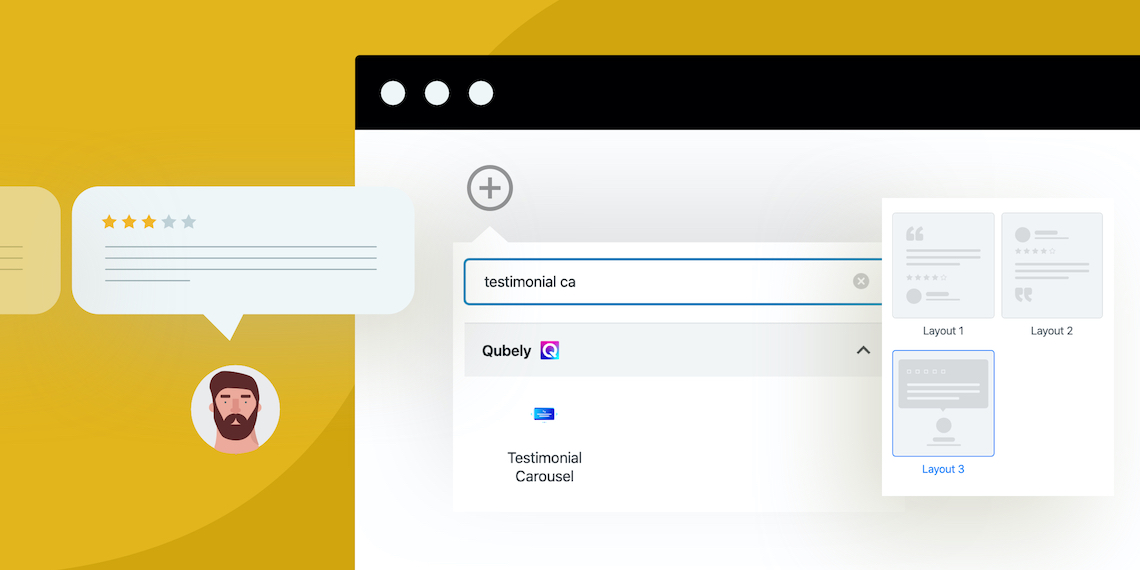
After installing and activating Qubely, you’ll get its blocks in the Gutenberg editing interface. Create a new page or open an existing one in the Gutenberg editor where you want to showcase your testimonials. Next, you need to hit the Add Block option, search for Qubely’s Testimonial Carousel block and insert it on the page. Now you are all set to work on it.

Step 2. Pick a Predefined Layout
As soon as you add the Testimonial Carousel block, you’ll see 3 beautiful predefined layouts at the top of the right sidebar. These layouts feature ready styles. Choose one from the list as per your preference.
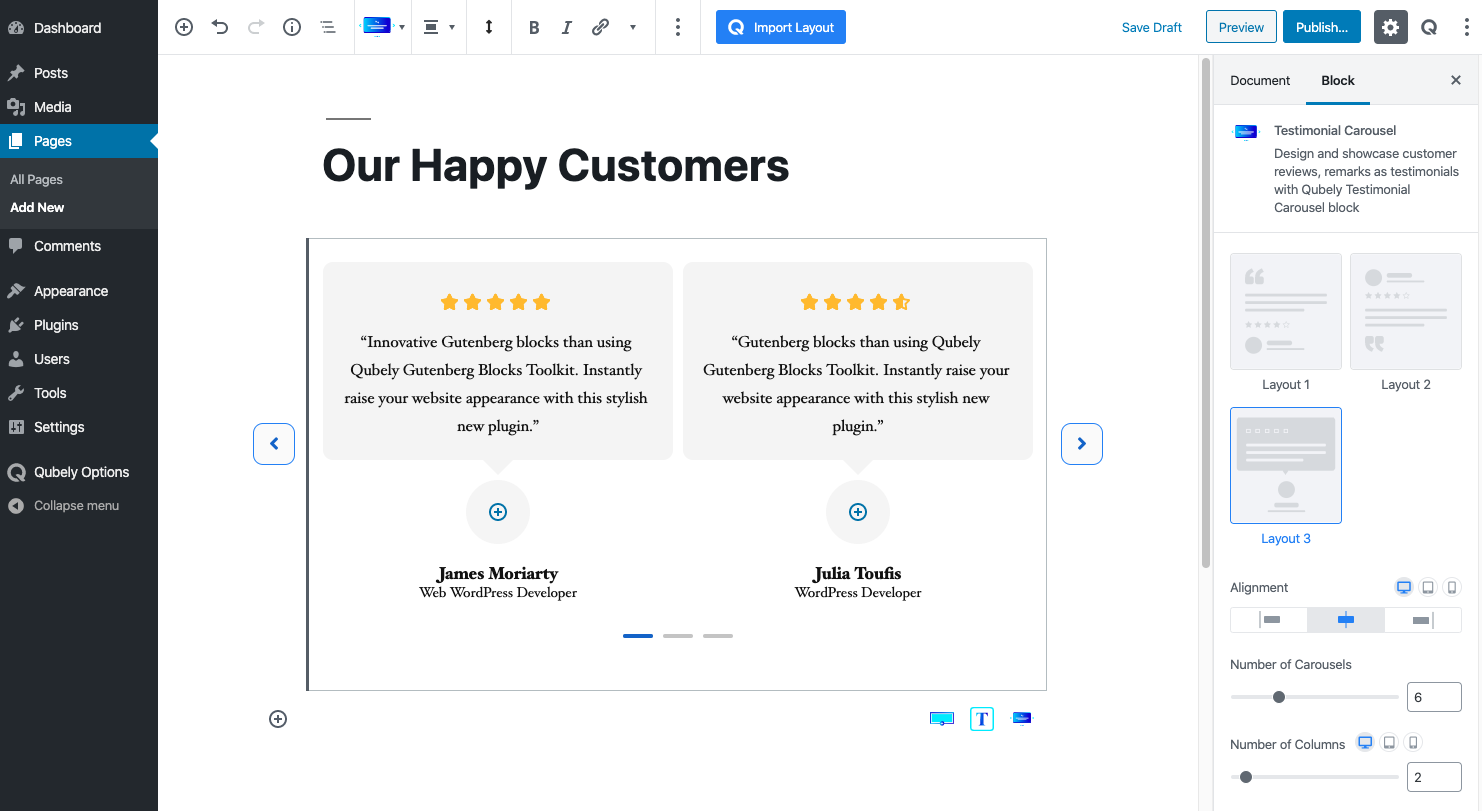
Step 3. Edit the Block as You Need
Now, select the number of carousels, columns, gutter size from the given options at the right side on the block editor. You are now all set to add the testimonial content.
Tips: Try to add pictures and get a nice typography to enhance its appeal to your website visitors.
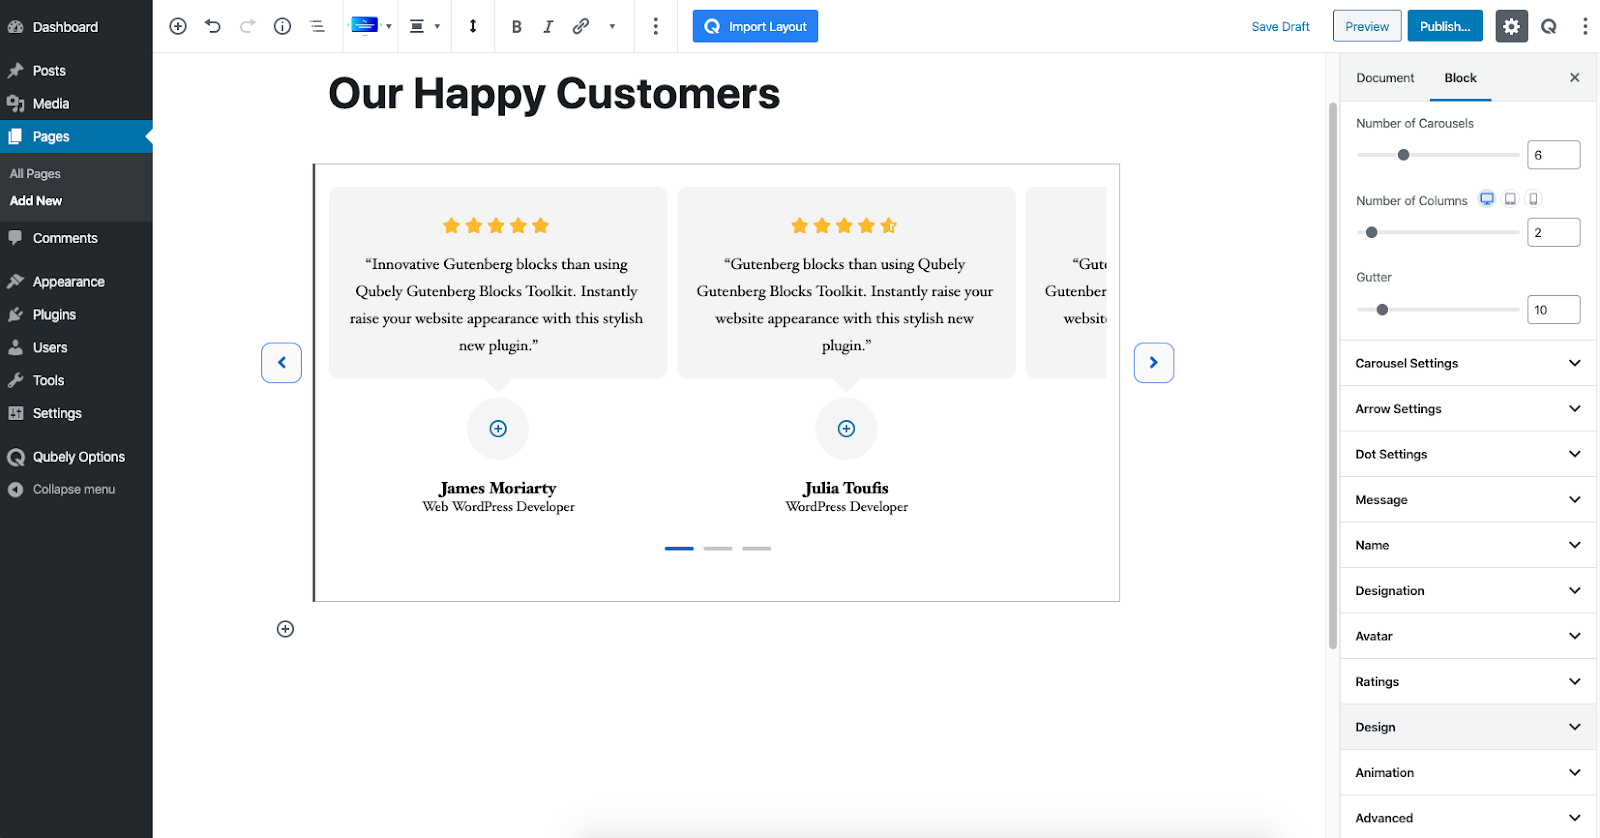
Step 4. Complete the Carousel Setting Procedure
This part will bring life to your carousel and make it more interactive to your audience. Here you’ll get to enable Show Arrow Navigation/Dot Navigation, Autoplay option, and set an interval (ms) & speed. Also, you can allow centered slides, and fade deactivated items.
Step 5. Design Customizations
Arrow Settings: Arrows are a crucial part of this carousel, and of all other carousels alike. They enable the user to manually navigate through the carousel. You can customize the testimonial carousel’s arrow style with numerous options like horizontal position, vertical position, shape size, arrow size, border style, corner radius, arrow, and background color, etc.
Dot Setting: Dots are kind of a more subtle version of arrows. They also supplement the navigation by allowing the user to quickly click through them instead of moving one by one. If you prefer to be a little more artistic then you can implement this part along with your testimonial. With dot width, height, border-radius, spacing, custom color with gradient option you’ll be able to style the dot part as your own.
Avatar: Avatars are small and simple images of people that have testified about your product or service. A vibrant avatar presence is important to showcase your testimonial in the best possible manner. And to make this part visible with your testimonial part you have to enable avatar first, and later you can sort its size, radius, border, and spacing.
Rating: Most consumers these days pay very careful attention to the rating of a product. Most market studies suggest that customers will only consider buying a product if it has a higher rating than 3.3-star. So, showcasing a high rated product is very important to drive sales. Bring in focus this significant part with a more highlighted look. For this, you can elect rating level, star size, and it’s color from a wide option.
Design: This section controls the design and layout part of the Testimonial Carousel. You can customize the look and feel of this Gutenberg block from here. Utilize the text color, background, padding, border style, box-shadow and other available options.
Step 6: Content Customization
Message: This is where we place the actual testimonial message. Add more creativity to the message part by setting your choice of font, top-bottom spacing, and typography with advanced setting options.
Name: Add a name to the faces on the avatar by giving the users their real name. If by chance, new visitors notice a familiar name and face, they will be very attracted to your business. You can edit this section with your preferred choice of spacing, typography, font, and advanced setting options.
Designation: Adding designations to the testimonials will increase credibility. For example, the CEO of a well known WordPress company is definitely going to influence the buyer’s outlook. Beautify this part by adjusting the typography, font size, font setting and more.
Animation: You can ensure a more lively presence of your testimonial carousel by adding animation. Choose a style from 7 given options. Plus, you can also include repeat frequency, duration, delay, and curve with it. After all the settings click animate to enable it.
….and that’s it! Following the above-mentioned manner, anyone can create a win-some testimonial carousel on Gutenberg.
Places to Insert Testimonials
Today, almost 93% of the purchase decisions are made after seeing the testimonial/review part. People tend to click and consider your previous buyers’ comments before making their purchasing decision. You shouldn’t miss the chance to showcase it on your website to get the best possible conversion rate.
Though it’s entirely up to you whether you want to keep a separate page or not for the testimonial part of your website. If you want to ensure the maximum visibility and exposure of this vital part then try to place it in multiple parts of the website pages.
Generally, pages with actionable steps tend to get more responses from a testimonial. So, you can place it on the homepage, close to a call to action button, product and service pages, etc. But, you have to pay attention to the quality of the content of the testimonial too. Otherwise it might create a negative impression about your overall business.
Wrapping Up!
We always try to make the WordPress experience easier for our users. And following this trend, in this article, we tried to explain every step of setting a testimonial carousel in a manner so that people with very little knowledge of WordPress can also get benefitted. While you are practicing our tutorial, do not forget to share your valuable opinion via comments which will help us to connect to you more closely.