At Themeum, we demonstrate a standard demo site built using every theme we develop. It shows the users how beautifully they can build a website with the theme offered by Themeum. Relevant demo contents are provided with individual themes. You get the demo files inside the theme package. Today I’ll show how to import these demo contents.
First of all, please note, the demo images and texts are not permitted/supposed to be used on commercial/live sites. You can just use them for gathering an idea of how to well organize your site.
Alright, after installing a Themeum theme, activate it. Once you activate the theme, it will prompt to install dependency plugins. Install those plugins and activate. Now you are ready to start importing demo contents.
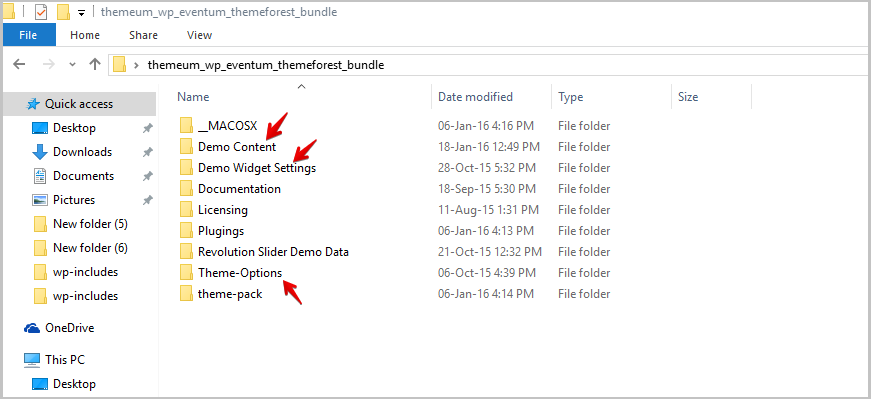
After unzipping the main downloaded theme folder, you will get several folders inside it. Here we’ve used our Eventum theme for this tutorial. The main demo elements are provided normally in ‘Demo Content’, ‘Demo Widgets Settings’ and ‘Theme Options’ folders.
At first, we will import the demo data provided via an XML file inside the ‘Demo Content’ folder. So go to WordPress Dashboard > Tools > Import > WordPress. It will prompt to install the WordPress Importer plugin.
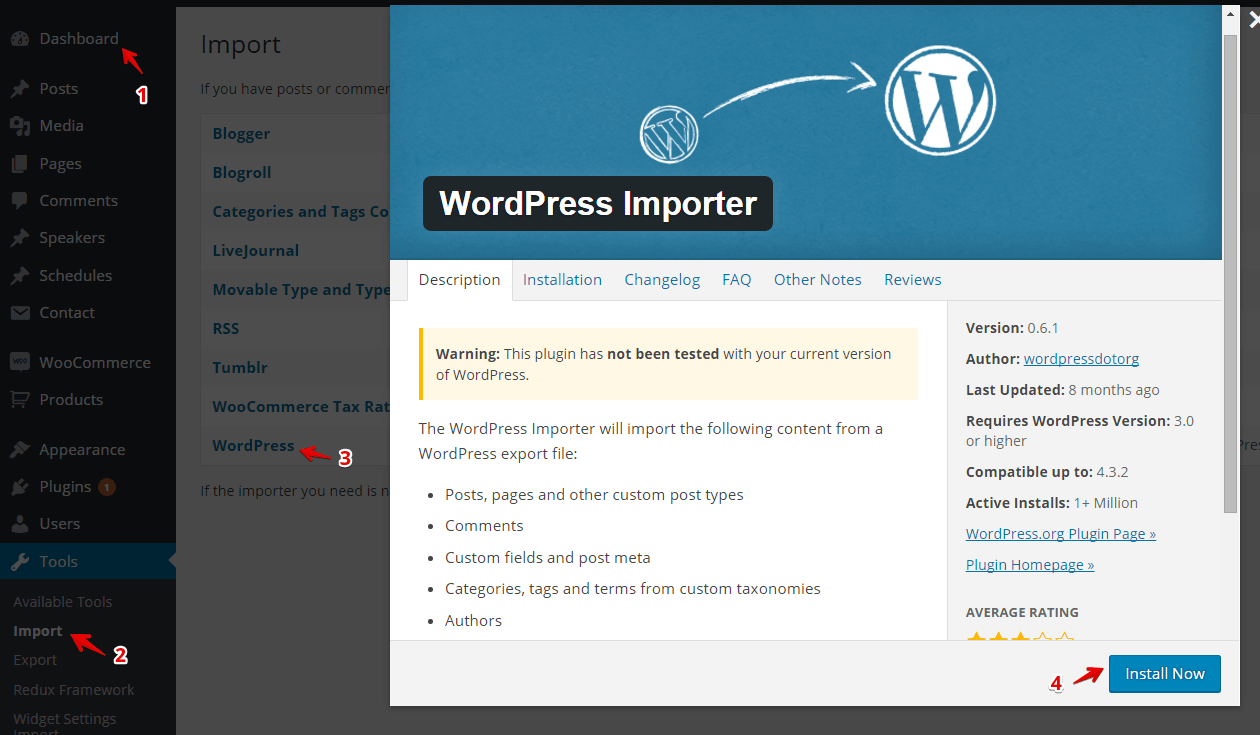
Install, activate the plugin and run importer.
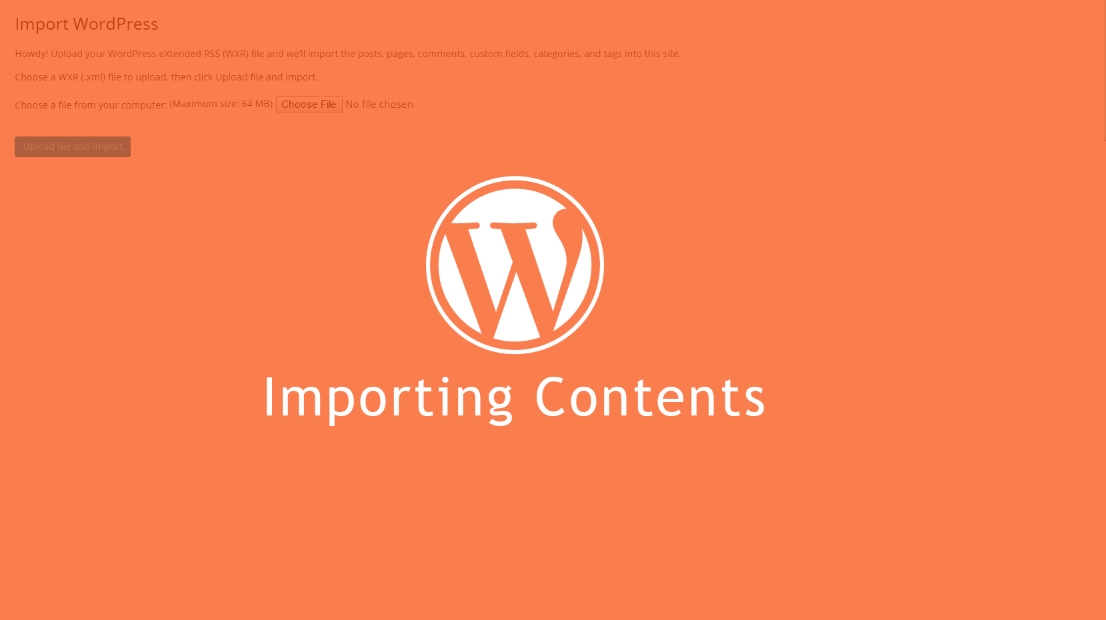
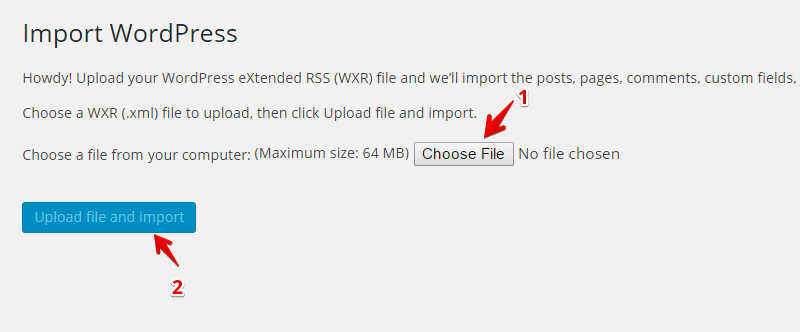
You will get a screen to choose a file and upload. Select the XML file you got inside the Demo Content folder of the main theme directory you downloaded.
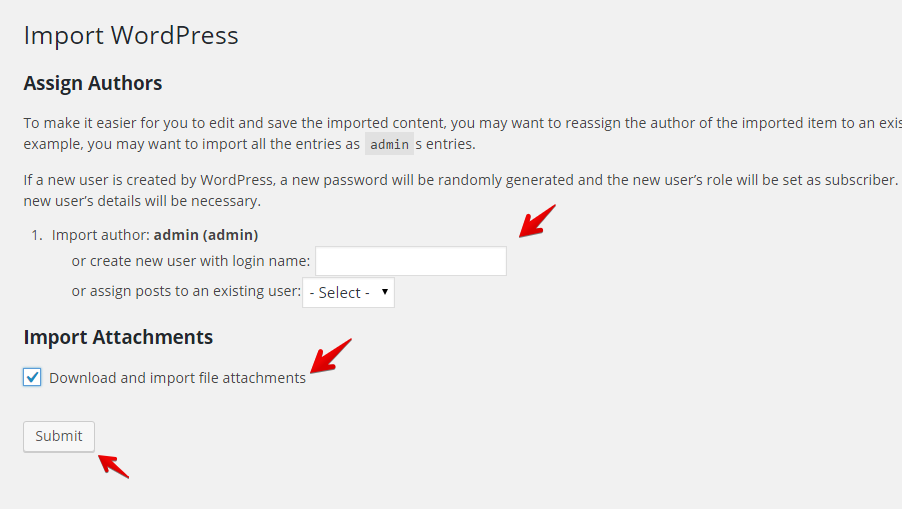
After pressing the ‘Upload file and import’ button, you will get some import options. You can choose to import the demo author as is or assign the demo contents to an existing author. There is an option to download and import the attachments used in the demo. Select it to get the demo images, videos etc. Finally, click the Submit button and it will start importing.
After importing demo contents from the XML document, the following screen will be displayed.

It’s time to move next.
Go to WordPress Dashboard > Tools > Widget Settings Import. It will bring the following page.
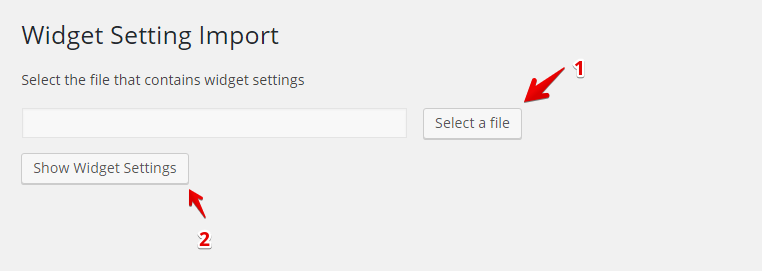
Select the ‘.json’ file found inside the ‘Demo Widget Settings’ folder.
Then click ‘Show Widget Settings’ button. You will get a page like the following one.
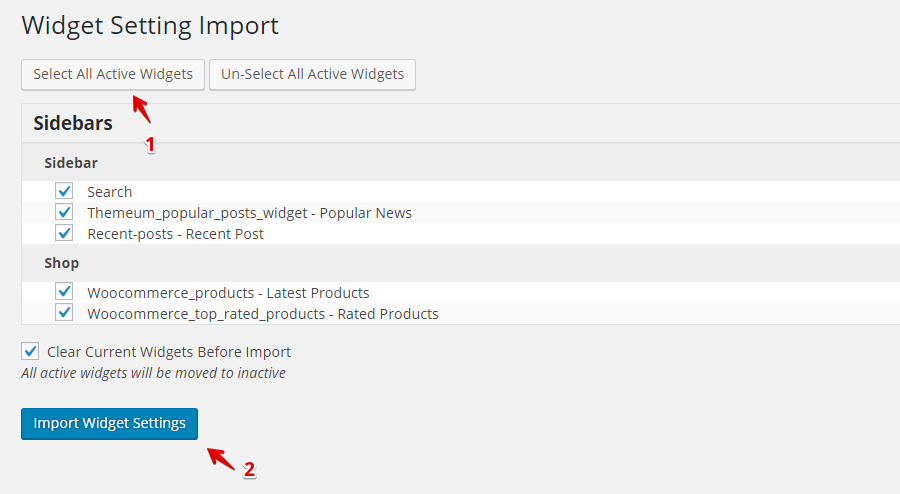
Hit ‘Select All Active Widgets’ and then click ‘Import Widget Settings’. A success message “All widgets with registered sidebars have been imported successfully.” will be displayed.
Here we’ll import theme settings. Go to WordPress Dashboard > Theme Options > Import / Export. It will bring a page like the following.
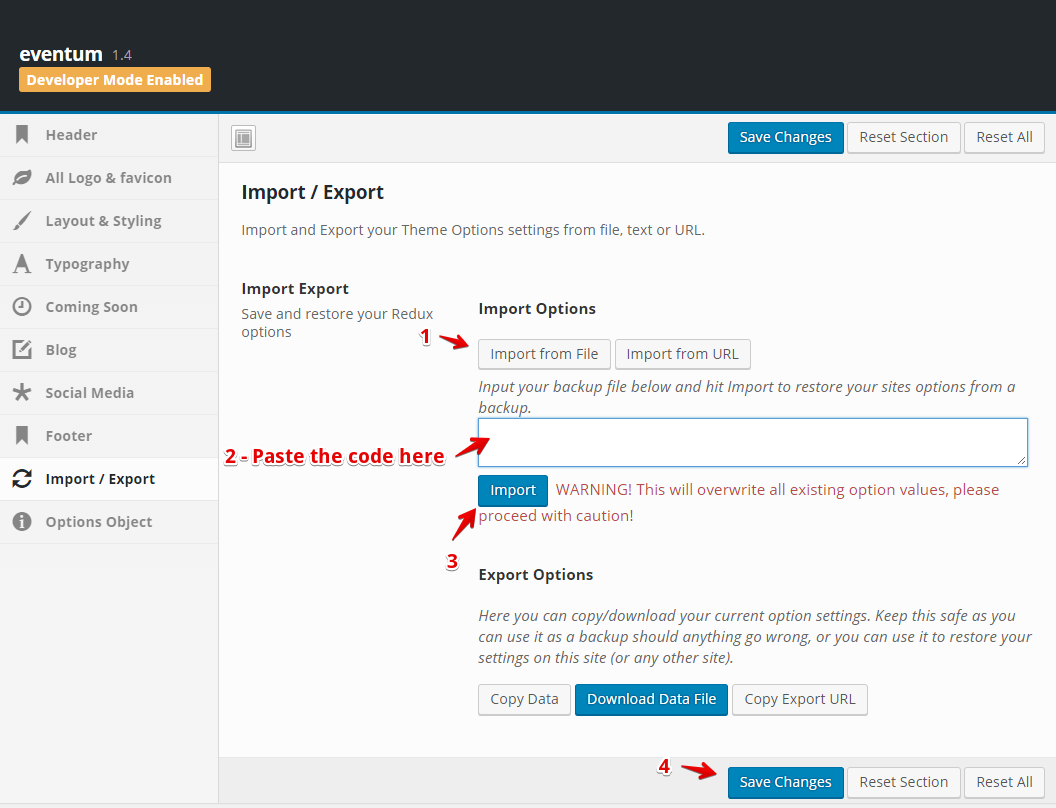
Firstly click the ‘Import from file’ button. It will open a form. Now go to the main theme directory which you’ve downloaded earlier. Open the Theme Options folder. You will get a .json file there. Open it with a text editor. Copy all code inside the .json file and paste them into the theme options importer form. Click the import button and finally save changes.
So the demo import completes here. Now we’ll set the default homepage (which we’ve just imported). Again visit the WP Dashboard > Settings > Reading. Set ‘Front page displays’ as ‘A static page’. Select ‘Home – Conference’ as the static homepage.
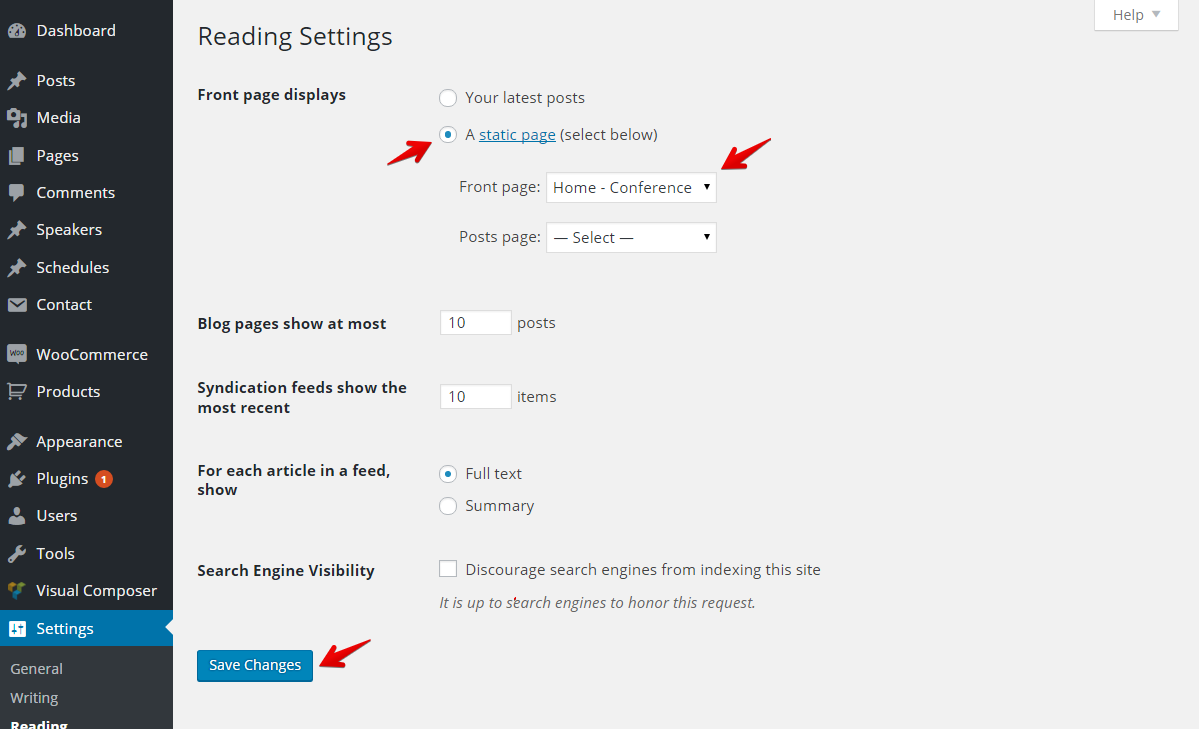
Save changes. Also set menus from Appearance > Menus > Manage Locations. It’s all done.
Here is our output.

So this post shows you the way to import a theme’s demo contents. Although I’ve used Eventum in this example, you can follow the similar method for other Themeum themes as well.
© 2026 All Rights Reserved. An Ollyo company