
Good morning, buenos días, and guten morgen Tutor LMS users! Have you ever wanted to create an eLearning platform that speaks your tongue? Honestly, regardless of how fluent you are at a second language, it’ll never be as comfortable as the first language you spoke as a child.
This is why having multilingual support is a significant factor for your website if you’re not creating educational content in WordPress’s default English language. So, we’re here today to give you comprehensive guidelines on how to upgrade your Tutor LMS site to a multilingual eLearning platform.
Note
WPML works with different languages for courses now. The Dashboard, Course Archive, Login and Registration templates are not compatible yet. The complete integration is under development and will be released soon.
Step 1: Download the Languages
First things first, we will need the language packs for Tutor LMS Pro or Tutor LMS free. To get the Tutor LMS free pack, we have to head to WP Admin > Settings > General and select the required language from the “Site Language” tab. This will prompt an update for all your plugins and themes that have available language packs. To force the update, go to the Updates section of the admin dashboard and you can manually start the installation process.
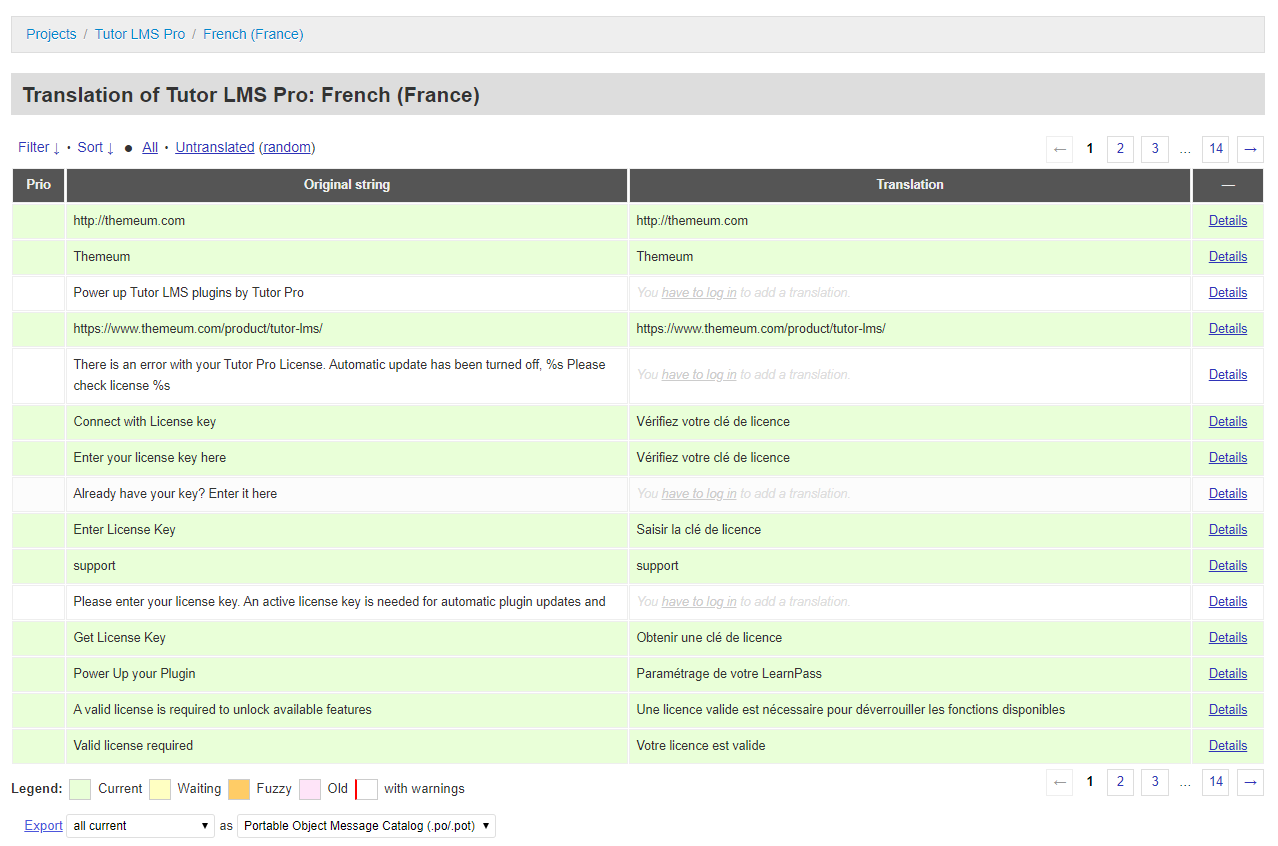
After that, we have to manually download and place the language pack for Tutor LMS Pro. All translation files done by the community can be found here in our translation directory. Simply select the language and click on export to download the .po/.pot file. Then, you have to navigate to your site’s WordPress directory to wp-content > languages > plugins and place your downloaded file here.
Apart from the translation directory, several users have created their own fully translated and fully functional Tutor LMS Pro websites. You could always post in the Tutor LMS User’s Facebook Group that you’re creating a multilingual eLearning platform! All of our users are incredibly generous and I’m sure they will be happy to give you their translation packs. WPML will automatically recognize the translation packs so you don’t have to manually translate all of the content yourself.
Step 2: Install All the Necessary Plugins
WPML is a multi-language management plugin for WordPress. Put plainly, it will manage all your translations as well as version control when it comes to WordPress post types.
WPML is a premium plugin that you can purchase from their website. You can use any other language localization plugin for this purpose as well. After installing it, go ahead and activate the plugin from your WordPress plugin manager. You will also need to install and activate WPML Translation Management, as well as WPML String Translator.
Step 3: Configure WPML
In the auto-configuration tool given by WPML, you can select the language you’re running right now, and then select the language(s) that you want to translate to.
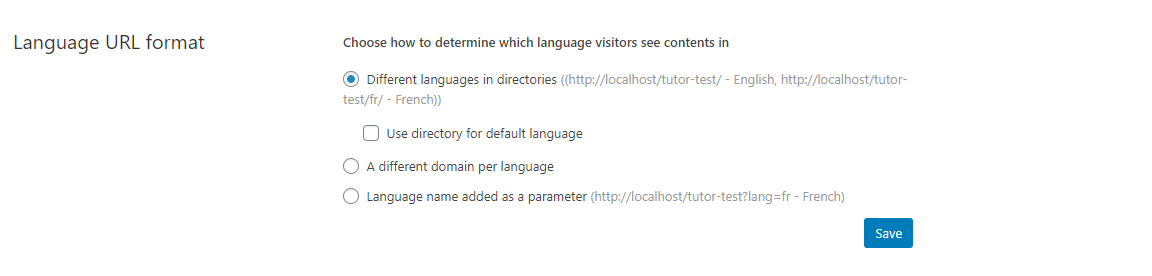
After you’re done going through the auto-configuration, head to WP Admin > WPML > Languages > Language URL Format from your admin dashboard and you can start configuring the plugin.
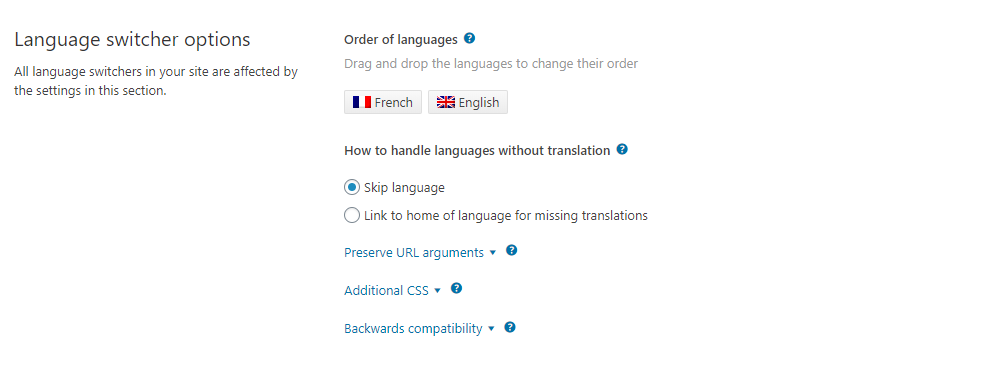
Then on the Language switcher options field, you can drag and drop to change the order of the languages used in your site.
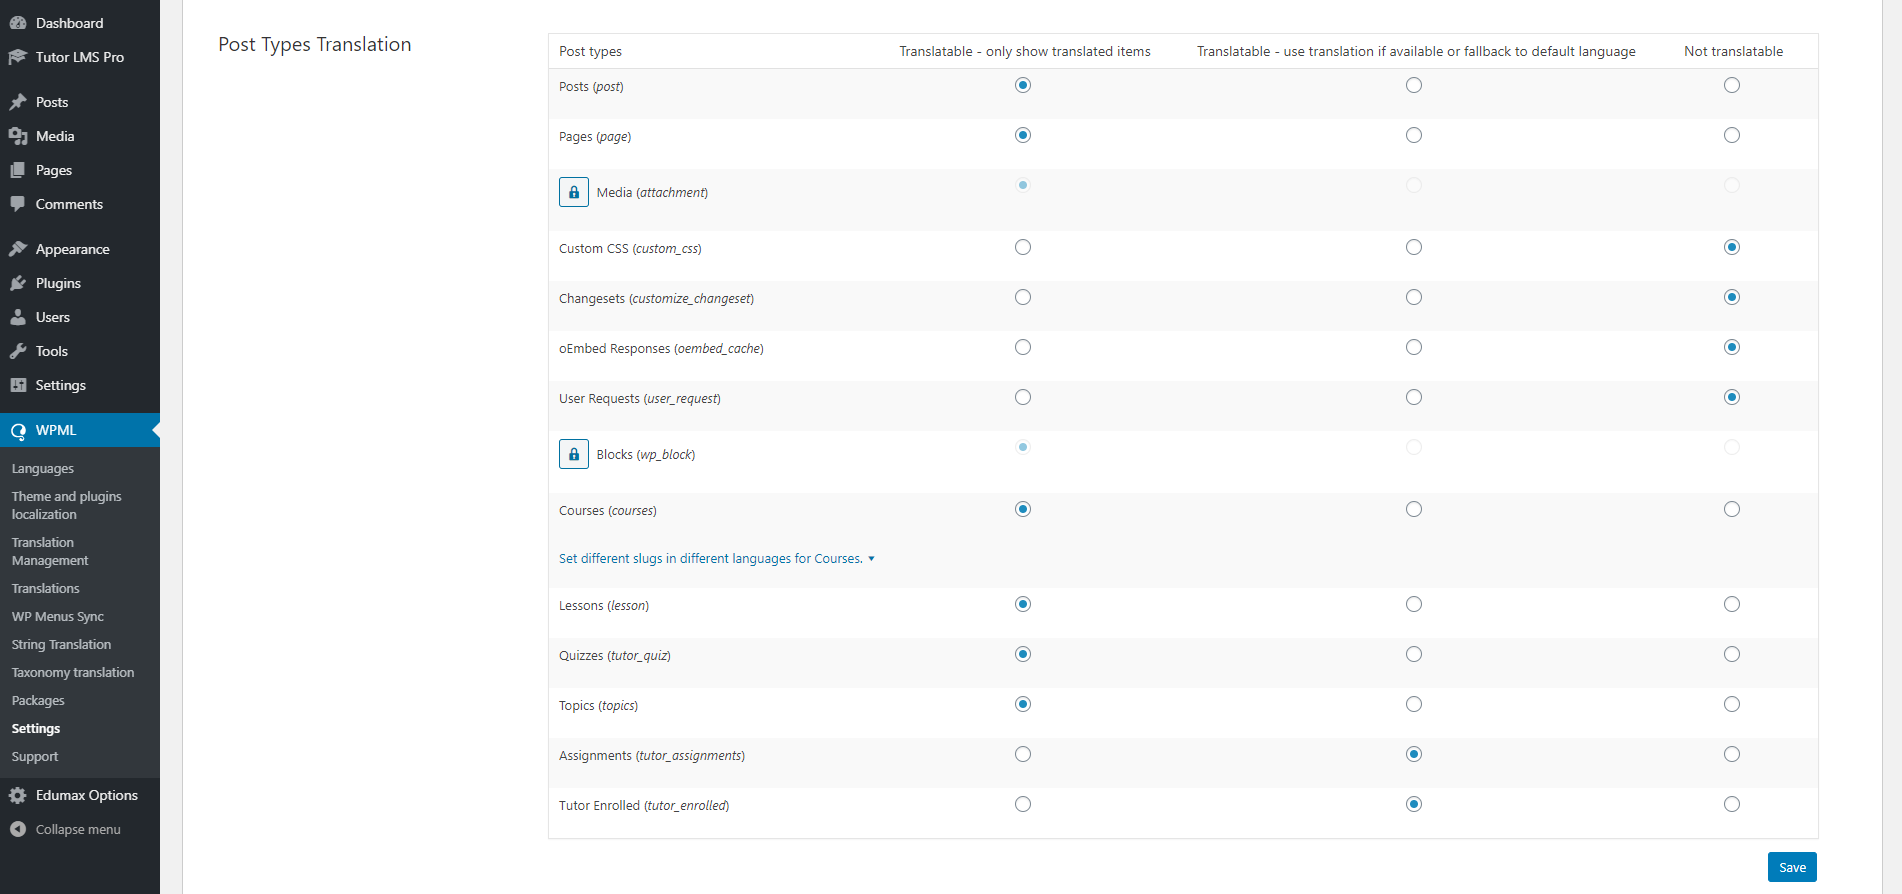
Next, we’ll navigate to WP Admin > WPML > Settings and go down to the Post Type Translation and select Translatable for Courses. This will enable you to have different versions of the same course.
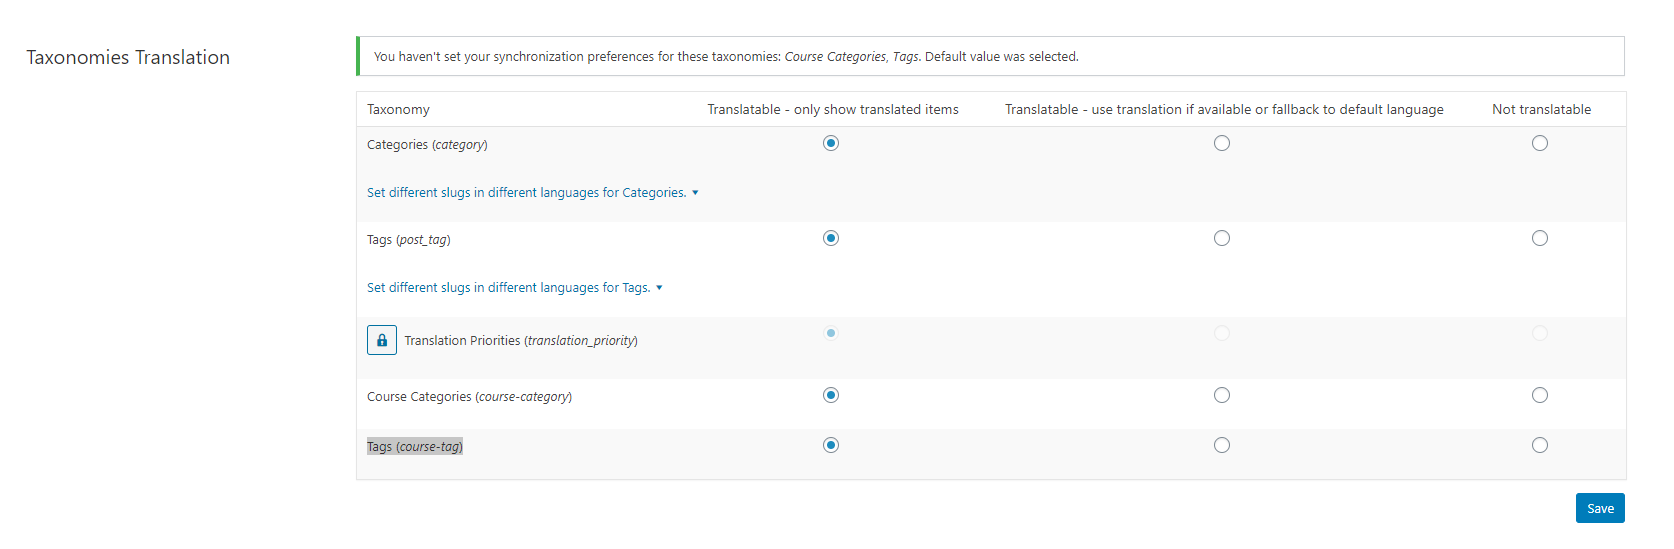
Similarly, if you scroll down, you’ll see a tab called Taxonomy translations. We will enable Taxonomy translations as well. Don’t forget to click on Save!
Step 4: Start Translating
Now that you’re mostly done configuring WPML, all you have to do is translate all of your courses to the required languages. This is one of the most important steps towards creating a multilingual eLearning platform. To do so, go to WPML > Translation Management and you’ll be greeted with another auto-configuration tool for the Translation Management addon. Make sure to select “Use WPML’s classic translation editor” in it.
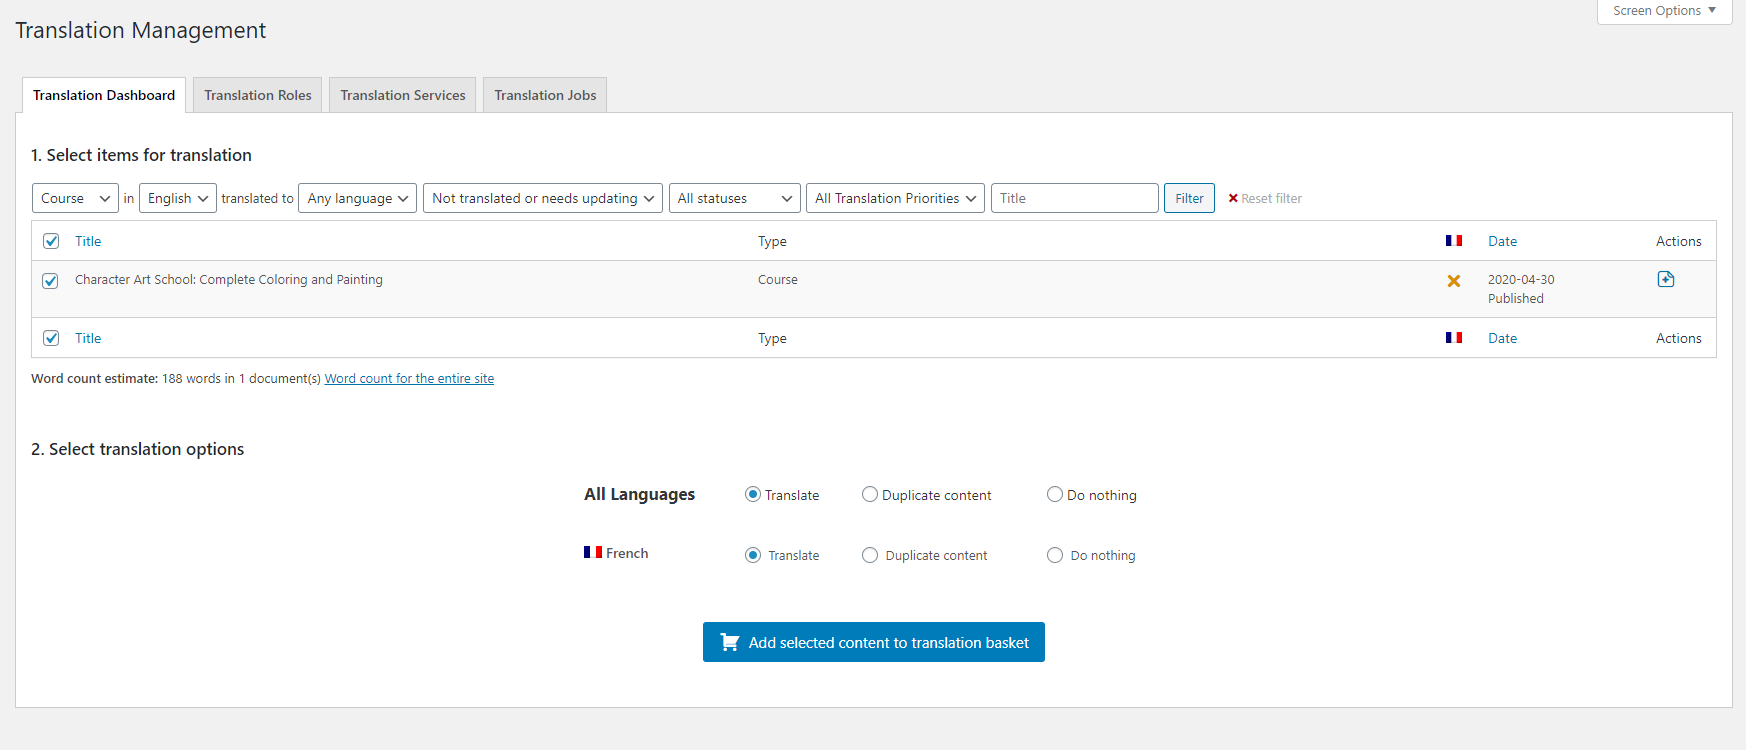
For Tutor LMS specific content, select “Courses” and “Not translated or need updating” from the dropdowns. After that, click on Filter, and you can see all courses that need to be translated. Then, if you’re ready to start translating, select the courses you want, and then click on Add selected content to the translation basket. After that, from the Translation Basket, you can send all items to a translator or a translation service.
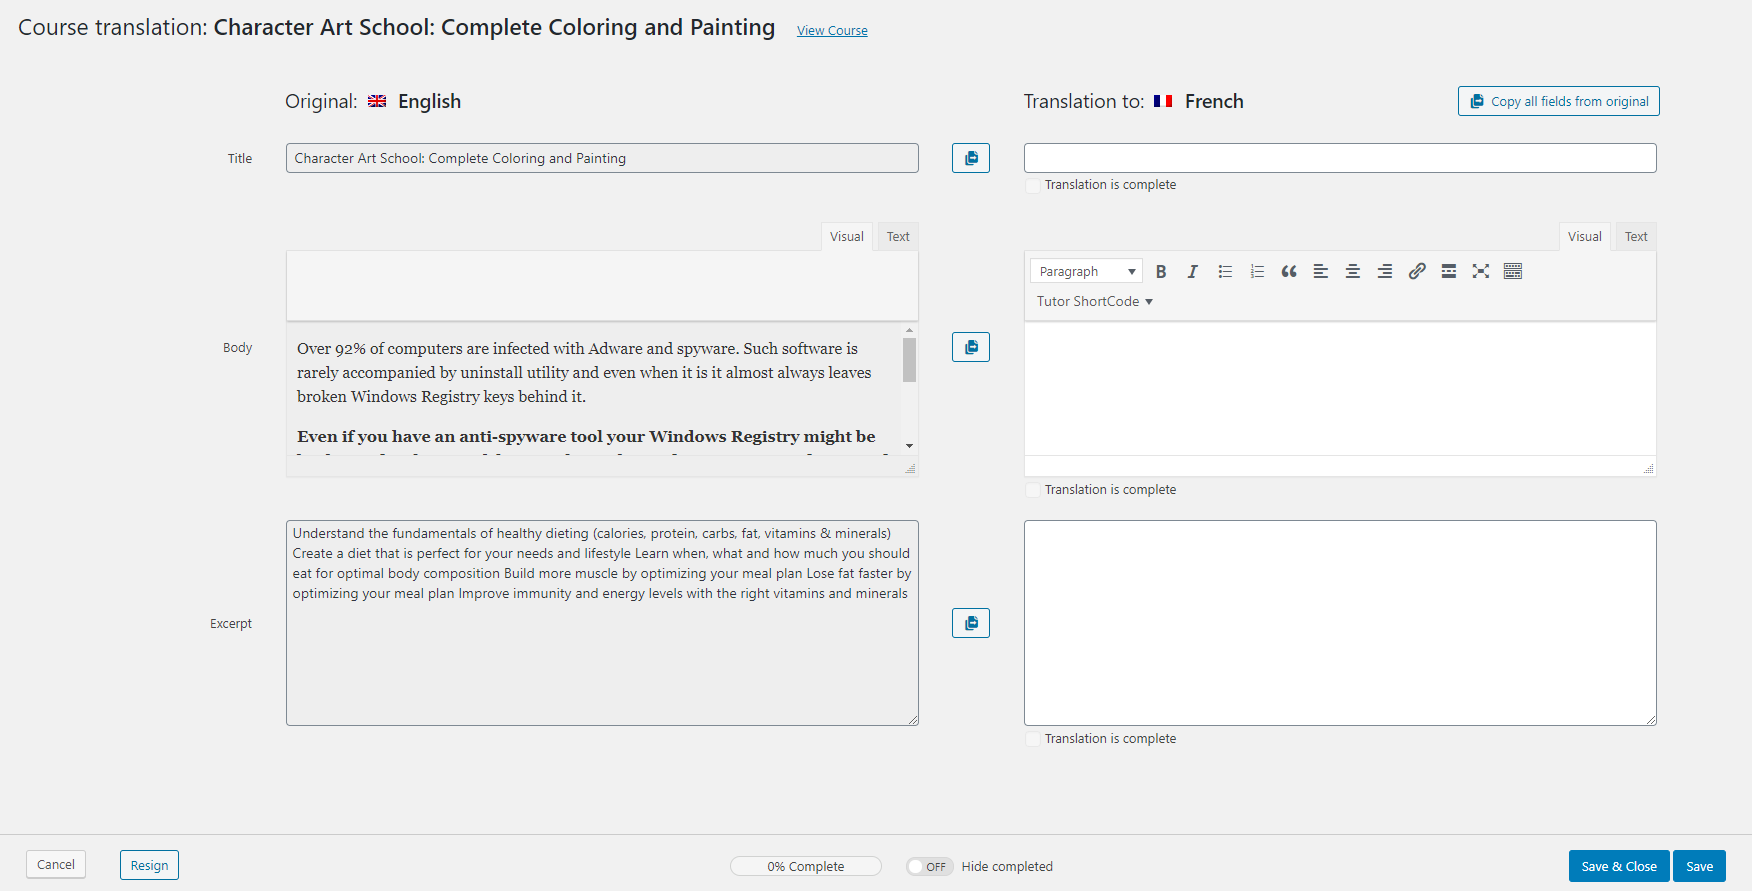
If you’re employing a manual translator, he or she will be able to navigate to WP Admin > WPML > Translations to view all the queued jobs and start working on translations.
Step 5: Add Language Switcher in Menu or Widget
Finally, to give the visitor an option to switch between translations, we’ll add a menu item that will enable language switching. To do so, head over to your WP Admin > Appearance > Menus and select the menu where you want the language switcher. You can also create a new menu just for the language switcher.
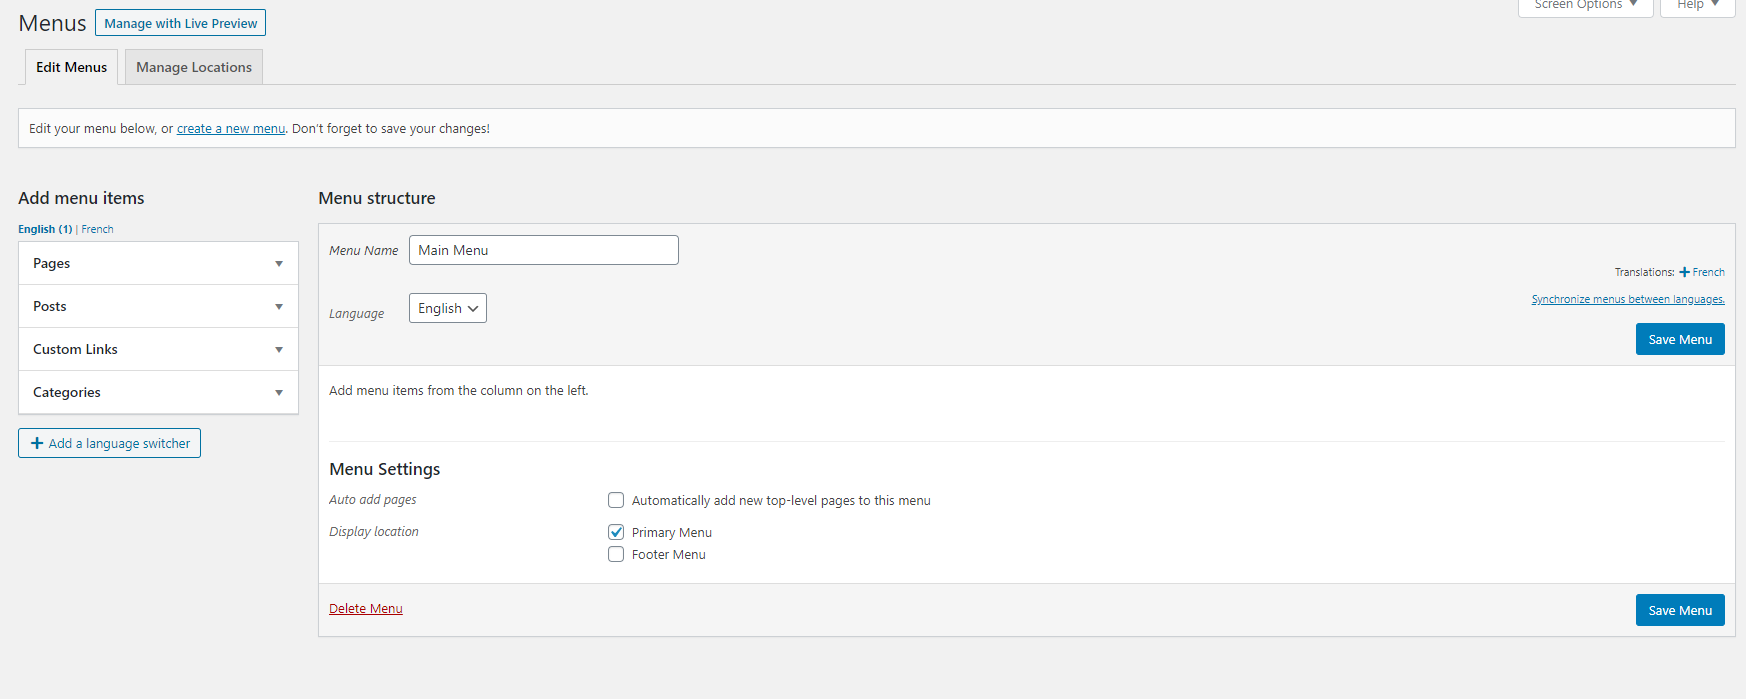
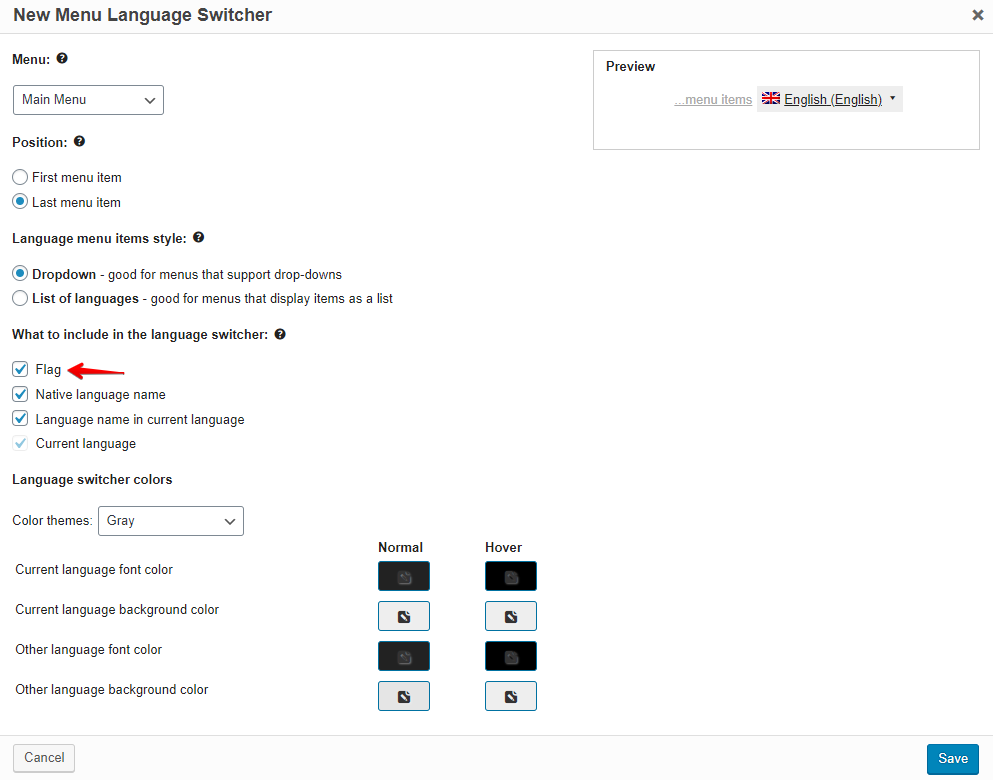
Then, click on “Add a Language Switcher” which will take you to the language switcher options. Make sure to enable the flag toggle so that users can easily pick the language.
The default menu element looks pretty bland. To make it look livelier, you can always use WP Mega Menu.
Wrapping Up
Perhaps one of the best ways to make a visitor feel right at home on your site would be if it was in their native language. Not only will you be able to convey ideas more efficiently, but you will also be able to communicate effectively. Taking the time and effort to create a multilingual platform truly goes a long way.
So, what are you waiting for? Start creating your multilingual eLearning platform with Tutor LMS and WPML today. And don’t forget to let us know if you’re confused or stuck somewhere, we’ll always be reading your comments!

One Comment