
The days of dealing with payment hassles are gone! Now, you can easily accept online payments from your students with multiple payment gateways from any corner of the world.
You must be wondering, how?
Today, in this blog, we will share with you how you can collect online payments for eLearning websites with multiple payment gateways.
So, without further ado, let’s dive in.
Why Should You Accept Online Payments With Multiple Payment Gateways
When you start selling courses online, your customers are not limited to a single boundary. Your site will have visitors around the globe. So, all of your customers won’t prefer a single payment gateway. For example, some may prefer using their credit cards, while others may be skeptical about putting their credit card details on your site. You can allow them to pay using PayPal, or other such international gateway for payment.
Again, some may want to pay using local currency while your payment gateway may not support them. In such a case, you will need a universal payment gateway like Stripe to receive payment in more than 135+ currencies.
It’s proven that sites allowing users to pay through their preferred payment gateways receive a higher conversion rate. So, the easier the payment process, the higher sales you can generate for your eLearning courses.
How to Accept Online Payments for eLearning Websites
If you are using WordPress CMS you can accept online payments through a single payment plugin without any complex coding. Thousands of plugins are available to receive payments but you will find only a few of them perfectly smooth, flawless, user-friendly, convenient, and easy to use.
Paymattic is one of the most popular plugins for online payments and that can be the perfect tool for your eLearning site. You can receive payments with 11 payment gateways using Paymattic. These payment gateways include –
- Stripe
- PayPal
- Square
- Mollie
- Razorpay
- Billplz
- Payrexx
- Paystack
- SSLCOMMERZ
- Xendit
- Flutterwave
On top of the payment gateways, Paymattic can do a lot more for you. It has integrations with 14 third-party platforms such as FluentCRM, TutorLMS, Slack, Telegram, Zapier and more.
Below are some of the exciting features of Paymattic –
- Subscription payment
- Customer profile
- Advanced reporting
- Custom form editor
- LMS integration
- Email notification
- Coupon configuration
- User registration
- Currency switcher
- Multi-layer security
- Payment form templates
- Export-import
- Customer support
Now, we will show you the step-by-step guide to receive online payments using Paymattic.
Install & Activate Paymattic Pro
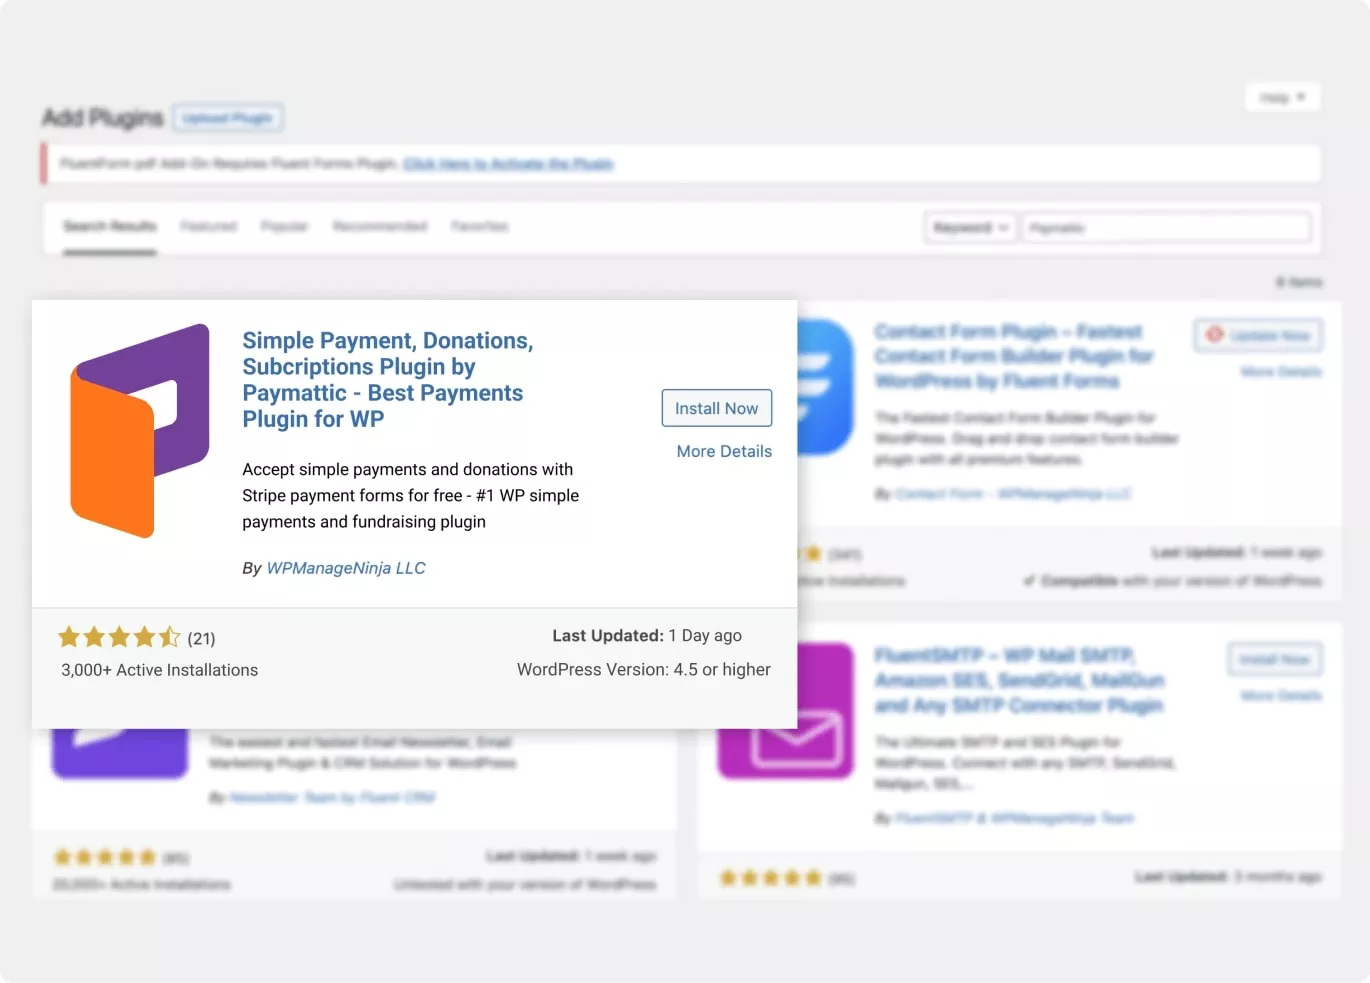
- Go to your WordPress admin dashboard, and click on Plugins > Add New Plugin. Now search for Paymattic. Then install and activate the plugin.
You can use only the Stripe payment gateway in the free version. To accept payments with all the payment gateways and to integrate LMS you need to upgrade to the premium version.
- Once you have activated the Paymattic plugin, go to Paymattic > Upgrade to Pro to activate the premium version.
Configure Payment Gateway
You have to configure a payment gateway to collect payments from your customers.
- Go to Paymattic Pro > Payment Gateway from your WordPress dashboard. Here you will find all the available payment gateways. Select your preferred payment system and insert the API credential for your merchant account.

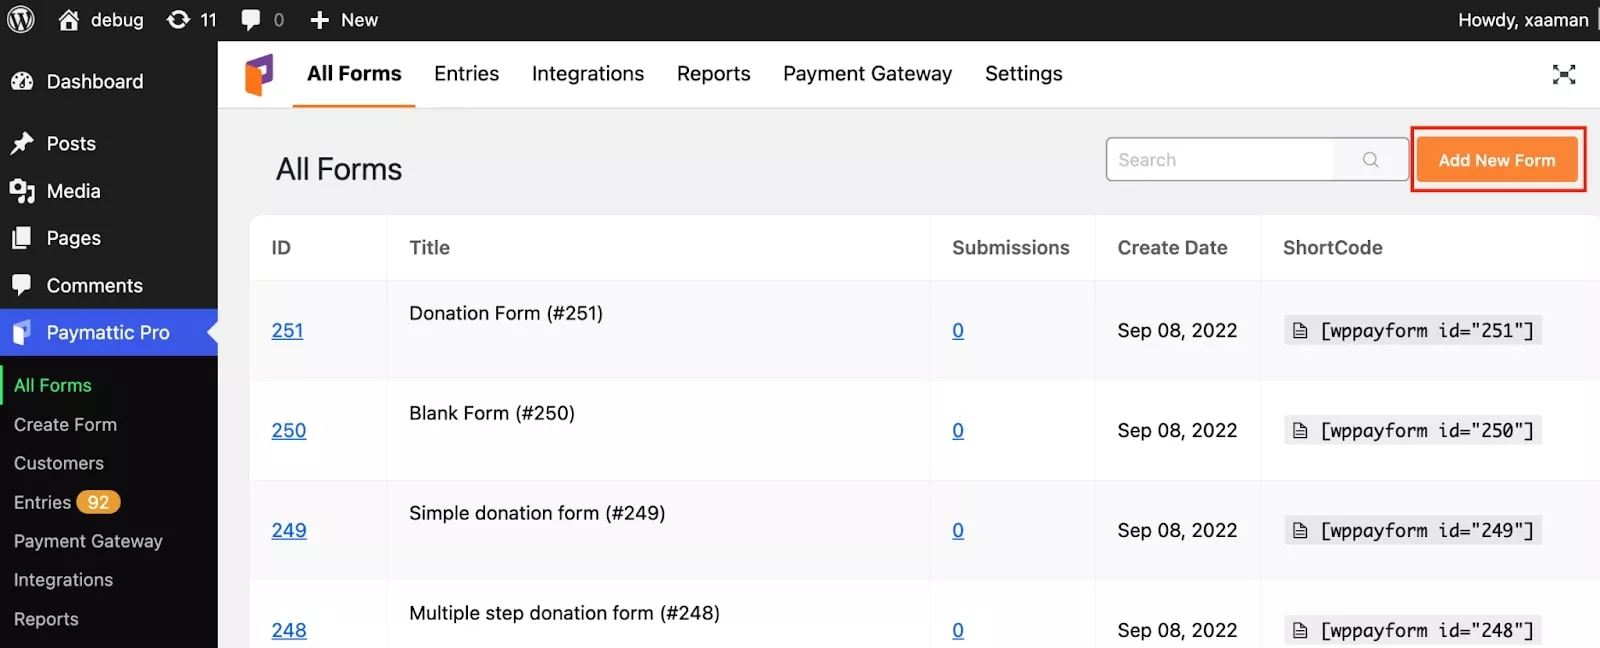
Create a Payment Form
To create a payment form with Paymattic, go to Paymattic dashboard > All forms > Add new forms.
Here you will find two editor options. Select Advanced Editor from here as this gutenberg-style editor contains some very easy to use pre-built payment form templates.

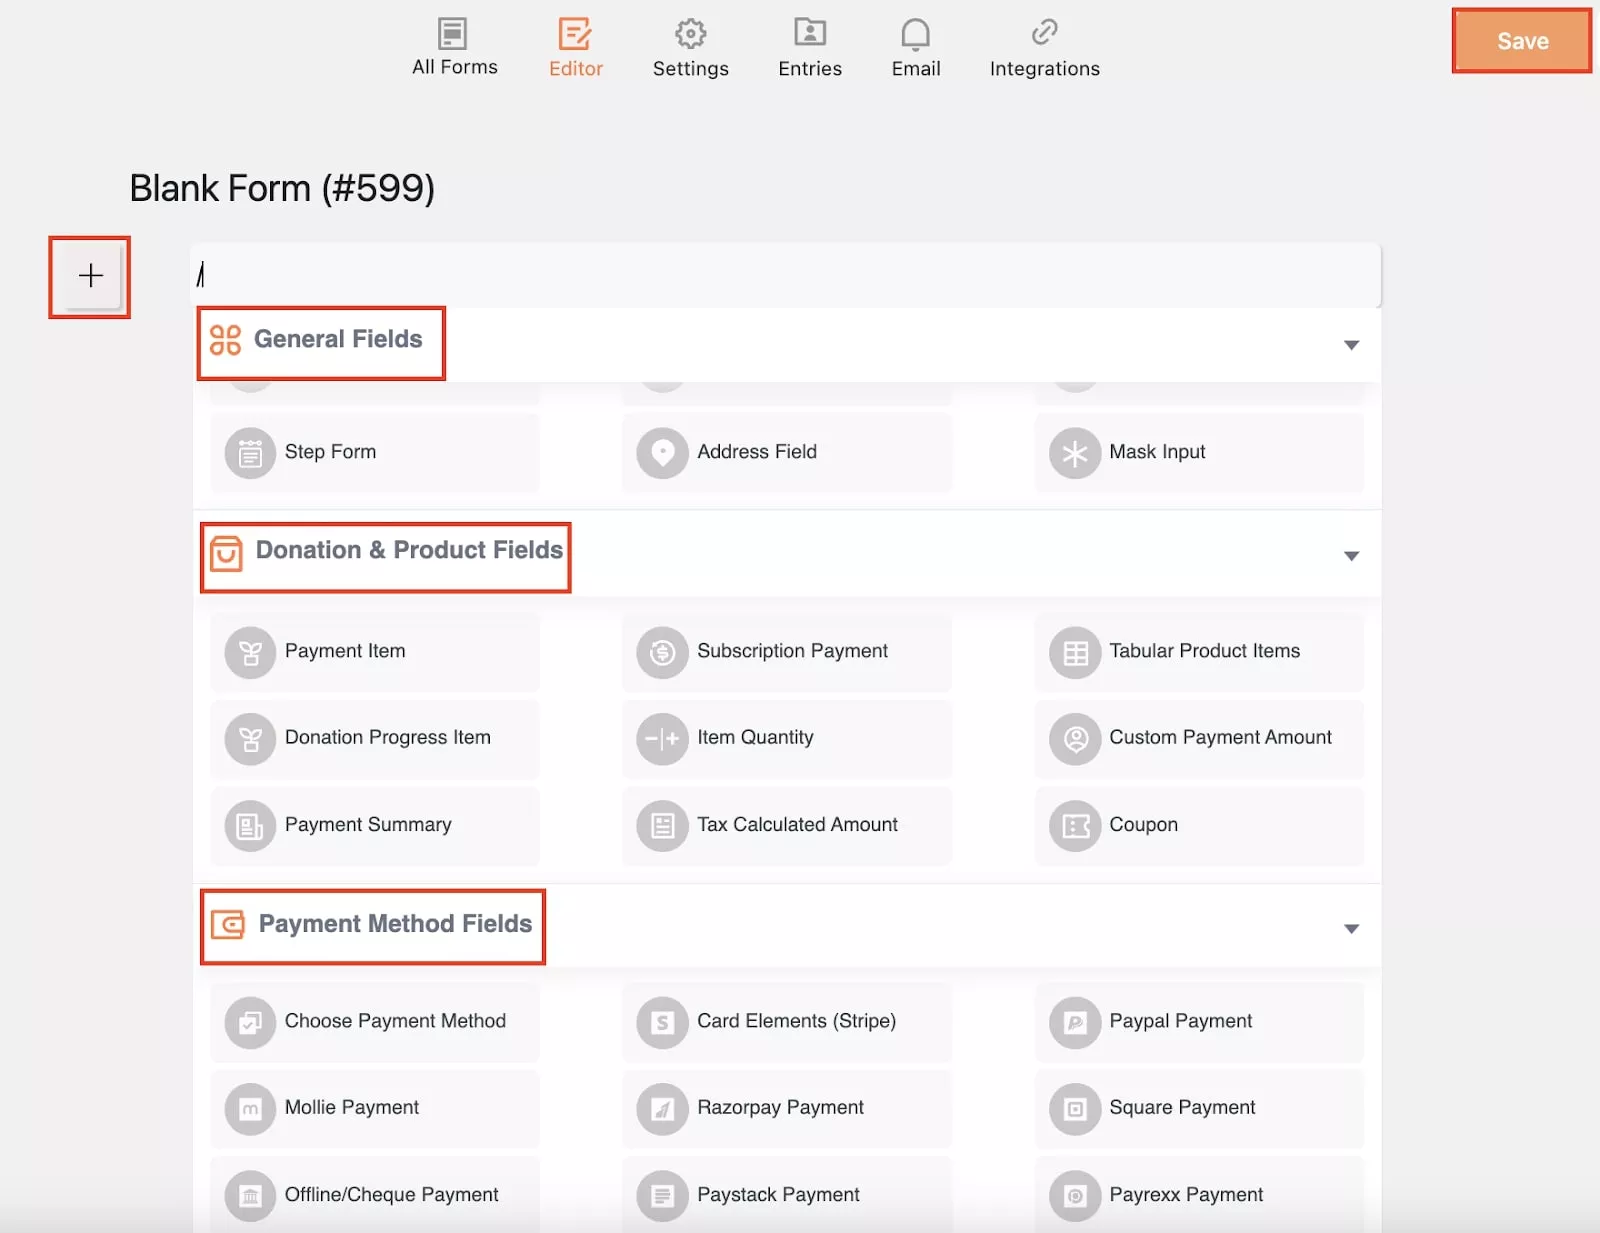
- You can create your payment form using these templates or create a new one with a Blank form.
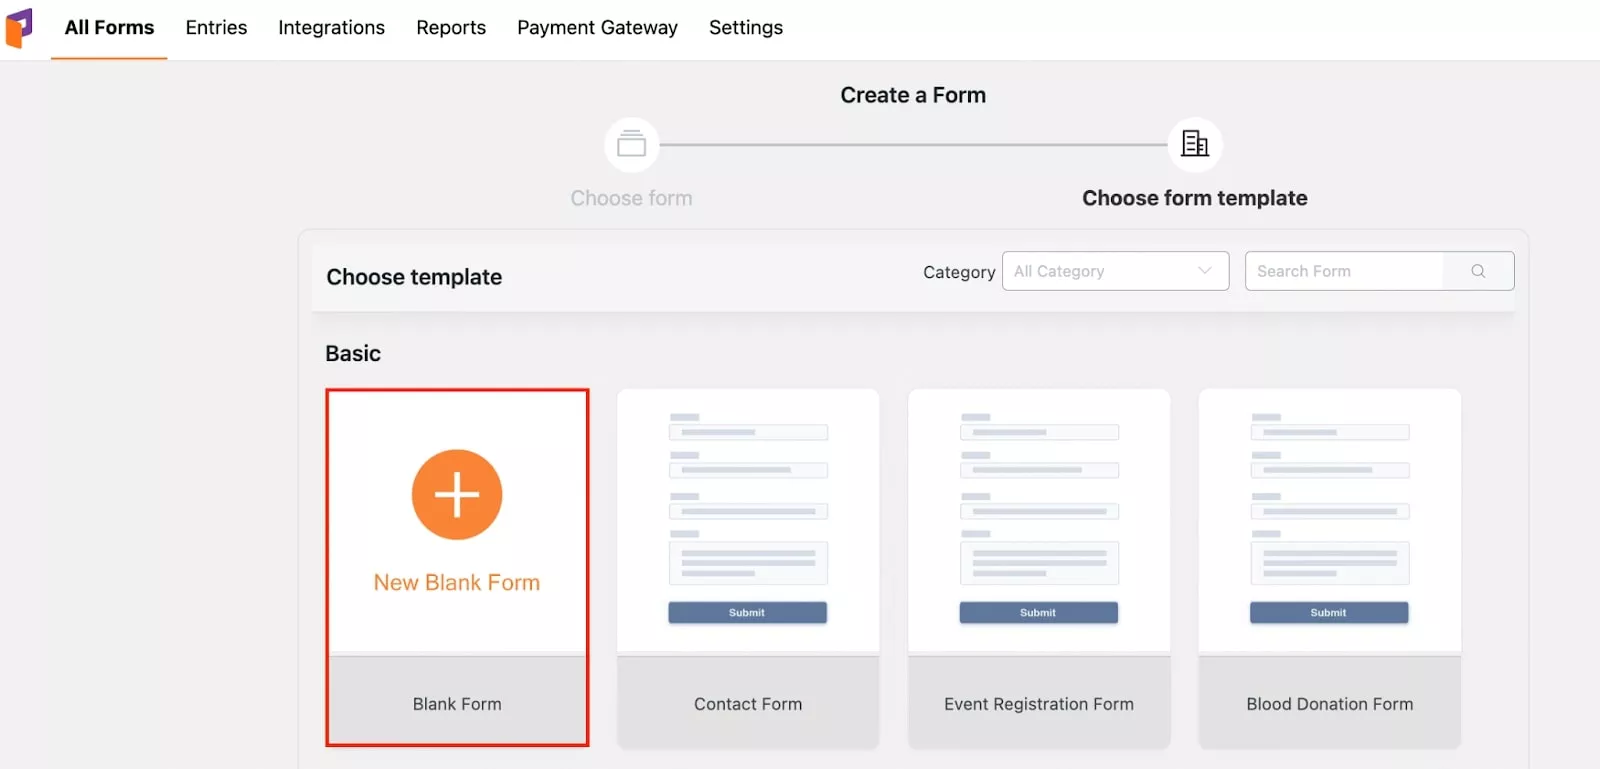
If you select the Blank Form option, you will get input fields to build your own payment form. To put input fields on your form, click on the (+) icon.
Here you can find three different form field categories– General Fields, Donation and Products Fields, and Payment Method Fields. Put your preferred fields on the form.
Finally, click on the Save button.
You can add custom CSS to design the form to match your branding & theme.
That’s all! Your payment form is ready to go online. Isn’t it super easy?
Preview Form
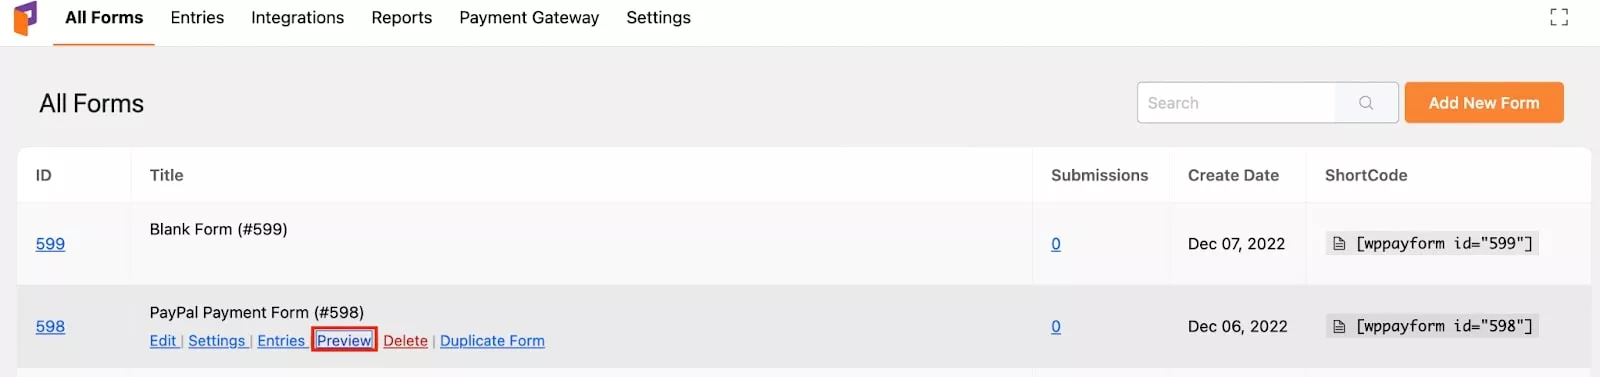
You can preview your created form right from the Advanced Editor. Simply, click on the preview icon located at the top right corner of the editor. Alternatively, Paymattic lets you preview your form anytime after you save it. To preview your form, go to All Forms and click on the Preview option below your form name.
Add Payment Form to Your eLearning Site
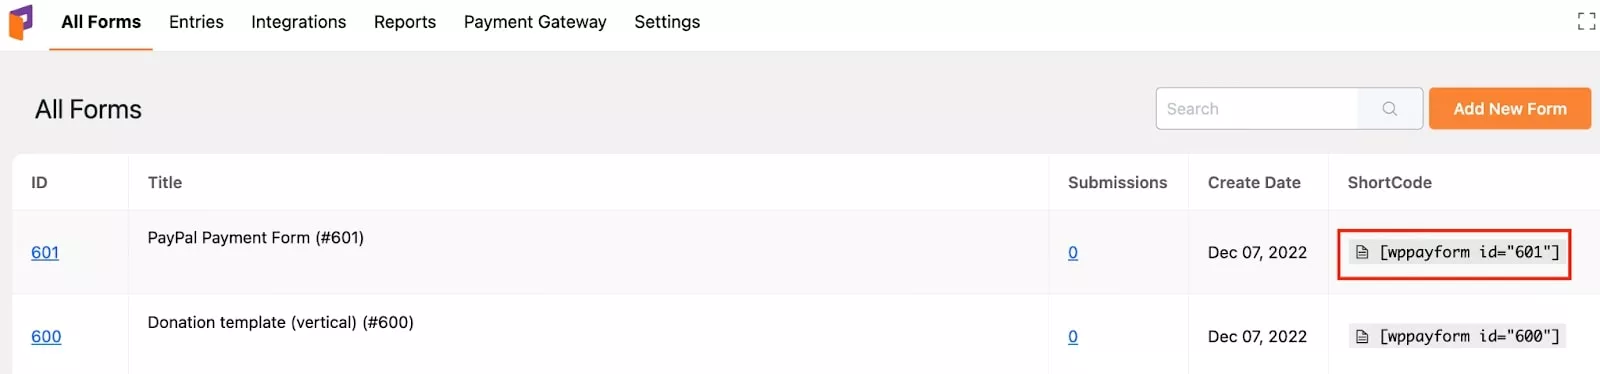
After you are done with creating the payment form, it’s time to embed the payment form on your checkout page. For this, go to Paymattic > All forms.
Then copy the shortcode of the payment form, which is located on the right side of the form name.
At last, paste this shortcode into the web page where you want to embed the form.
Start Collecting Online Payments Today
Hope, now you know how to collect online payments with an eye-catching form.
This plugin also lets you export and import your forms for further use. So what are you still waiting for?
Use the power of Paymattic today and explore the synergy it creates for your eLearning website.
Good luck!