

Social media has become a part of everyone’s daily lives in this day and age. Whether it be to promote or run your business or to check up on that one distant uncle, we’re all on some form of social media. So why not boost your eLearning site with a unique social media experience curated for Tutor LMS?
Introducing the all-new BuddyBoss Tutor LMS integration bringing all the buddyboss social goodness for your very own Tutor LMS.
Combining the robust capabilities of a premier learning management system with the vibrant community features of BuddyBoss, the Tutor LMS integration with BuddyBoss offers the best of both worlds.
In this article, we will see how you can go about creating a group with this integration and talk about how groups can promote social learning.
What Is the Integration All About
The Tutor LMS integration with BuddyBoss will help enhance student engagement by automatically sharing course activity into Social Groups, fostering a sense of community among learners. In short, this feature not only keeps students informed but also encourages them to actively participate in discussions and share their experiences, creating a collaborative learning environment. You can have students have a social learning experience straight in your eLearning site.
So let’s start with how we can set up this integration and we’ll discuss more features and benefits of the integration along the way.
Setting It Up
First, we need to install and activate BuddyBoss on our site. To do this:
- Download the BuddyBoss Platform free plugin
- Upload the file on your WordPress site
- Install and activate the BuddyBoss Plugin
Remember for this integration to work you will need BuddyBoss Platform Pro and Tutor LMS Pro. Make sure to have the licenses activated for both of them. With BuddyBoss installed and activated, we can move on to setting up the integration with Tutor LMS.
From your WordPress dashboard navigate to BuddyBoss > Integrations > Tutor LMS. You’ll be prompted to enter your license key here. Activate your license and the integration will be ready to use.
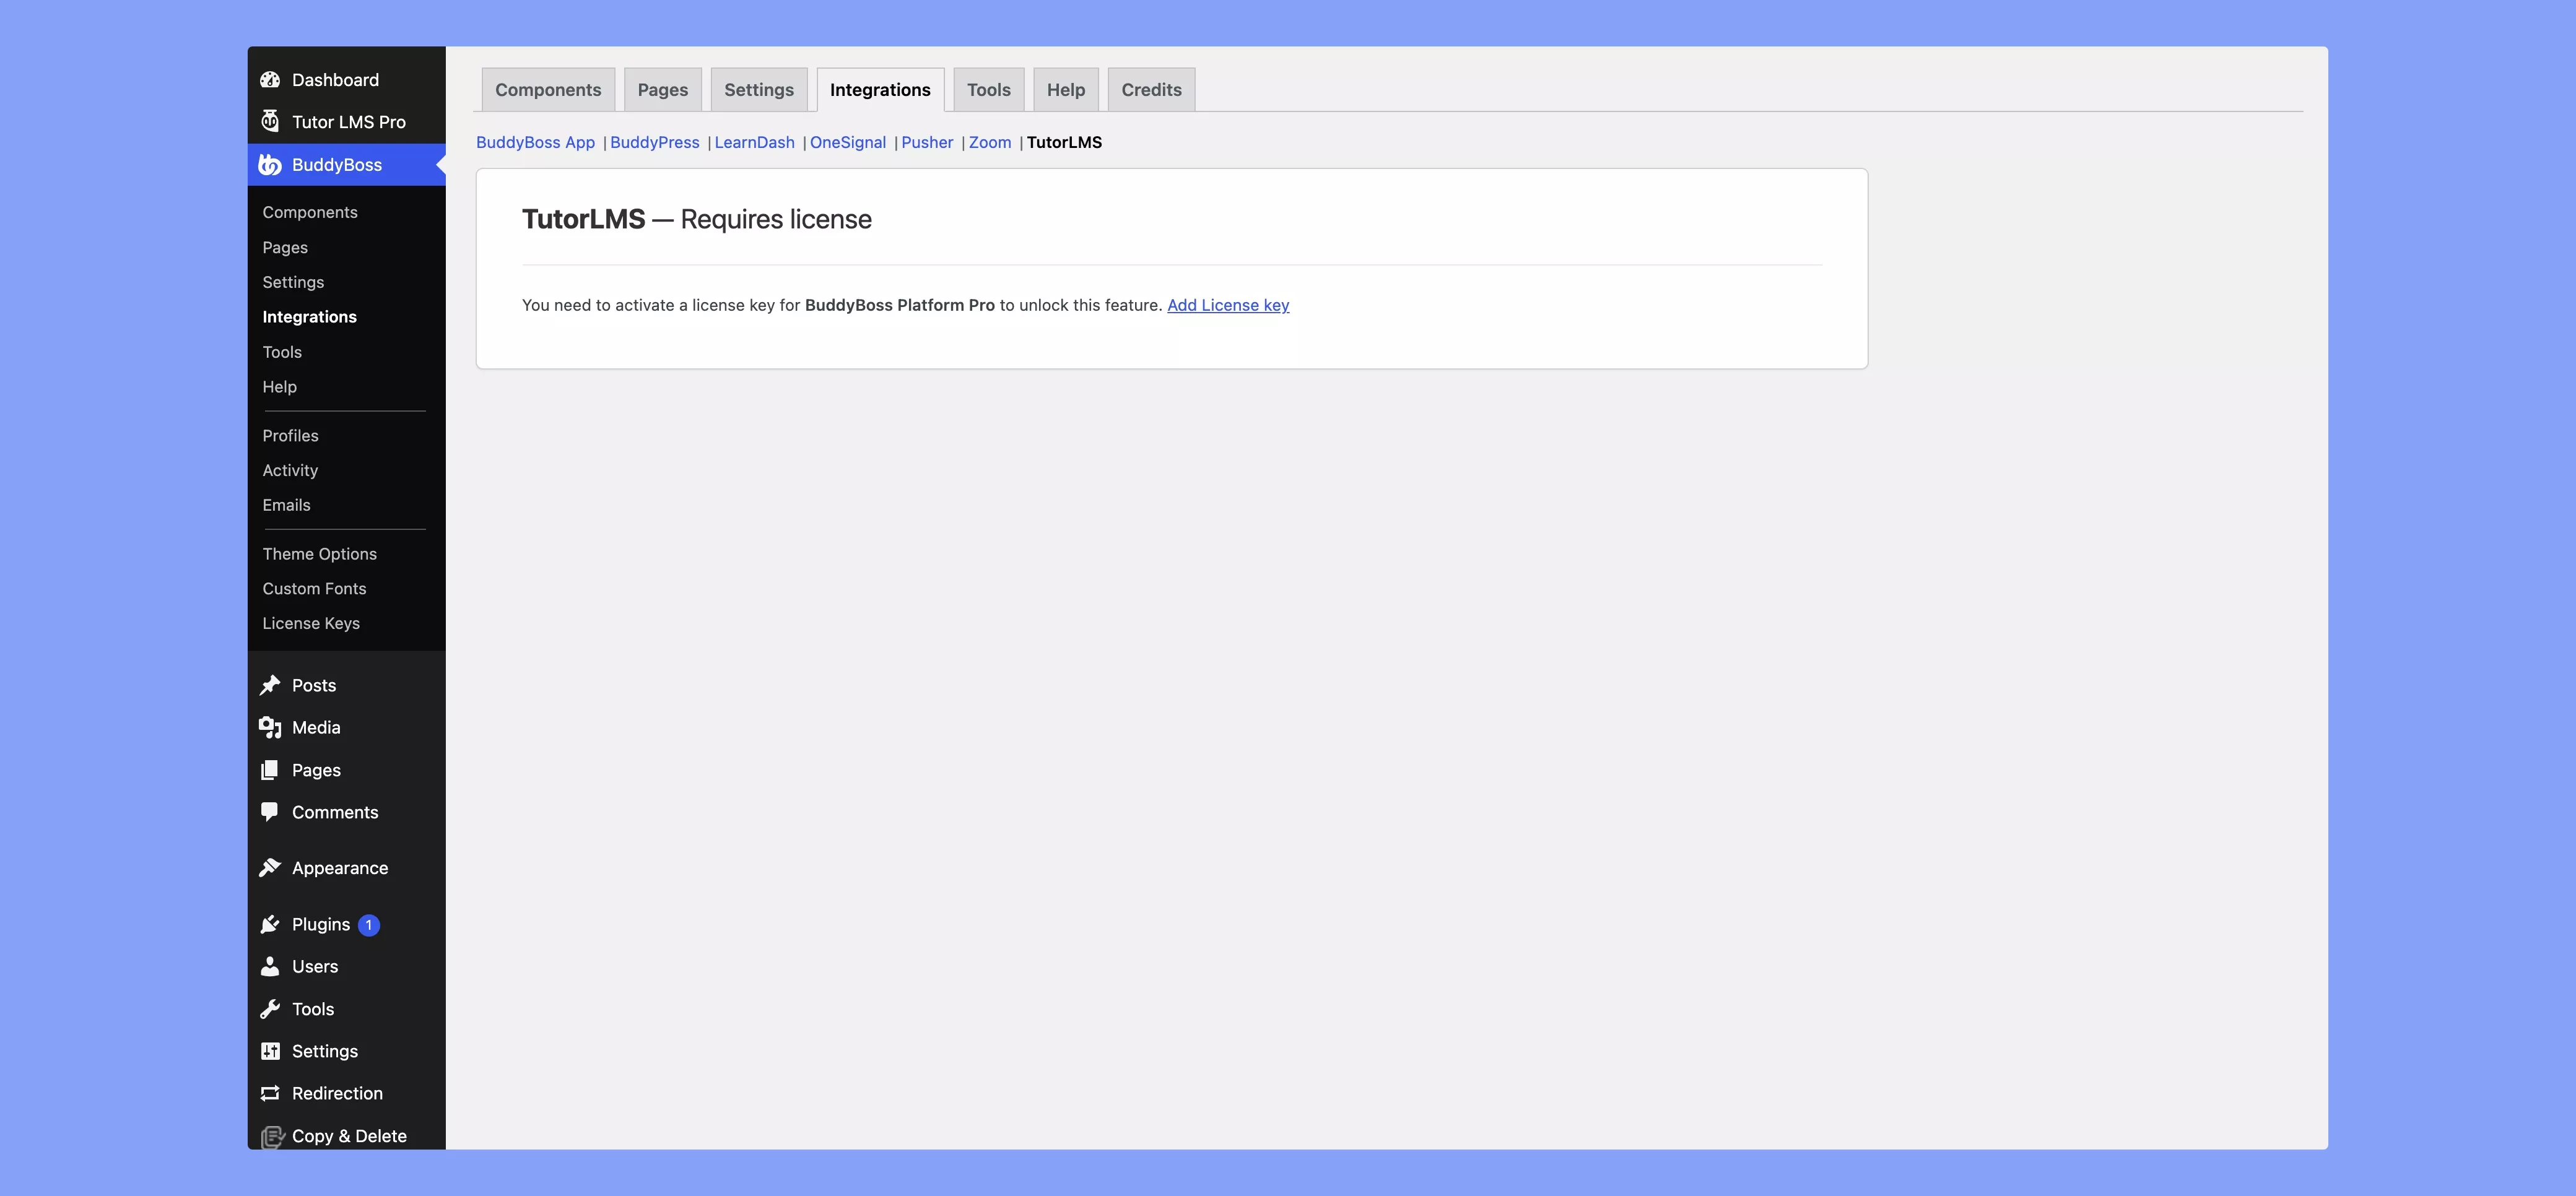
Once you activate the license, simply check the Tutor LMS Group Sync box and the integration is ready.
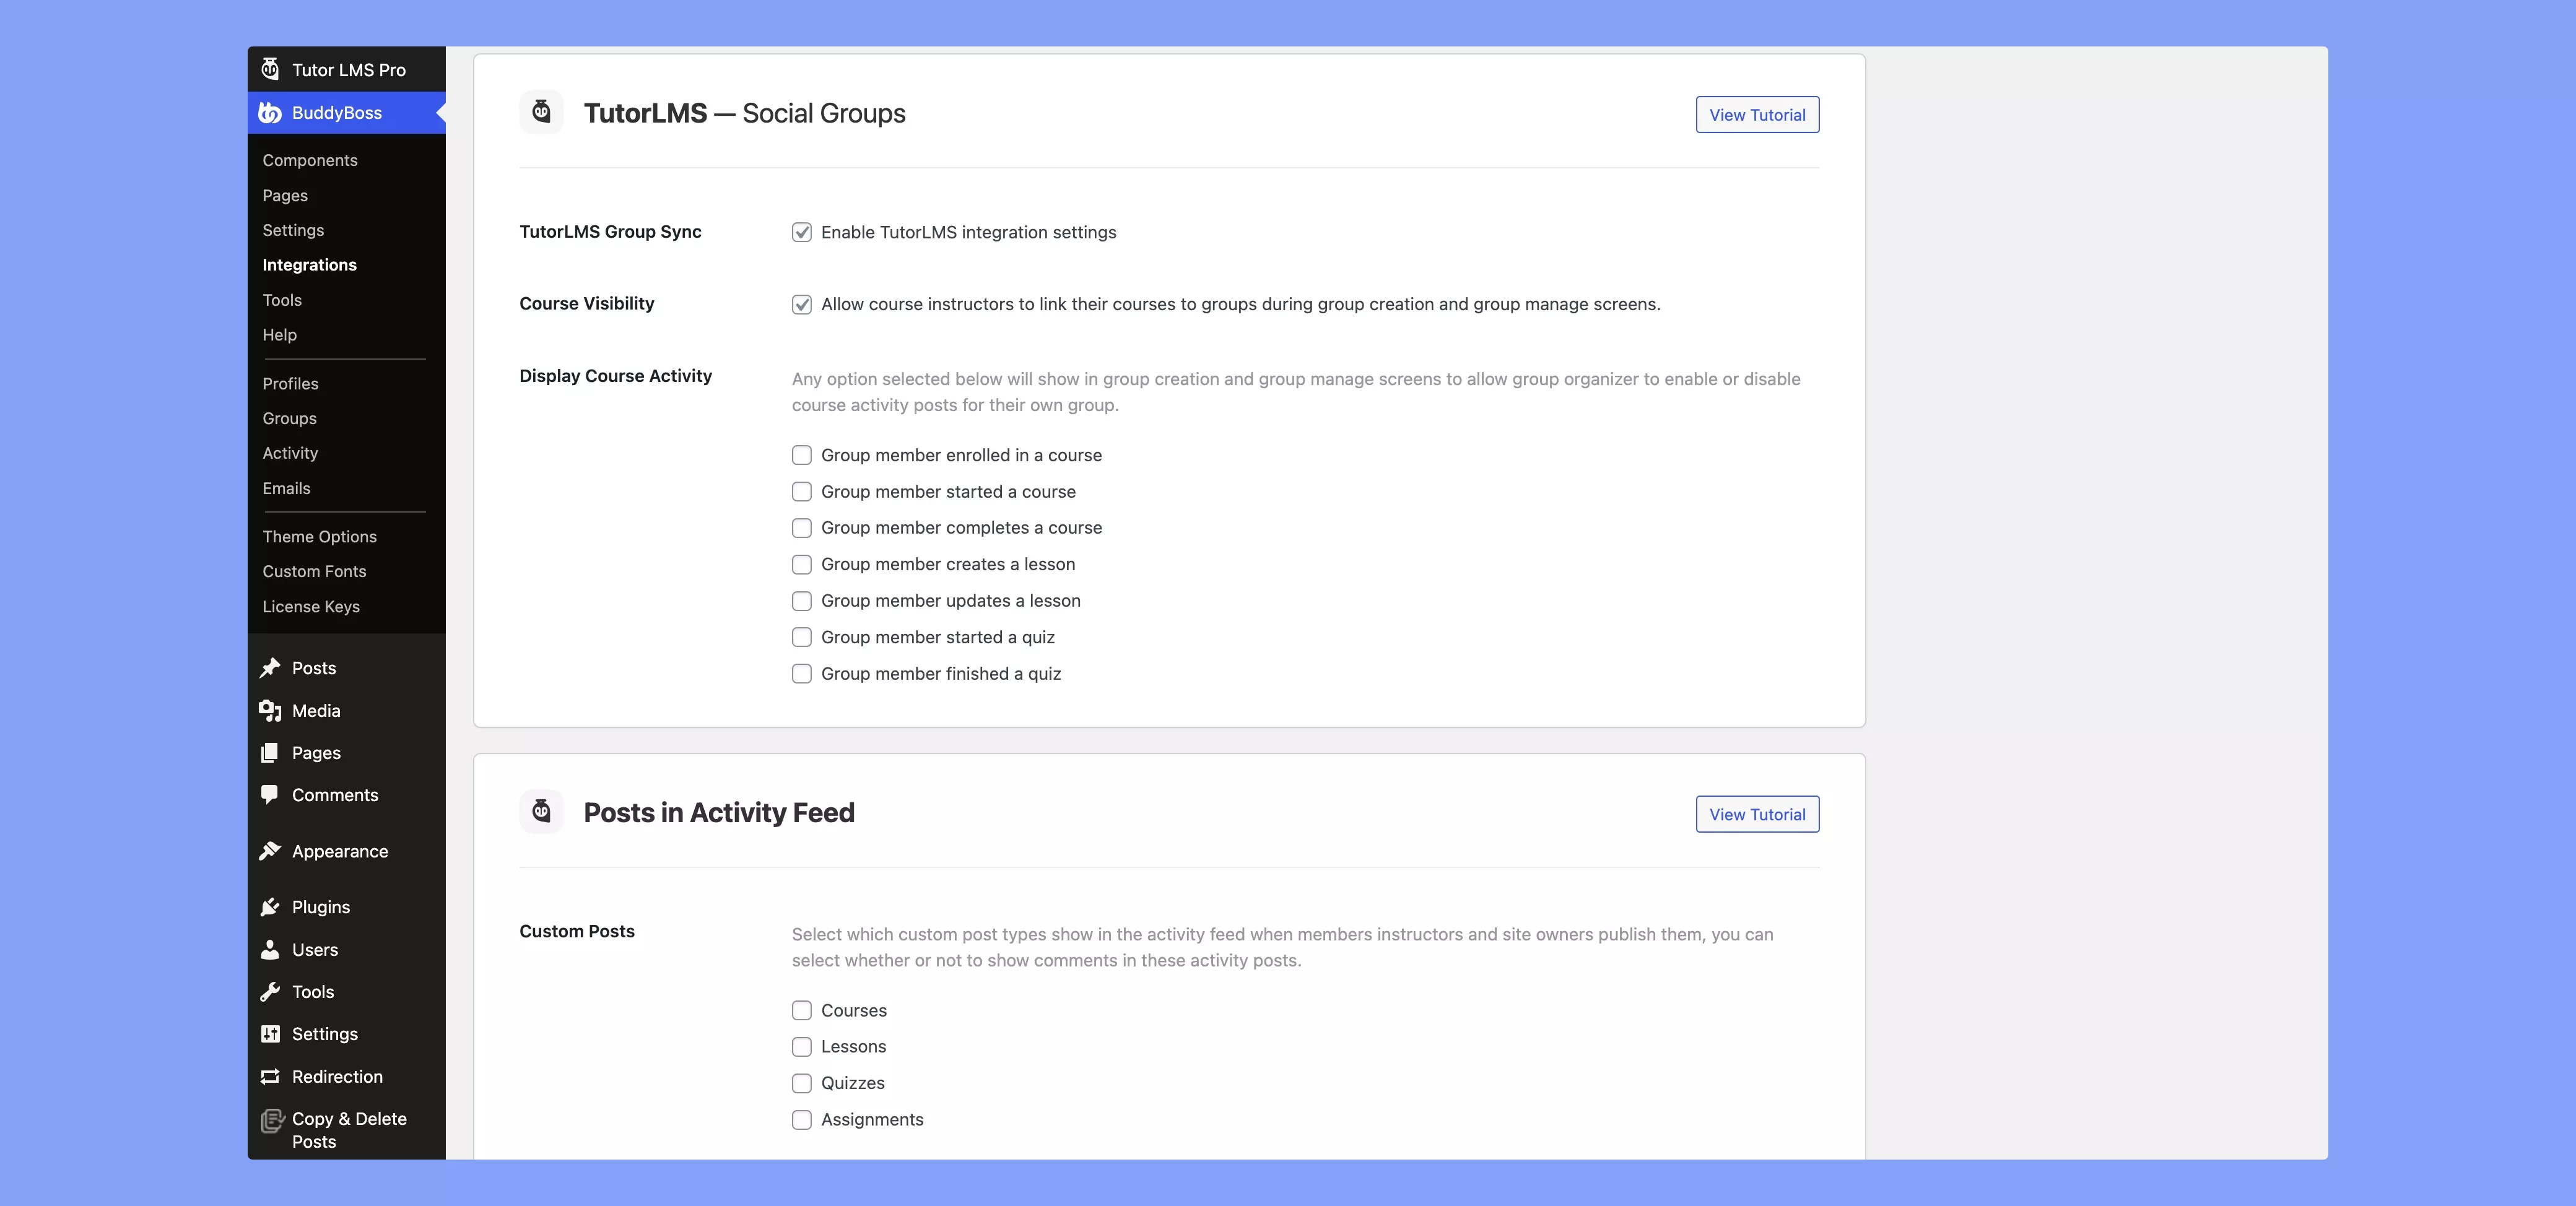
After you enable the integration, you can configure more settings within the BuddyBoss integrations tab. You can opt-in to allow instructors to link courses to groups as they are creating groups with BuddyBoss. You can also configure global course activity options for groups, but these can be changed during group creation and management.
To make the most of this integration we also need to install and activate the BuddyBoss theme. This will give Tutor LMS a change in appearance with the BuddBoss styling on the front end.
Creating a Group With Buddyboss
So with our integration all set up let us see how we can use BuddyBoss and Tutor LMS to promote social learning. BuddyBoss’s social platform needs no introduction. Now with Tutor LMS being integrated we can have social groups for courses and foster a sense of community with our students/instructors without hassle.
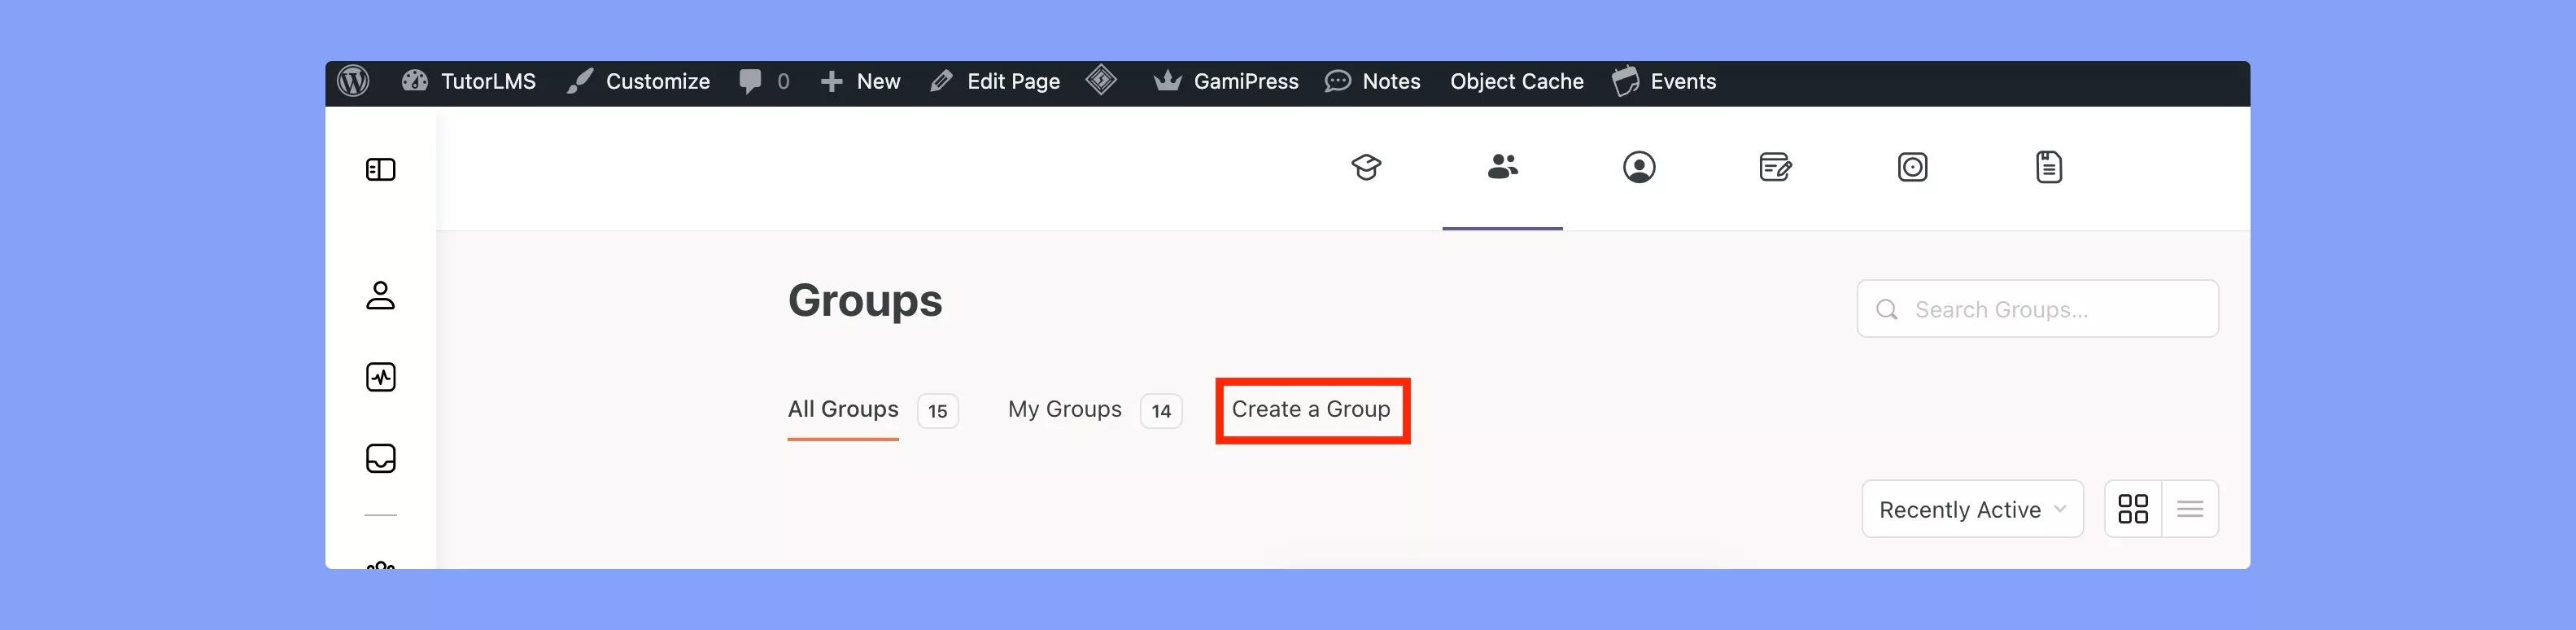
To start, we need to create a Group with BuddyBoss and attach it to a course in Tutor LMS. Navigate to the frontend and find the groups tab, go to the group tab, and click on Create a Group.
You will then be brought to this group creation journey.
Step 1: Set a Name for your group and add a Description to explain what purpose the group serves concerning the courses it’s associated with.
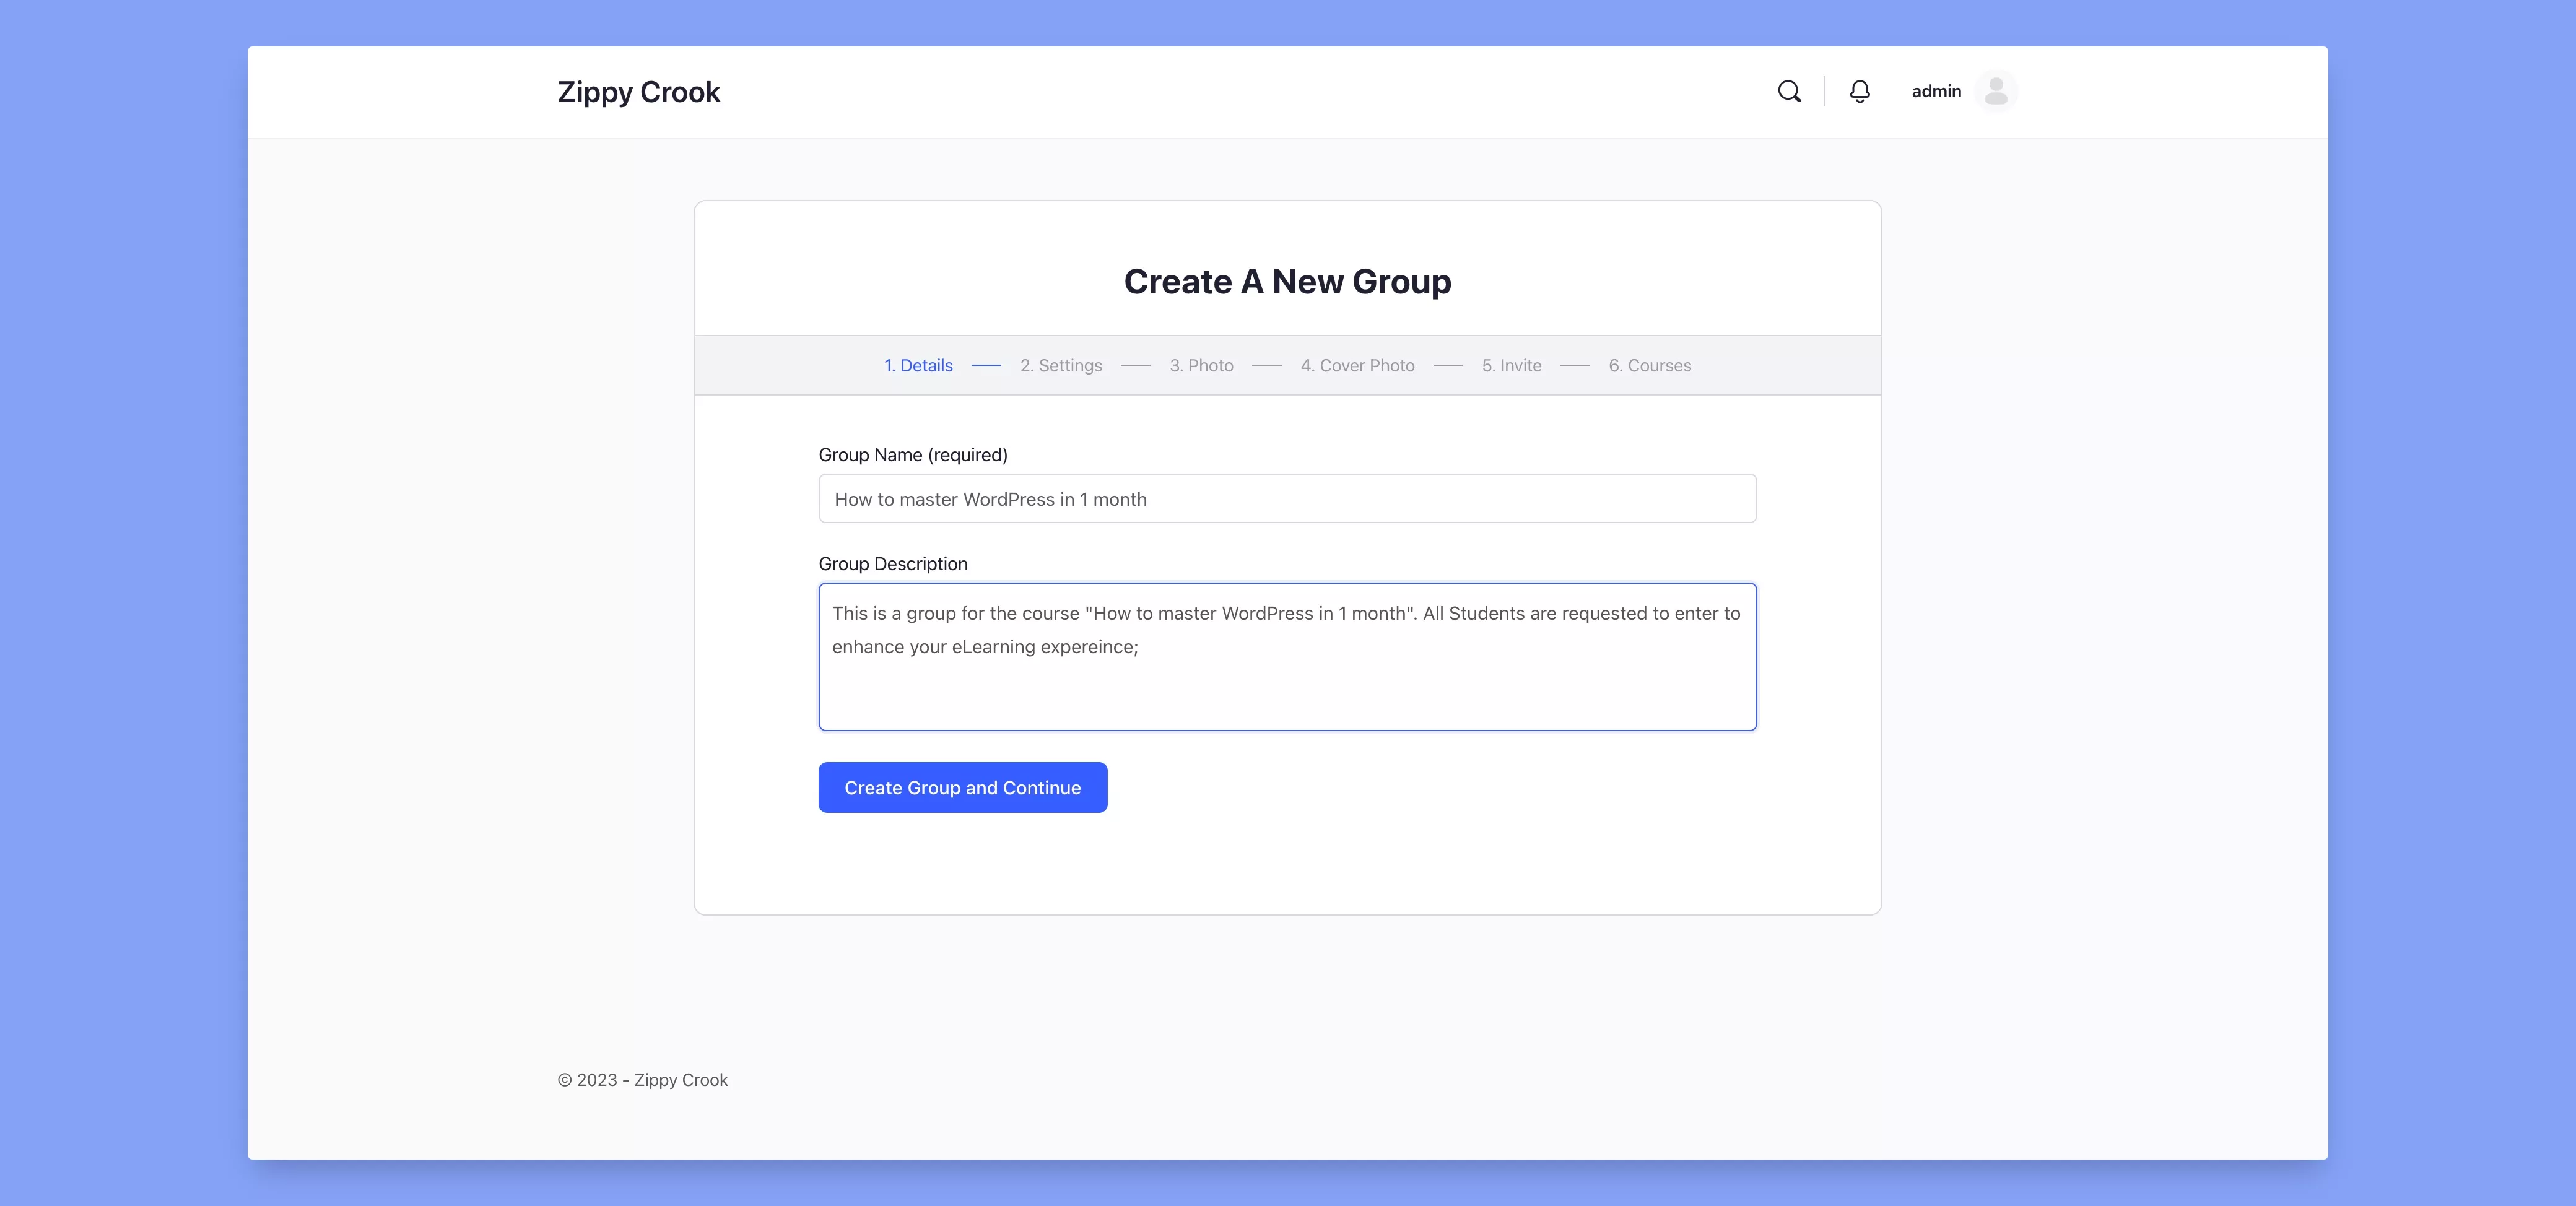
So, if your group is meant to be a place where students and instructors can get to know one another and create a community, mention that in the description. Alternatively, your group could be only restricted to course-based activities/discussions, specifying the details helps create a more helpful group.
Once you’re done click Create Group and Continue.
Step 2: Set the privacy options for the group depending on how you want the visibility to be.
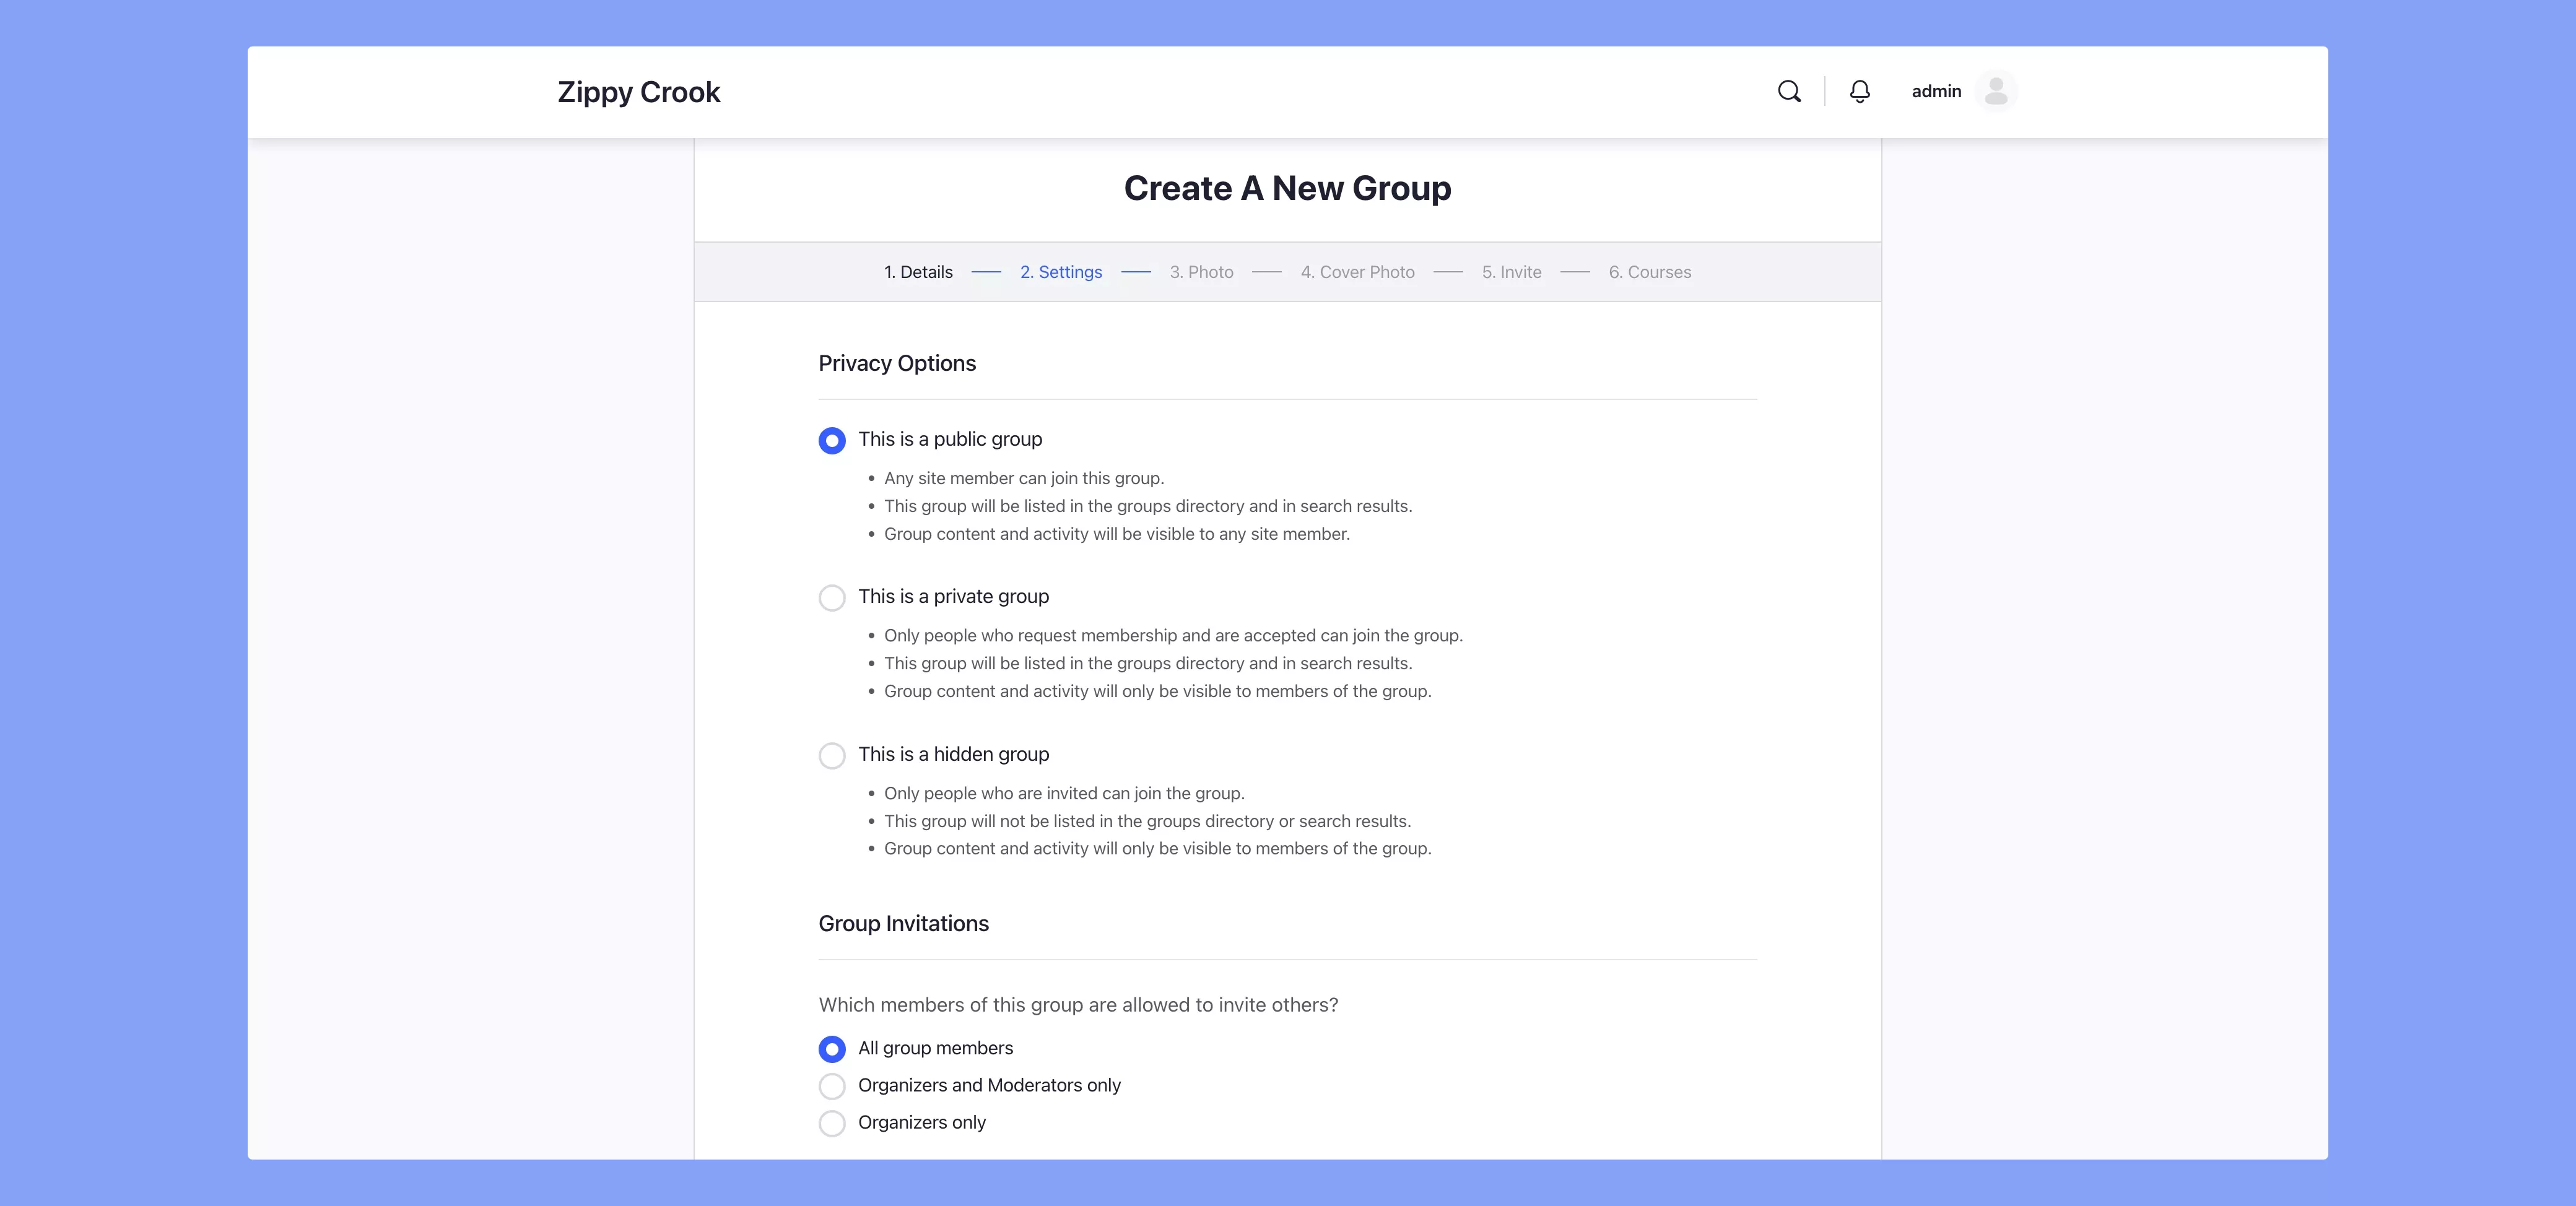
It can be open for all, private to member requests, or an invite-only group. It all comes down to once again, the purpose your group is meant to serve.
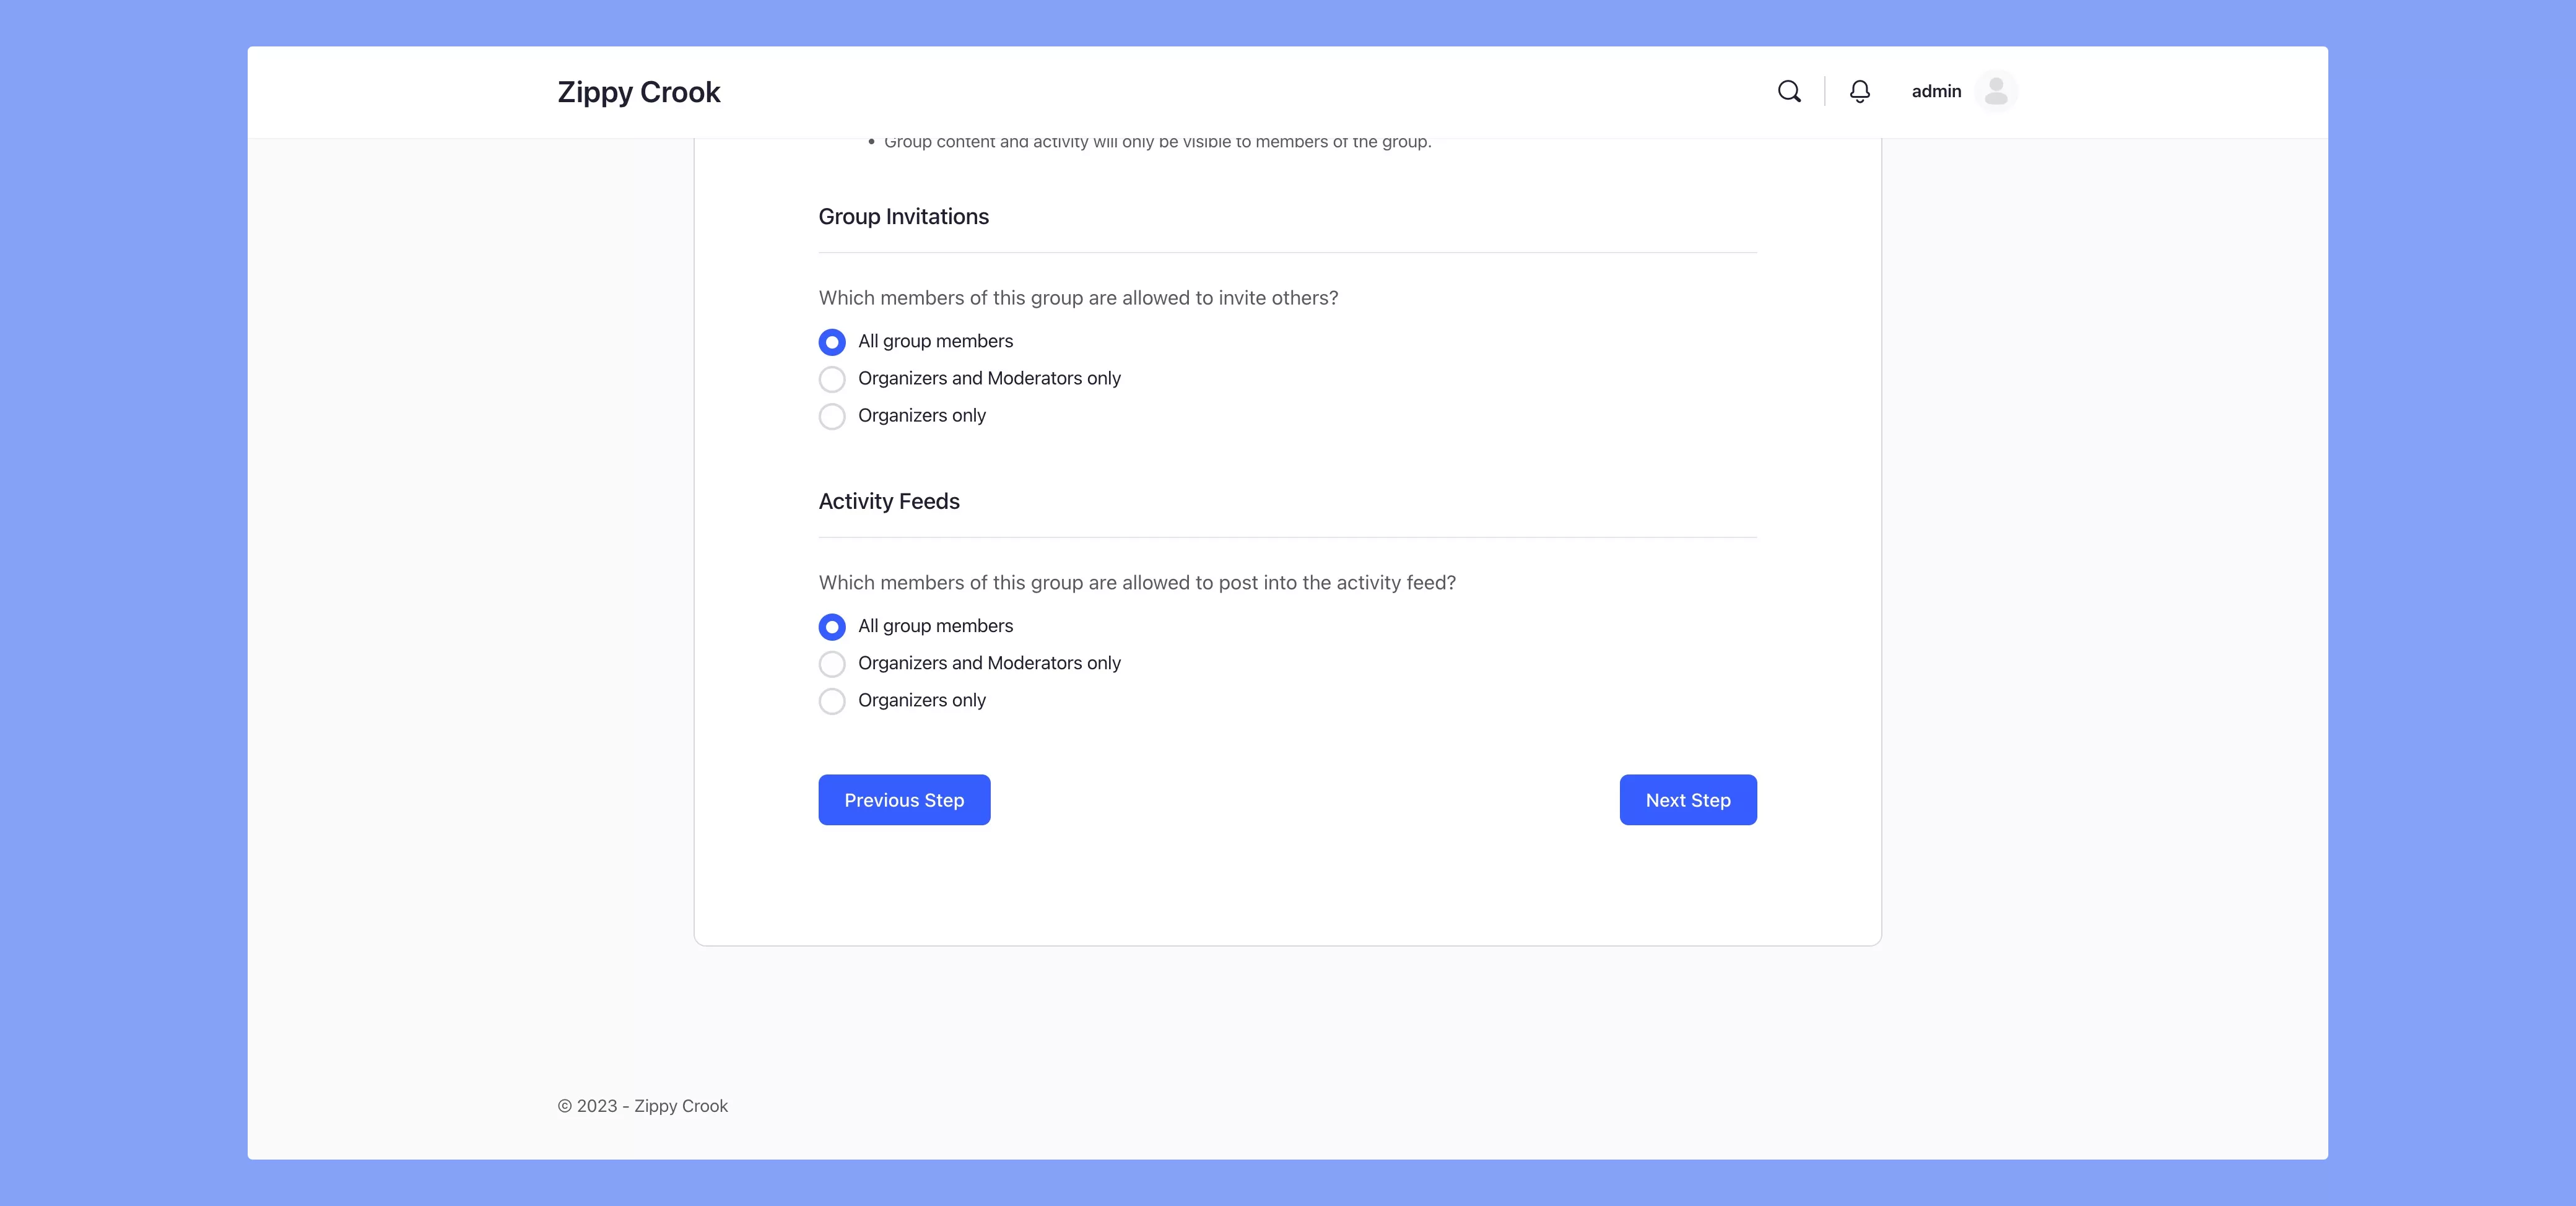
You can then configure Group invitation permissions and Activity feed permissions. Once done with all this click Next Step.
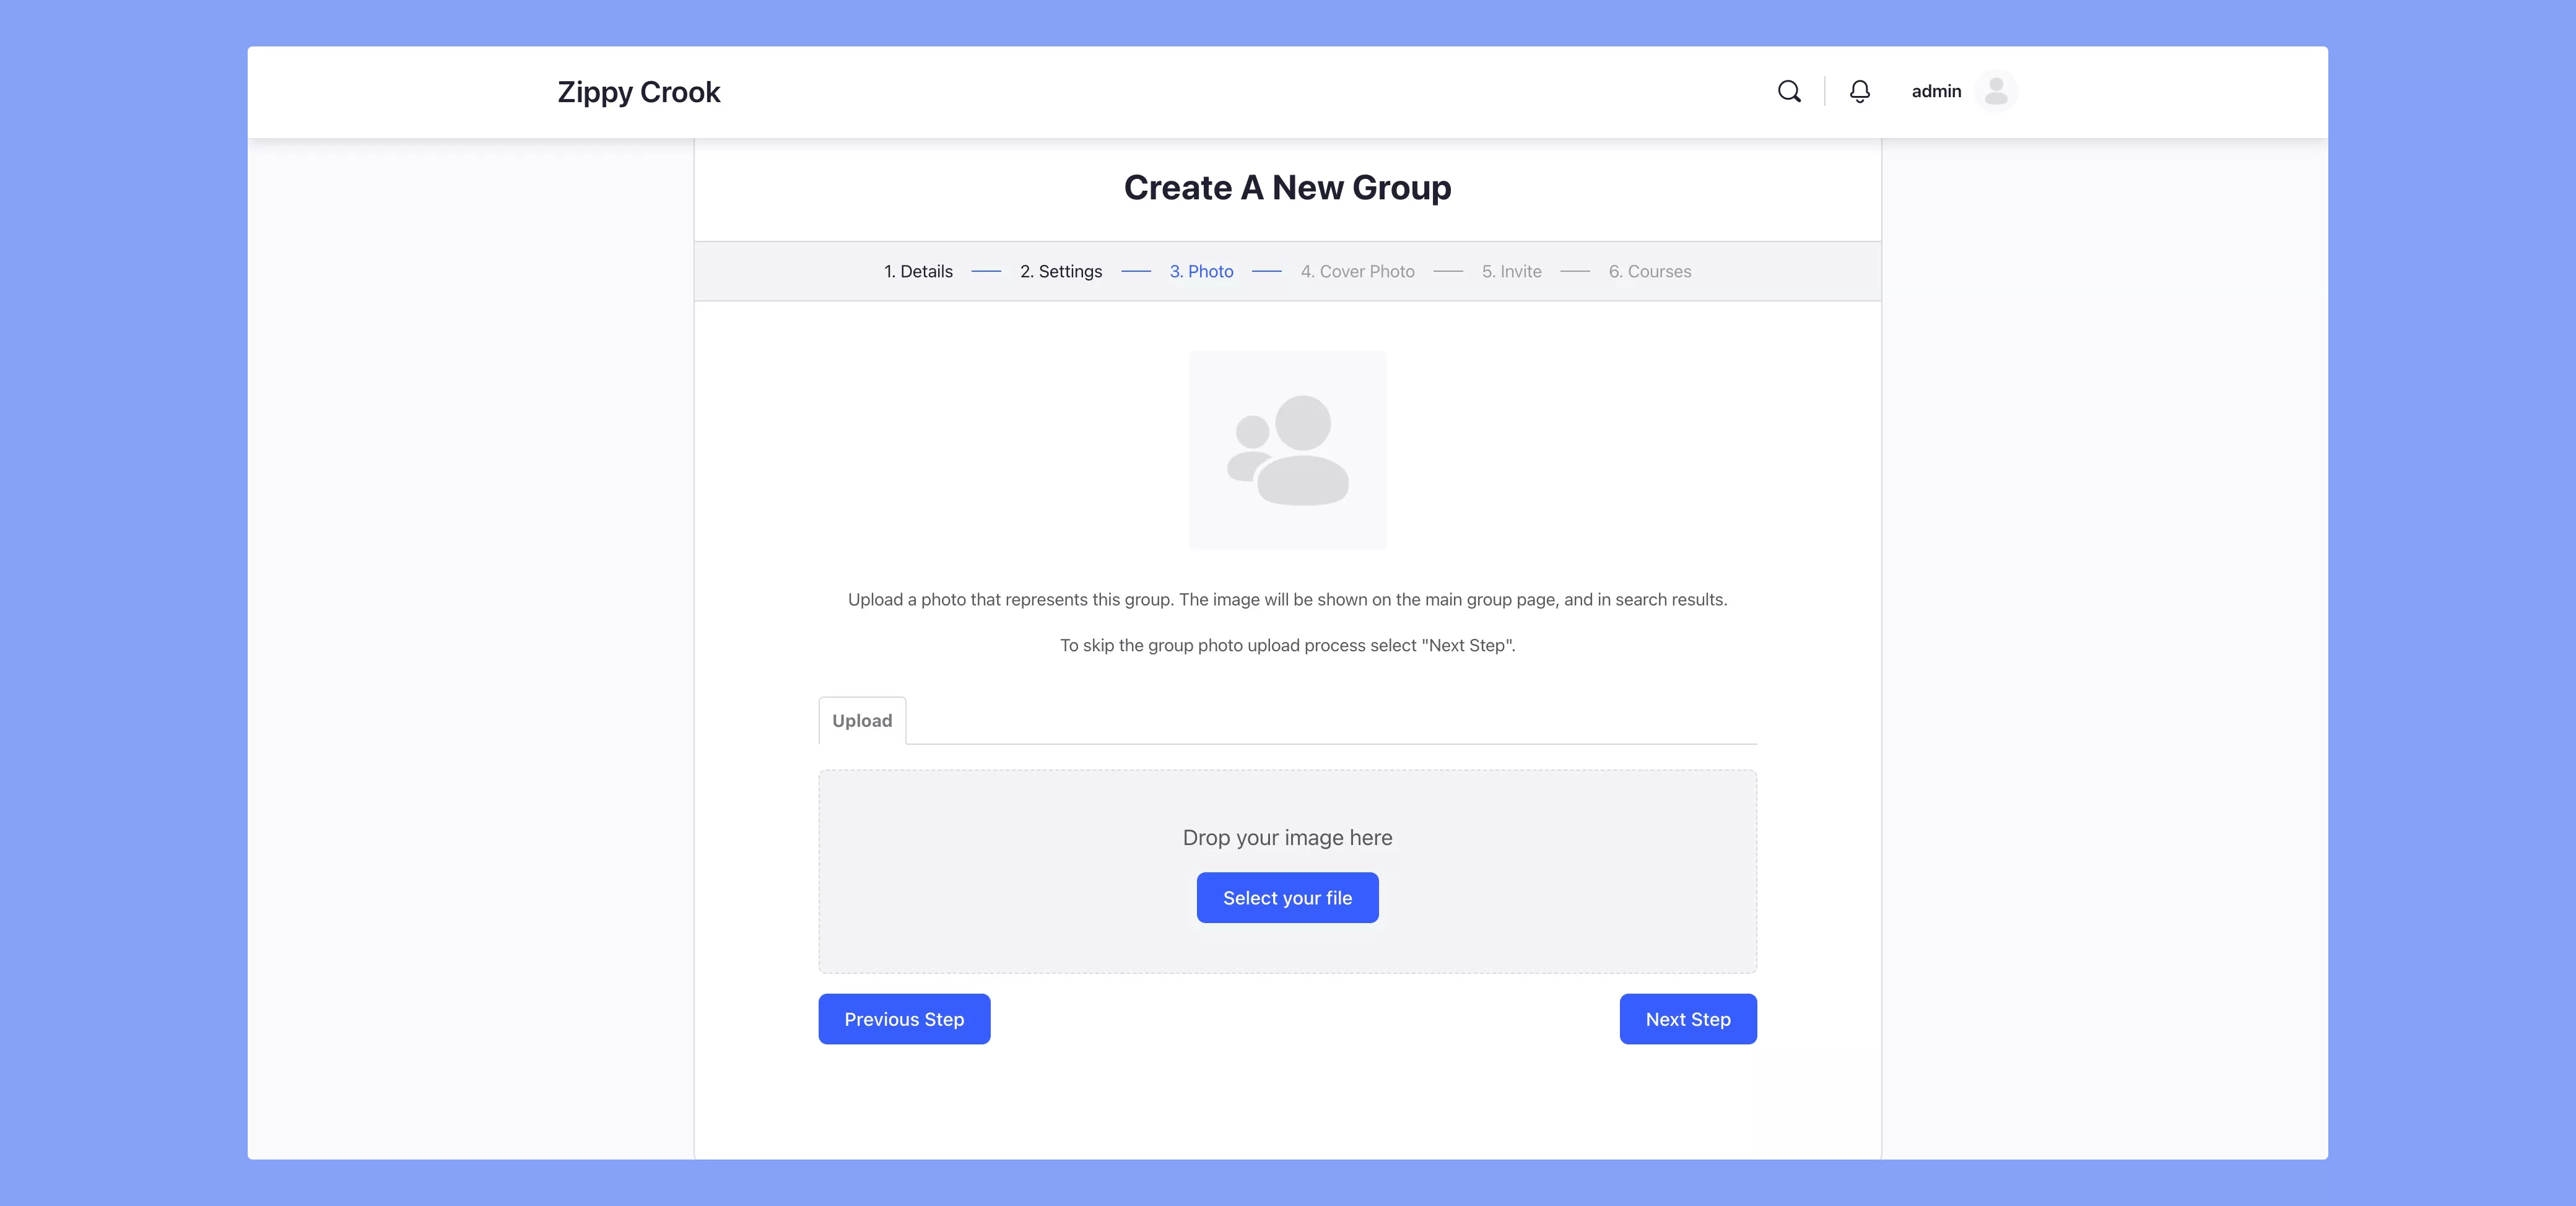
Step 3: Upload an image for your group. Make it attractive and appealing for students to promote courses further on your site. And right after that, you can upload a cover photo for the group as well.
The group photo and cover photo should complement one another well to make the group look most attractive.
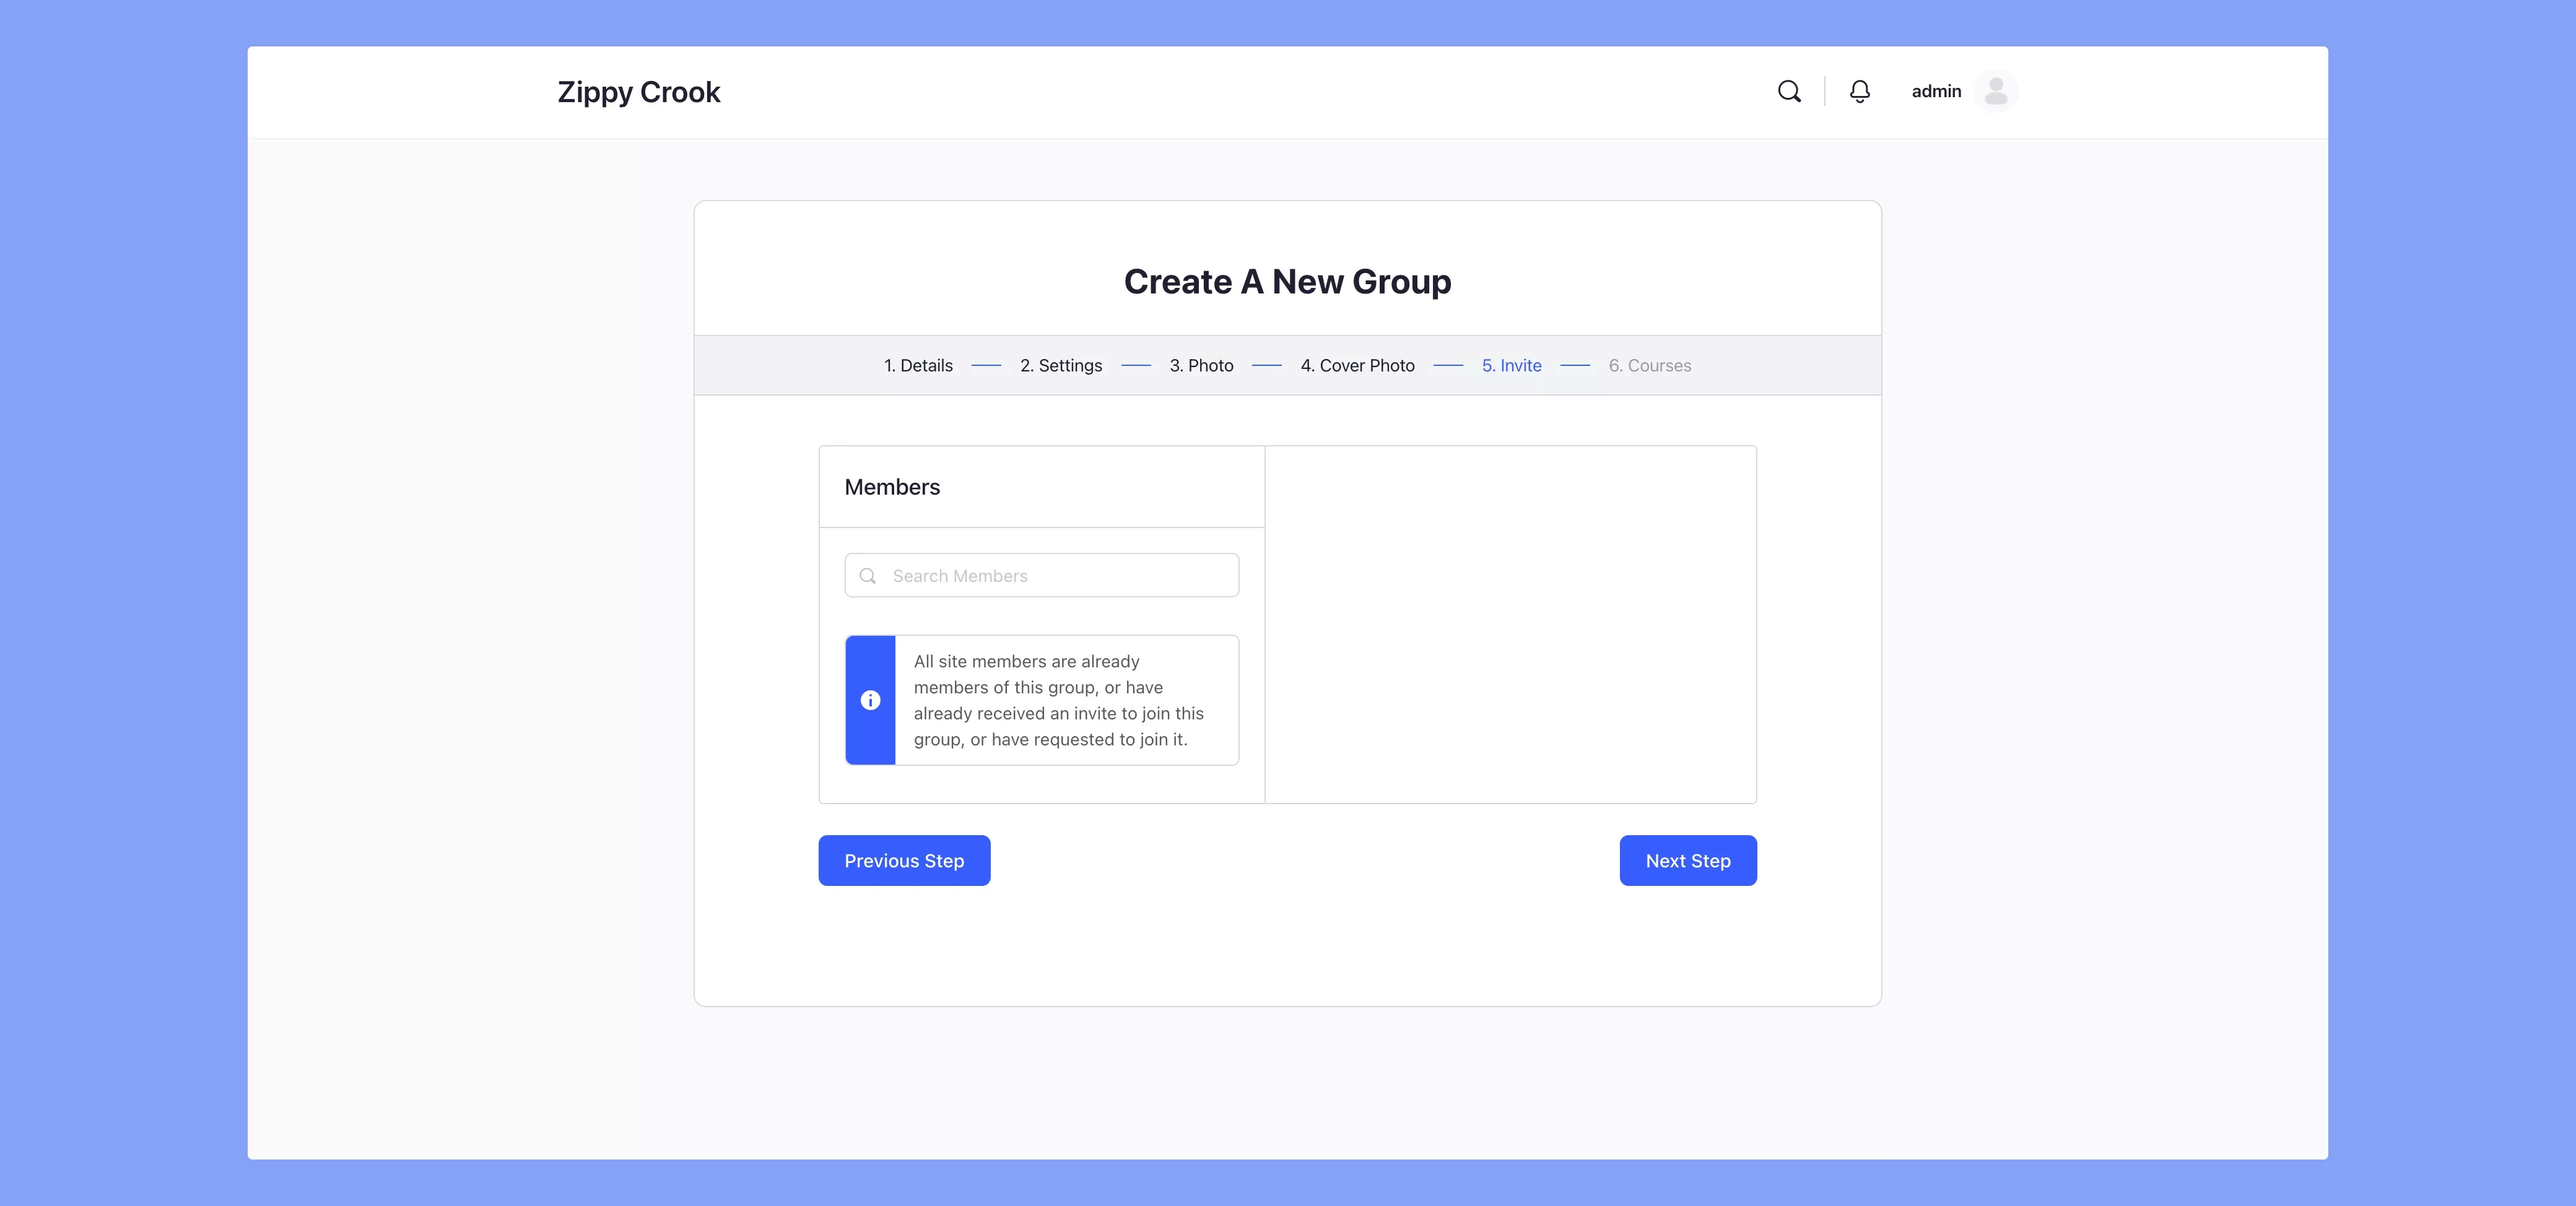
Step 4: In the next step you can select and add members to your group. Go ahead and add the members that are relevant to the courses for which you are creating the group.
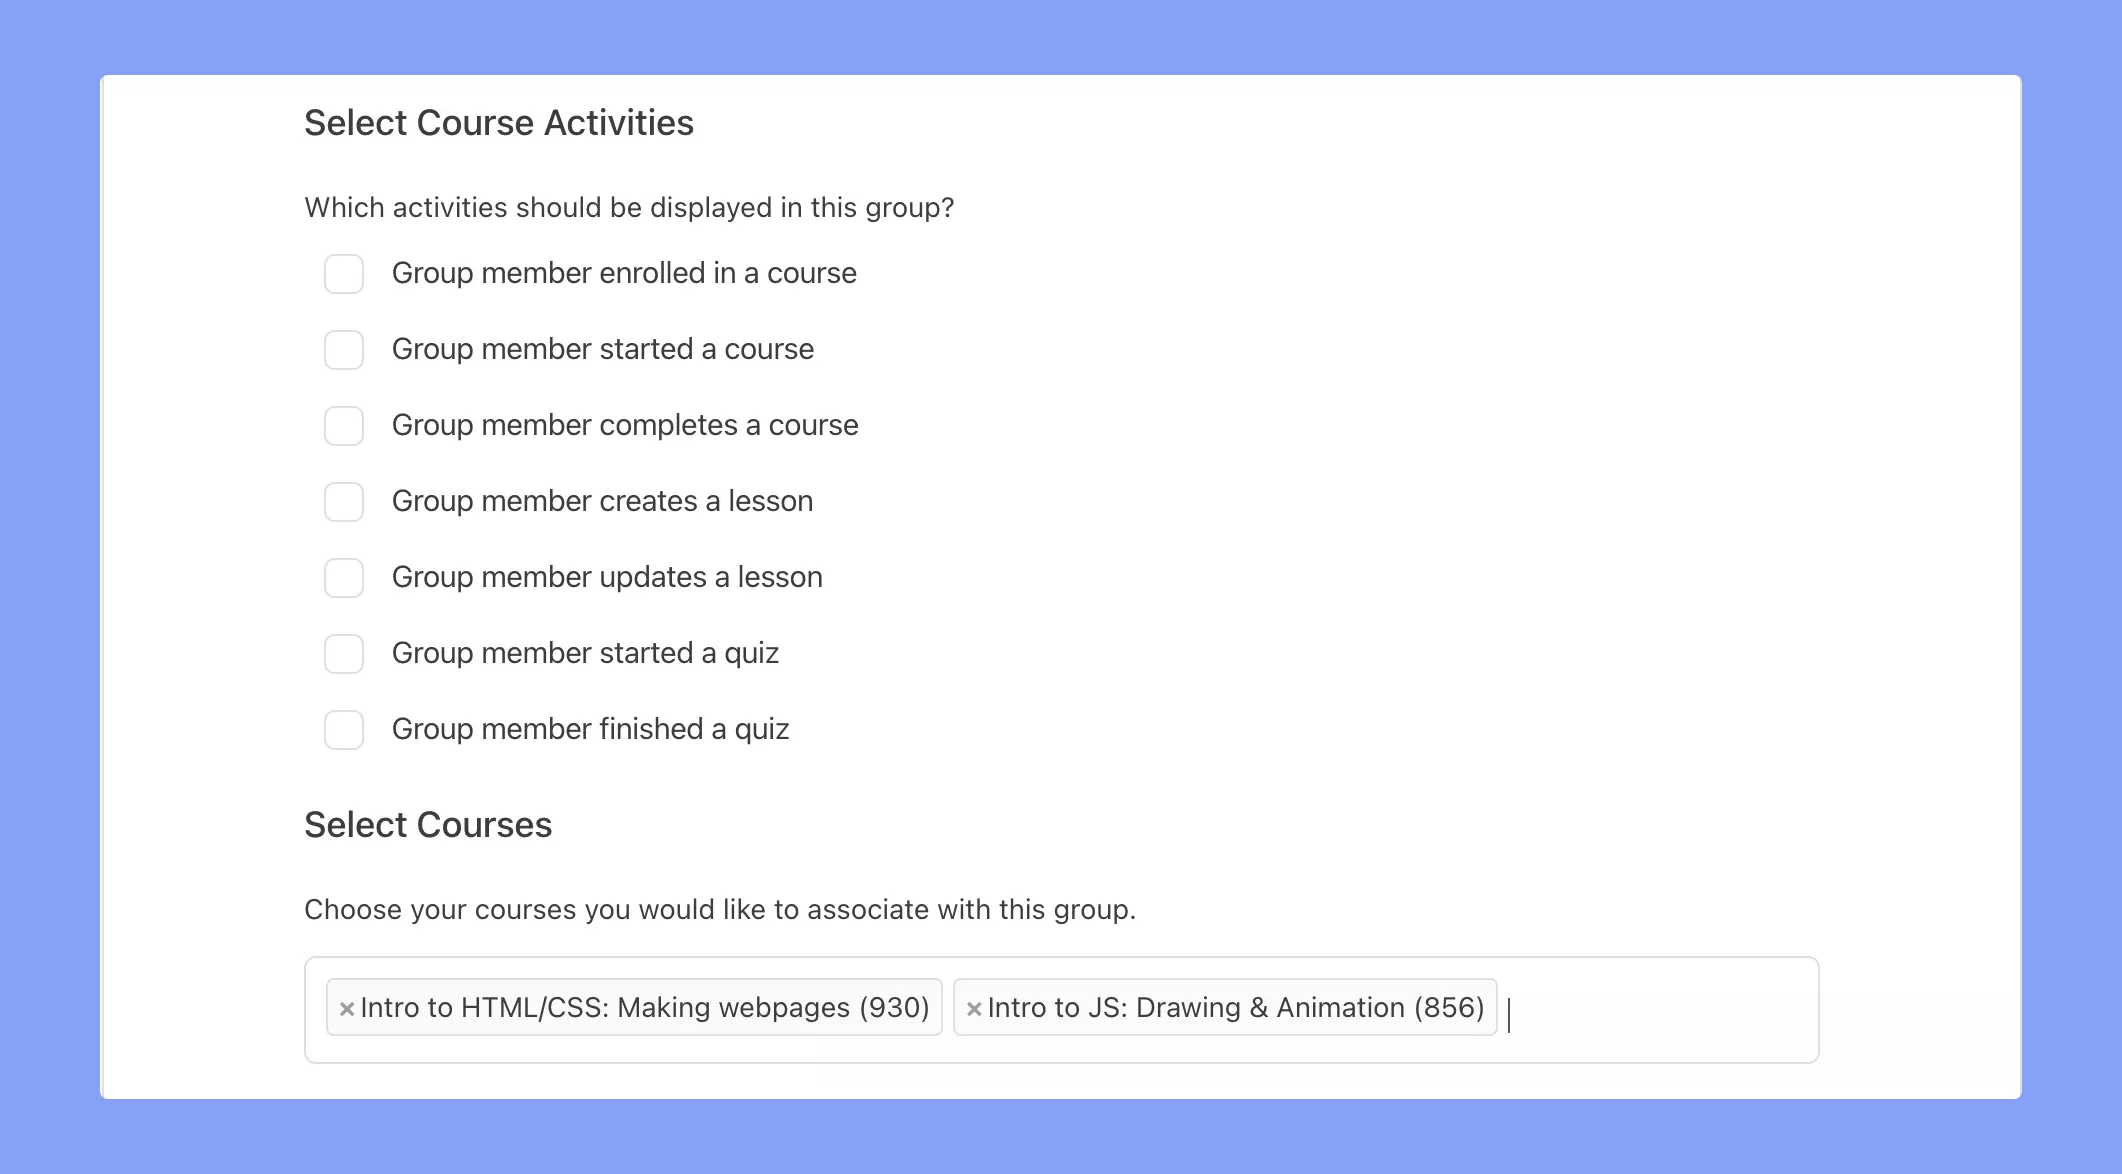
Step 5: Click on the check box to be able to add courses to your group. Once you enable this you will be able to attach courses to a group and any course-related activity will be posted in the group.
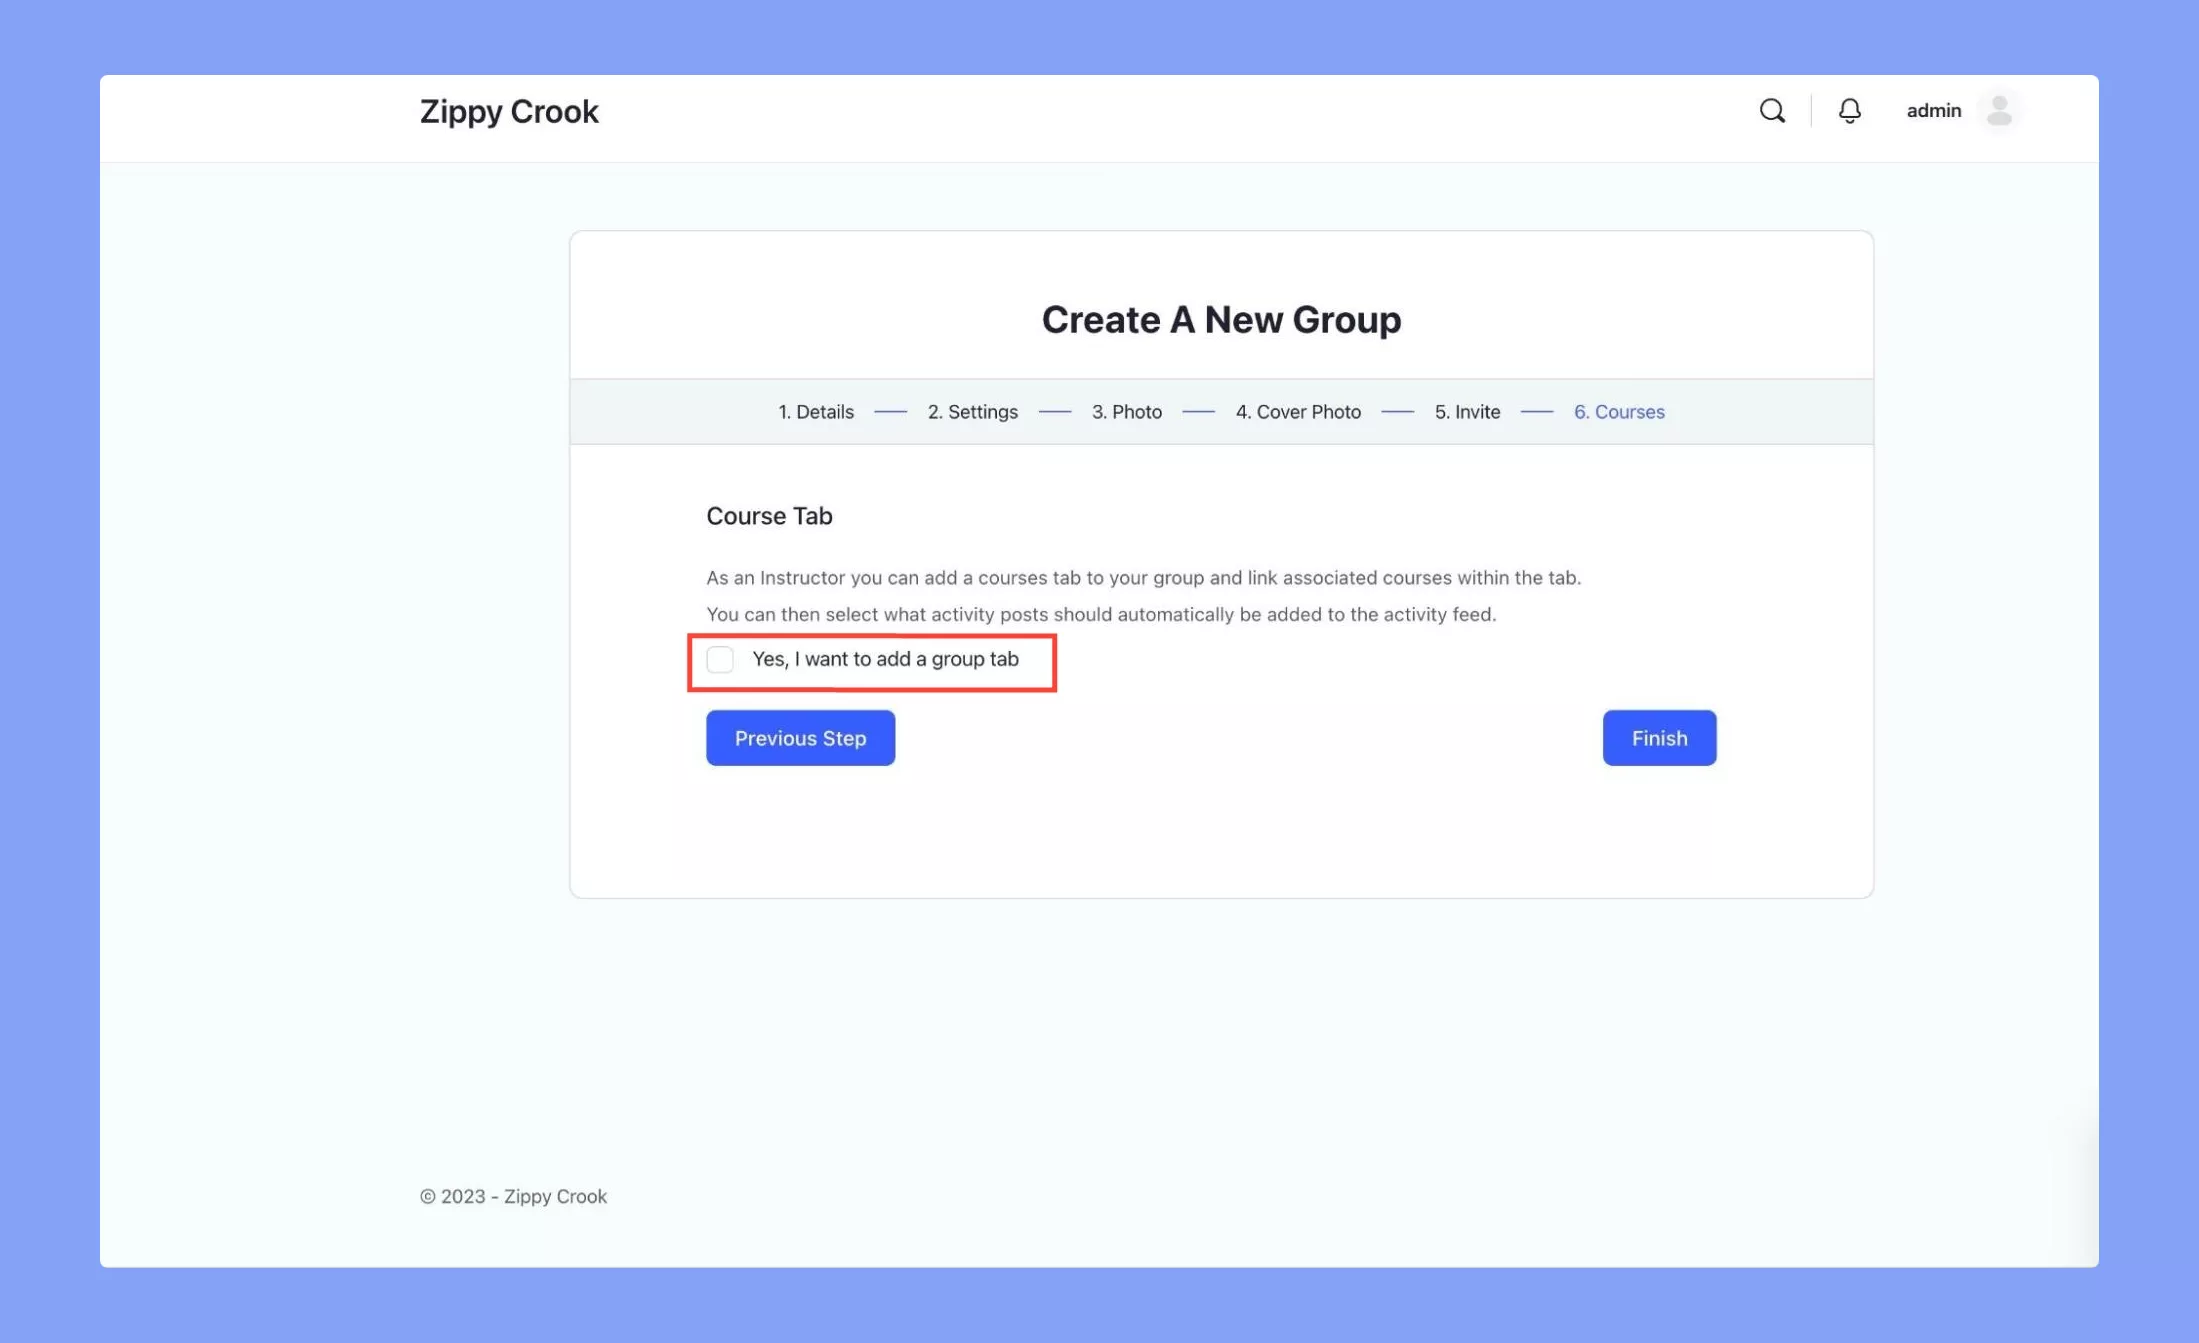
These are the new boxes with options you can configure depending on your group’s use case. You can attach multiple courses to the group you are creating.
After all this just go ahead and click on Finish and the group will be created. With that, we are done with our group creation.
Promote Social Learning With BuddyBoss Groups
Now that we have a group created with the BuddyBoss-Tutor LMS integration we can sort of see where the social learning aspect would come in. In the process of creating the group, we had options to show activities in our groups.
These consisted of a group member starting and finishing a quiz, among many others. For this particular example, we can encourage new students to promptly finish course material following their peers. Watching fellow students complete quizzes/lessons can create a spirit of competition among students. This will create a ripple effect and increase participation in courses creating more turnover.
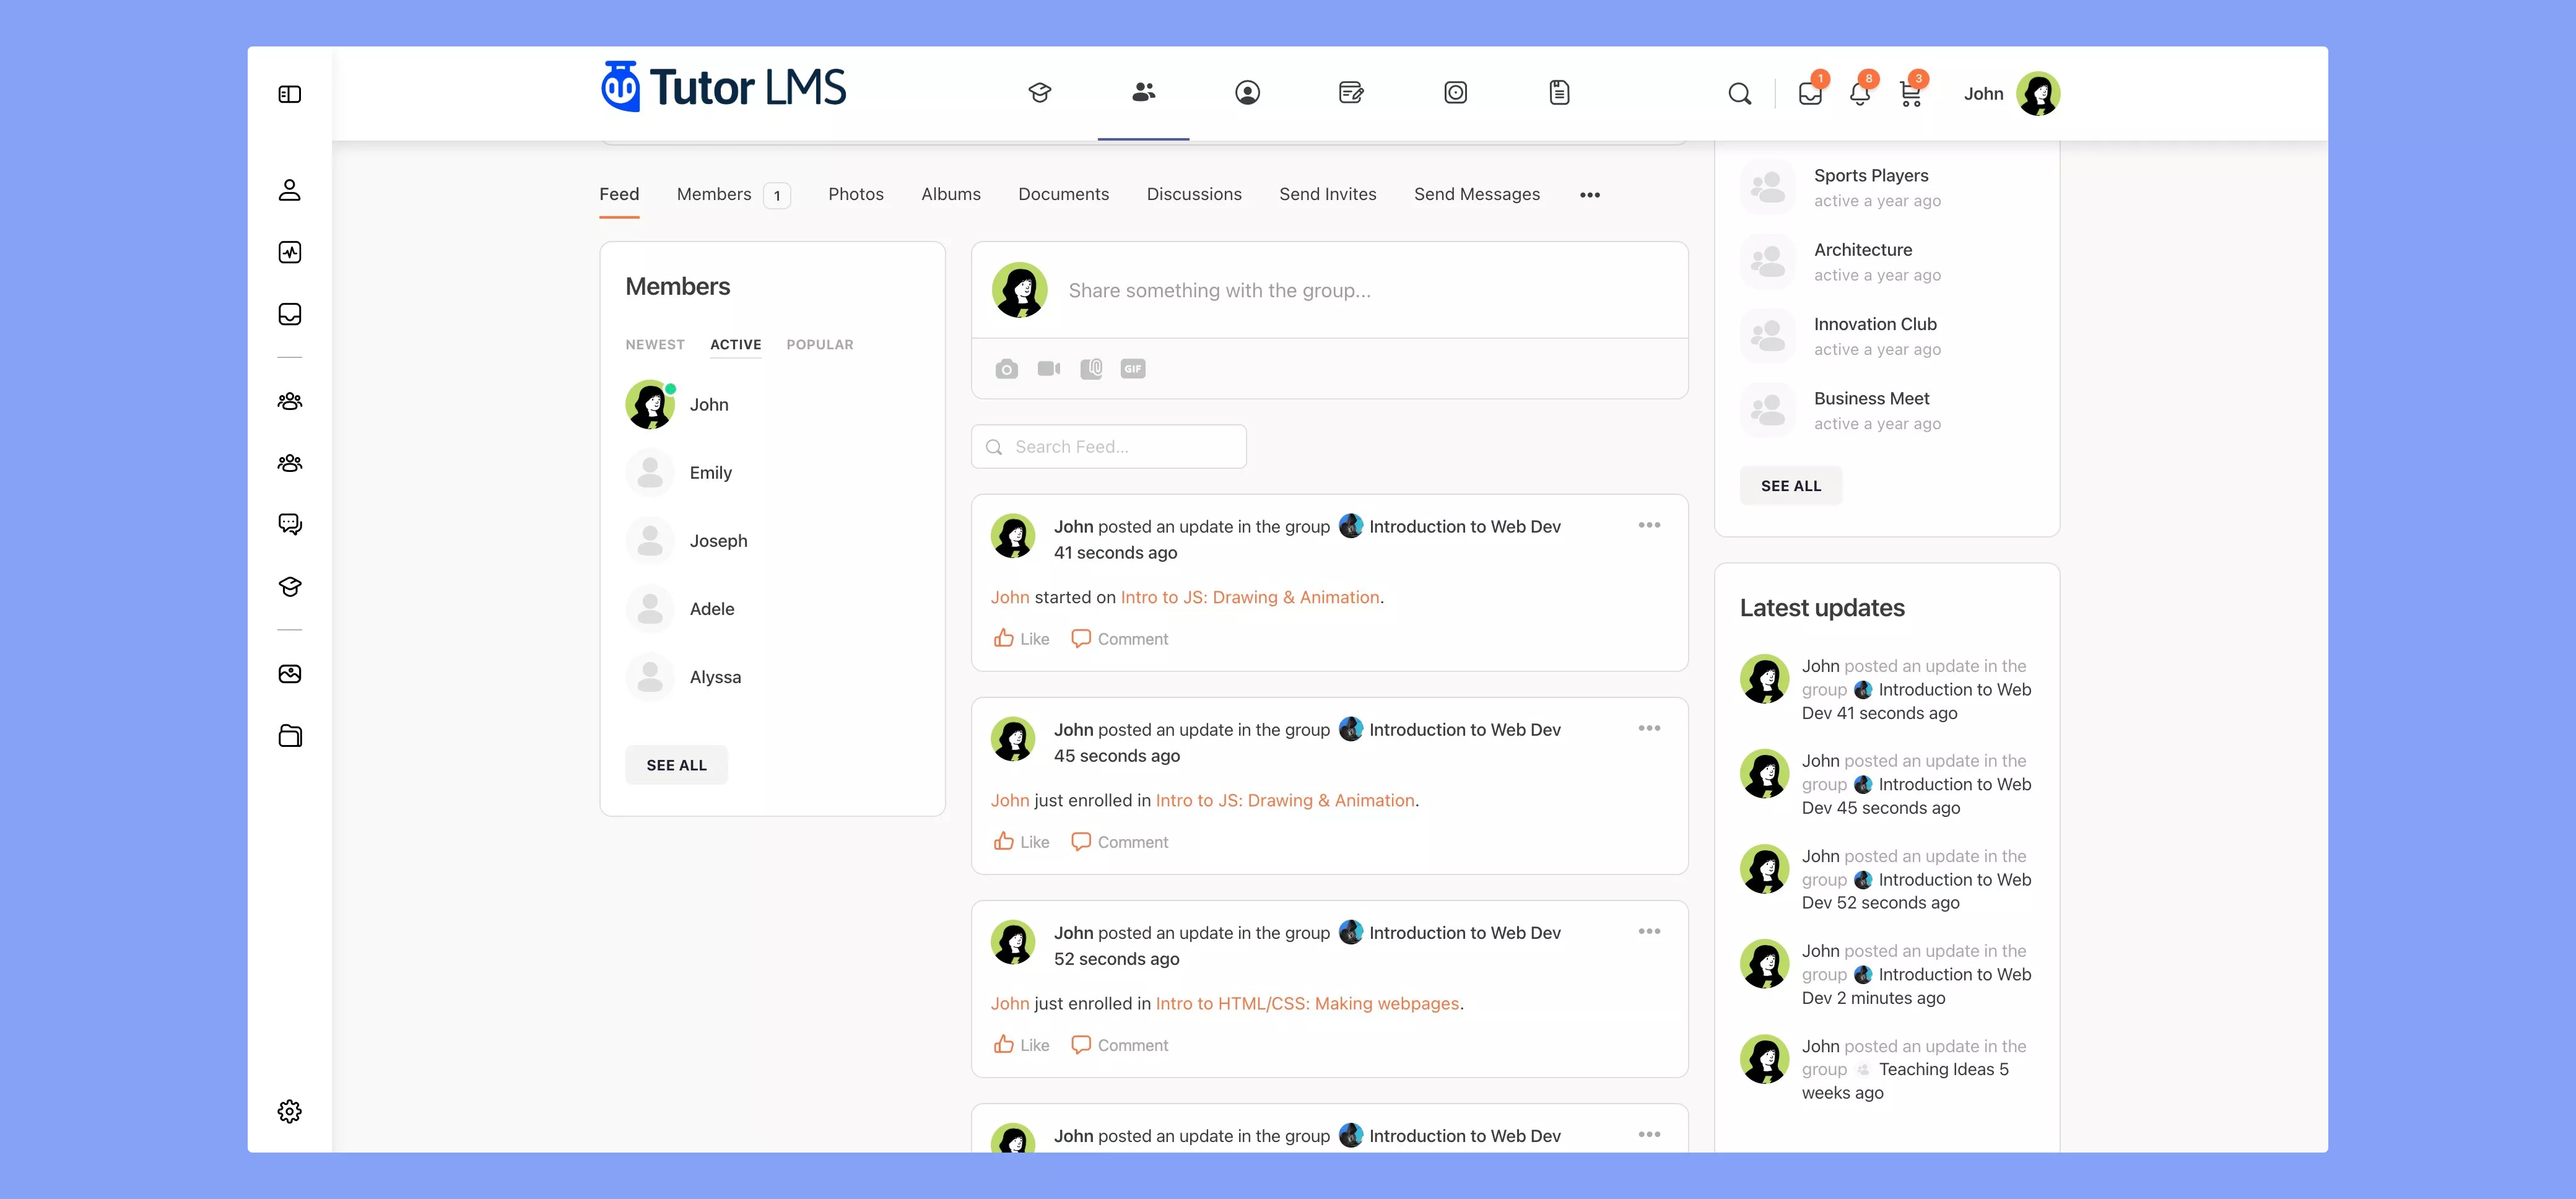
Every new activity will be highlighted in the group you have. Students and other instructors can be aligned with new updates to courses or even all new course releases. This will even help sales for upcoming courses as students see peers joining in new courses creating a sense of FOMO.
Engagement and reach will also be maximized as well when groups are showcasing little details and updates about courses. Along with the automatic updates on the groups, you can also create polls, discussion posts, or feedback posts to encourage participation and engagement from students. Fostering a sense of community among students on your eLearning site will surely solidify your site as one to come back to.
Wrapping Up
This integration brings the intuitive and easy course building of Tutor LMS with the community building of BuddyBoss for an amazing eLearning experience for students and instructors. You can take your already incredible site and elevate it to new heights now with BuddyBoss. Check out BuddyBoss’s article on the integration.
The incredible features of Tutor LMS are as is with this integration. Frontend course creation, Multi-instructor support, and varied quiz creation are all still there but now with all new community creation features from BuddyBoss. So why wait?
Activate the Integration with BuddyBoss and Tutor LMS today and let us know how it helps your eLearning business grow to new heights. Happy eLearning!


Oscar Lindeberg
Great! How do you add a private course to a group?
Mac
Sounds great, now |I wonder does this allow Tutor LMS to work offline?