
Email is already one of the primary communication channels in the eLearning industry. It is a hyper-personalized communication channel that helps the eLearning platform admin, instructor, and students stay connected.
While the platform’s admin can get notified when a student completes a course, instructors can notify the students after they have graded an assignment. And to achieve this, Tutor LMS offers a powerful email notification tool that lets you guide your student’s learning progress.
But if you want to grow your eLearning platform, you’ll need more than an email notification tool. So today, we want to introduce you to the Tutor LMS-FluentCRM Combo!
The FluentCRM team has just released FluentCRM 2.8.2 with a deep Tutor LMS integration. This version of FluentCRM offers a lot of Tutor LMS-specific features and in this article, we’ll show you exactly what’s possible.
So without further ado, let’s get into it!
Tutor LMS-FluentCRM: A Duo Made in Heaven!
Tutor LMS is built with user-friendliness in mind so anyone can build their eLearning platform quickly. FluentCRM is no different. The plugin is so easy to use that even beginners will find email marketing effortless. And for Tutor LMS users, FluentCRM’s deep Tutor LMS integration is the cherry on top!
Why?
Because this combo makes it easy to:
- Drive email signups with customizable forms
- Keep track of your students and get entire eLearning platform data at a glance
- Send customized branded emails to your leads and students
- Launch personalized email campaigns to promote new courses
- Automated student onboarding and nurturing
- Guide student’s learning progress with personalized emails
- Boost course sales by sending personalized course recommendations
- Provide course access to students automatically
Along with that, FluentCRM’s regular features will also let you keep your leads and students engaged by sending automated newsletters and recurring campaigns. Thus, it’s a duo made in heaven!
Now that you know what’s possible, let’s get into action.
Installing and Configuring FluentCRM
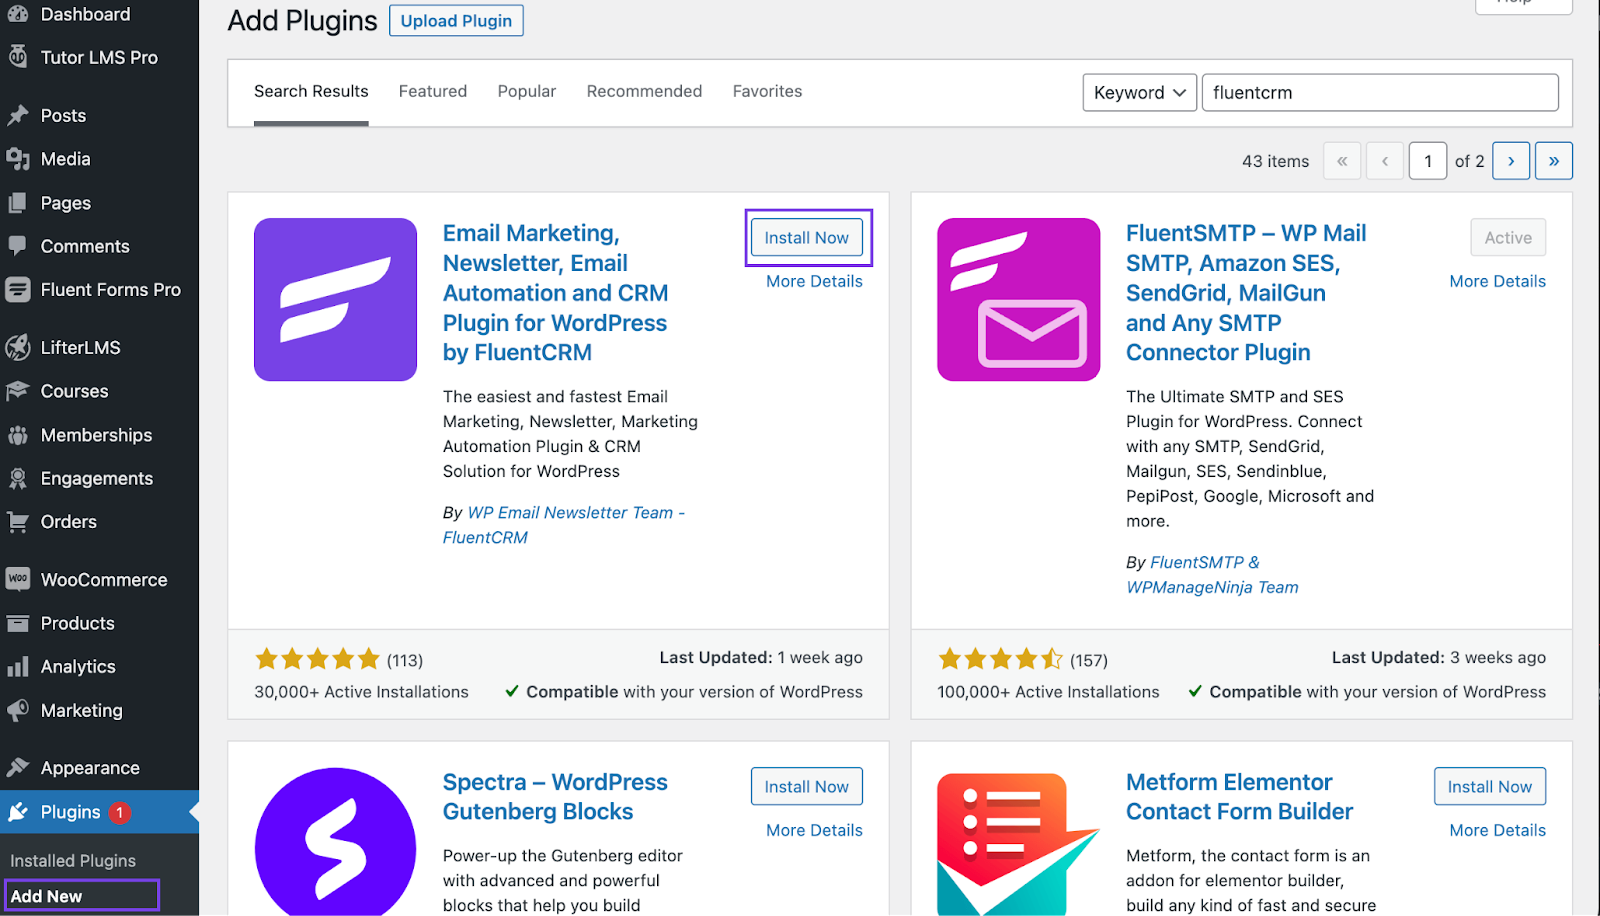
Installing FluentCRM is as easy as installing any other plugin. All you have to do is go to Plugins>Add New and search for FluentCRM and then install the plugin from there.
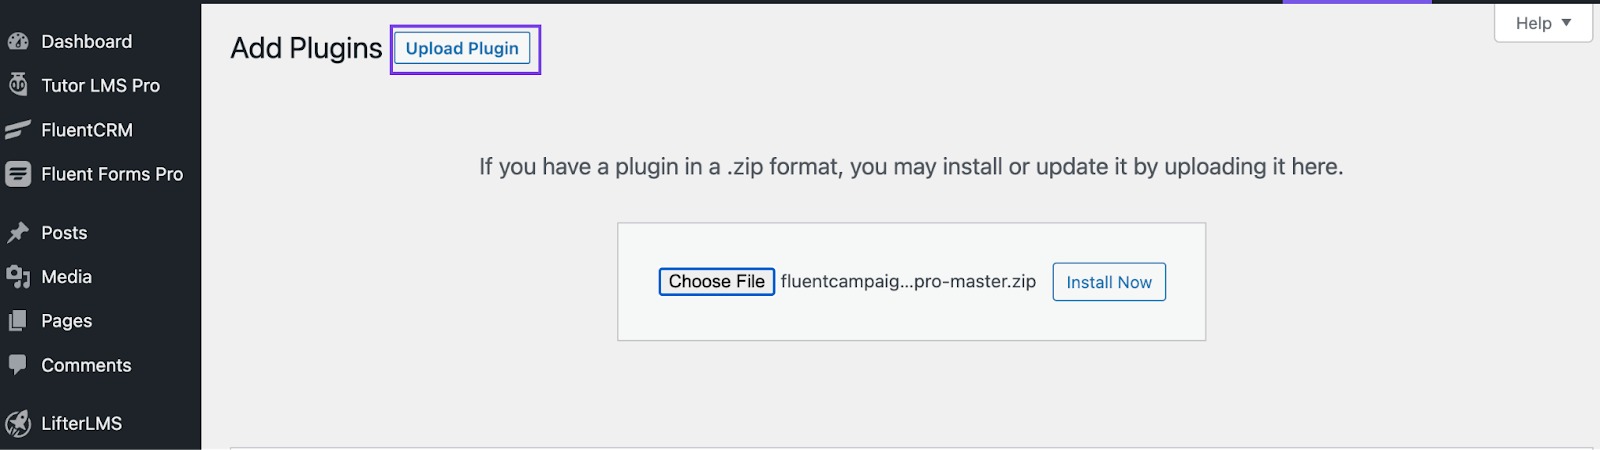
However, you’ll also need FluentCRM Pro to use Tutor LMS integration. Visit their website to buy FluentCRM Pro which will give you acess to the integration. After Purchasing you can download the Pro plugin from your account.
Once you have the Pro addon file, you can click the Upload Plugin button to upload and install FluentCRM Pro.
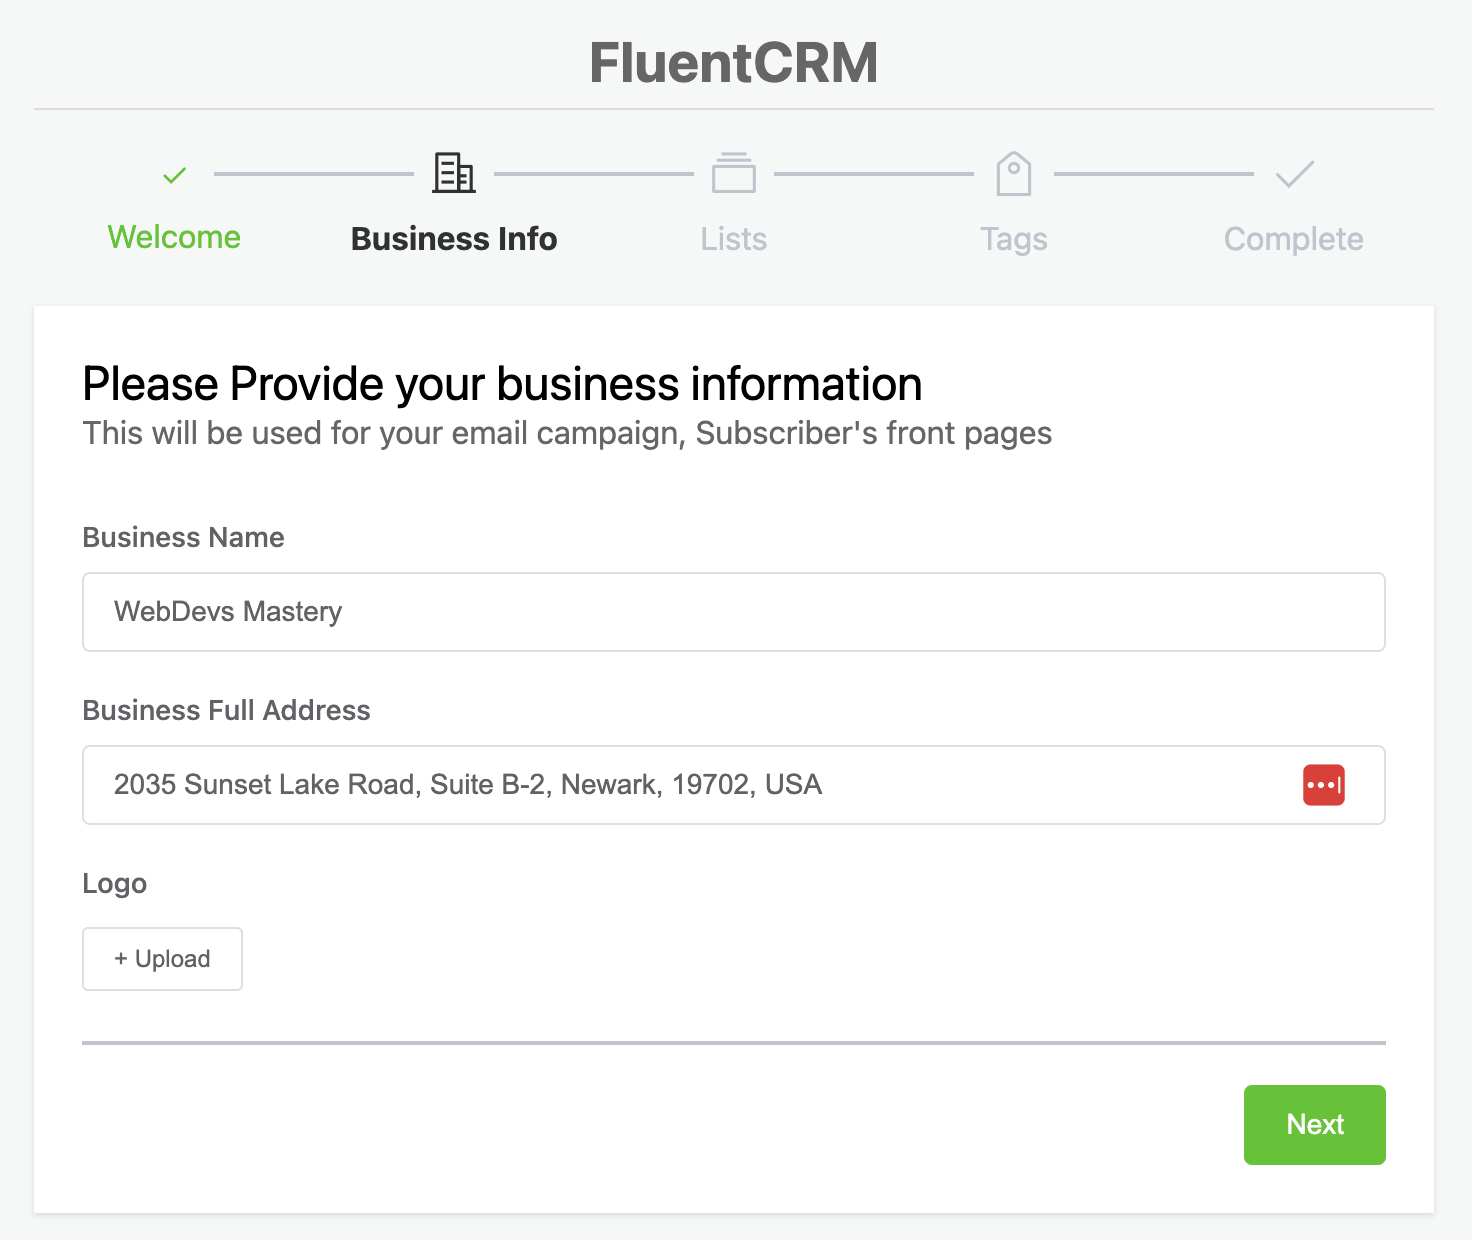
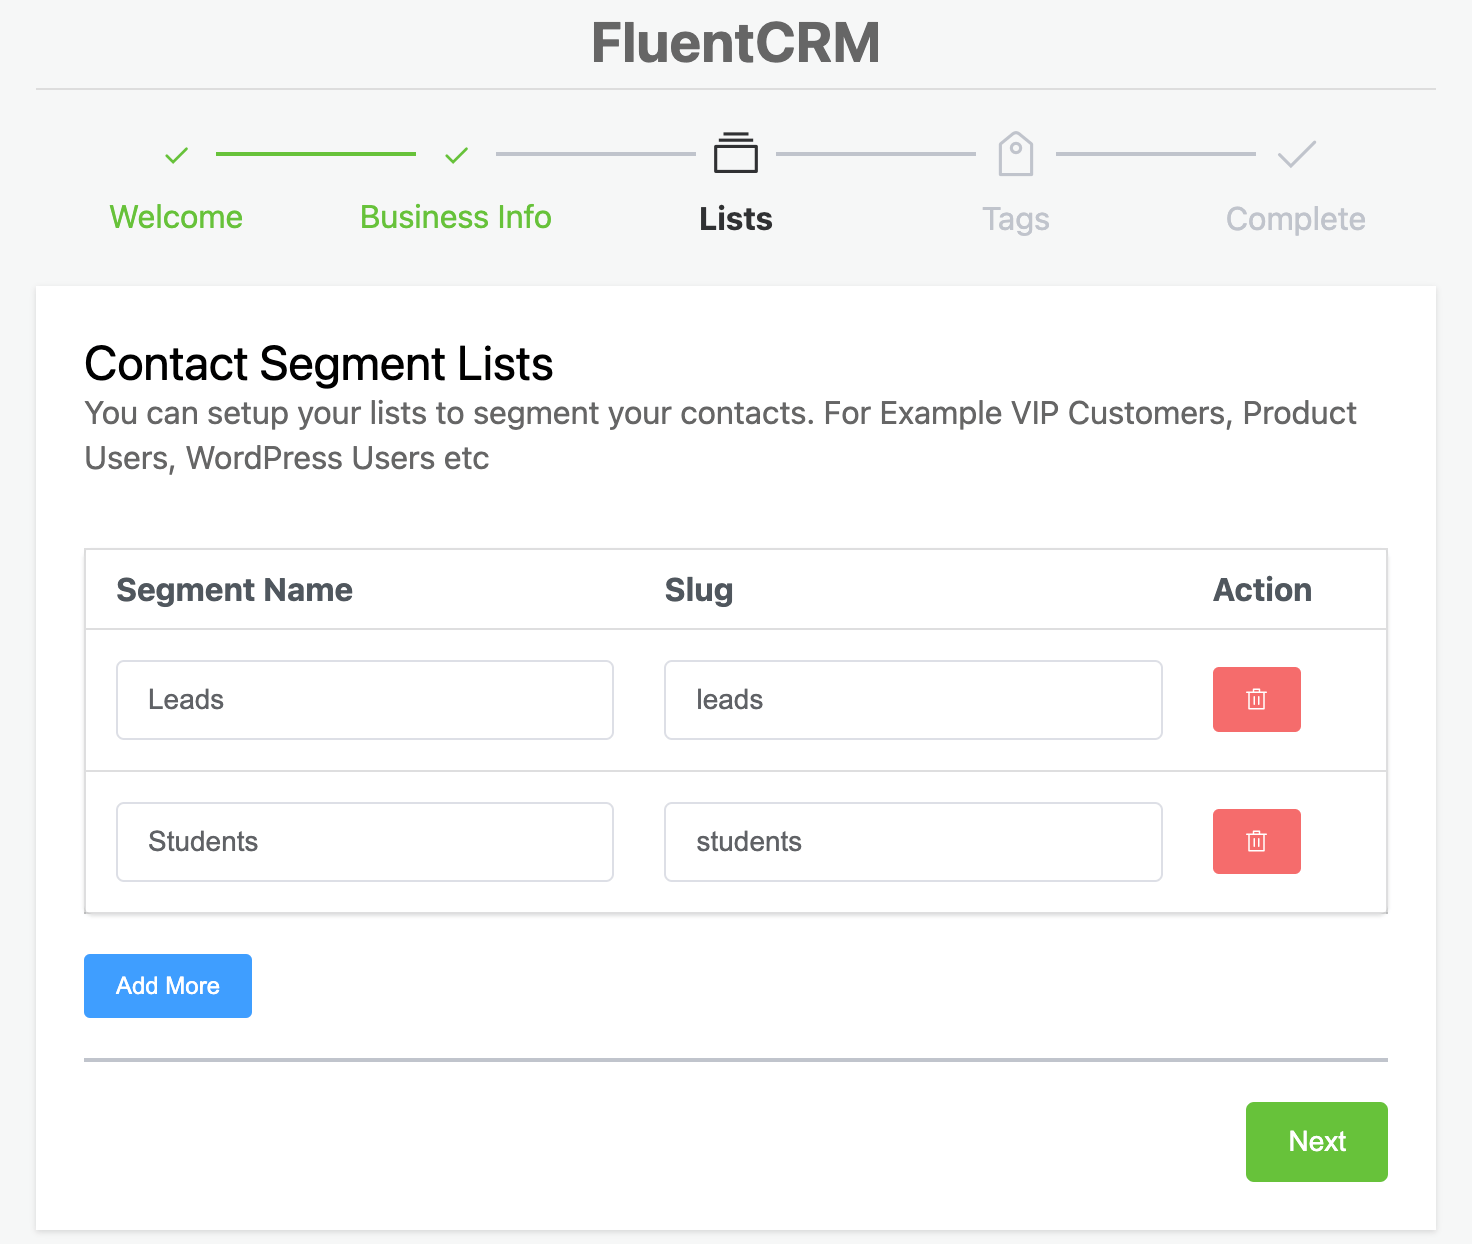
After installing, FluentCRM will take you through its setup wizard where you’ll need to provide your Business Info and create lists and tags to segment your contacts.
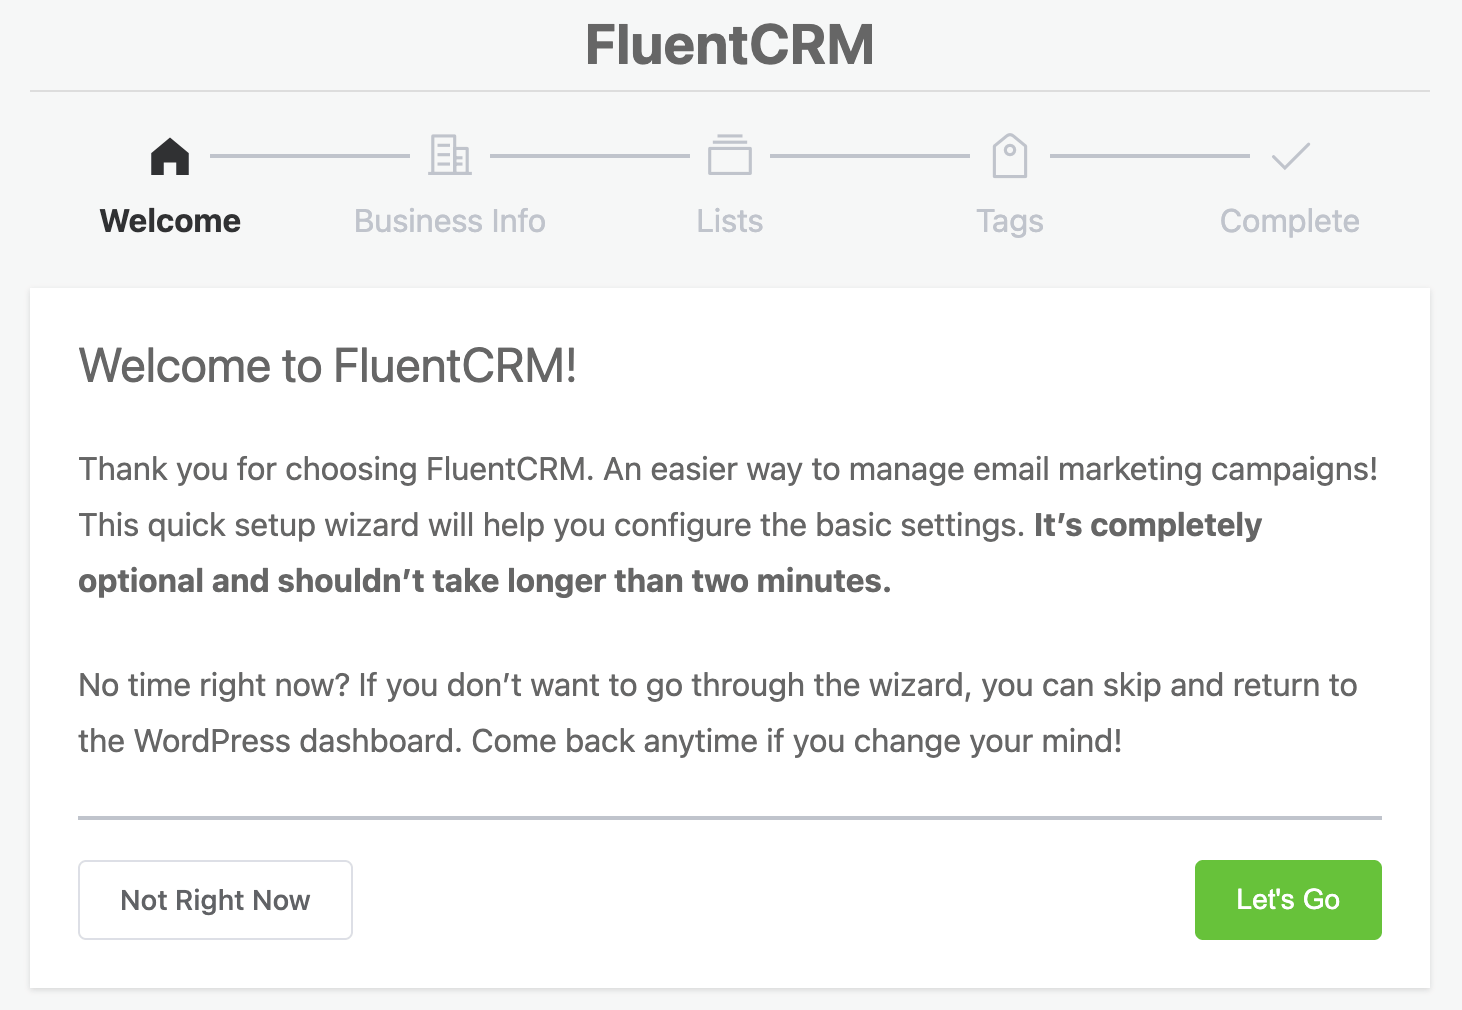
FluentCRM will use business info in your marketing emails as a best practice. So make sure to provide the correct information.
Then, create a few lists depending on your business needs. Remember, lists are meant to be the larger segments of your contact database. That said, you might want to consider naming two of your lists Leads and Students.
Then, you’ll need to create some tags to create micro-segments and store additional information about your contact database. For example, if you have several web development courses on your website, it’s wise to create tags for those courses.
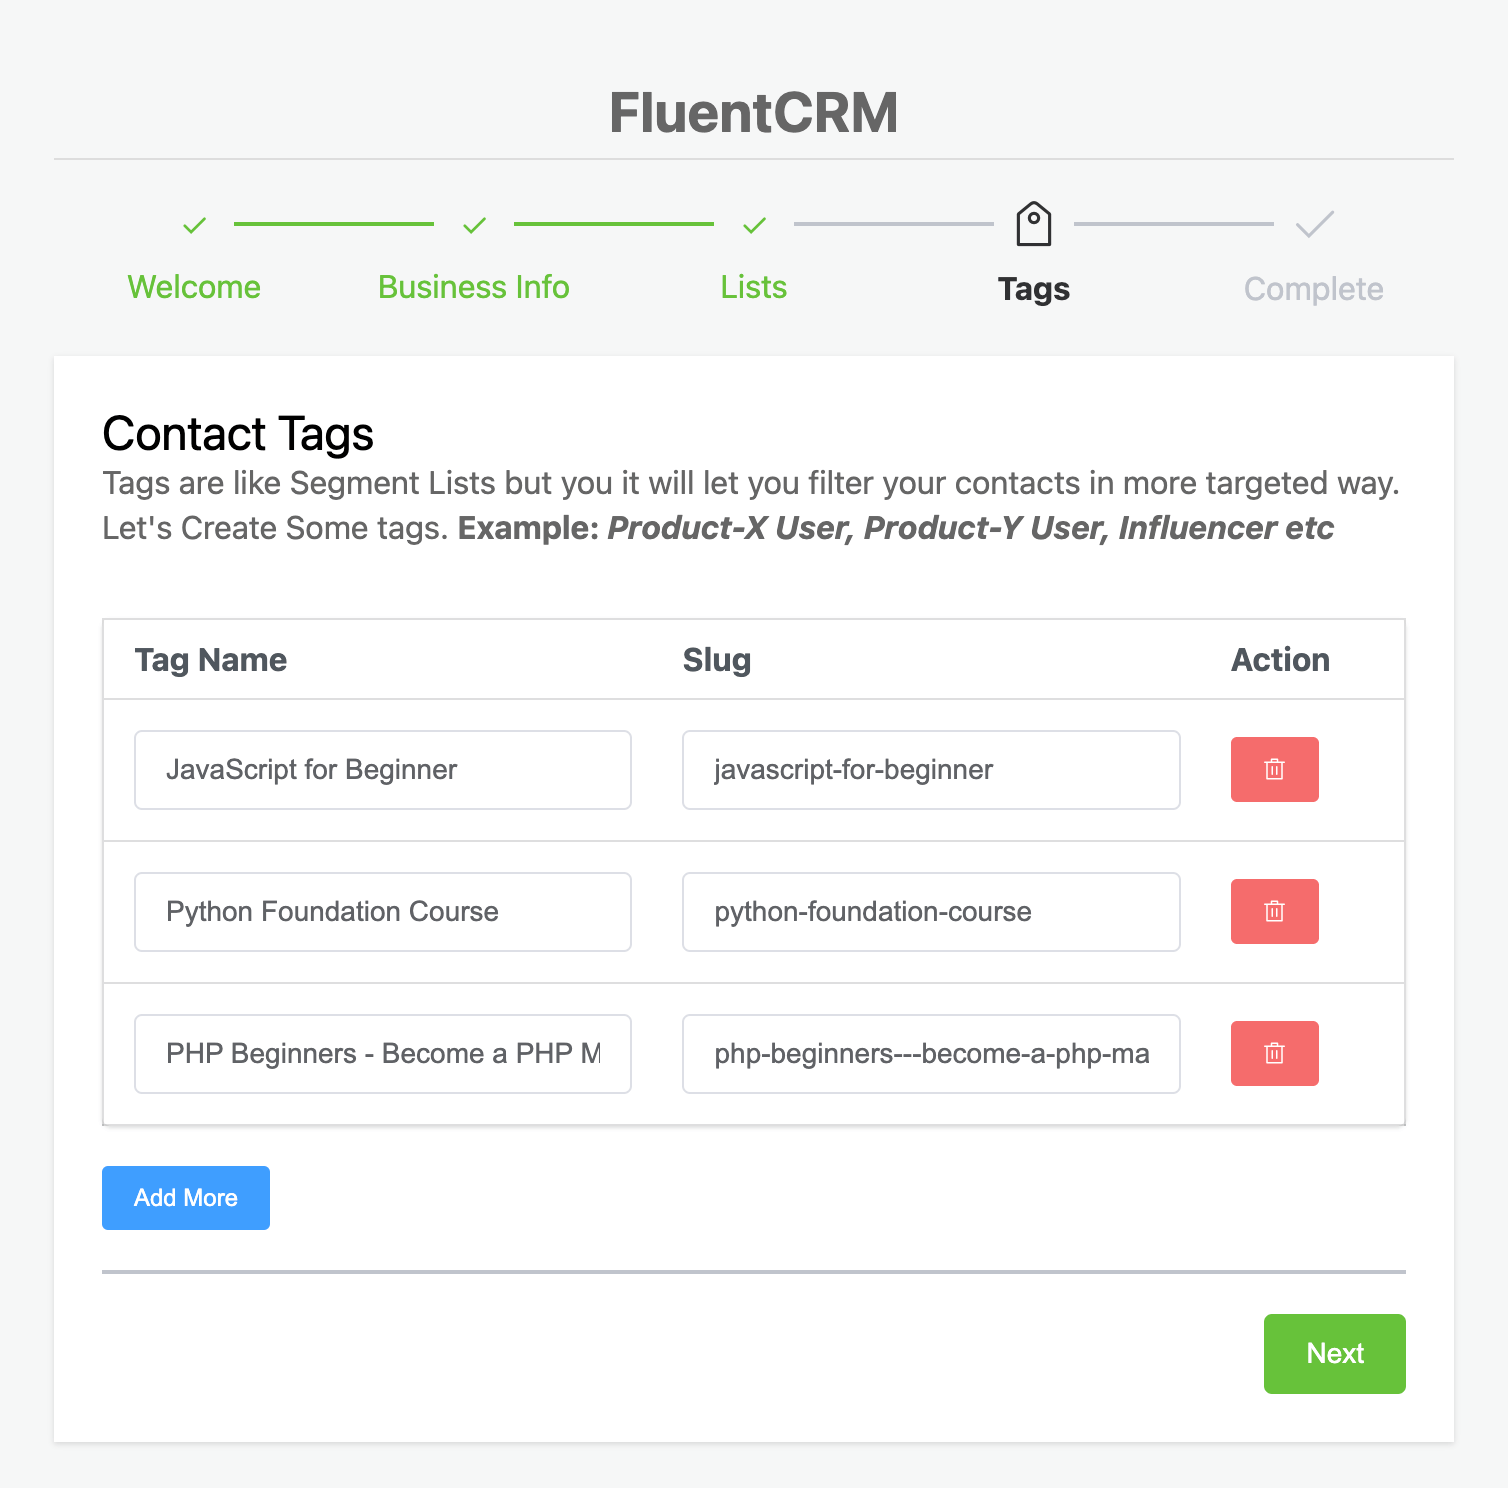
However, both lists and tags can be created later.
Finally, you’ll be prompted to install Fluent Forms for lead collection. Fluent Forms is the best form plugin with a lot of advanced features. Plus, it offers the most advanced integration possibilities with FluentCRM. So we’ll keep the box ticked.
Once you’re done with the setup wizard, you’ll need to configure email deliverability
Your default WordPress email settings can be configured to send marketing emails from FluentCRM. But it’s better to set up a good SMTP service to maximize email deliverability. You can read this article to learn how to set up an SMTP service.
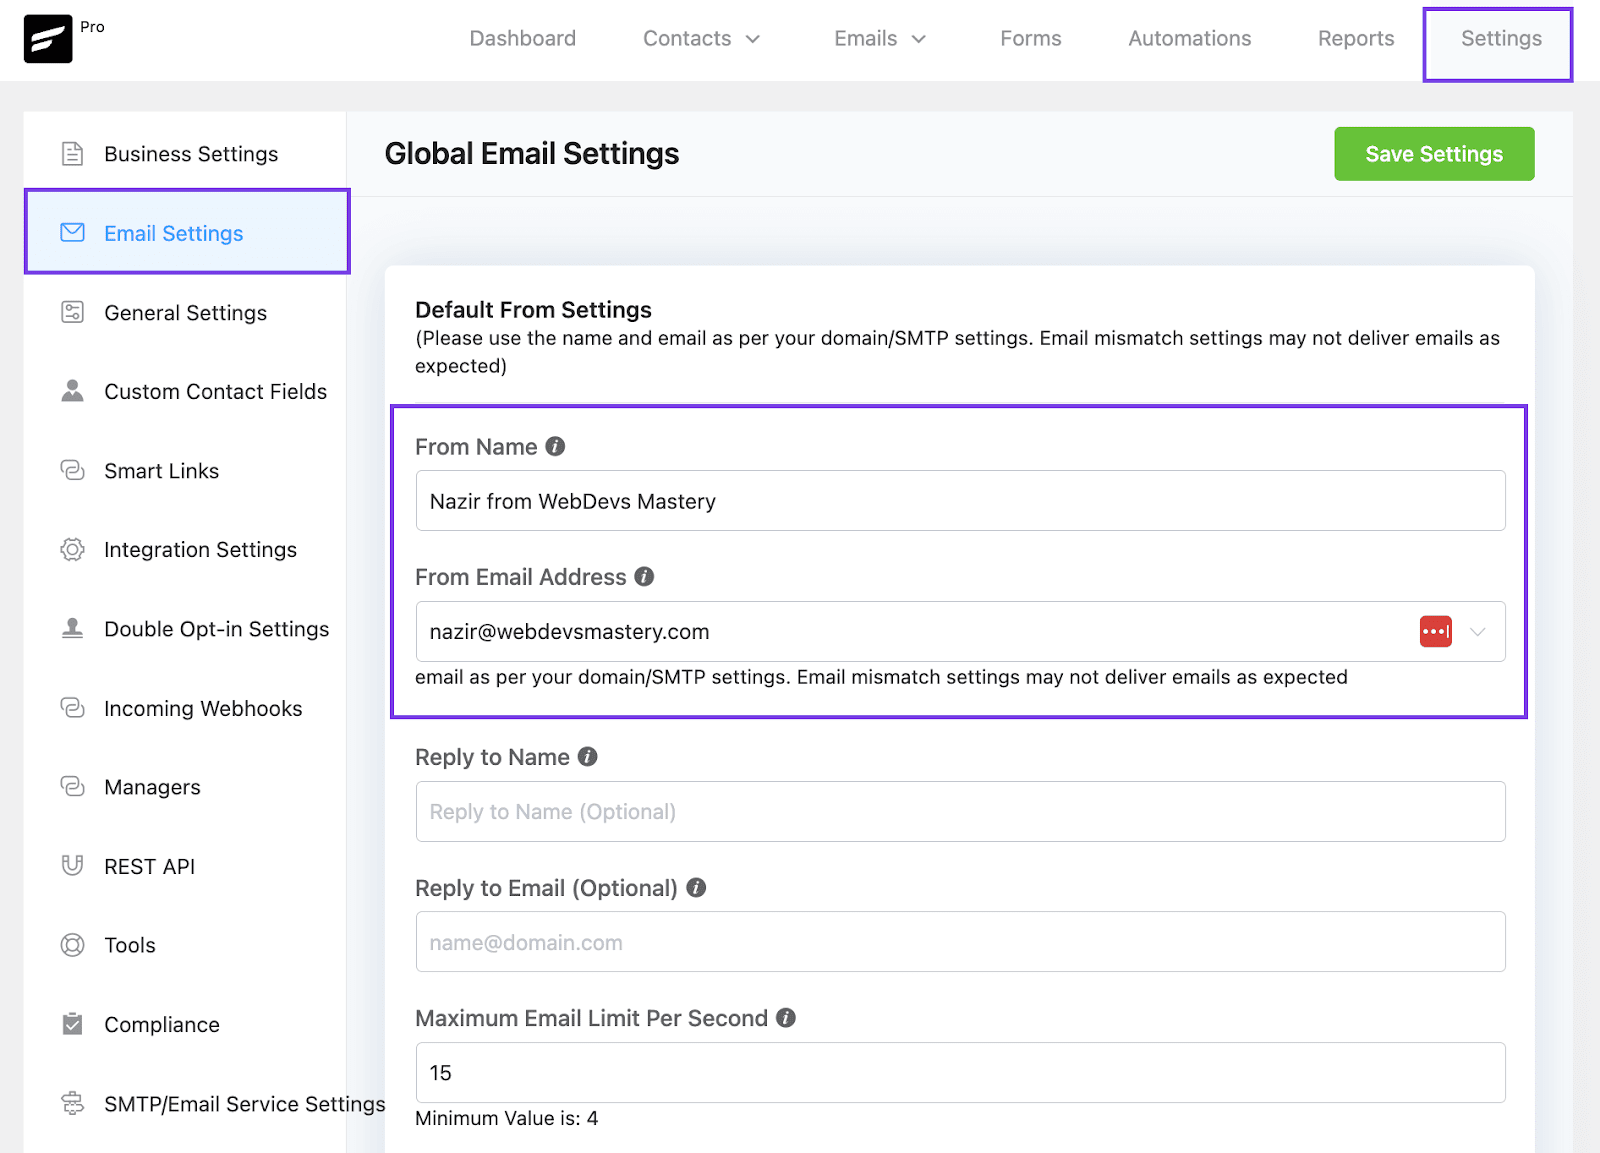
After configuring an email service, go to FluentCRM Settings>Email Settings and save your email address as the From Email Address. You can also set a custom From Name to use it as the default sender name.
And that’s it, you now have a complete email marketing platform set up inside your WordPress dashboard!
Integrating Tutor LMS with FluentCRM
Thanks to FluentCRM’s deep Tutor LMS integration, it takes just one click to integrate Tutor LMS!
To integrate Tutor LMS with FluentCRM, you’ll need to go to FluentCRM Settings>Integrations and then switch to the Tutor LMS tab.
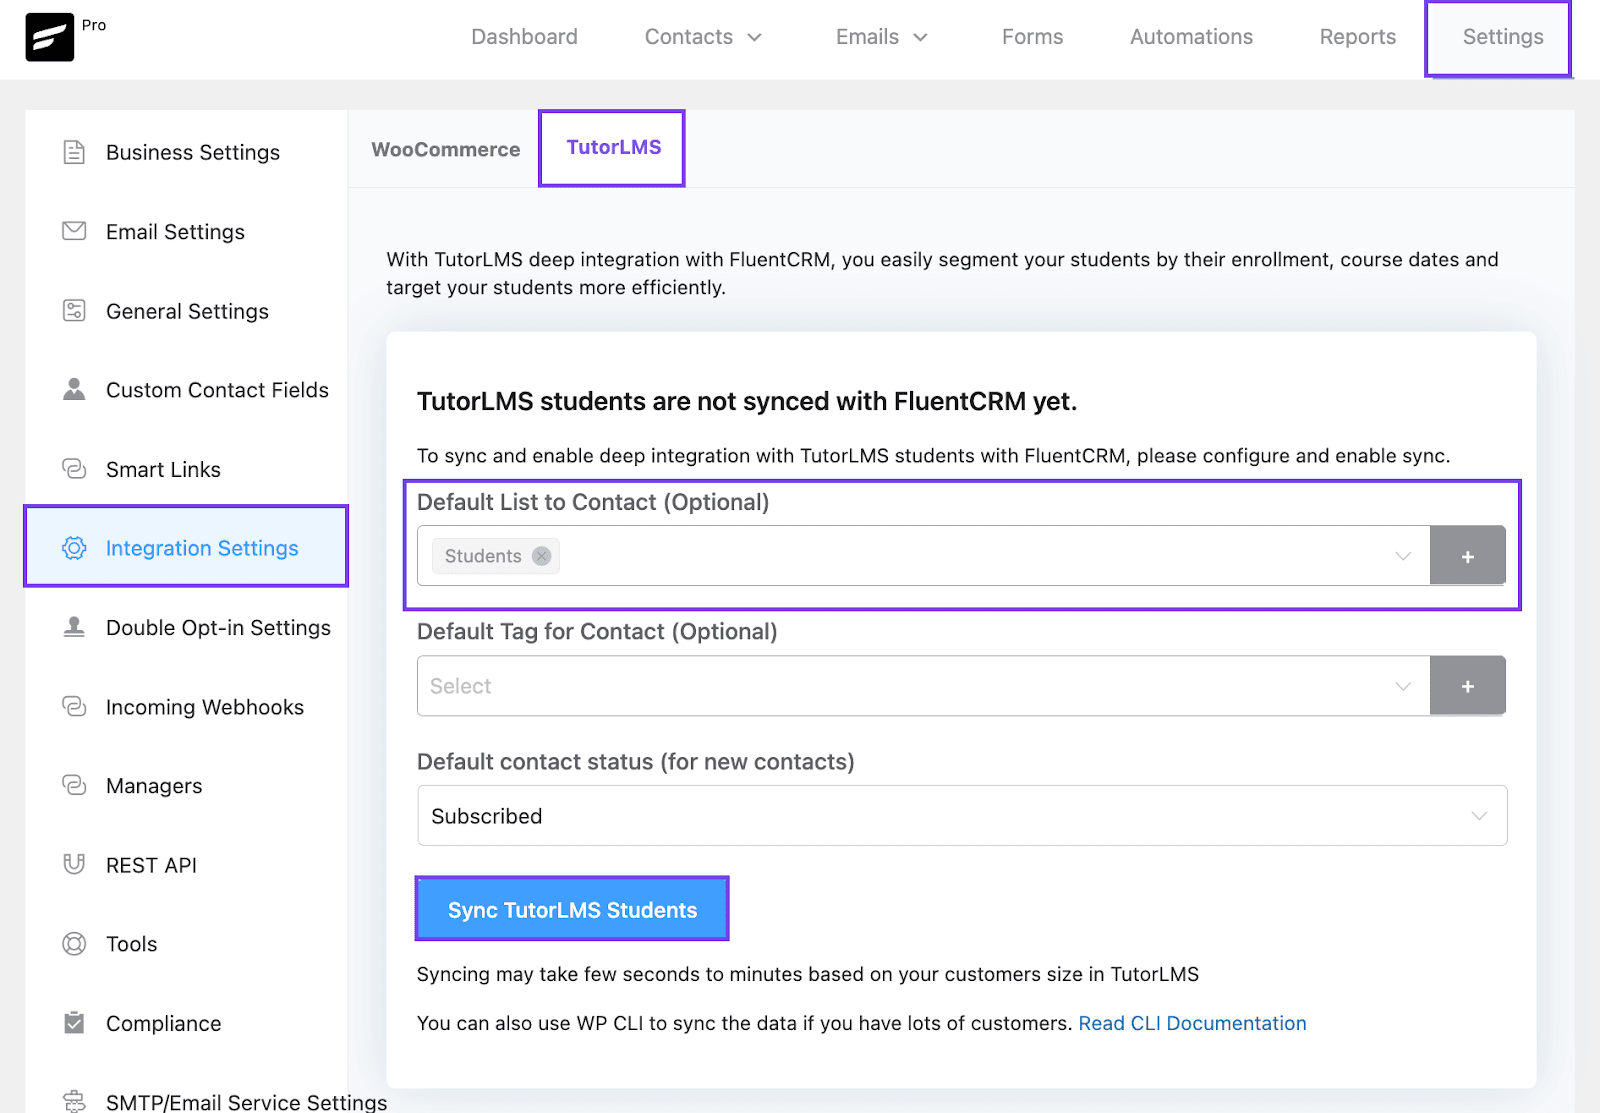
From here, just click the Sync TutorLMS Students button to integrate FluentCRM with Tutor LMS. Once you’ve done that, all your students will be imported to FluentCRM!
Student Overview, Filtering, and Tutor LMS Report
Integrating FluentCRM with Tutor LMS instantly gives you several advantages. You can get a complete student overview, filter them by various key data points, and get a complete report of your e-learning platform.
Let’s start with Advanced Filtering.
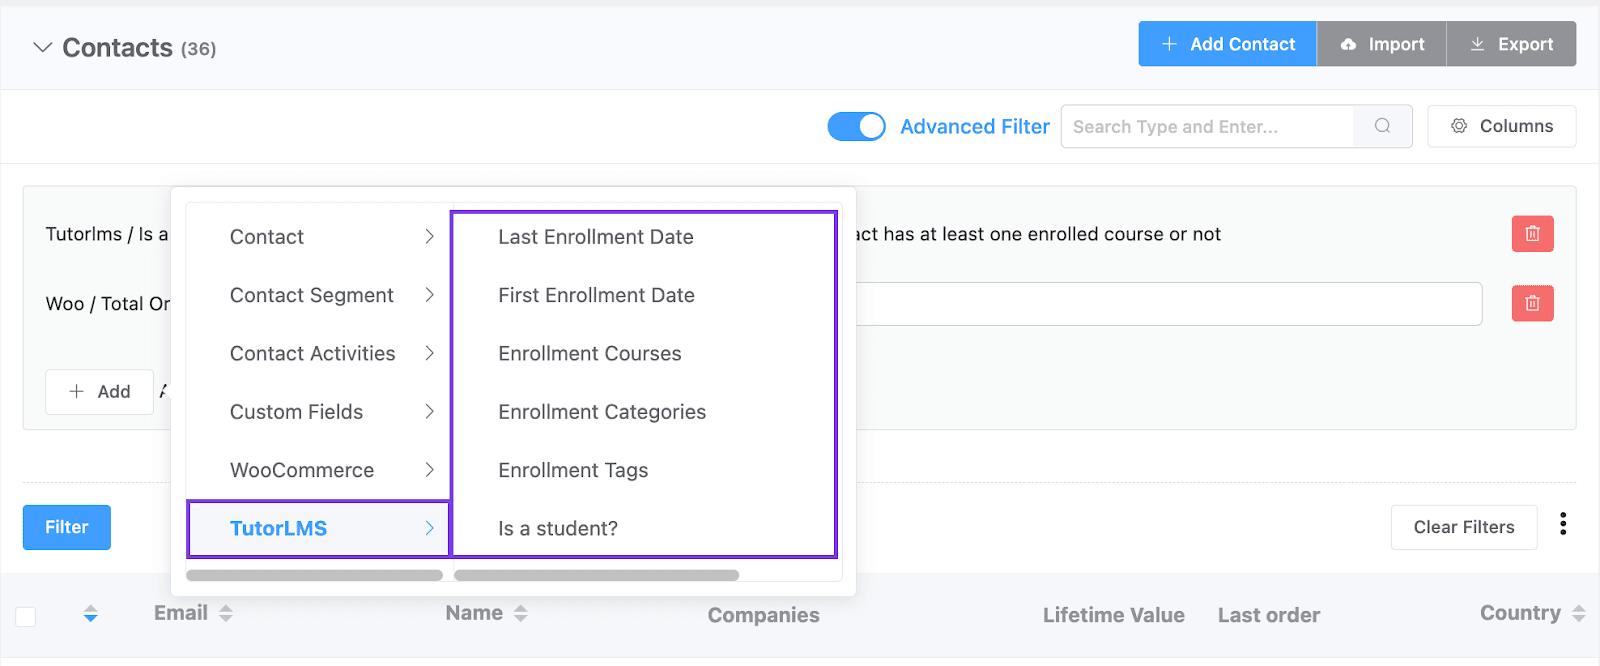
Advanced Filtering is a very powerful feature in FluentCRM. This feature gives you a wide range of conditions so that you can mix them up to find specific students based on meaningful data.
For example, say you want to filter students who bought courses worth at least $500 using WooCommerce. To do so, simply enable the Advanced Filtering from FluentCRM Contacts and specify the conditions.
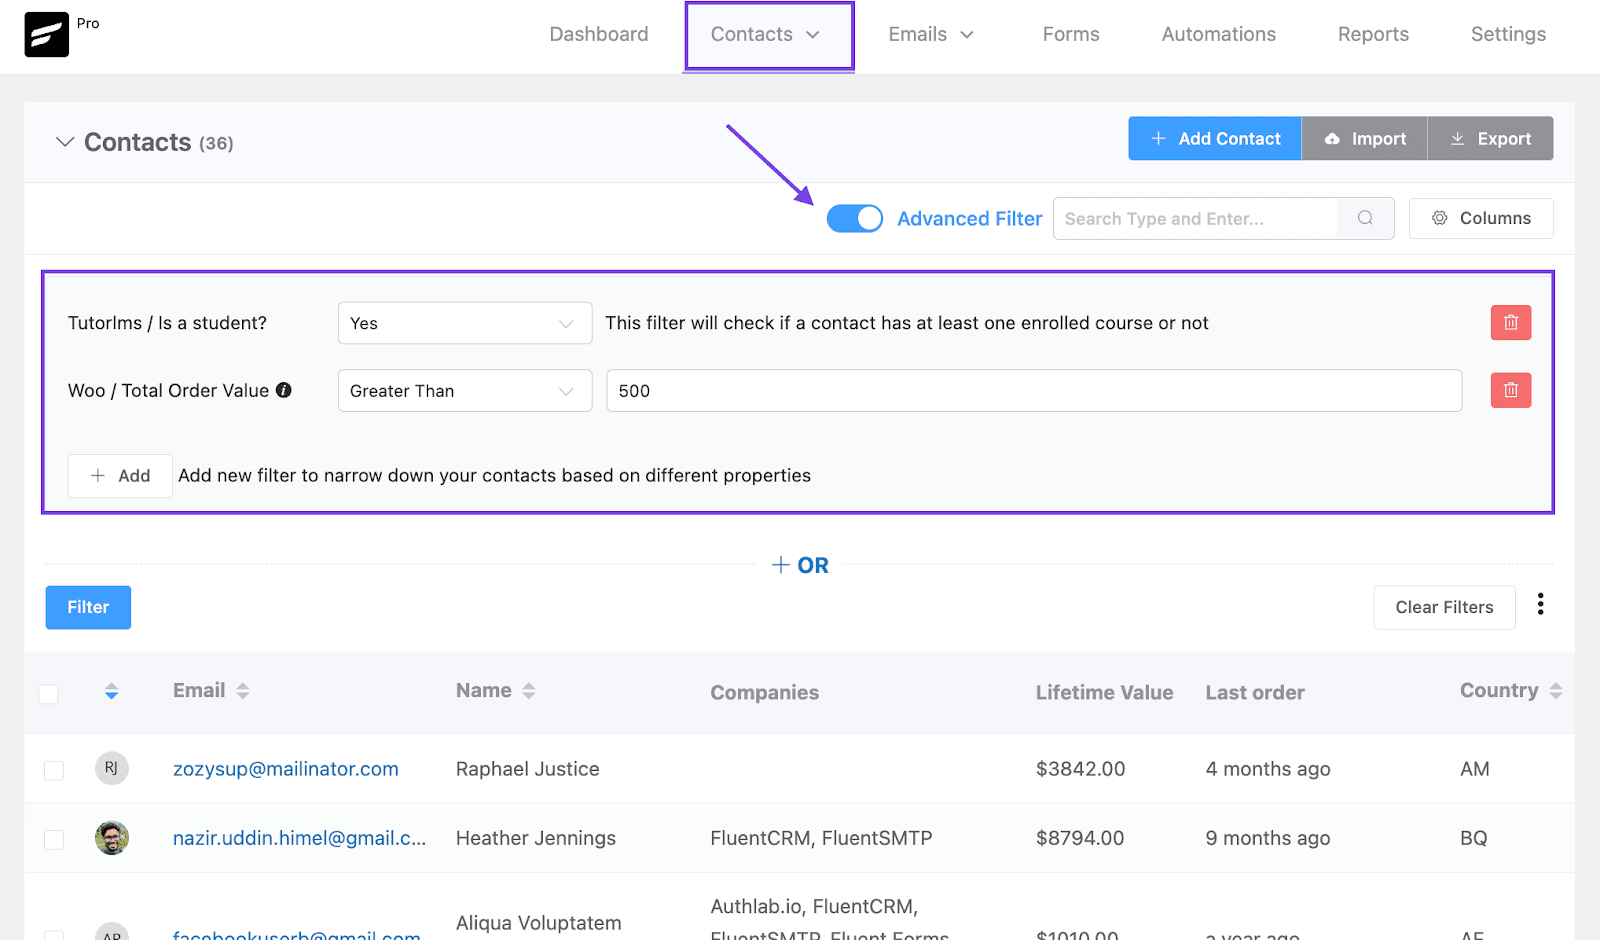
The best part of Advanced Filtering is that you’ll have advanced conditions to find and categorize your students. And in this era of personalization, it’s incredible!
Below is an image showing just how advanced it can be —especially for Tutor LMS users!
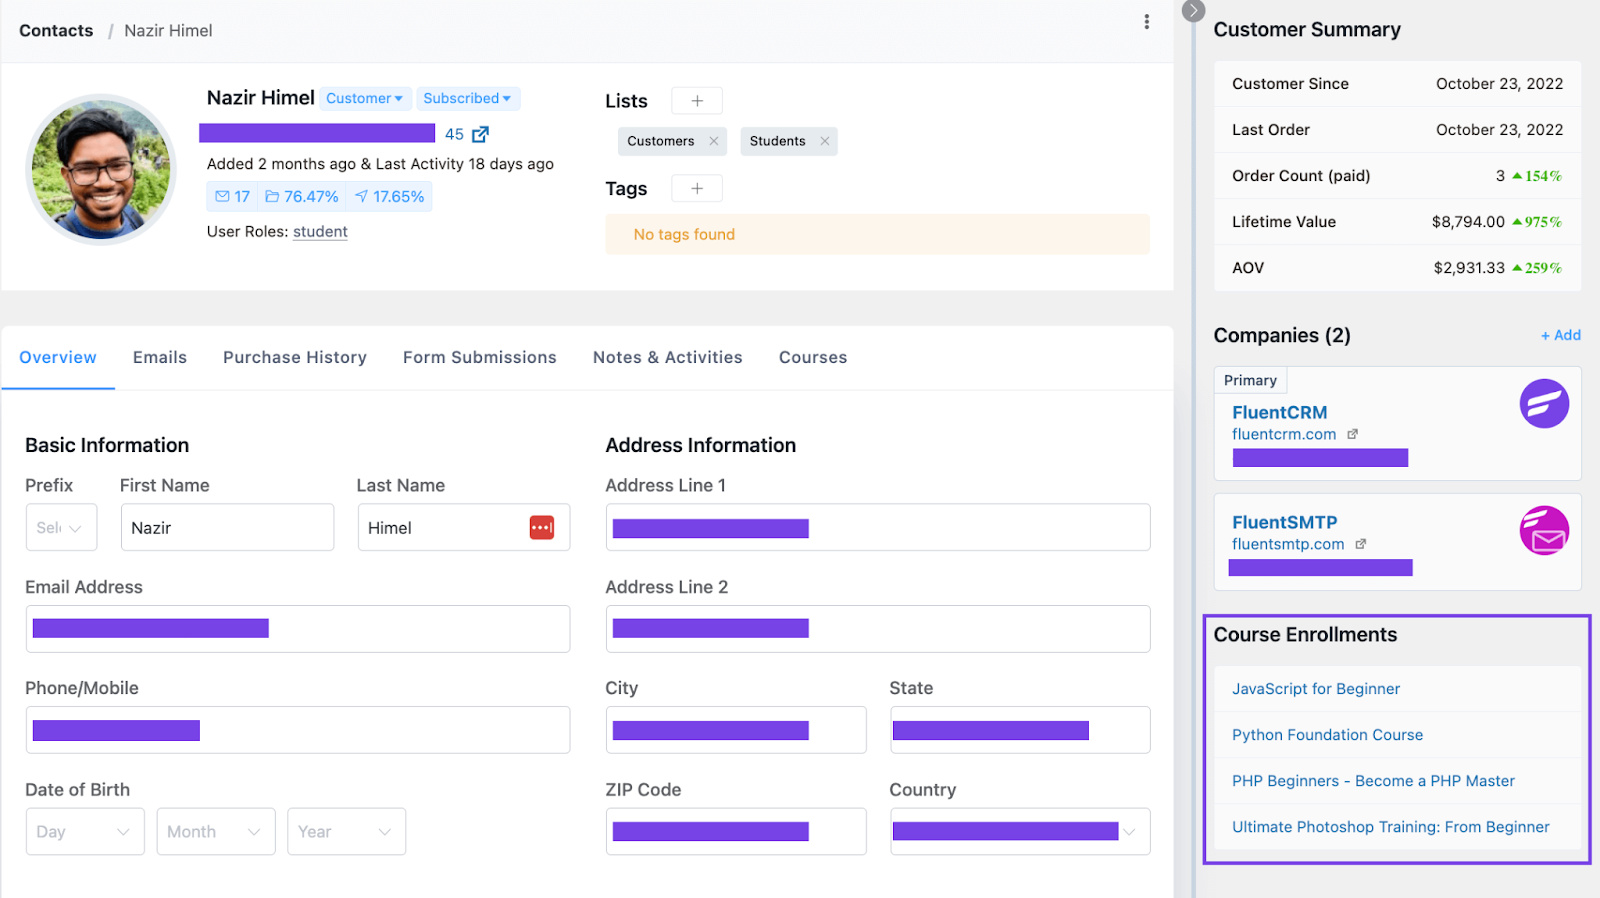
But that’s not the only point of integrating Tutor LMS with FluentCRM. You’ll get a complete student overview showing a student’s detailed information, as well as the courses they have taken!
And if you want to understand how your eLearning platform is performing, you can get a full platform report by going to FluentCRM Reports>Tutor LMS tab!
The report will give you a clear overview of your Tutor LMS-powered eLearning platform’s performance and you can also compare your growth for specific periods.
Sending Micro-targeted Promotional Campaigns
Just as we mentioned, Integrating Tutor LMS with FluentCRM instantly gives you a lot of advantages. And one of those includes the ability to send micro-targeted promotional campaigns —without segmenting your contacts at all!
Suppose some of your courses are selling like crazy and some of your courses aren’t selling much. Since your existing students are taking multiple courses, you might want to boost your course sales by promoting less-selling courses to those existing students.
How do you proceed?
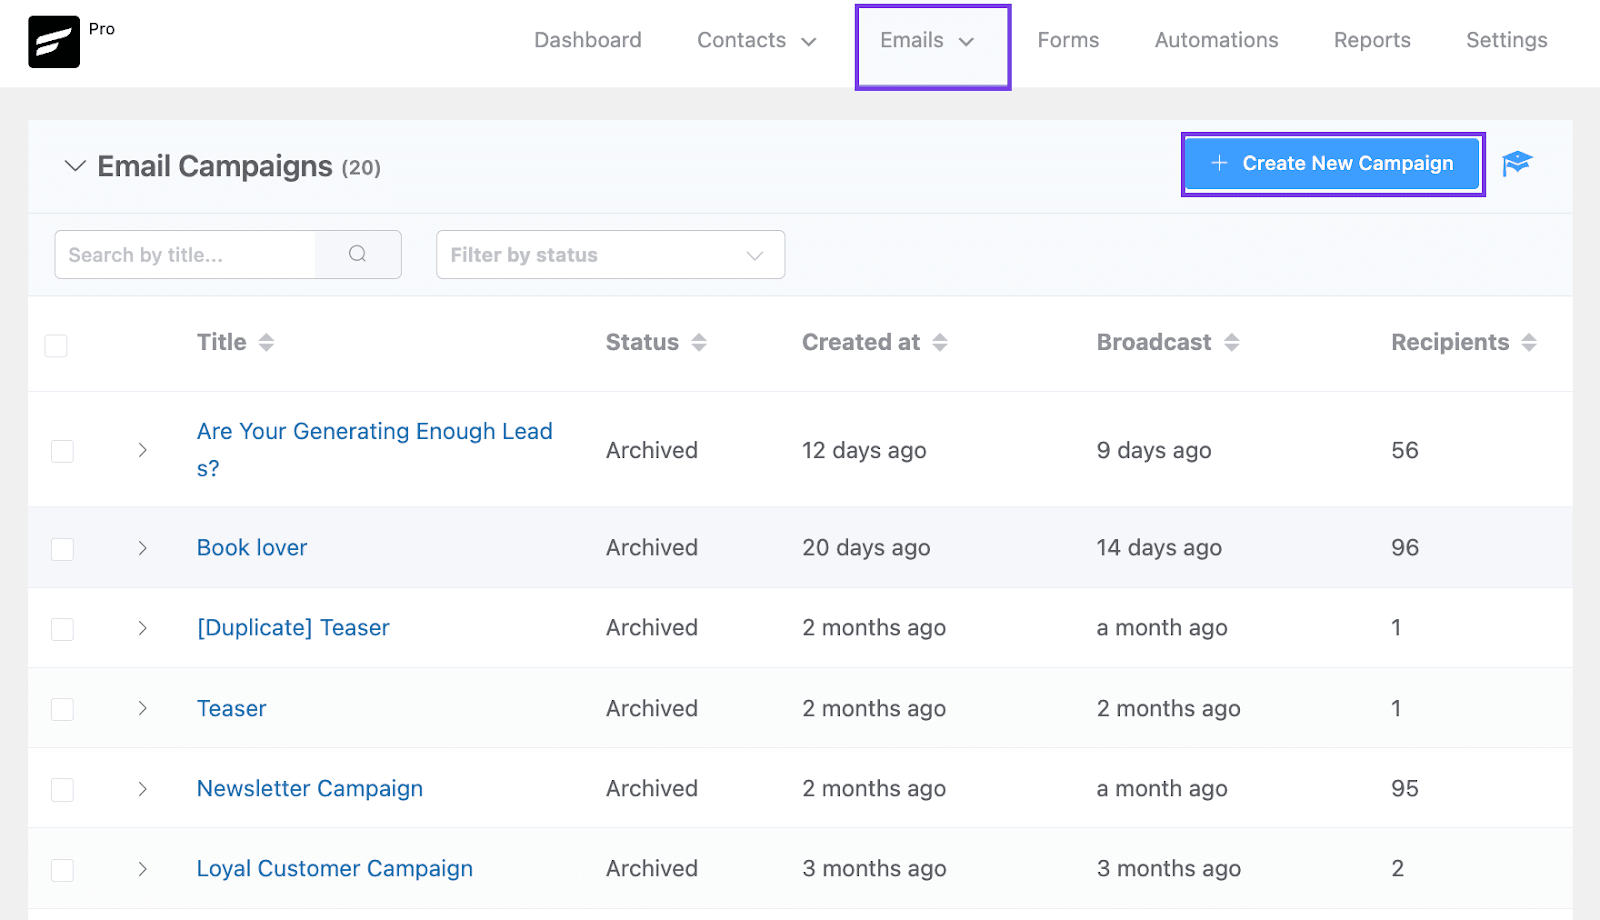
First, you’ll have to go to Emails>Create New Campaign.
Then give a title and you’ll be taken to the Email Composer. FluentCRM’s Email Composer offers massive customization options. While it’s possible to write beautiful plain emails using the block editor, you can also use a drag-and-drop builder to design stunning branded emails.
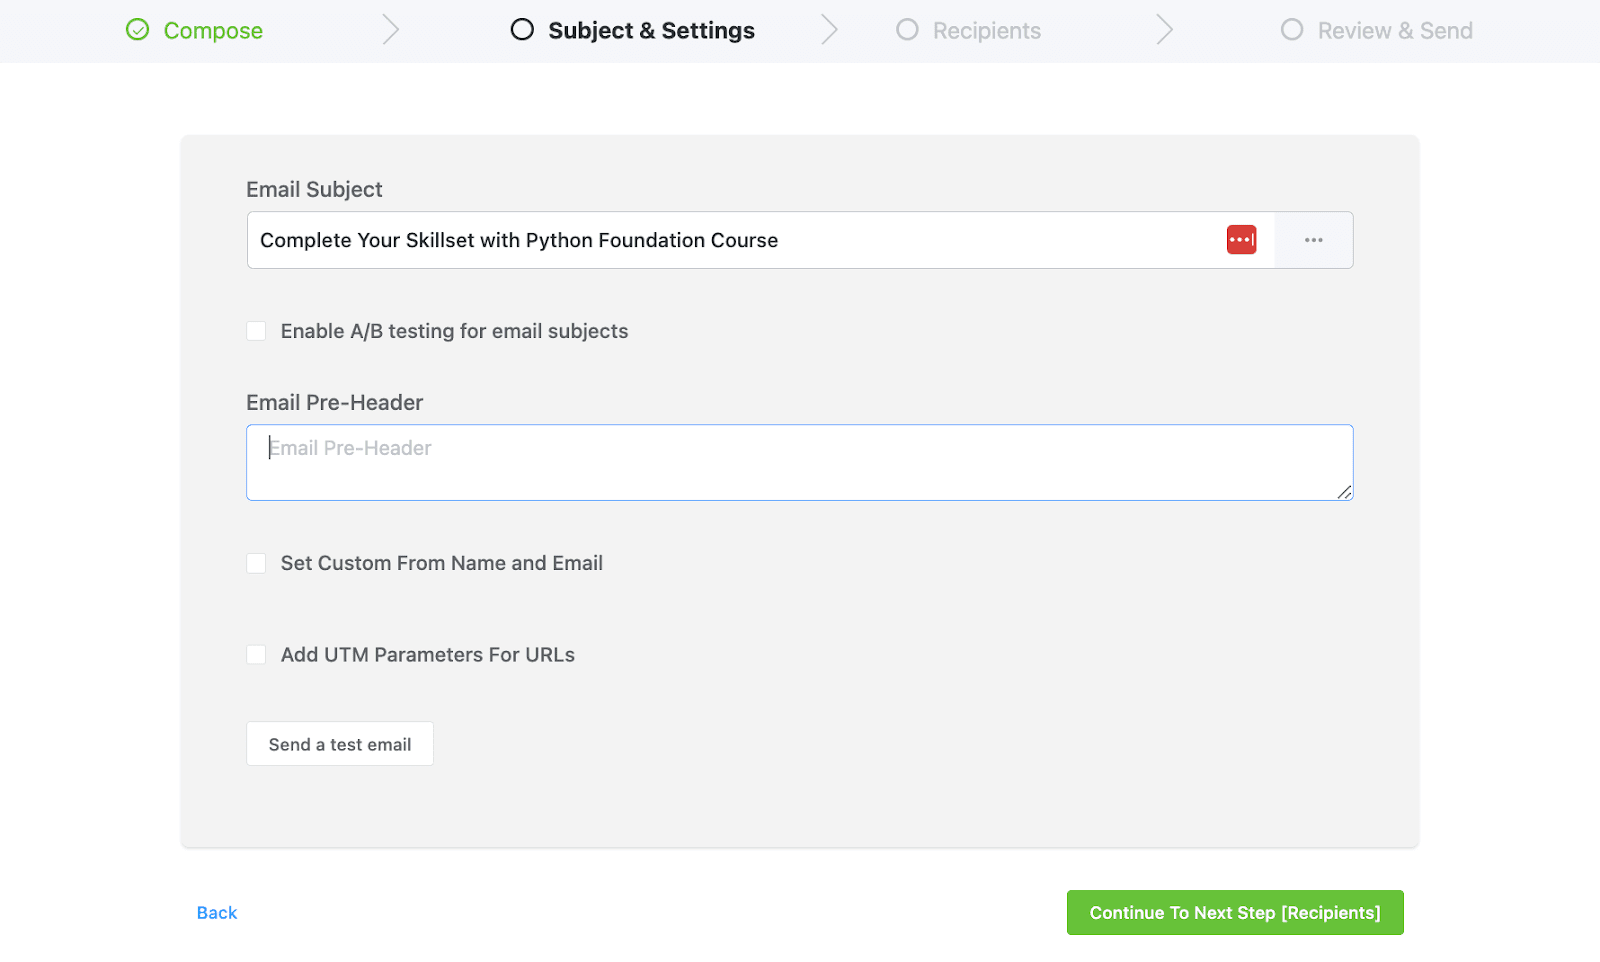
Once you’ve written the email, click Continue [Subject and Setting].
Then, you’ll need to write a Subject Line and Pre-header. You can A/B Test subject lines and set UTM Parameters to track the campaign through Google Analytics.
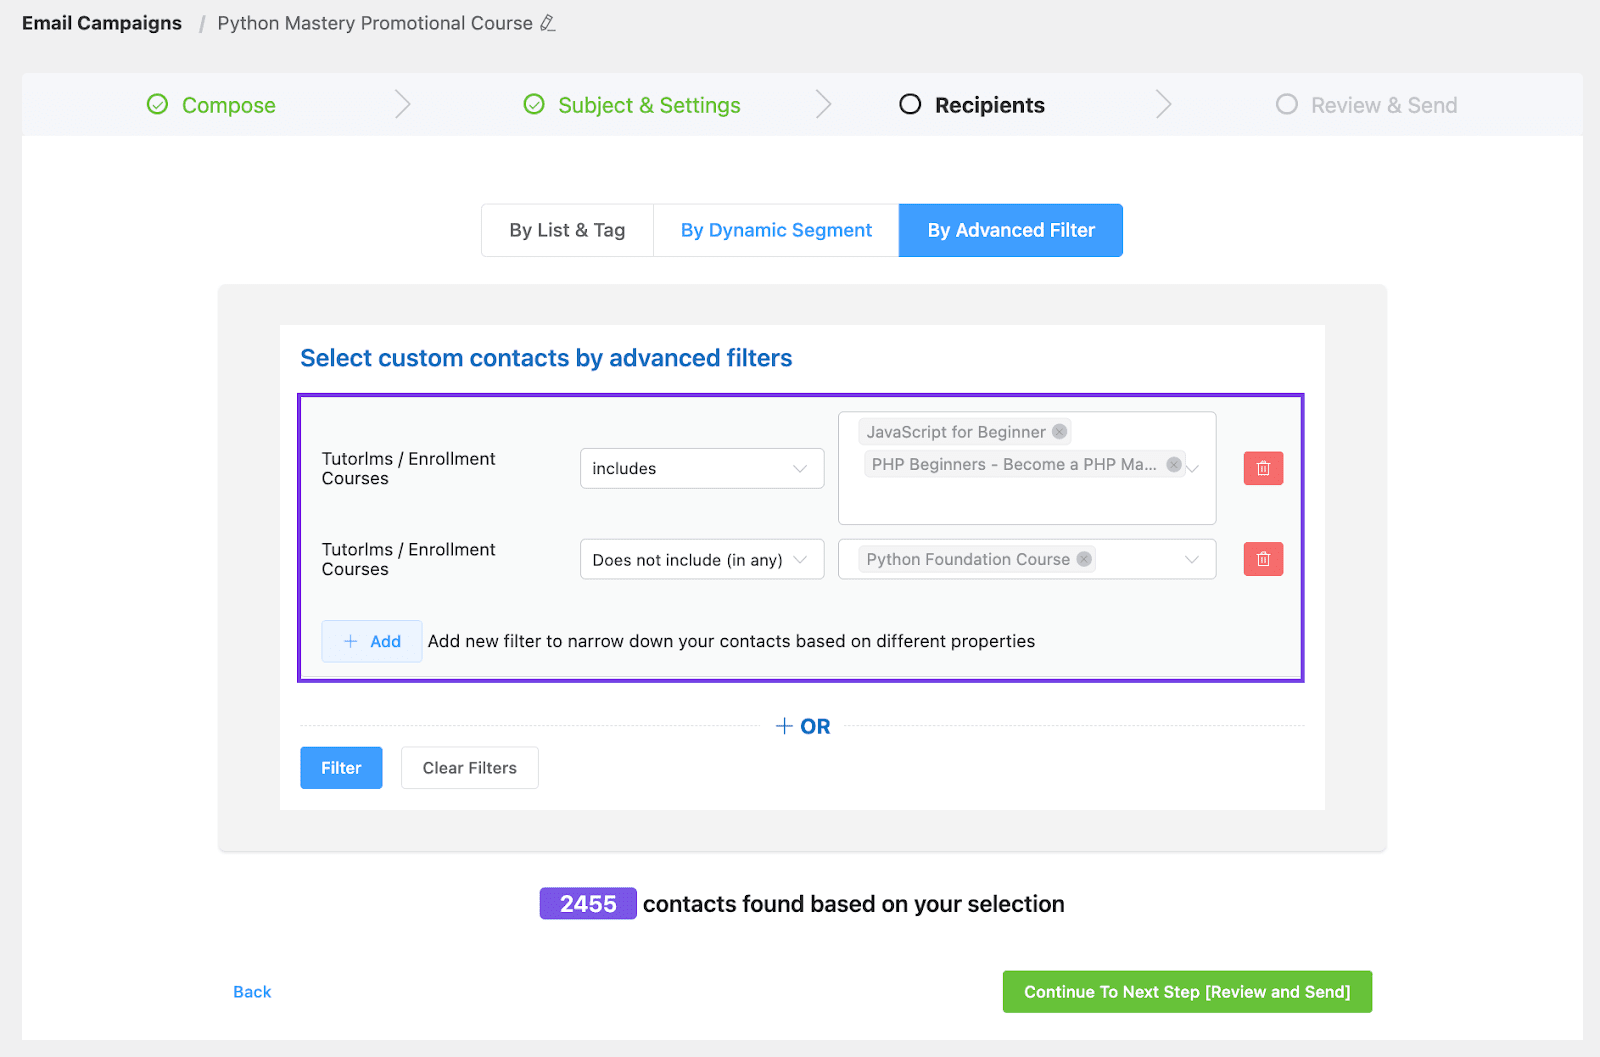
Here comes the fun part —while you can send your campaign to a List or Tag, Advanced Filter makes targeting easier.
For example, we want to promote our Python Foundation Course to those who have taken JavaScript for Beginner and PHP Beginners – Become a PHP Master course. Here’s how easy it is to target our audience with FluentCRM:
Once you’ve set a target audience for the campaign, you can now Review & Send. And of course, if you want to schedule the campaign, that’s possible too!
Driving Email Signups and Providing Course Access
As an online creator, you’re probably following hundreds of strategies to drive new students to your courses. You may be demonstrating your expertise on the blog and social media, arranging and attending podcasts and events, answering questions on various communities, offering free ebooks and courses…the list goes on.
These are all great strategies however, all of these usually end up in one place —your email list. And to build one, you’ll need to create a form. In this section, we’ll show you just how easy it is to create a form using FluentCRM.
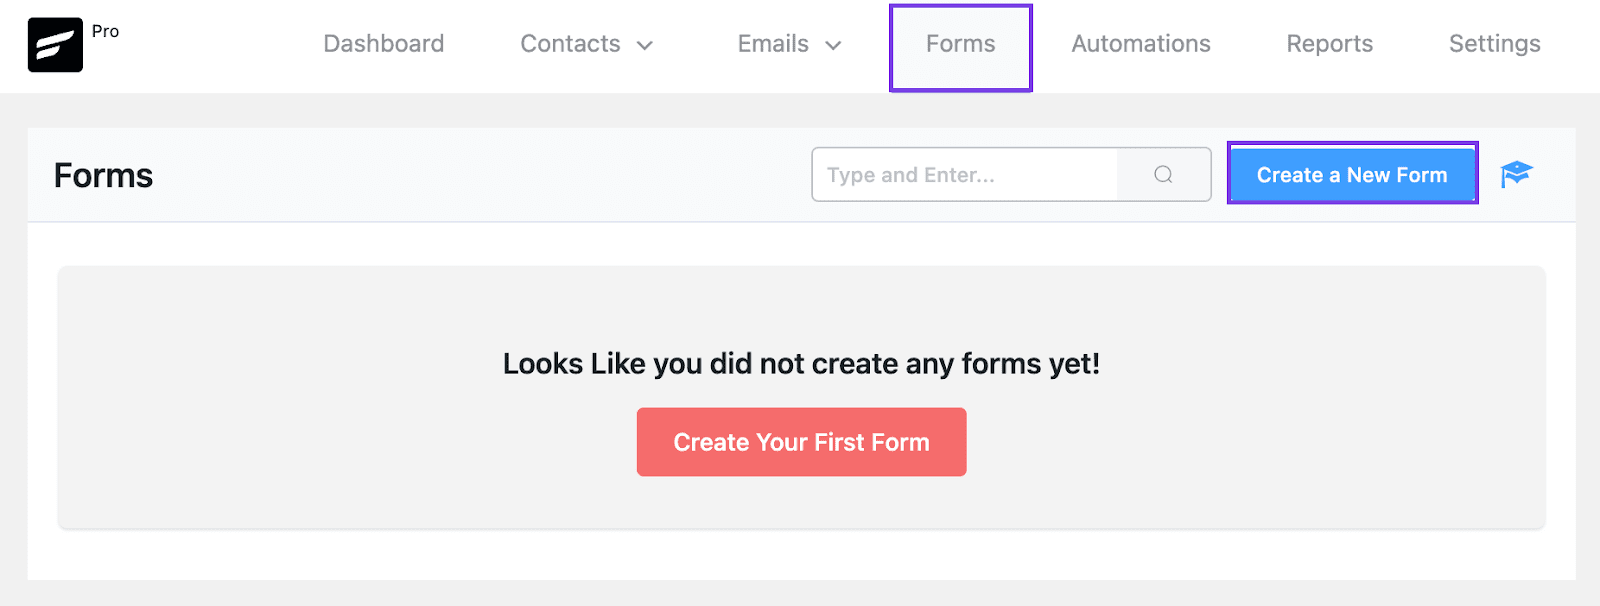
To start off, go to Forms>Create a New Form.
This will pop up a few templates from which you can choose one.
Once you’ve chosen a template, write your Form Title and assign Lists and Tags that will be applied when people submit the form. You can also Enable Double Opt-in Confirmation to prevent spam submissions.
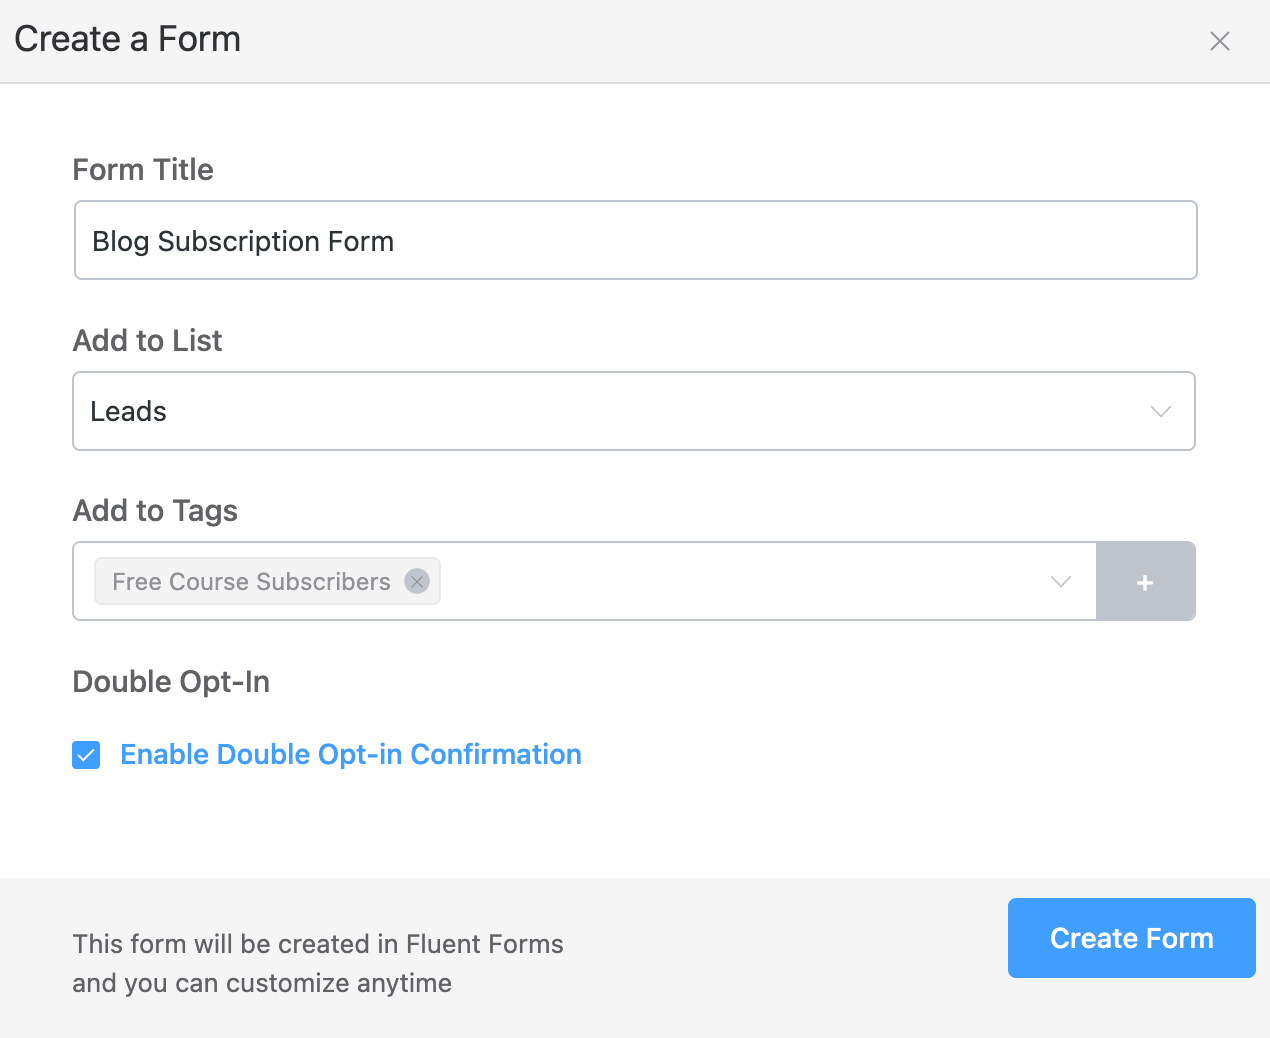
Upon clicking the Create Form button, you’ll get a shortcode to display the form anywhere on your website.
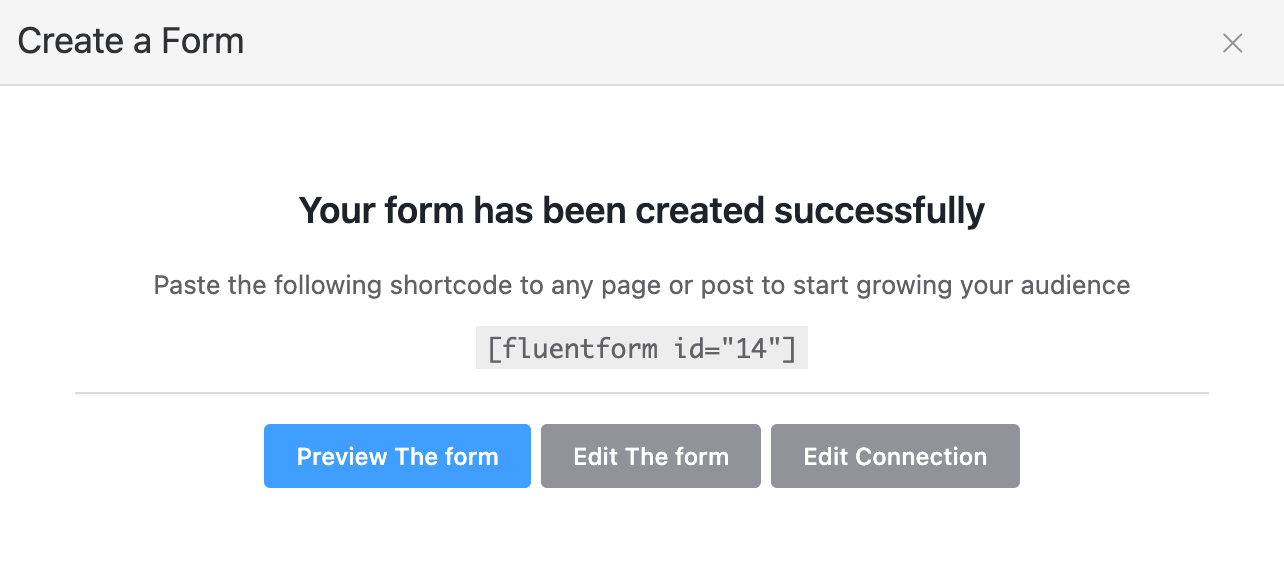
You can also preview or edit the form or integration by clicking the buttons.
Now, let’s say you’re offering a free course in exchange for your visitor’s email addresses. Generally, in that case, you’d create a free course that users can enroll in by registering on your website. However, FluentCRM gives you an easier way.
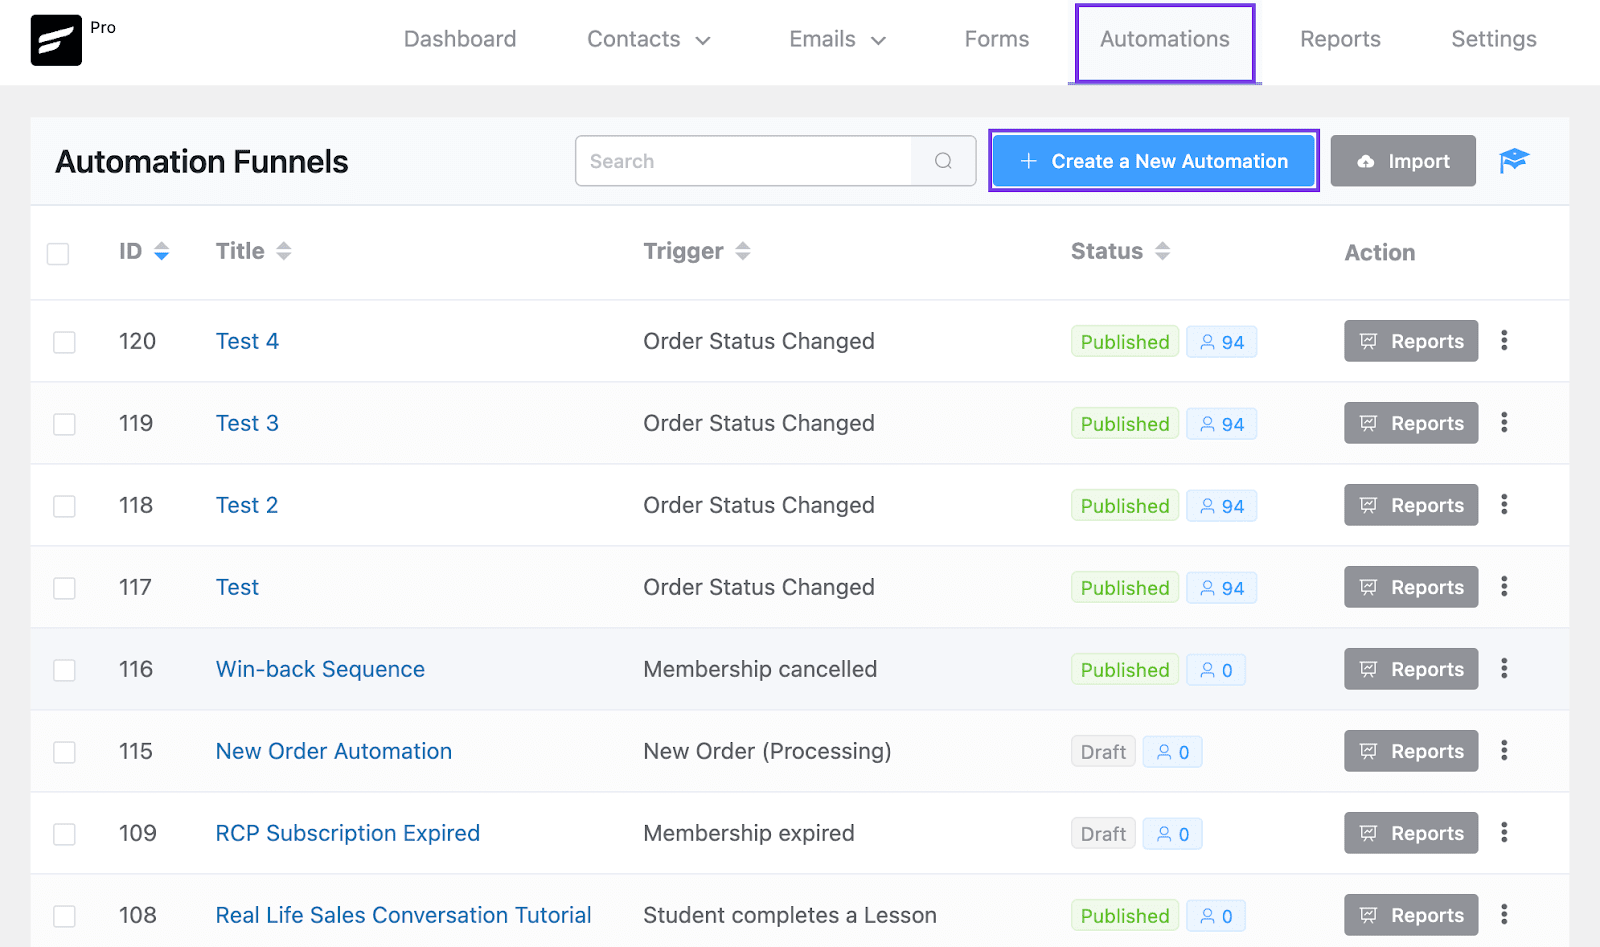
You can let visitors enroll in courses with just their email address. For that, you’ll need to create an automation by going to Automations and clicking the Create a New Automation button.
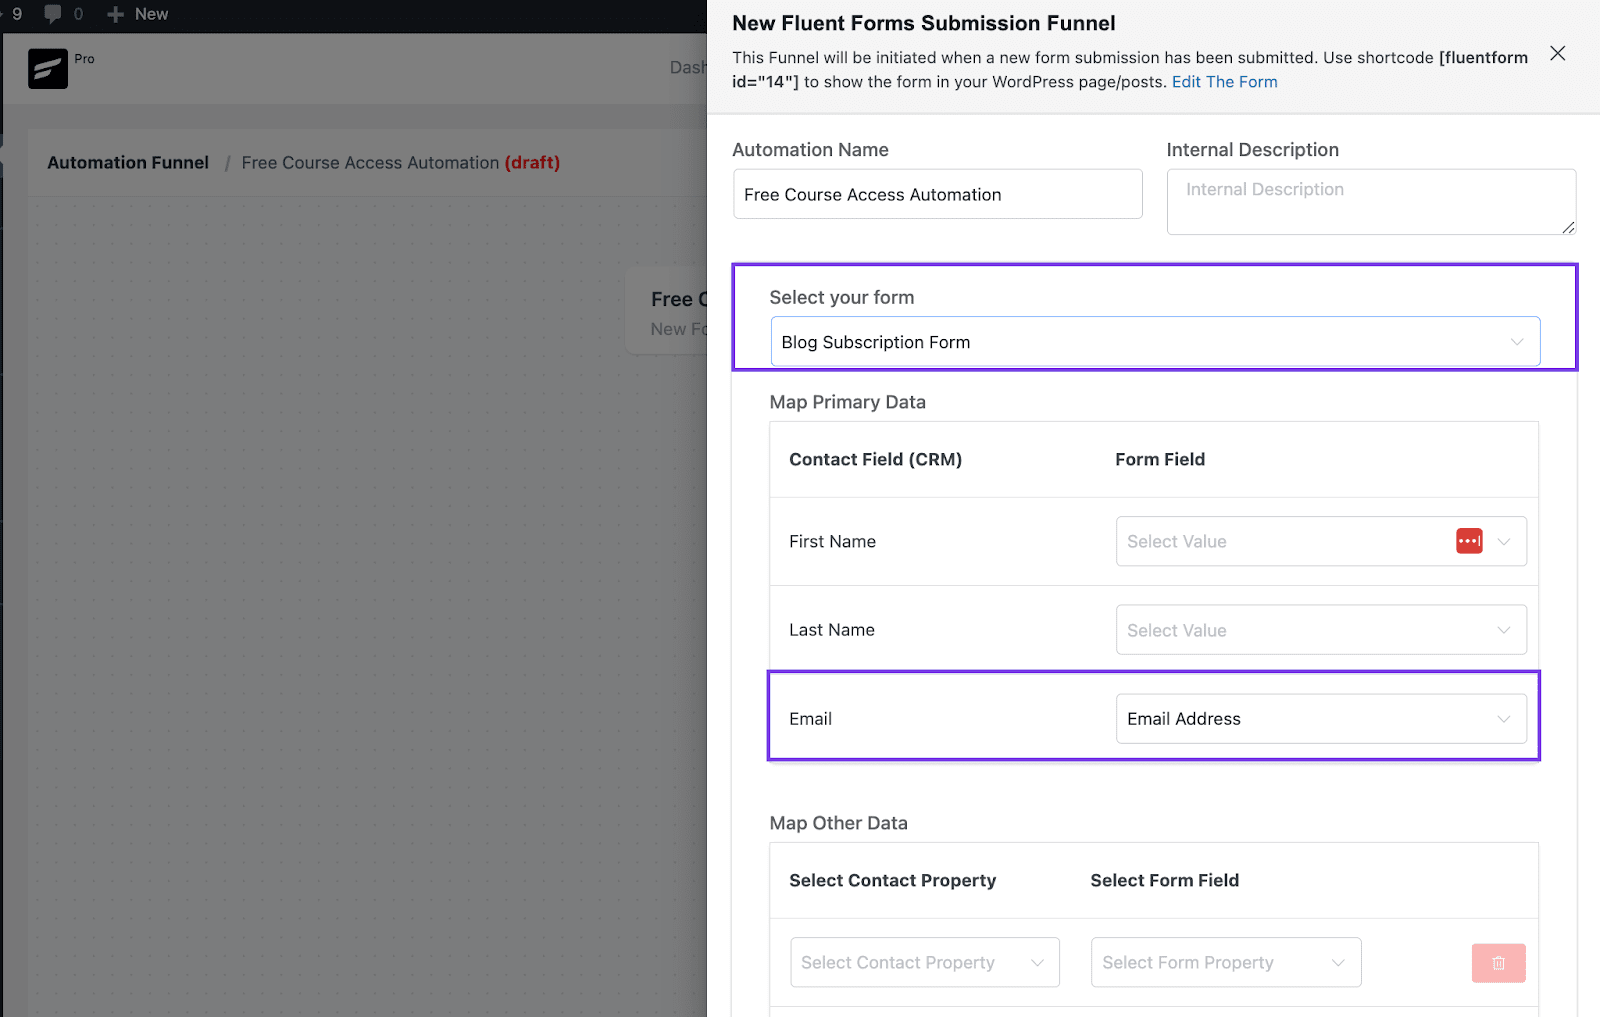
Then, give an Internal Label and choose the New Form Submission (Fluent Forms) trigger. This will let you automate various actions for a visitor who submitted a form.
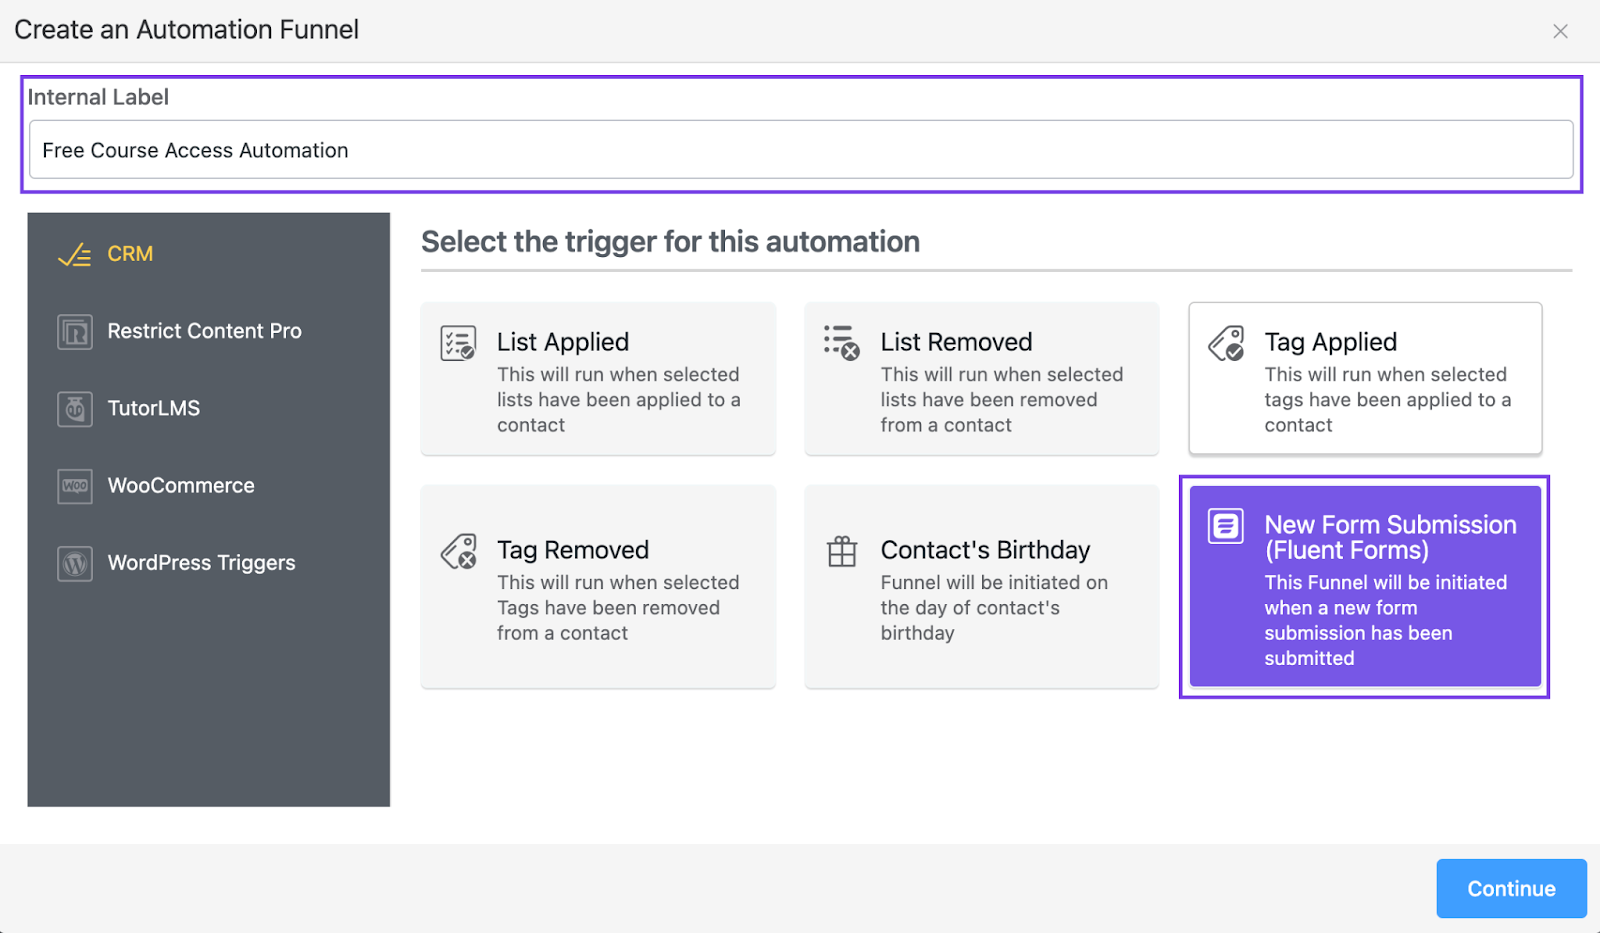
Then, you’ll need to configure your trigger —which is as simple as specifying which form will trigger the actions.
Simply choose your form from the list and map the form fields. Below, we’ve chosen our Blog Subscription Form as the trigger event and mapped the Email field (that’s the only information we’re collecting).
Finally, you have to add an action that’ll automatically provide course access to those who requested course access by submitting your form. For that, click the plus (+) icon and choose the Enroll to Course action under Tutor LMS actions.
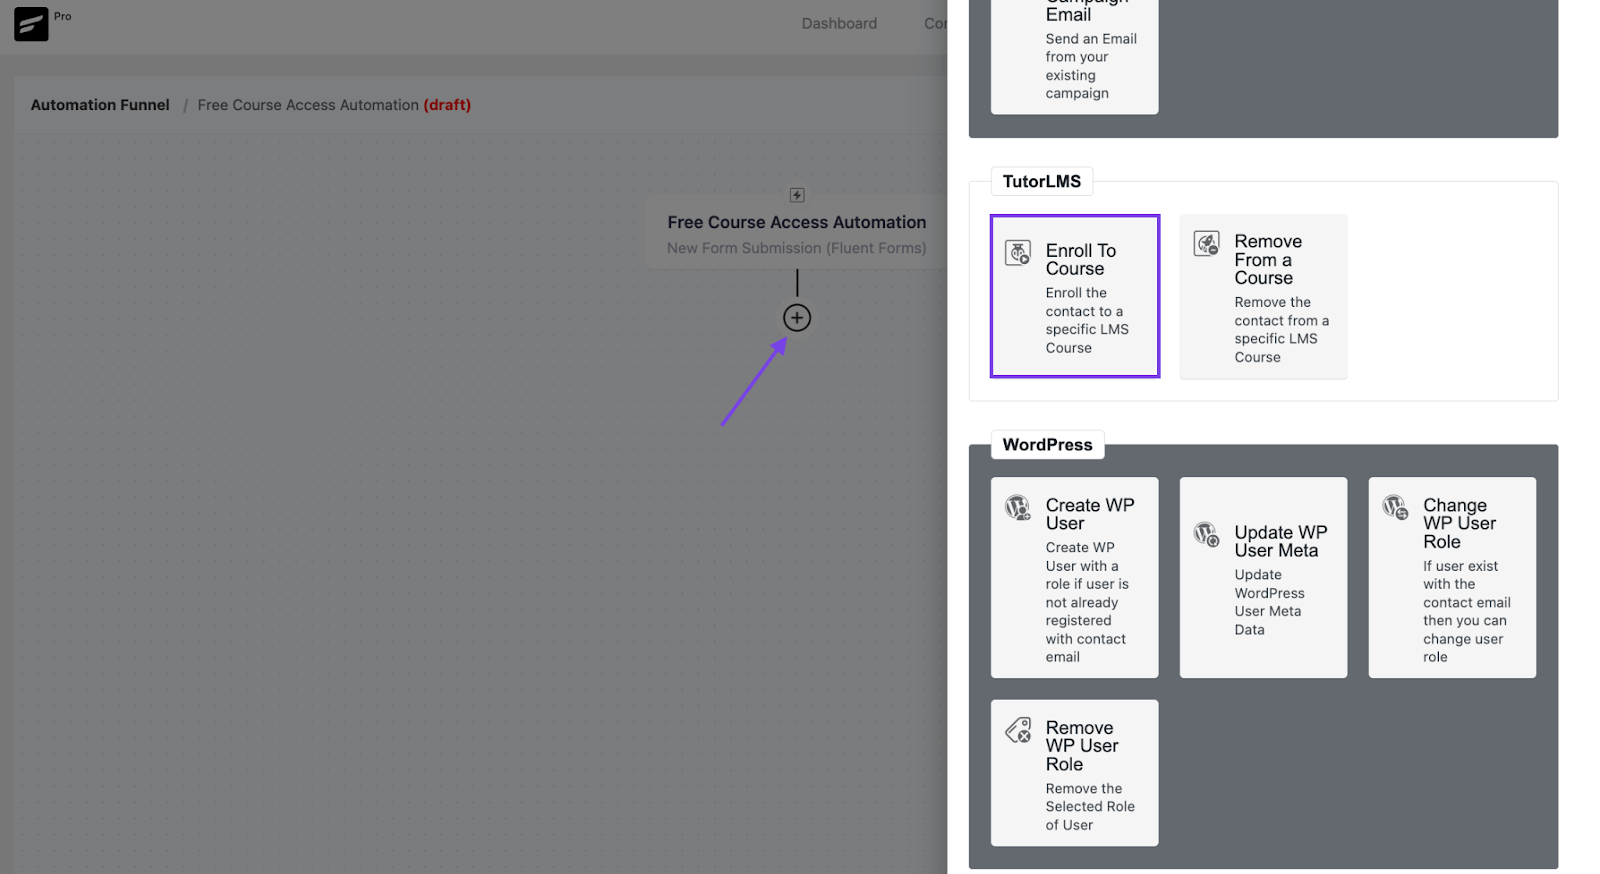
Then, specify your free course from the following drawer menu.
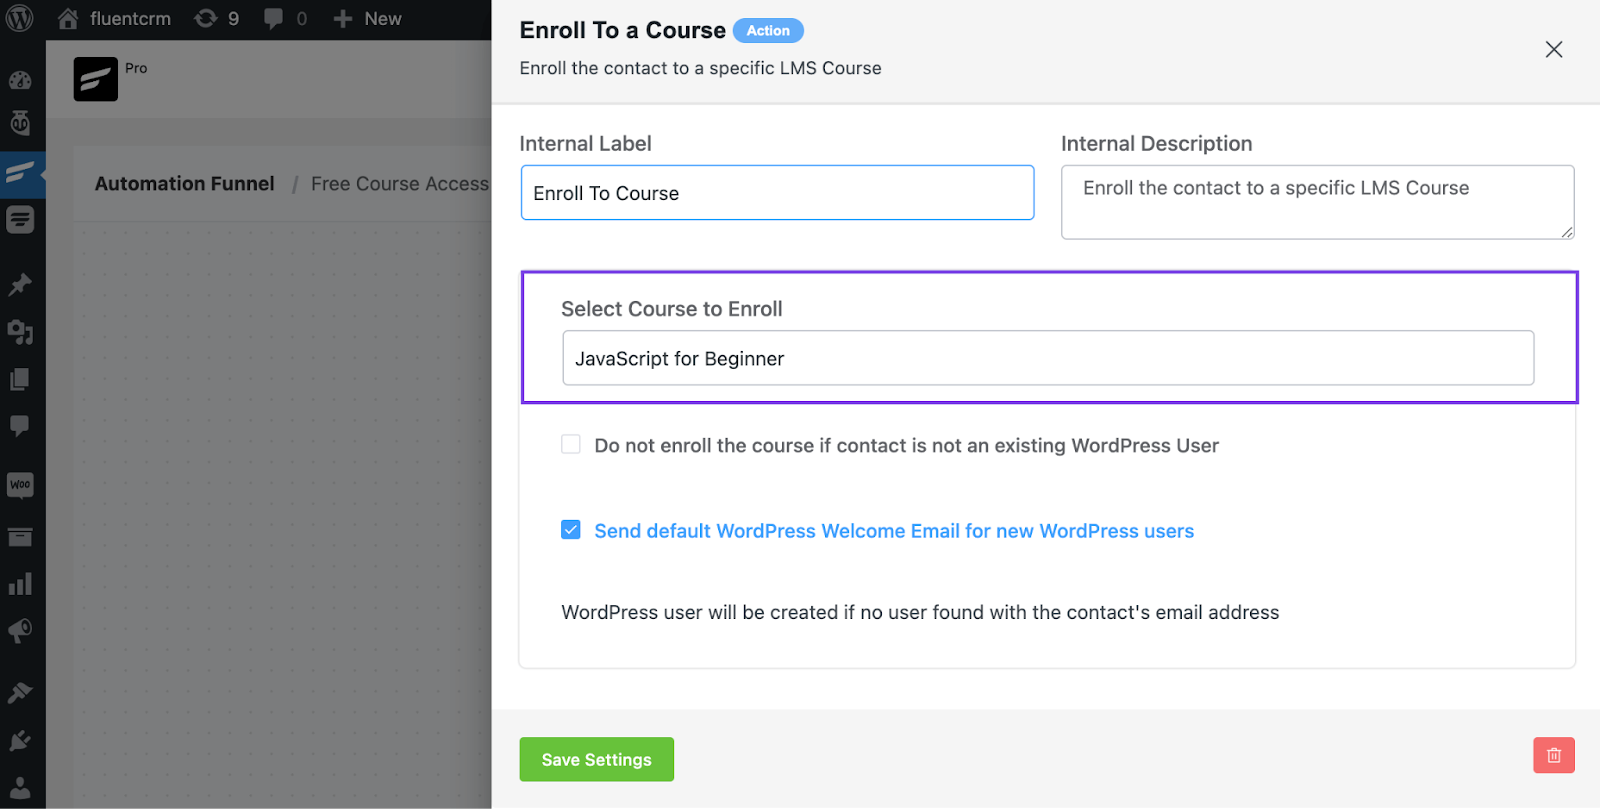
That’s it, the automation is fully configured to enroll visitors to courses when they submit a form.
Wouldn’t it be great if you could also send a welcome email after they got enrolled in a free course?
Let’s set it up too and activate the automation by clicking Published!
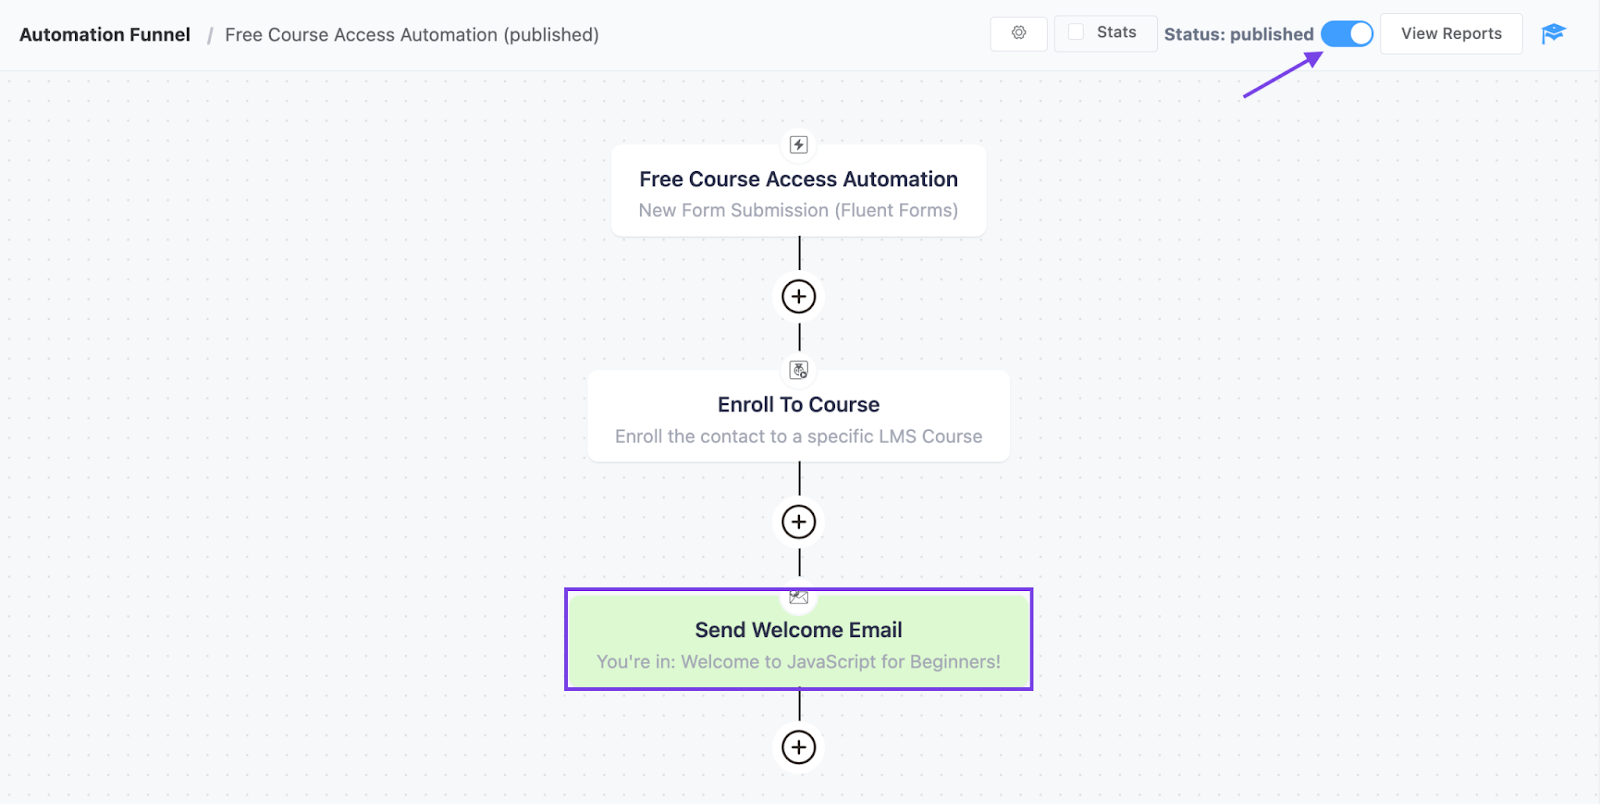
With the above automation activated, now you’ll be able to drive email signups and provide free course accesses on autopilot!
Course-specific Segmentation
In today’s world, personalized learning isn’t just important, it’s something your students deserve. In order to personalize your student’s learning progress the automated way, FluentCRM gives you easy course-specific segmentation options.
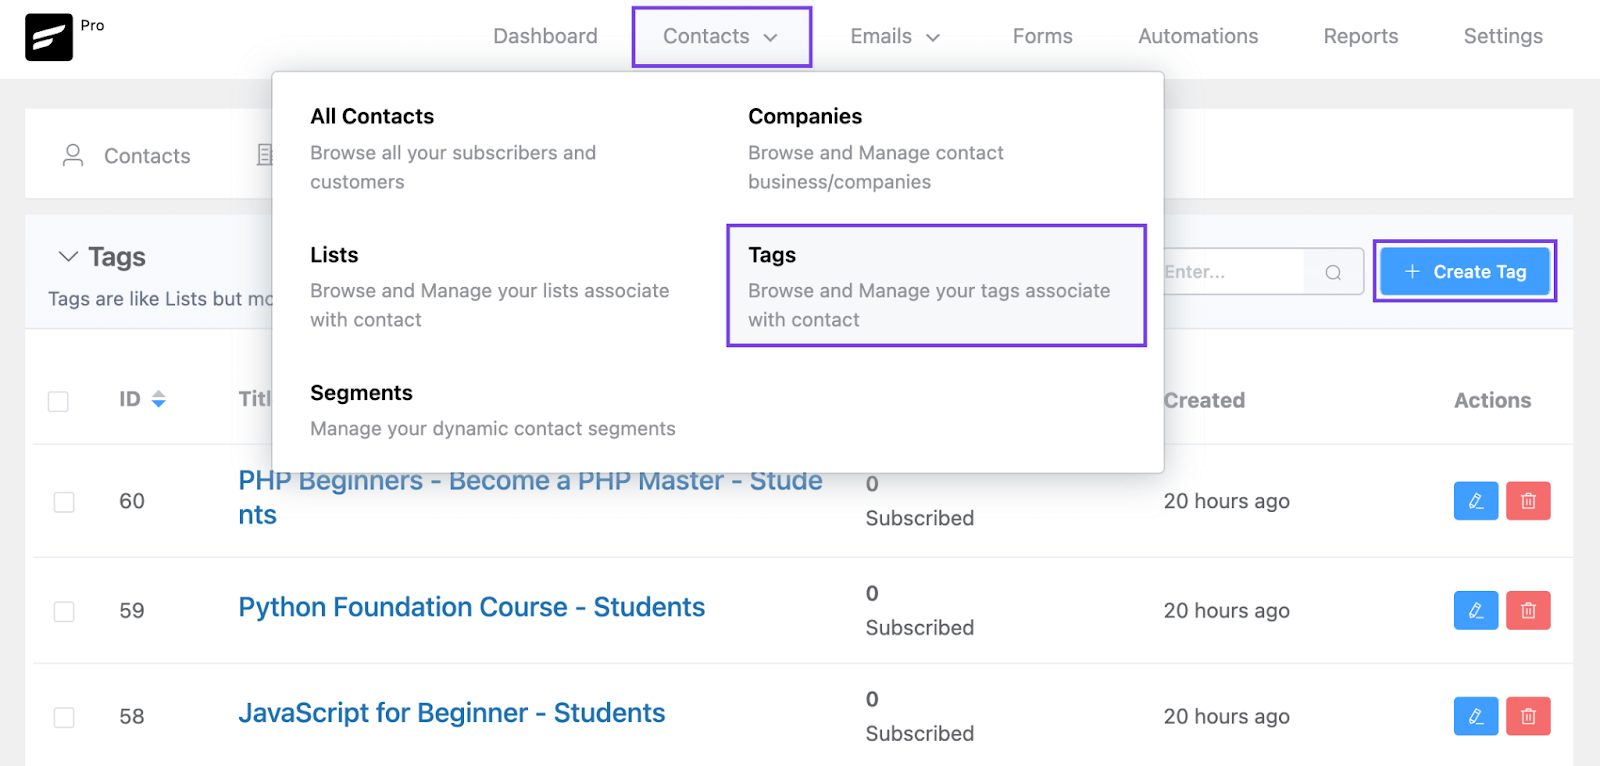
Considering most of you may already have a few students, it’d be wise to start by segmenting your existing students. So first, you’ll have to create a few tags for your courses. Hover over to Contacts>Tags and click the Create Tag button to create tags.
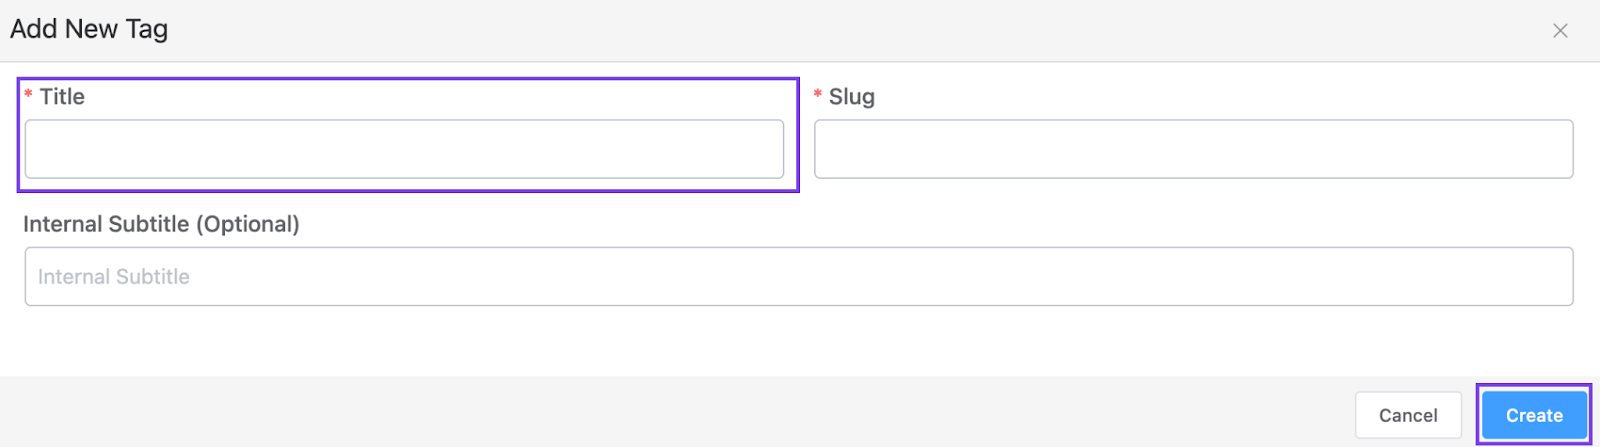
Then, give a name for your tag and click the Create Tag button. You can also set a slug and internal label if you want.
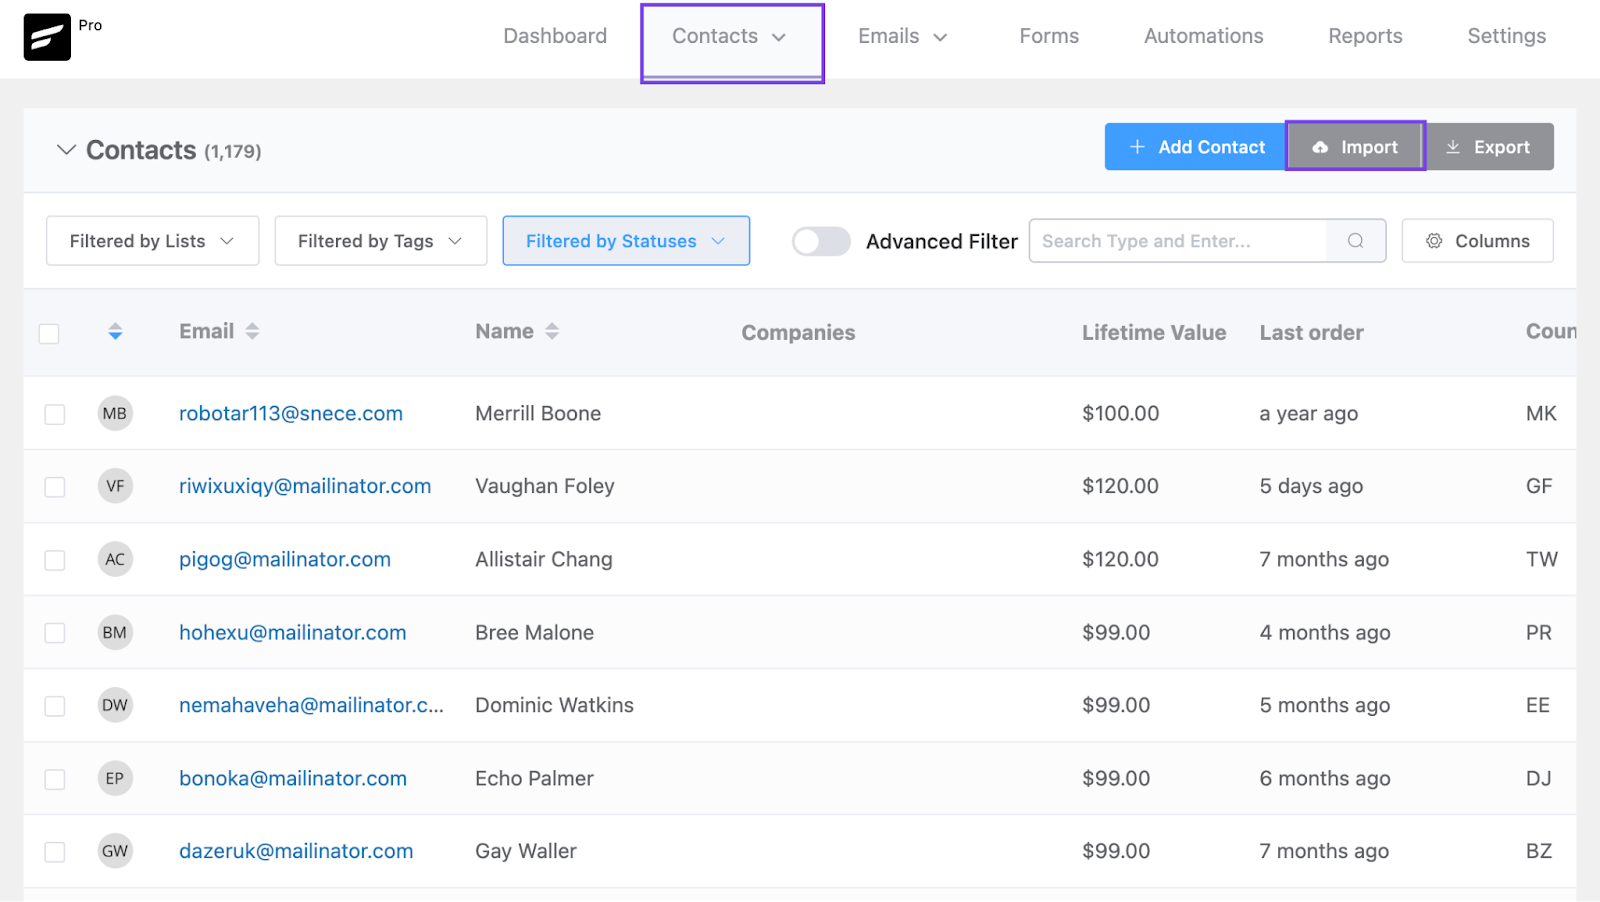
Once you’ve created the tags, head over to FluentCRM Contacts and click the Import button.
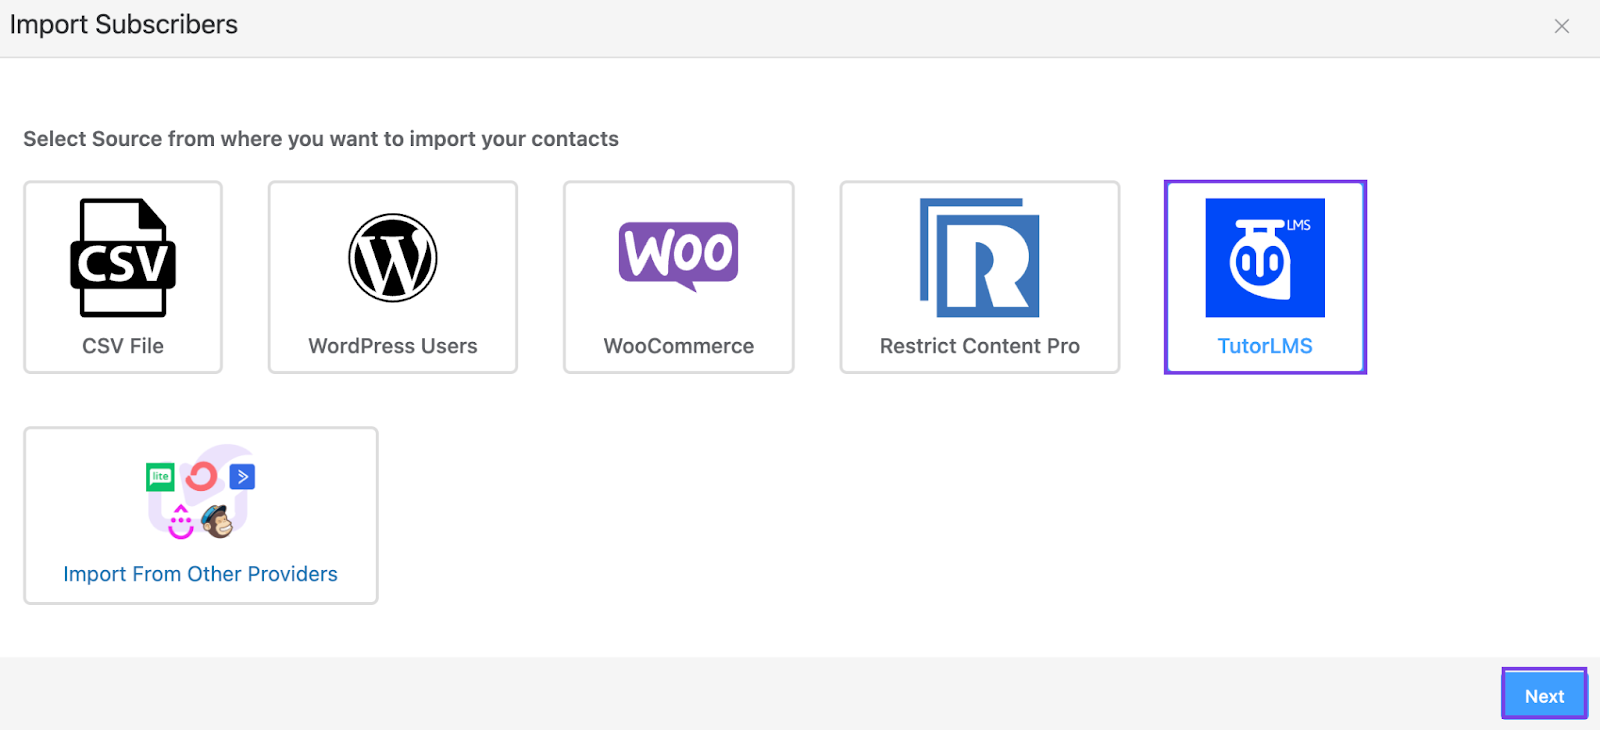
Then choose the Tutor LMS icon from the list and hit Next.
Then, map your courses and tags the way you want and click next.
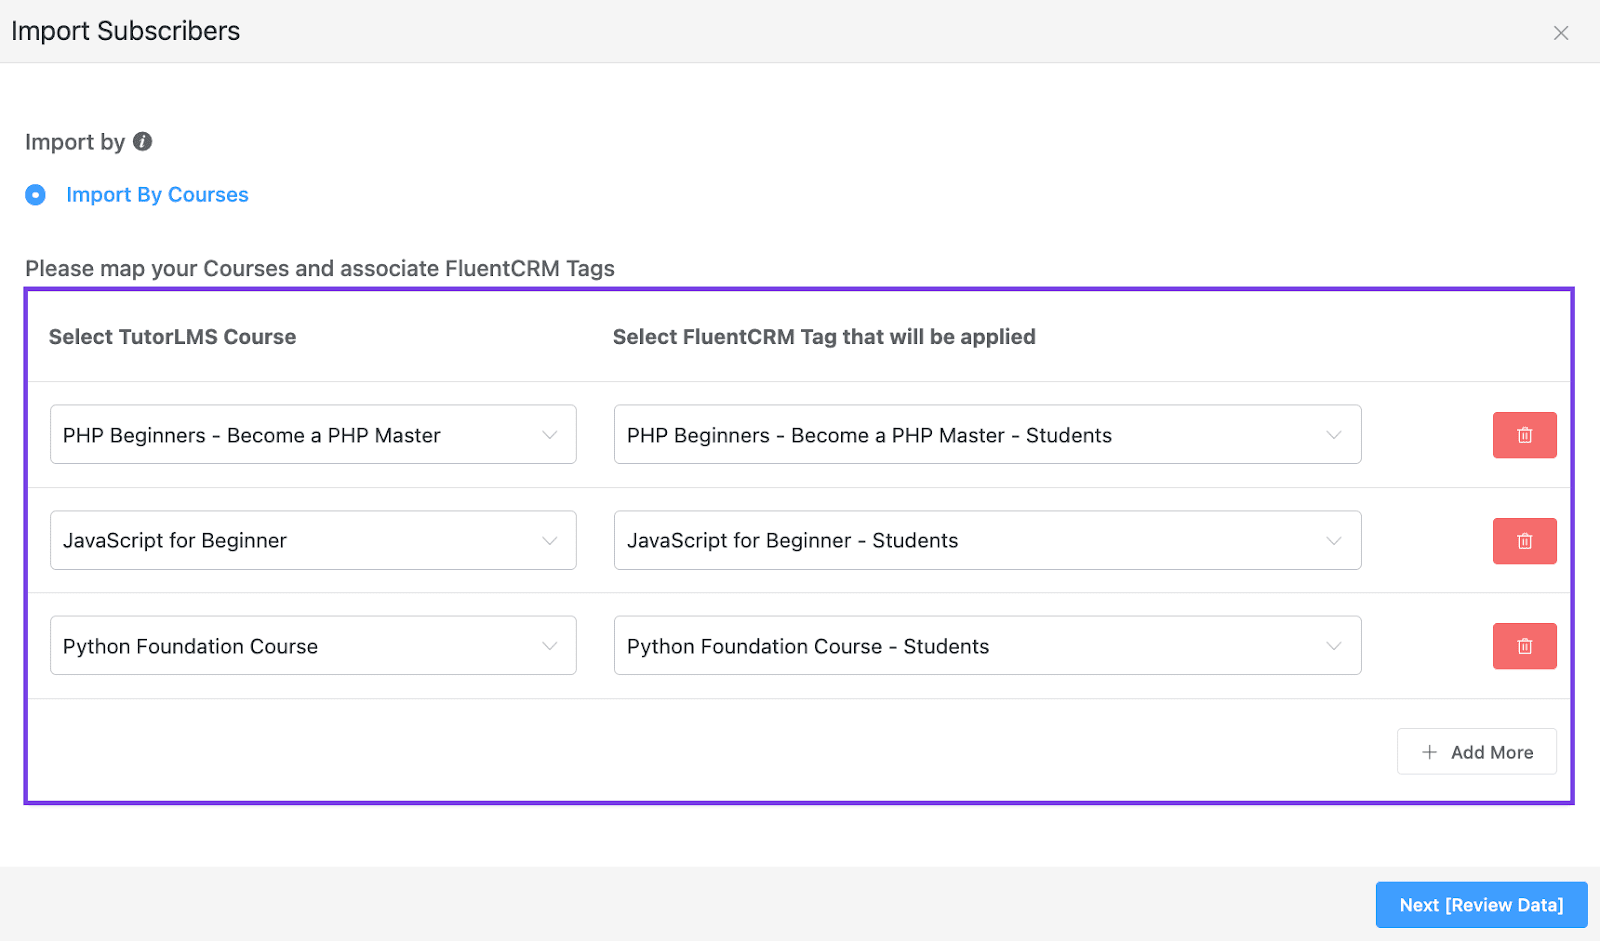
Finally, review everything and click the button to apply tags to your existing students.
Your existing students are segmented by course enrollments, what about future students?
Well, you can segment them too!
For that, simply go to the Course Editor in Tutor LMS and scroll over to the FluentCRM meta box. The meta box lets you apply tags based on course enrollment and course completion. But for now, we’ll add a tag based on course enrollments.
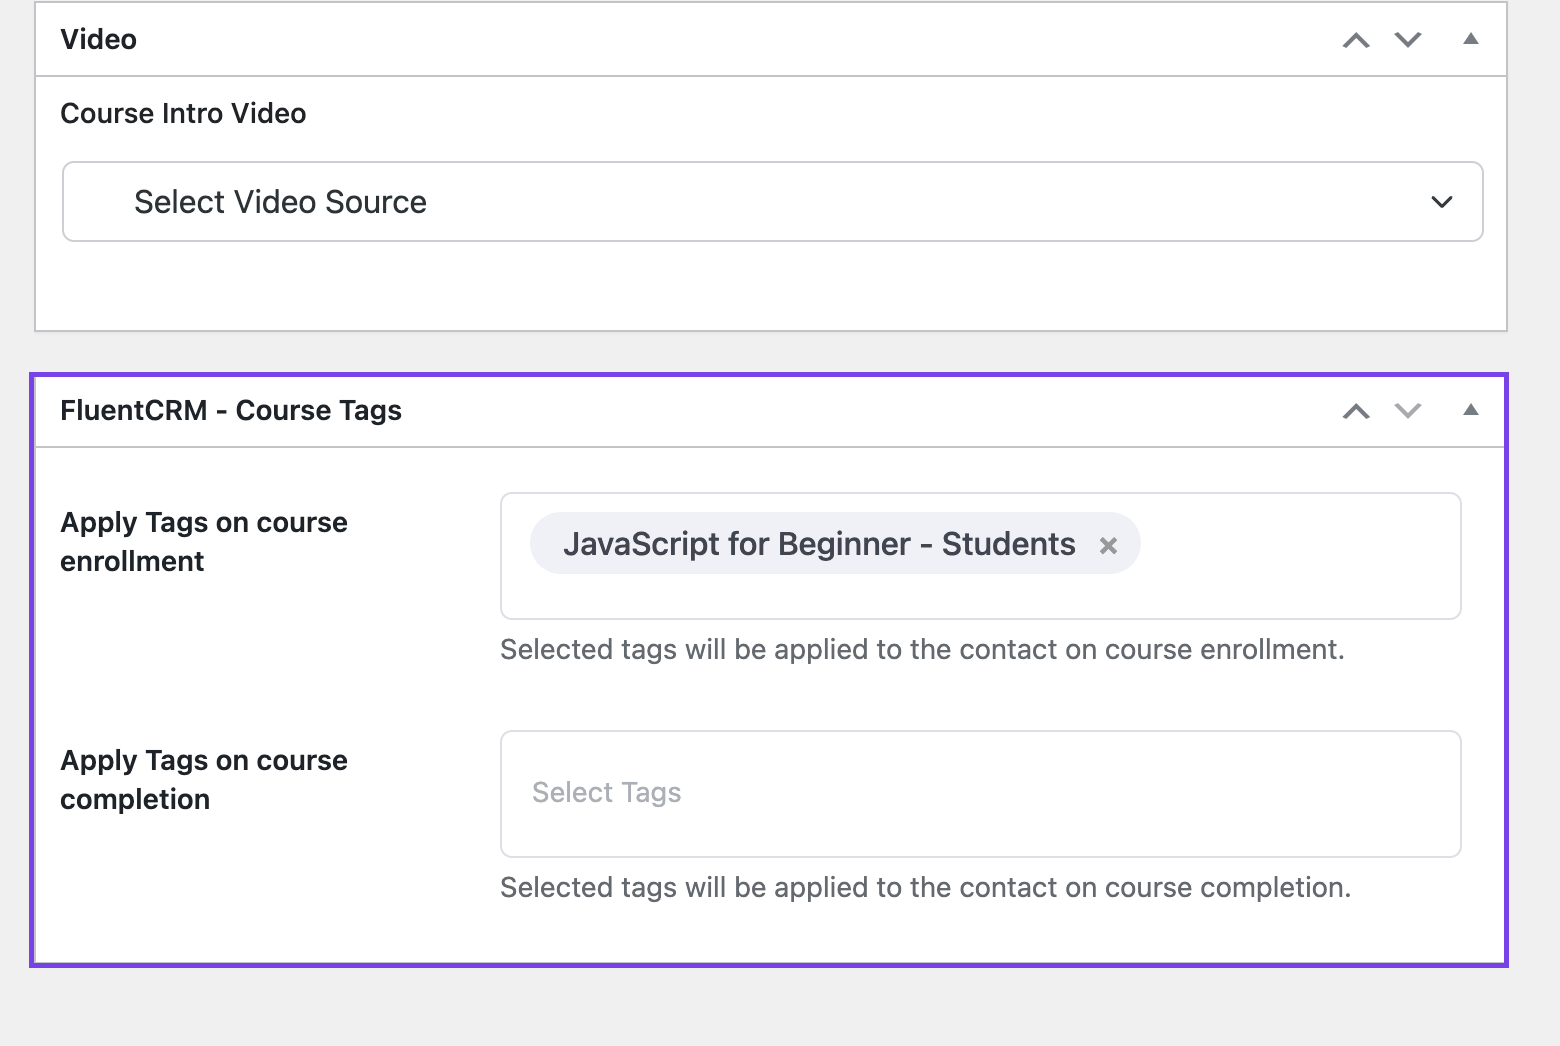
That’s it. All your existing and new students will be segmented into appropriate tags.
Personalizing eLearning
Imagine nurturing your students with a series of emails after they have enrolled in a course or sending them a personalized email after they have completed a lesson. Sounds great, right?
You can send course materials, helpful documents, and many other things your students might need without them even asking. FluentCRM makes this pretty easy!
Now that all your students are segmented based on the course they have taken, you’re ready to send personalized emails to guide your student’s learning progress. And the first personalized experience begins with onboarding your students to courses the right way.
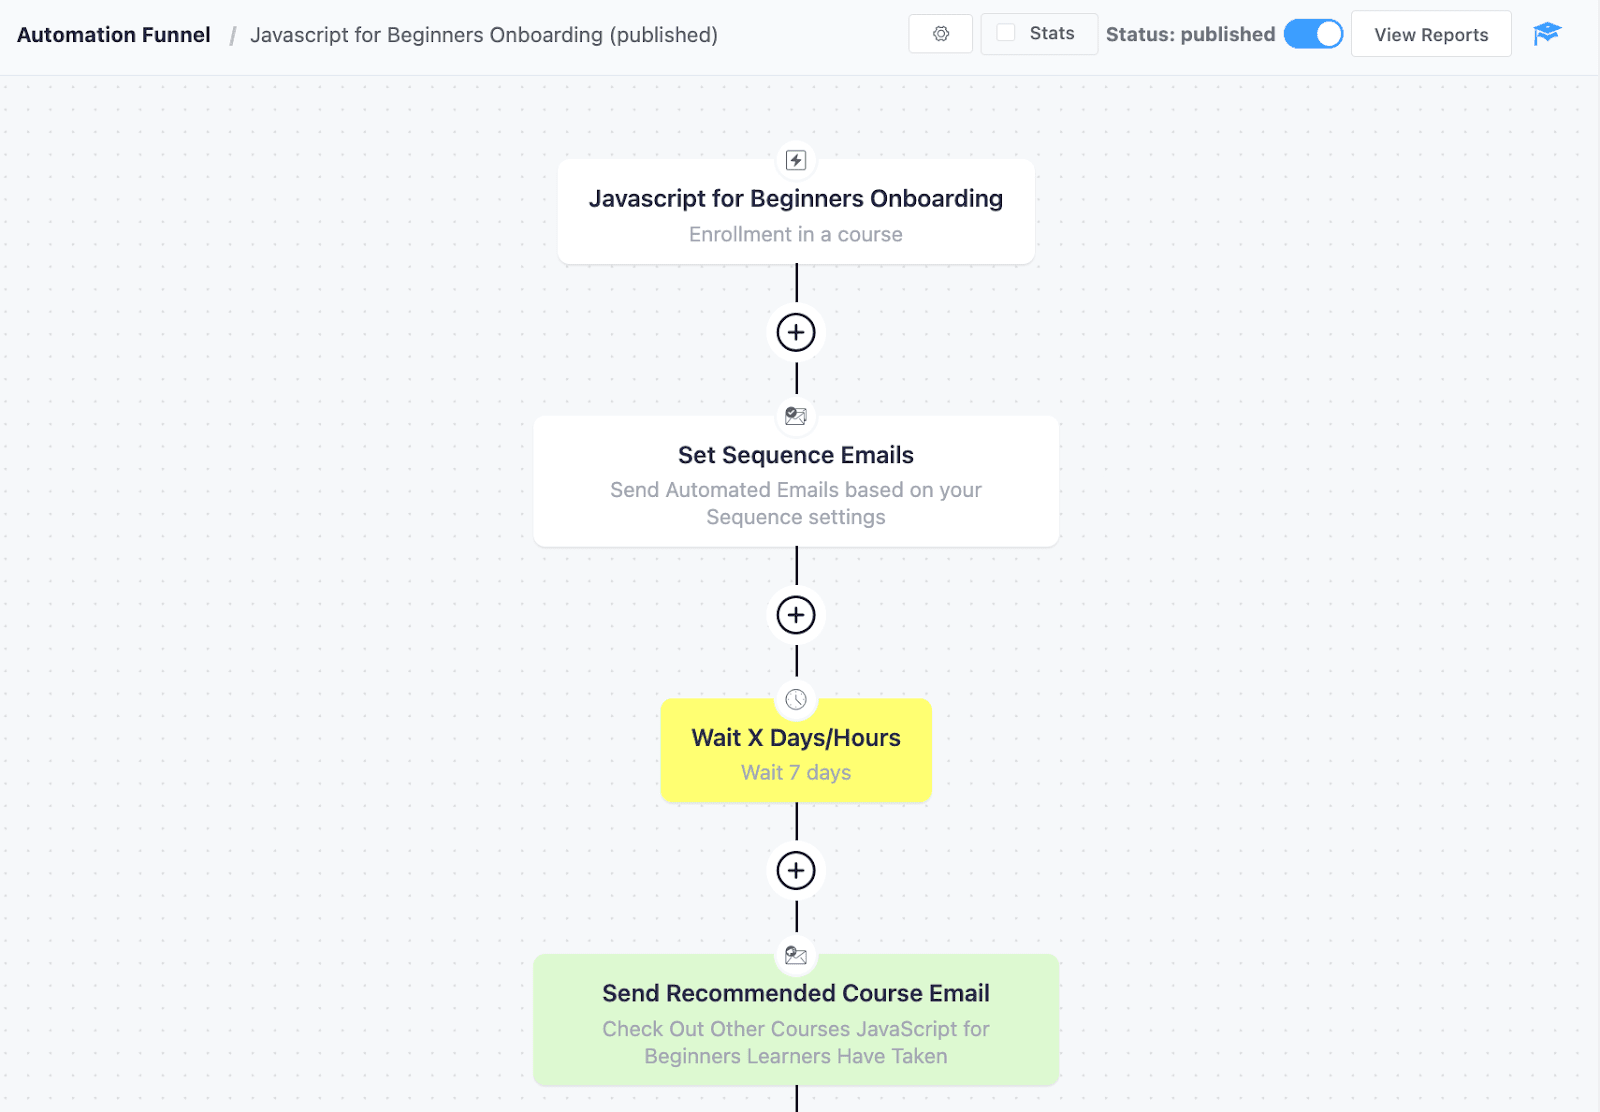
Let’s set up an onboarding email sequence for the new students!
First, go to Email Sequences and create a new email sequence.

Then click Add a Sequence Email.
In the next window, you need to compose your email. You can set a delay, choose the sending time range, and even set specific days for sending emails.
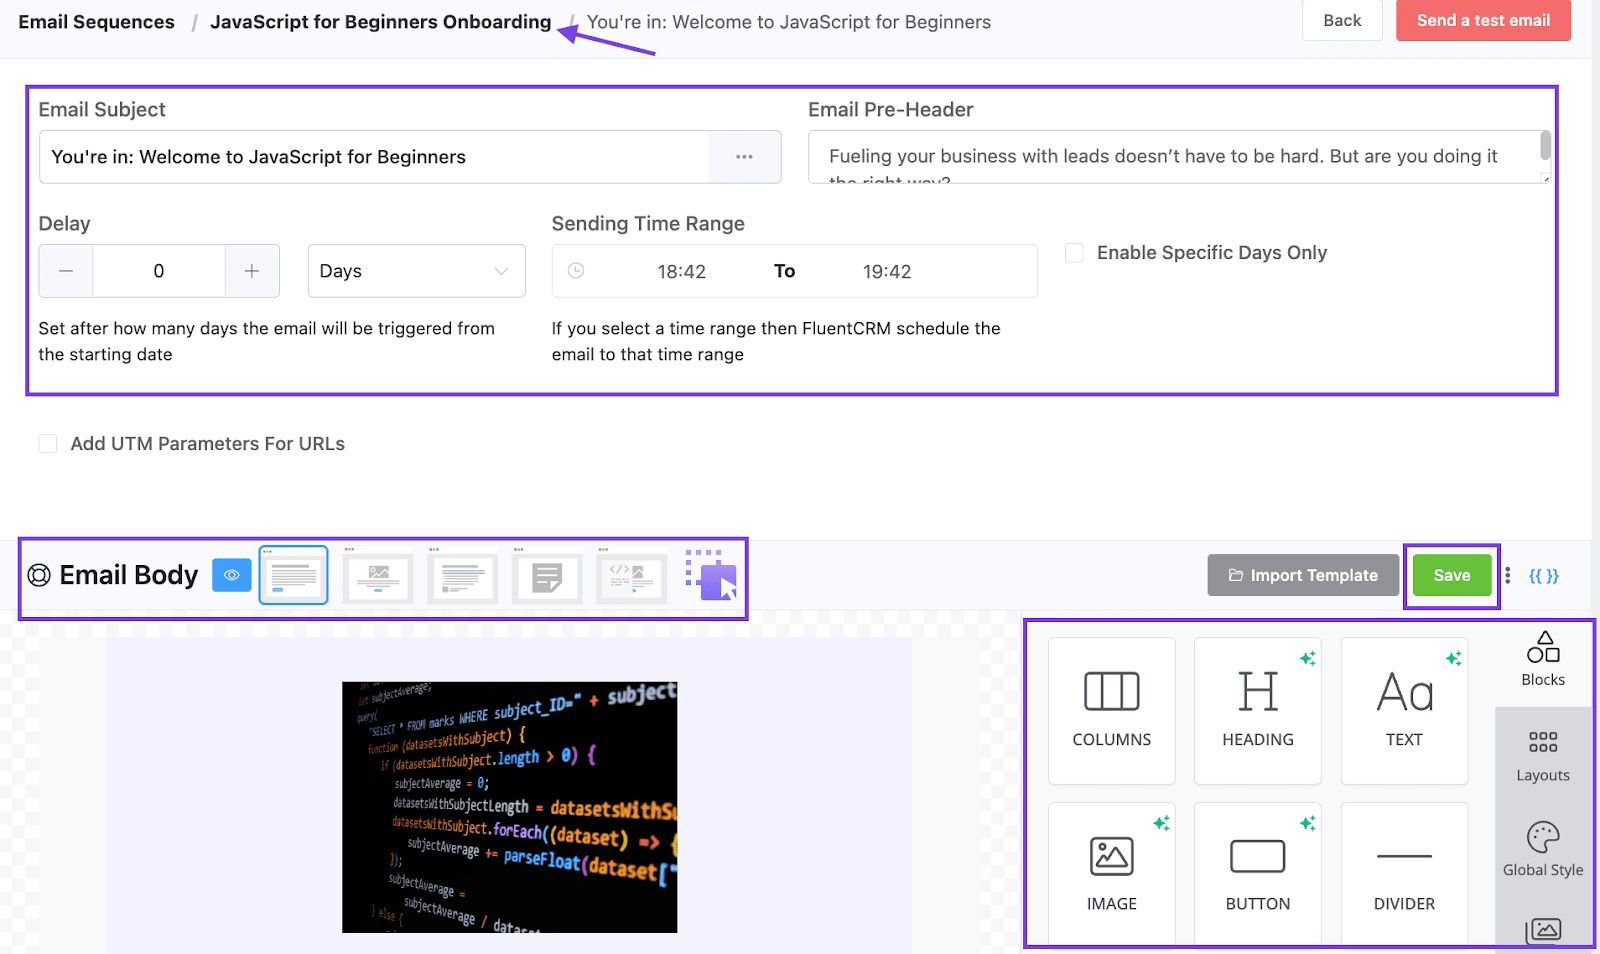
Once you have created an email, click the Save button and get back to the sequence.
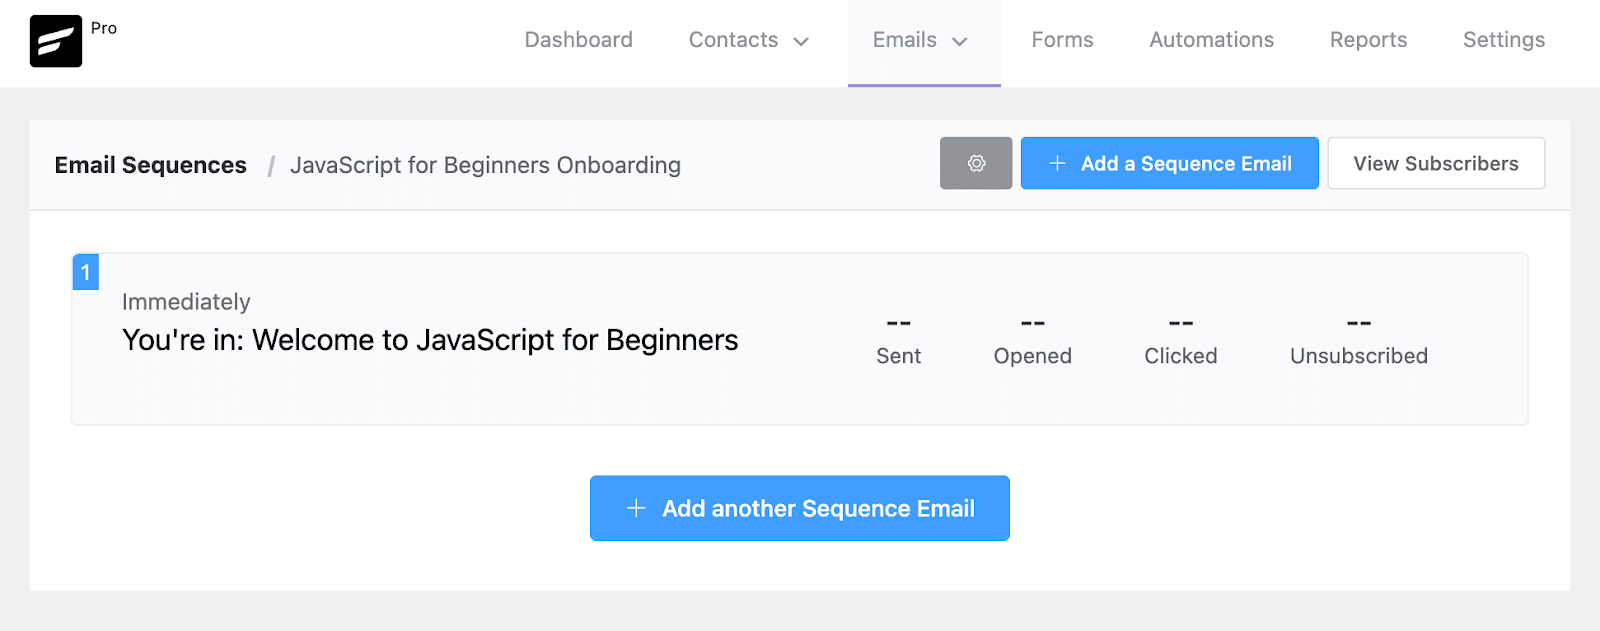
Then, repeat the whole loop and add as many emails as you want. Let’s say our email sequence consists of three emails, the email sequence would look something like this:
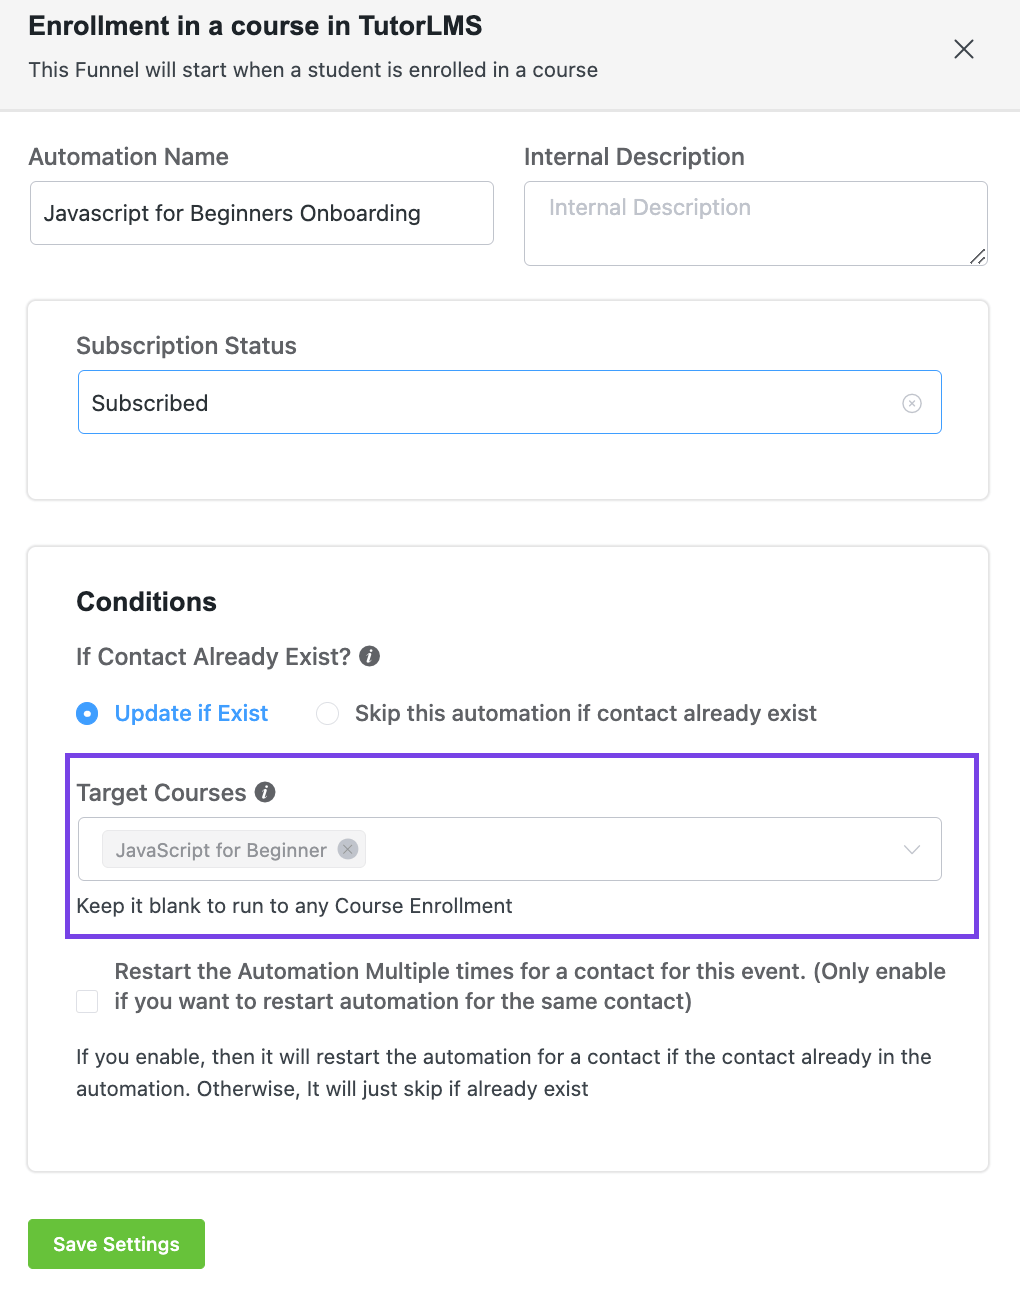
Now that our email sequence is ready, you’ll need to trigger the email sequence when someone enrolls in the course. For that, FluentCRM provides a built-in trigger that captures the event (Enrollment in a course).
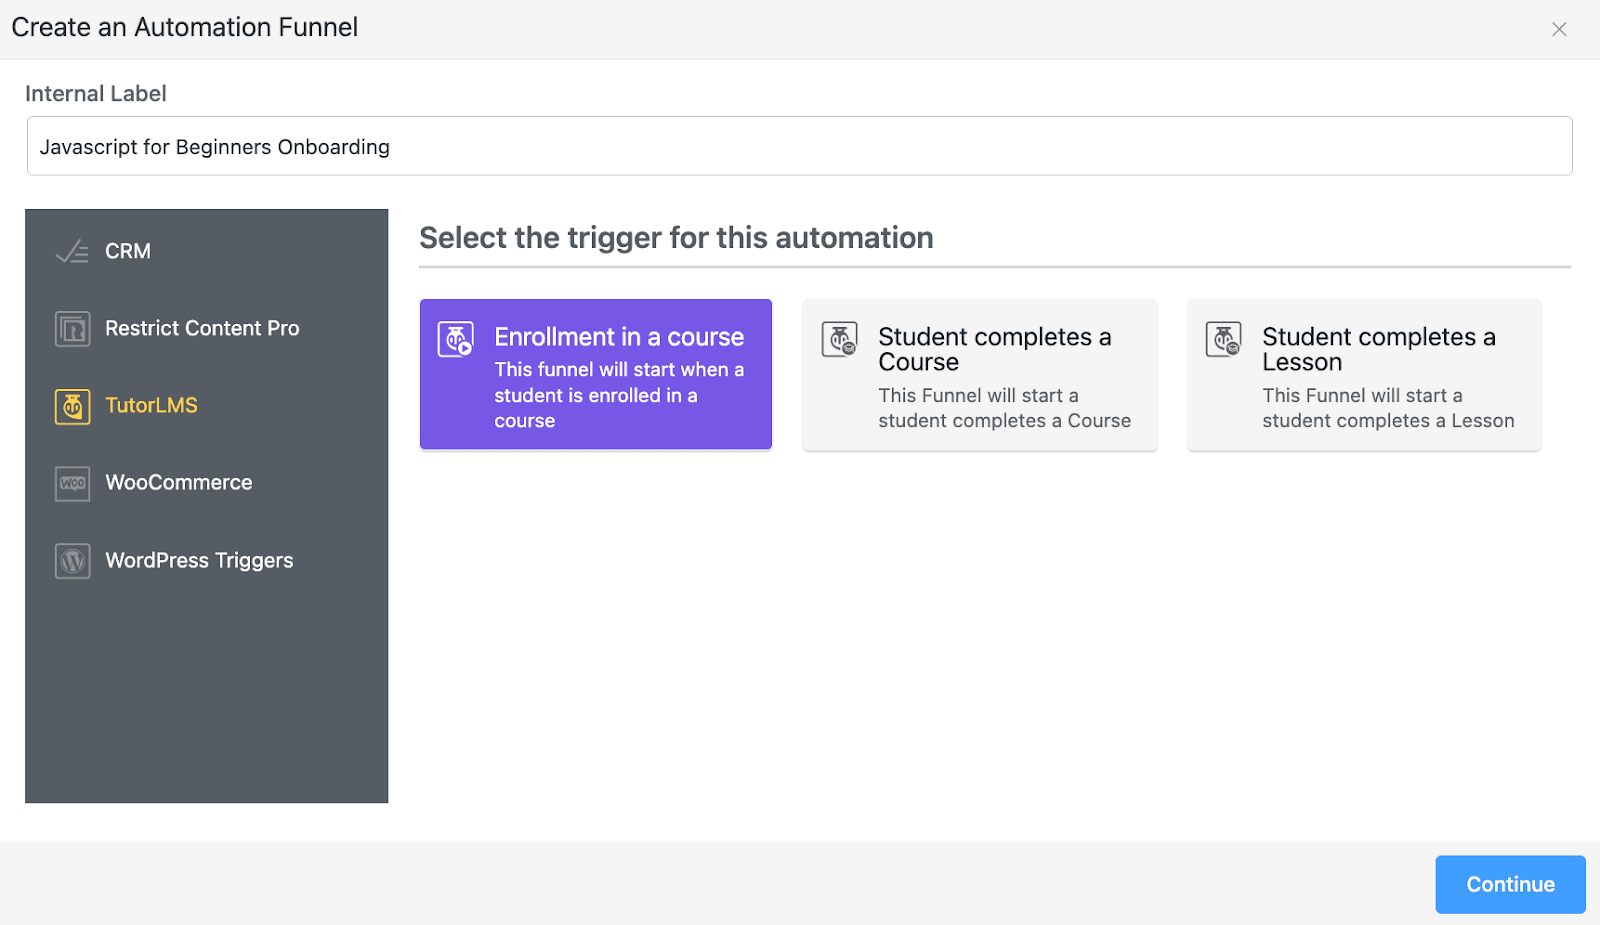
Let’s select that and configure the trigger by specifying our Target Courses.
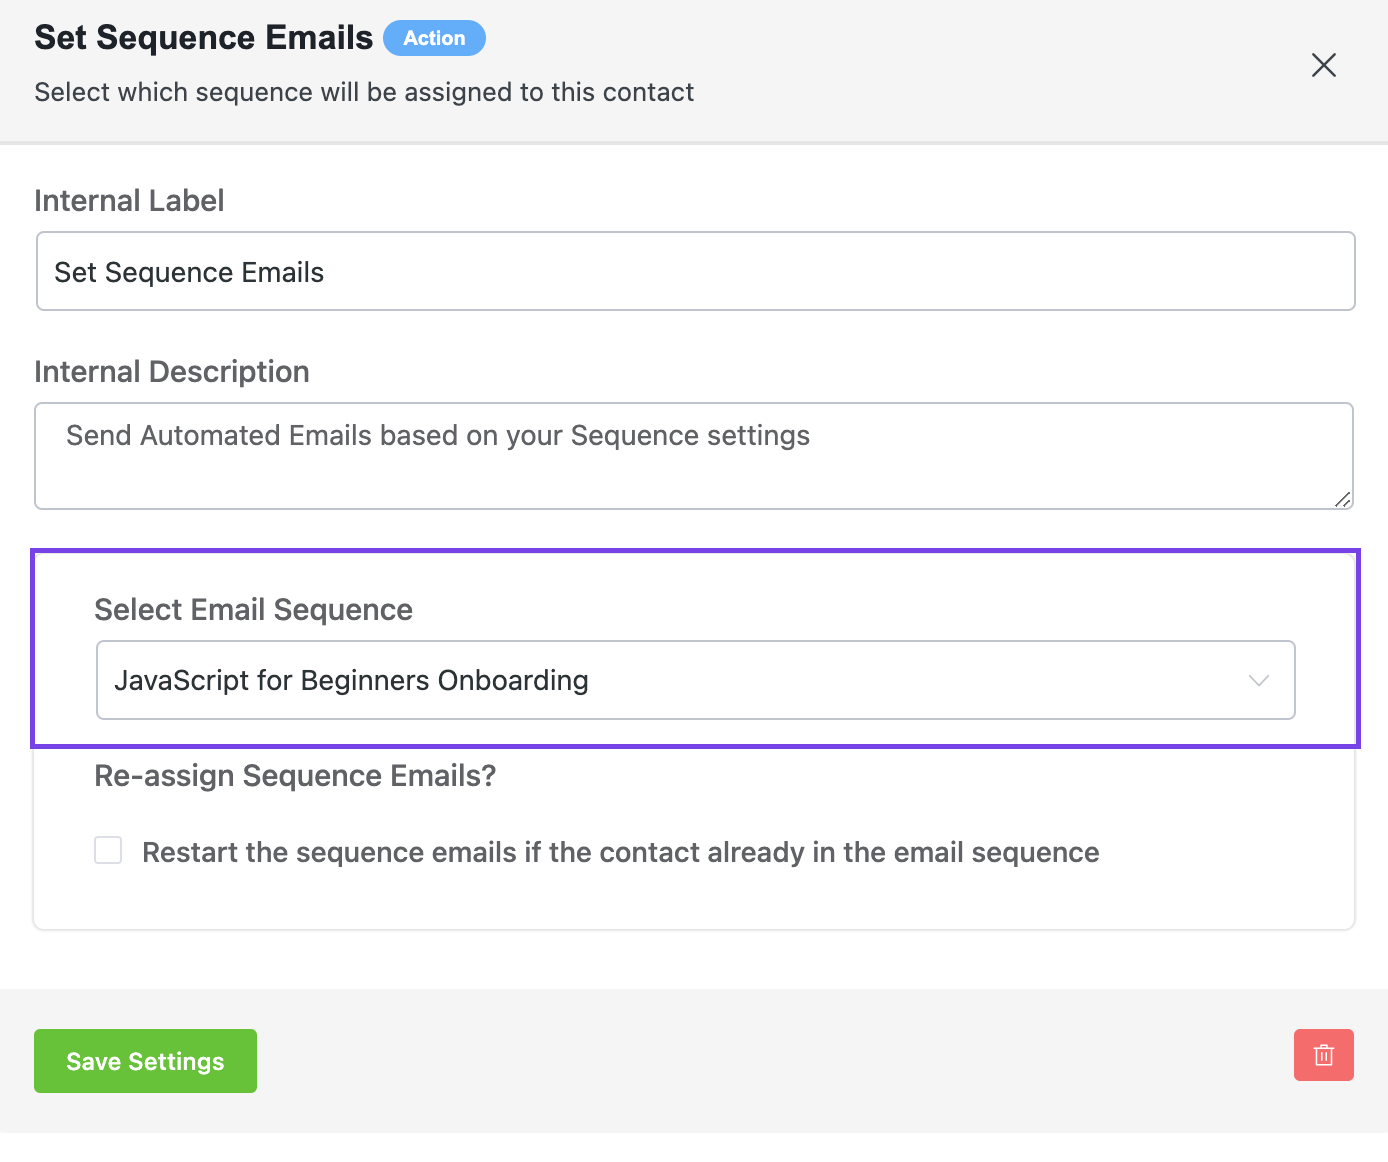
Once you’ve added the trigger, you’ll need to add an email sequence to the automation funnel. It’s just as easy as selecting the Set Sequence Emails block and specifying the email sequence you created earlier.
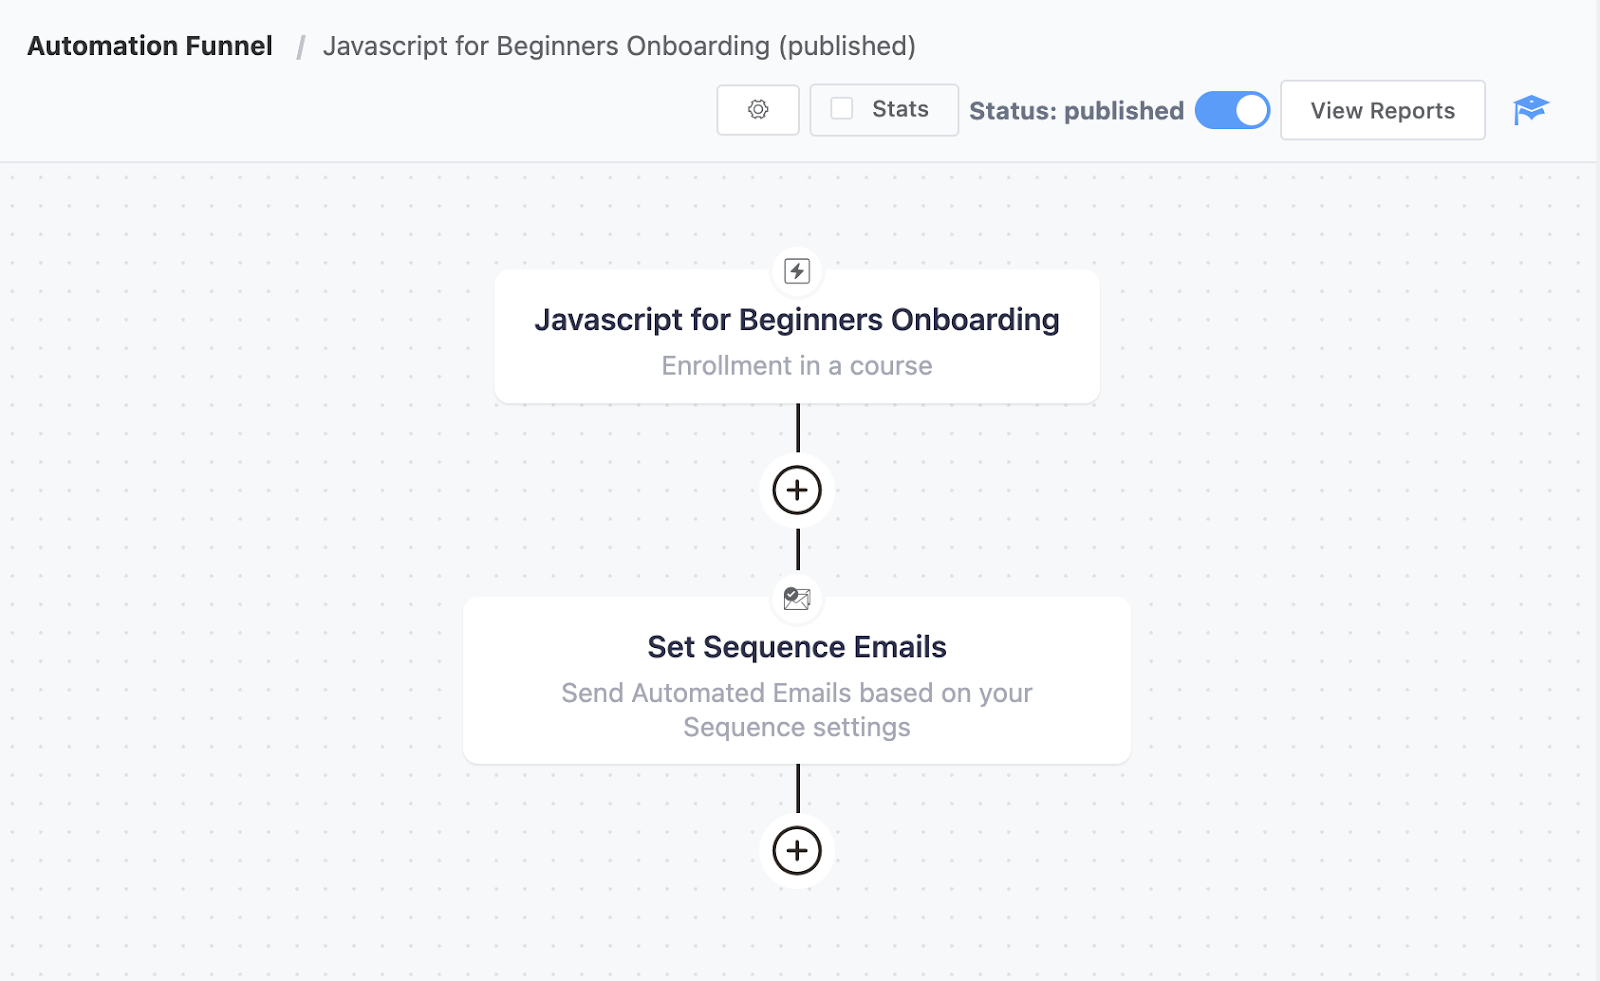
Your final automation will look something like this:
Once you’re done onboarding your students, why not invite them to check out your other courses too?
This is just an example of how FluentCRM makes personalized eLearning convenient. These small personalization techniques and promotional tweaks make the difference at the end of the day.
A personalized experience makes eLearning fun and engaging. Combine that with personalized course recommendations using FluentCRM’s wide range of triggers and actions, you get a selling machine at your disposal!
And That’s Just a Glimpse of What Tutor LMS-FluentCRM Combo Offers!
Email marketing is one of the best ways to promote your courses organically. It’s affordable and makes course promotion a whole lot easier and effective. That said, there’s no reason not to utilize this powerful marketing channel.
The Tutor LMS-FluentCRM combo should give you an edge over your competitors because of how strong the integration is. The duo is made with perfection and won’t cost a dime extra because everything is inside the same platform (WordPress).
Plus, FluentCRM’s overall feature set includes several other robust features such as — recurring campaigns, intelligent tracking, and analytics, conditional content, webhooks, etc.
We believe FluentCRM is the best email marketing tool to use if you are a Tutor LMS user and recommend getting FluentCRM Pro if you haven’t already. So go ahead and give this combo a try. Boost your course sales with the Tutor LMS-FluentCRM duo.
Good luck, and happy email marketing!
Note: This article has been written by Nazir Himel. He leads the marketing team at FluentCRM. He loves to explore and write about new technology trends and marketing. If he isn’t busy writing, you’ll probably find him exploring the city.