Making compelling video lessons that engage learners is both an art and a science. As an educator, you put your passion into creating content that changes lives. But you also need practical tips to grab attention, spark curiosity, and inspire action.
In this post, we’ll explore the key ingredients for making binge worthy, can’t stop watching video lessons on Tutor LMS. You’ll learn proven techniques to tell compelling stories, build community, and design an irresistible learning experience.
Whether you’re making short tutorials or multi hour masterclasses, these tips will help you create videos that educate, entertain, and get students to enroll. By the end, you’ll discover real world strategies to create lessons that educate, captivate, and drive enrollment. Plus, you’ll learn how Tutor LMS Pro’s robust tools can make your video content truly irresistible. Ready? Let’s start unlocking the secrets of incredible online video lessons!
Crafting a Compelling Course Video: What You Need to Know
Course videos can really take your online teaching game to the next level. They grab your students’ attention, explain tough topics clearly, connect with your audience, and help them remember what you taught. But making great videos isn’t as easy as just hitting record. You need a plan to make binge worthy content that nails your learning goals.
Want to create course videos your students will love? Let’s start unlocking the formula for online video greatness:
Step 1: Craft a Compelling Narrative
Everyone loves a good story, and video lessons are the perfect place to tell yours. Use these tips to create a compelling narrative that sticks in students’ minds:
- Plan out your story flow ahead of time: Draft a storyboard that maps out the major plot points, scenes, and flow of your video lesson. Identify where you will explain key concepts. Sketch out any graphics or visuals to include. Storyboarding the narrative will ensure your video stays focused while helping concepts stick.
- Hook viewers immediately: Your opening scene or question should instantly grab students’ attention and make them eager to hear more. Consider sharing an intriguing statistic, telling a real world anecdote, or posing a thought provoking question to kick things off on a high note.
- Close your video memorably: Wrap up with a summary of the big ideas and leave them wanting more. Ending strong will make your key points more memorable.
- Bring energy and passion: Let your enthusiasm for the topic come through naturally to bring the story alive. Appropriate humor can further amplify engagement.
Step 2: Create Binge-Worthy Lessons
In the era of Netflix and Hulu, students are used to binge watching their favourite shows. Why not apply those bingeable concepts to your video lessons? Use these tips to create content students just can’t stop hitting “play” on:
- Aim for shorter videos: Breaking your lessons into 6 to 15 minute chunks that align better with student attention spans in the streaming era.
- Recap frequently: Briefly summarize key takeaways every few minutes instead of info dumping everything at once.
- End on cliffhangers: Wrap up each video with an unresolved question or teaser that leaves them eager to start the next one.
- Build-in breaks: Insert natural stopping points between videos for students to reflect without losing momentum.
- Link it together: Use chapter markers with descriptions to stitch your content flow seamlessly.
- Optimize video pacing: Leverage video forward seek locking to ensure they view critical portions before proceeding further.
Step 3: Boost Production Value
Want to take your video production to the next level? Use these tips to give your lessons a major quality boost:
- Light it right: Ensure consistent lighting with minimal shadows. Face toward natural light when filming.
- Capture crisp audio: Use lavalier mics for clear narration. Avoid echoes and ambient noise.
- Edit to polish: Trim unnecessary sections and transition between clips smoothly.
- Integrate graphics: Include relevant on-screen text, images, animations, and B-roll.
- Brand it up: Introduce your lessons with branded intros and outros.
- Add captions: Provide readable, accurate captions and transcripts for greater accessibility.
Step 4: Make Videos Interactive
Imagine watching a video that’s not just a one-way street but a two-way conversation. Adding interactivity means turning passive video watching into active learning. Here’s how:
- Embed mini quizzes: Pause and ask MCQs or short answer questions to test understanding.
- On-Screen Graphics: Insert relevant images, text, charts, and graphics over the video. Think of these as visual aids. They can be helpful notes, animations, or anything that pops up on the screen to make things clearer and more interesting.
- Annotations: Link to resources or highlight key points with clickable on-screen callouts.
- Links: Enhance videos with links to external sites or related lessons. You can click on links within the video to explore related topics or dive deeper into what you’re learning.
- Assign follow-up activities: End each video with thoughtful reflection prompts or offline assignments that have students apply the knowledge actively. These allow learners to apply what they’ve learned, reinforcing their understanding.
Step 5: Promote Discoverability
In the digital age, it takes more than good content – you have to optimize so students can actually find your amazing videos! Use these strategies:
- Fill out descriptions: Write thorough summaries with engaging keywords students would search for.
- Tag thoughtfully: Use relevant tags like topic, concept, and skill level to categorize your content.
- Playlist your videos: Curate them into logical playlists around key subjects or lessons.
- Add closed captions: Transcripts boost SEO and accessibility.
- Share snippets: Post short, engaging clips on social media, driving traffic back to your course.
The right optimization makes your lessons visible both in courses and across the web. Help students find the videos that will unlock their potential!
Unleash the Power of Your Video Lessons with Tutor LMS’s Advanced Tools and Features
Well done! You have grasped the fundamentals of creating captivating video lessons. But the journey doesn’t end here. Now that we are done with the basics, let’s move on to the more advanced tips and tricks for creating engaging video lessons:
Learn at Your Pace
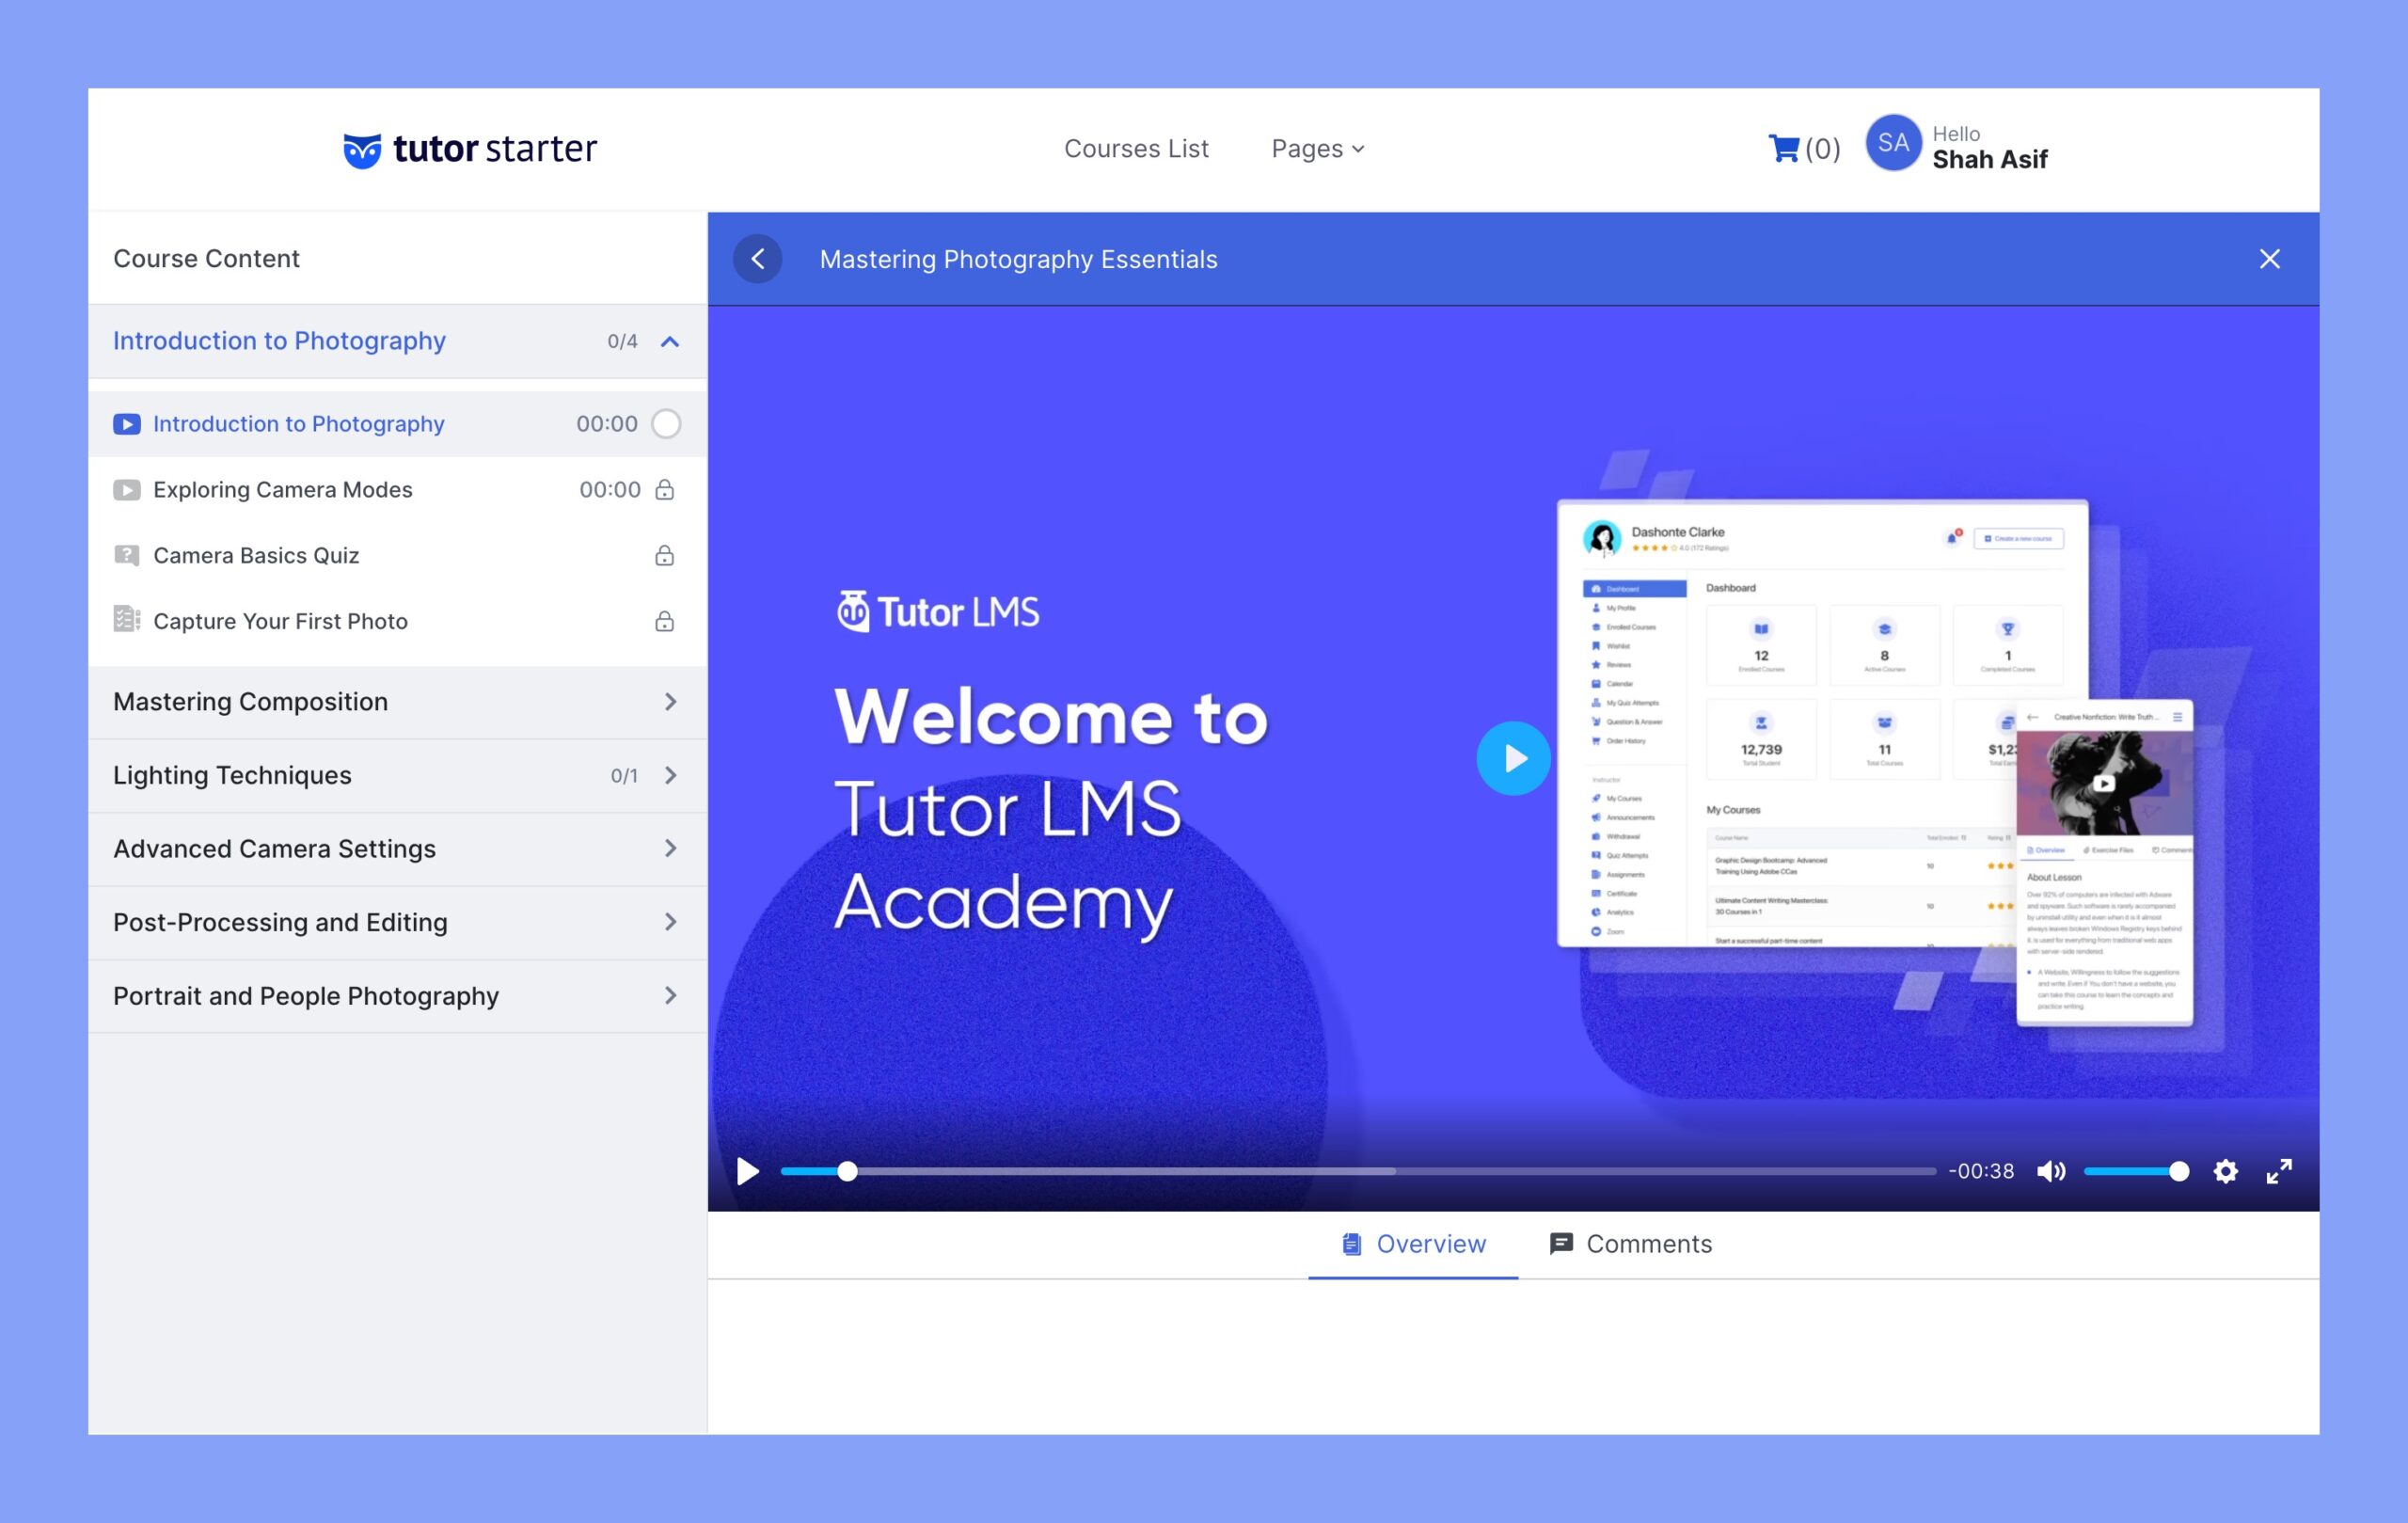
Empower your learners to control their learning experience. With Tutor LMS Pro video lessons, students can pause, rewind, or even speed up videos as they see fit. It’s all about flexibility and individualized learning. This feature is automatically available to students in your courses.
Auto-Resume
Never lose your spot again! This great feature bookmarks your video progress so you can seamlessly pick up where you left off, whether you’re switching devices or simply taking a break. With Tutor’s own Tutor Player will automatically resume from the last watched position.

Completion Control
Want to make sure your students watch the essential parts of your lessons? Say hello to Completion Control. You can set specific percentage requirements for video completion, ensuring your learners get the most out of your content. To enable this, go to TutorLMS Pro > Settings > Course > Video Lesson Completion Control. To learn more about this feature, take a look at our documentation.
Streamline Video Sharing
Hosting plays a very important role in your course video’s success. Using well-known and popular platforms, your learners can access content anywhere since these services are optimized for different devices and networks.
Tutor LMS makes sharing your videos incredibly easy. Integrate top platforms like YouTube and Vimeo, among others, right from your Tutor settings. With just a few clicks, your creative lessons can reach students globally.
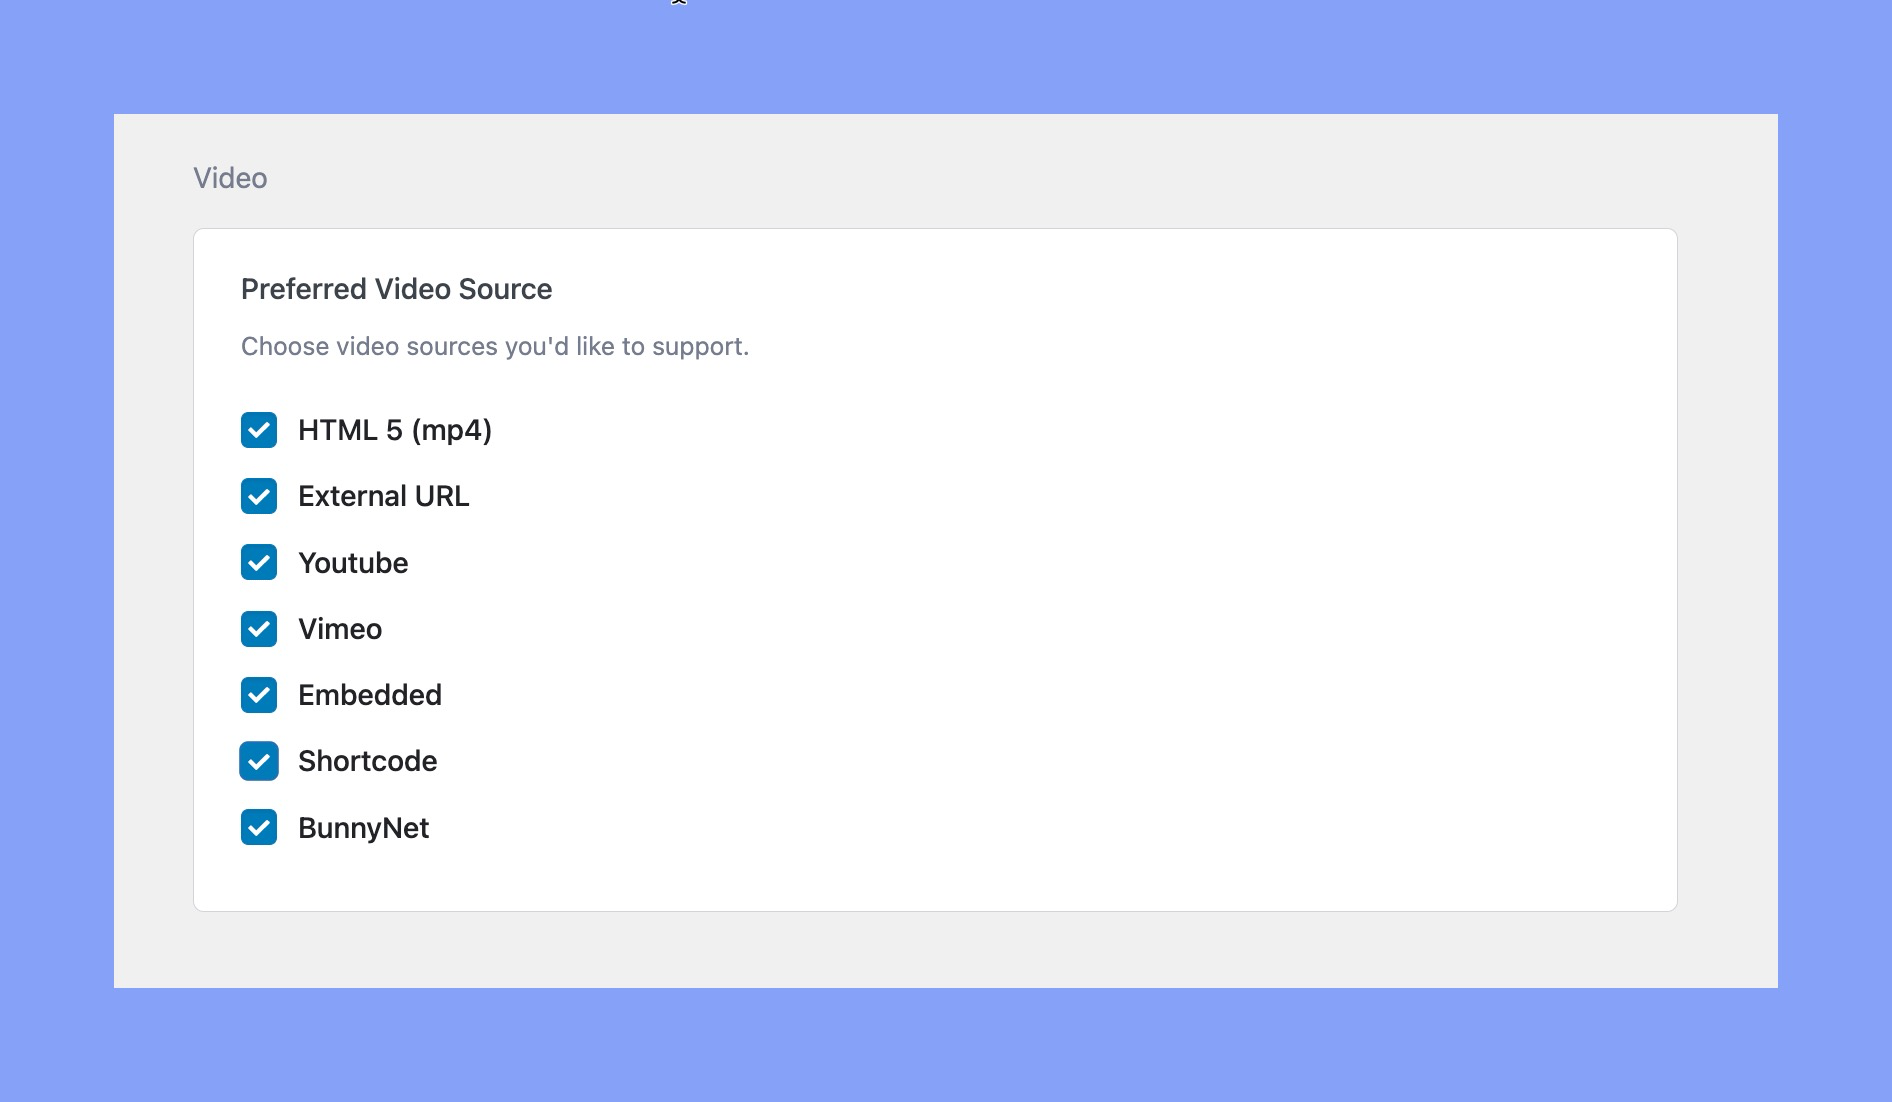
Additionally with Tutor LMS Pro you can also remove external branding from videos. Link YouTube and Vimeo videos, but hide the logo when playing them in Tutor.
Interactive Elements
Want your students to be fully immersed in your online courses? Tutor LMS lets you integrate interactive elements to captivate learners:
- Build customizable quizzes with multiple choice, short answer, matching, and more. Weave these throughout your course to check student’s understanding.
- Encourage deeper insight with discussion prompts for reflection and collaboration. Peer-to-peer forums are great for applying concepts.
- Assign hands-on projects to let students showcase skills. Active application sticks better than passive reading.
Through well-choreographed video lessons, you can prompt students to pause and complete quizzes or assignments at key points.
The more activities you blend in, the more actively engaged students will be. Tutor LMS gives you robust tools to create an interactive, minds-on experience that resonates.
Accessibility
One of the ways to make your online courses more engaging and effective is to use videos. However, videos can also pose accessibility challenges for some learners with disabilities or different preferences. Ensure your content is accessible to all by adding captions, transcripts, audio descriptions, and video quality control. It’s important to avoid certain effects in your videos too. Strobing or flashing effects can be dangerous for users with photosensitive epilepsy or other visual sensitivities.
To make accessibility control easier, Tutor LMS makes it simple to add captions to your videos hosted on popular platforms like YouTube or Vimeo. You can follow this tutorial to learn how to easily add captions to your videos.
Live Streaming
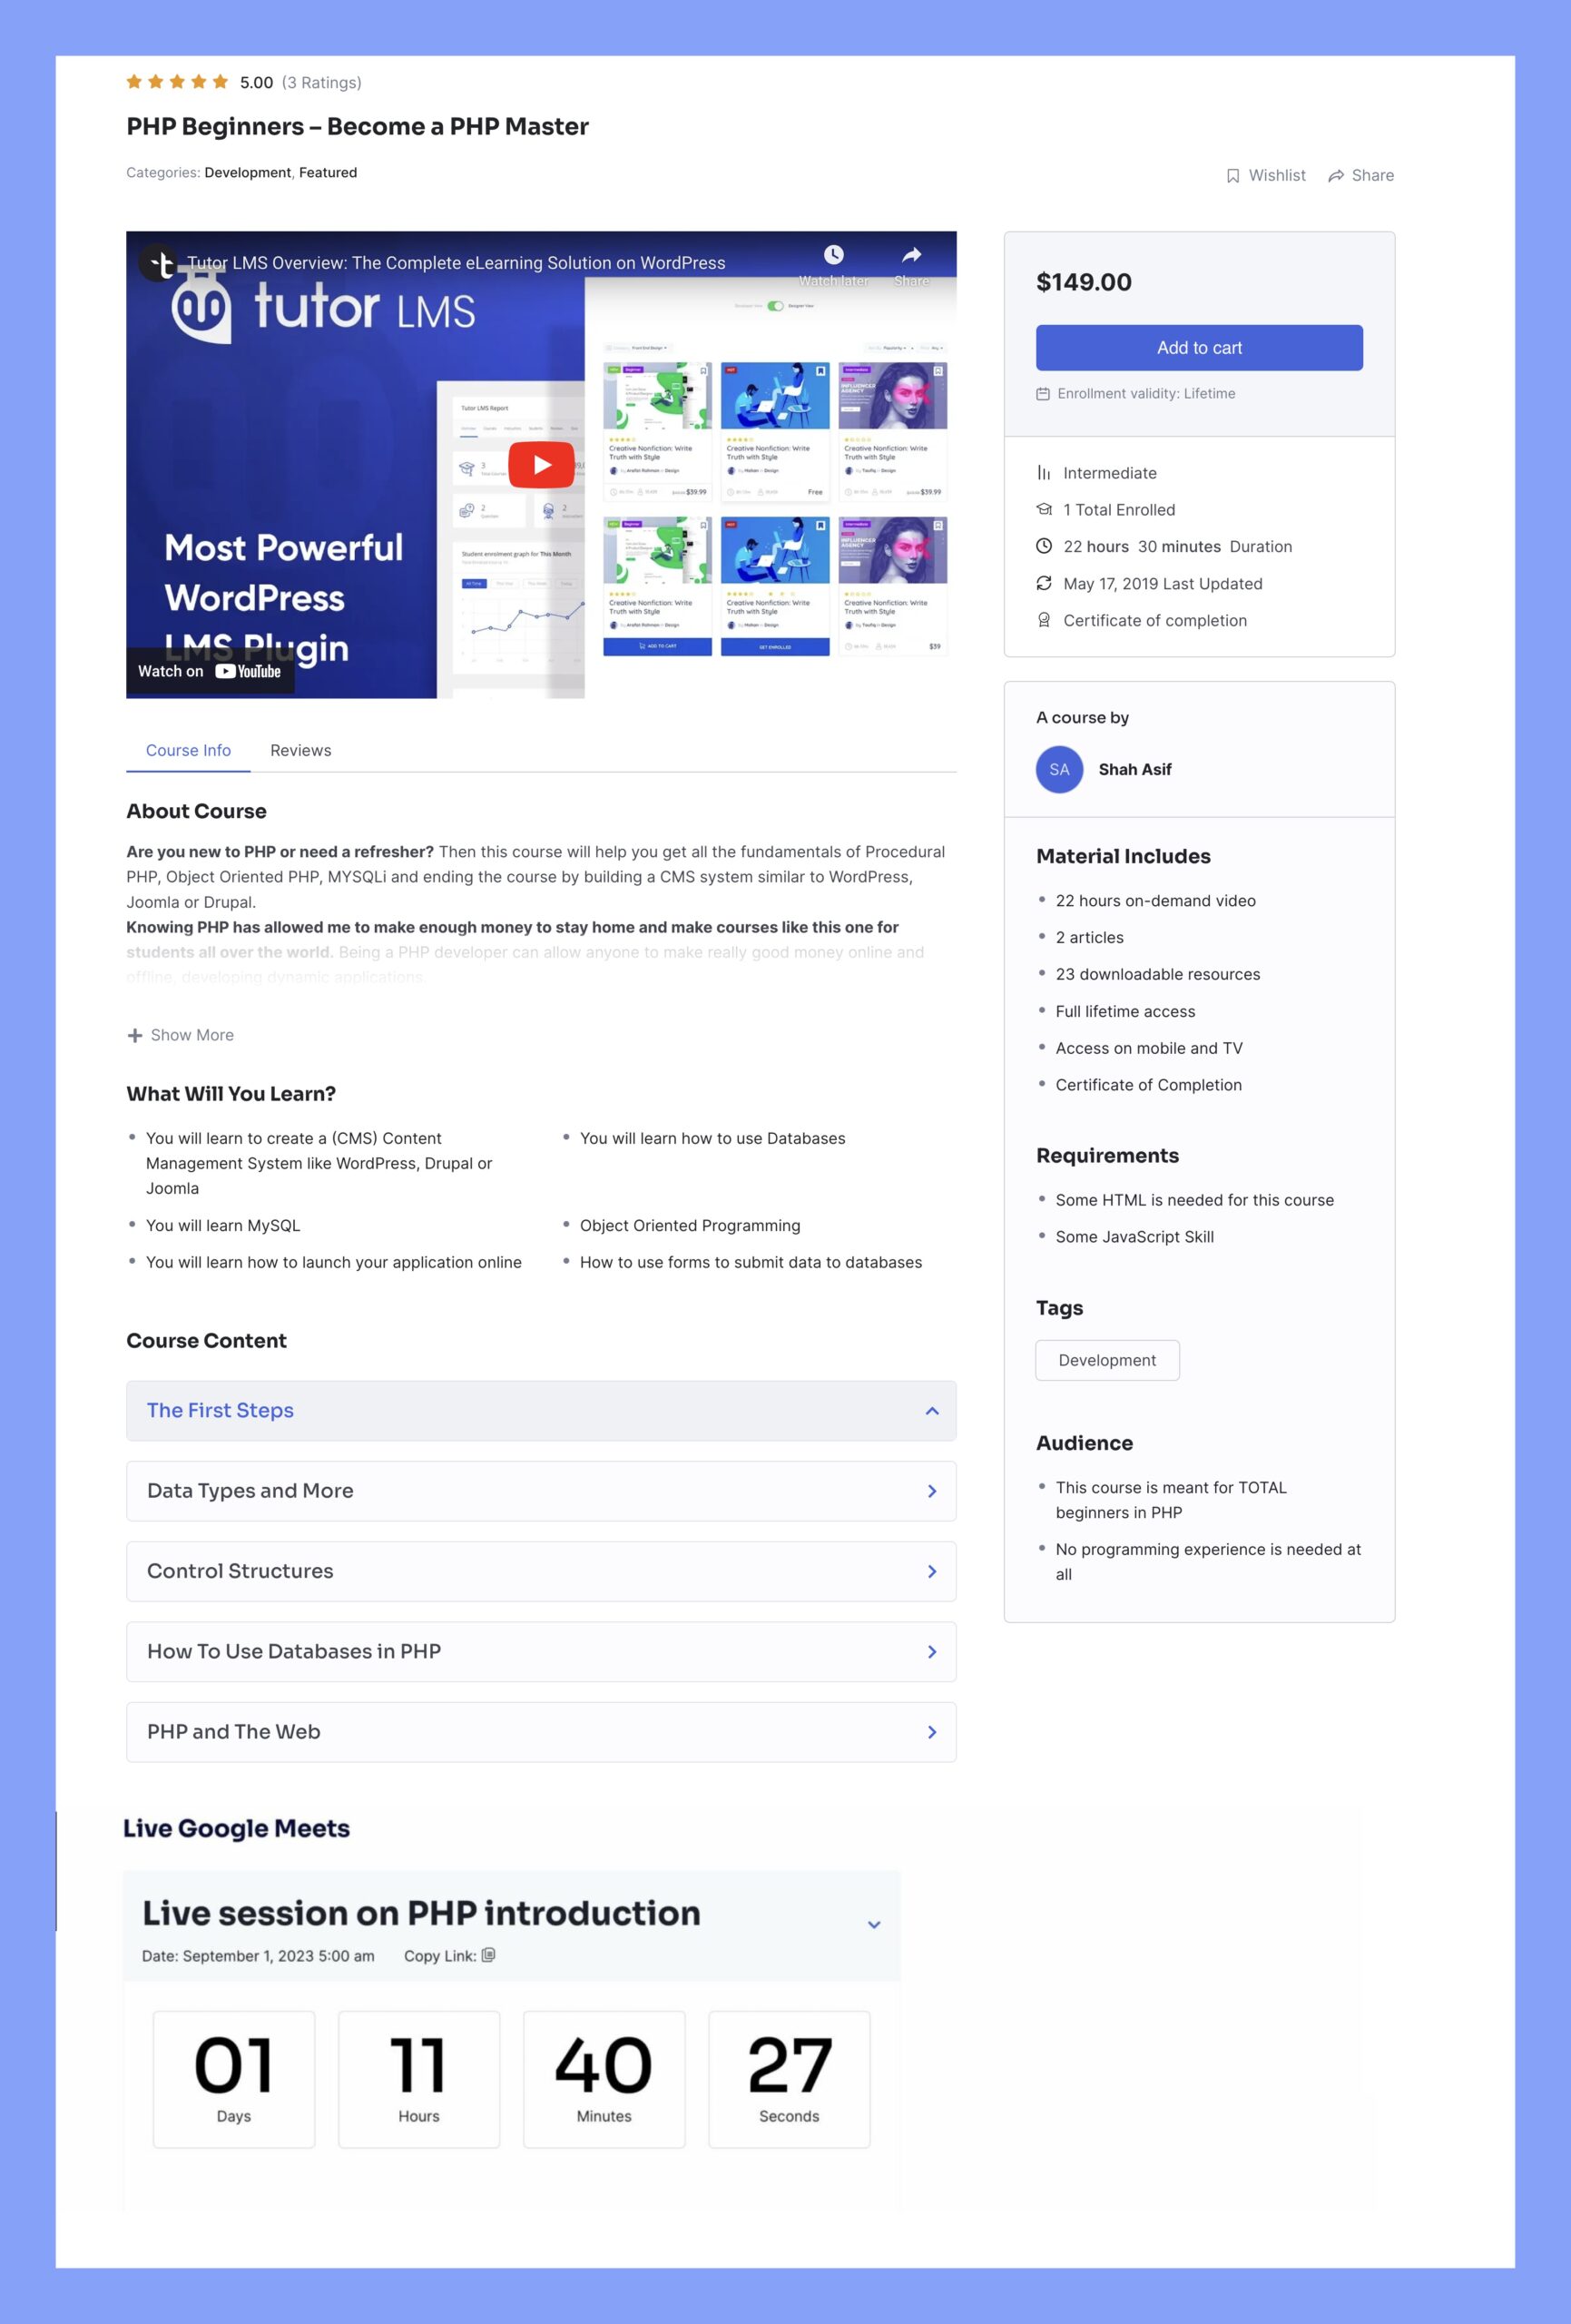
Hosting live video sessions allows you to connect with students in the moment. You can answer questions instantly, discuss ideas spontaneously, and collaborate in real time. Live video helps build community since students can chat and work together. It brings your virtual classroom to life.
To unlock live streaming powers in Tutor LMS, just install one of the available add-ons like Bunny.net, Zoom, Google Meet, or Google Classroom. Choose the one that fits your preferences and budget. With just a couple of clicks, you can integrate interactive live video into your courses.
Summing Up
So there you have it—everything you need to create incredible video lessons that will wow your students! With Tutor LMS, you’ll have all the tools to take your content to the next level. Just imagine how excited your learners will be when you implement things like interactive elements, accessibility options, and chapter markers. Your enrollment numbers will surely start climbing!
The key is keeping your audience hooked with an engaging tone, clear explanations, and plenty of visual appeal. Don’t be afraid to get creative and add your own flair, too. After all, your unique teaching style is what connects with students. Finally, I hope you found this article helpful and informative. If you have any questions or suggestions, please do not hesitate to reach out in the comments below.