Two-step verification or 2-factor authentication, whatever you may call it, is a real lifesaver in this age of digital entrance system. You must have noticed that, Google, Facebook, Microsoft, Apple and most other companies are now encouraging their users to activate 2-step verification system. It tightens the account safety by adding an extra layer of security. You can do it for your WordPress site account as well.
Why 2-step verification?
If you enable 2-factor verification system in your online account, this will require you to provide an additional proof to ensure that the account credentials have not been compromised. In most common cases, besides the general login information such as the user ID and the password, the user needs to enter a unique code which is usable only once and generated remotely. This unique code is normally delivered to the legit user via SMS, call or in-app systems.
It makes a great sense of security. Because, even if an attacker somehow manages to get your username and password for an online account, they might not get access to your mobile phone. So they would not be able to get the verification code, and hence, they will not be able to login to your account.
You can utilize this amazing security system in your self-hosted WordPress site (WordPress.org) and beef up your website security (it’s a native feature for WordPress.com sites). There are many plugins and services for this. In today’s article, I will discuss the easiest one. That’s the Google Authenticator method.
How to activate login verification in WordPress?
To enable 2-step verification on your WordPress site using Google’s Authenticator service, you need two things. One is a WordPress plugin to implement it on your site, and another is the Google Authenticator app on your smartphone.
So, visit your WordPress site dashboard and navigate to the Plugins > Add New section. Search “Google Authenticator” in the plugin search box found on the top right corner of the ‘Add Plugins’ page. Install and activate the Google Authenticator plugin from there.
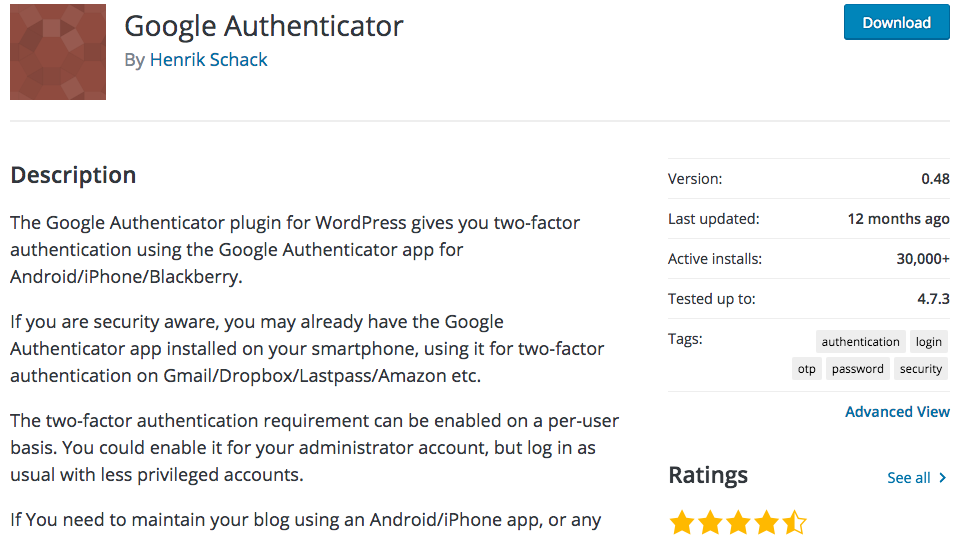
Also, open your smartphone’s application store and search and install the Google Authenticator app. You can get official links to the app for different platforms here.
Once you’ve activated the plugin on your WP site and installed the Google Authenticator app on your smartphone, now it’s time to connect them so that they can interact with one another to provide the authentication feature.
To setup the authentication system, visit your WordPress dashboard. Go to Users > Your Profile. There you will find the Google Authenticator configuration page for your account. Enable it by checking the box on the top of the settings. Also, add a description so that you can recognize your site on the mobile app. See other options carefully.
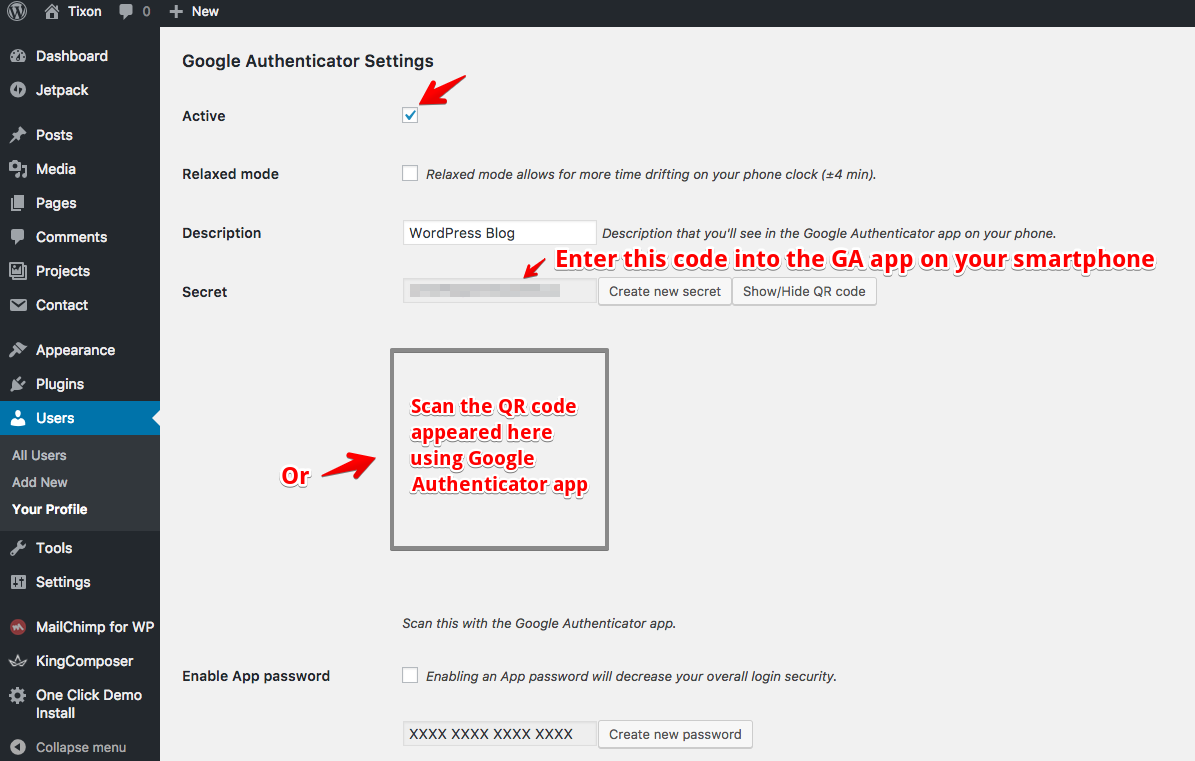
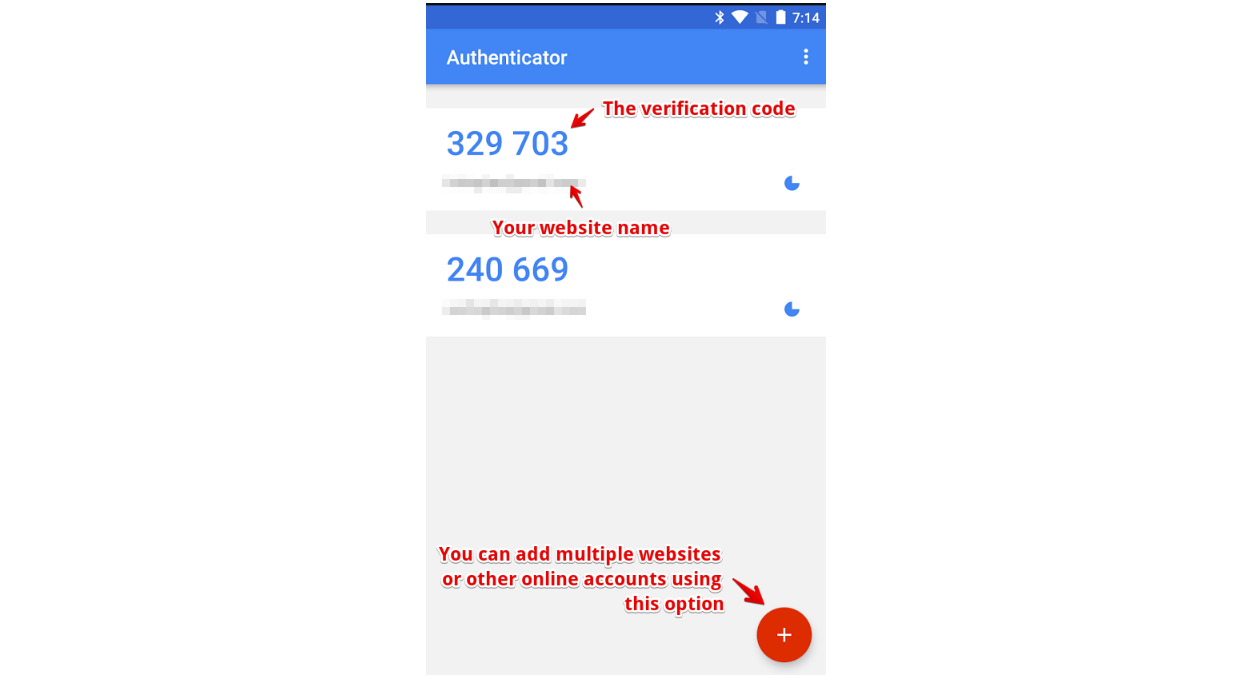
On the same page, you will get a secret code and a QR code. You need any one of these to link the Google Authenticator (or GA for short). Open the Google Authenticator app on your phone. You will get options for scanning a barcode or entering a provided key. Use any one of these two options and link the app to the website. After connecting the site to the Google Authenticator app, save your profile settings on the site.
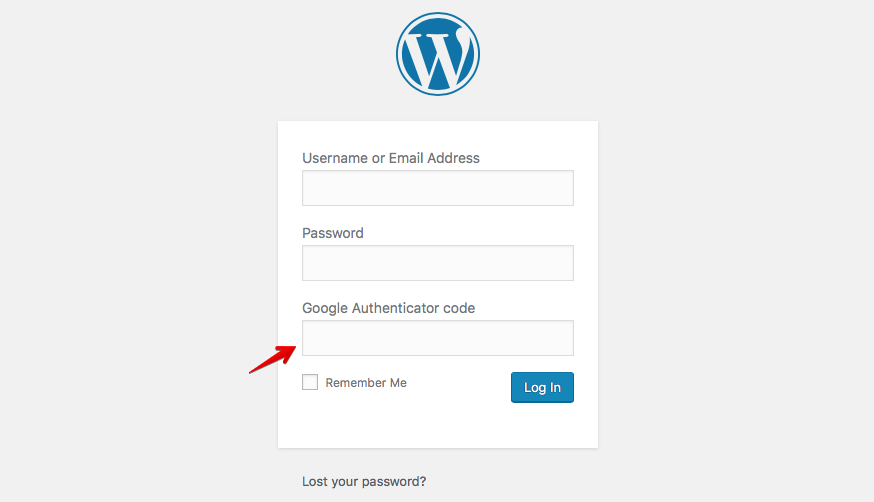
From now on, every time you want to login to your website, you will find the additional 2-step verification code field on the login form. Open the Google Authenticator app, take the code for your website and enter it into your site’s login form’s appropriate field. Use your other credentials and then you can login to the website.
If your site has other users, they can setup 2-step verification for their own accounts from their profile settings. Since the Google Authenticator plugin is already installed on the site, the other users will only need to link Google Authenticator app on their mobile. If a user doesn’t turn this feature ‘on’ for his/her account, they can login to the site by leaving the verification code field blank.
Don’t get locked out
If for any reason, you lose access to your mobile, or the Google Authenticator app gets removed from your phone, you won’t be able to get the code. In this case, you will need to remove the Google Authenticator plugin folder from your server. Explore WP Content > Plugins directory, and delete the Google Authenticator plugin folder from your server. You can do it using an FTP client or from the cPanel file browser, if available.
In this post, I’ve tried to describe how easy it is to enable 2-step verification in WordPress. There are many other ways, but I found this method the easiest. Do you use 2-step authentication on your site? Which method? Please share your experience with us.

