

Good morning Qubely users! Today’s an exciting day for all of us. We’ve been working on something amazing for the last few weeks, and we’re very exhilarated to say that the update is available for you to use! In this update of your favorite Gutenberg block plugin, we’ve added a highly requested and influential tab that will help you design your blocks with ease.
Say Hello to Qubely Global Settings
Designing and maintaining continuity throughout your entire platform is the very essence of web design. And when it comes to designs that immediately grab your visitors’ attention, a uniform color scheme and typography throughout goes a very long way.
Qubely global settings will help you do just that. This piece of utility will speed up your workflow and help you take your work to the next level.
So, let’s take a look at how it works!
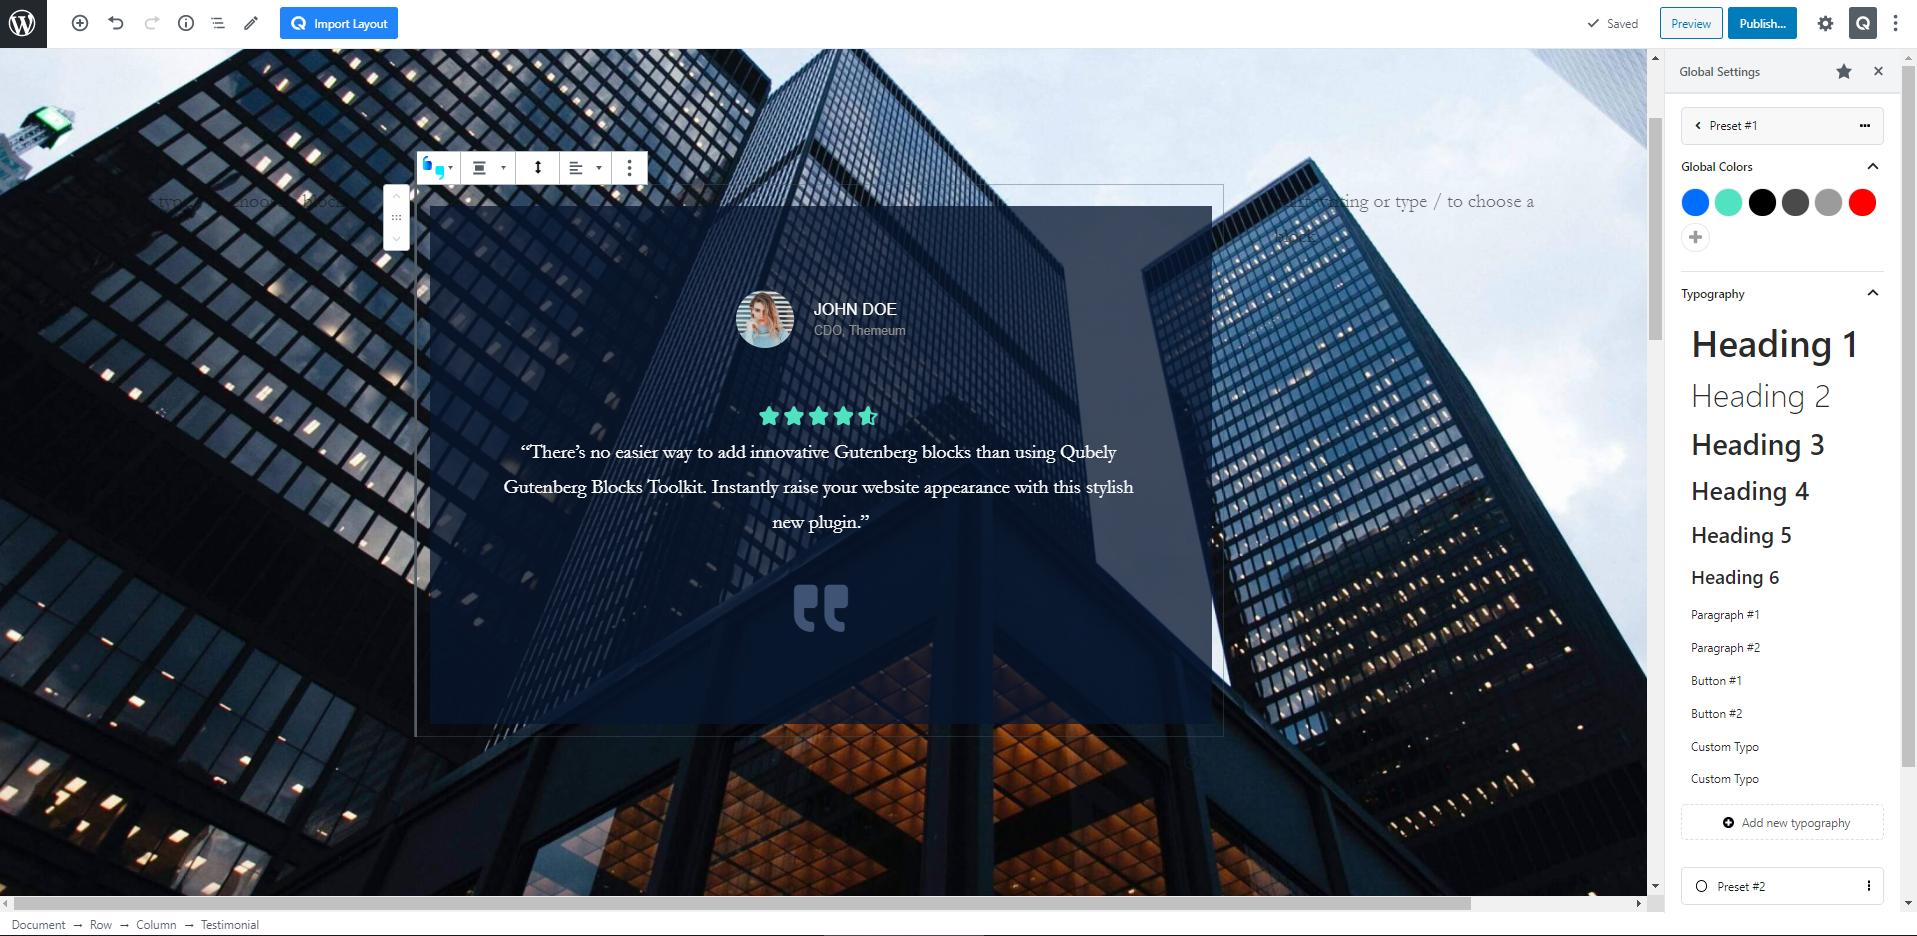
Right next to the Block settings in the Gutenberg editor, you’ll notice a Qubely icon which contains all global settings. Once you click on it, you can locate all the presets. One of the presets will be set to “active” by default, but you can activate or add other ones from right here. Each preset contains two major tabs: Global Colors and Typography. Using the Global Colors preset, you can set colors to use later during the design phase of your website. There are 5 added by default; you can’t delete them, but you can modify them. We’ve added 5 colors as a minimum because we believe at least 5 is needed to create an attractive color palette for your WordPress website.
Step 1: Add Your Custom Preset
In the Global settings panel, you’ll notice an option at the bottom to “Add new preset”. With this, you can create your preset with customized colors and typography.
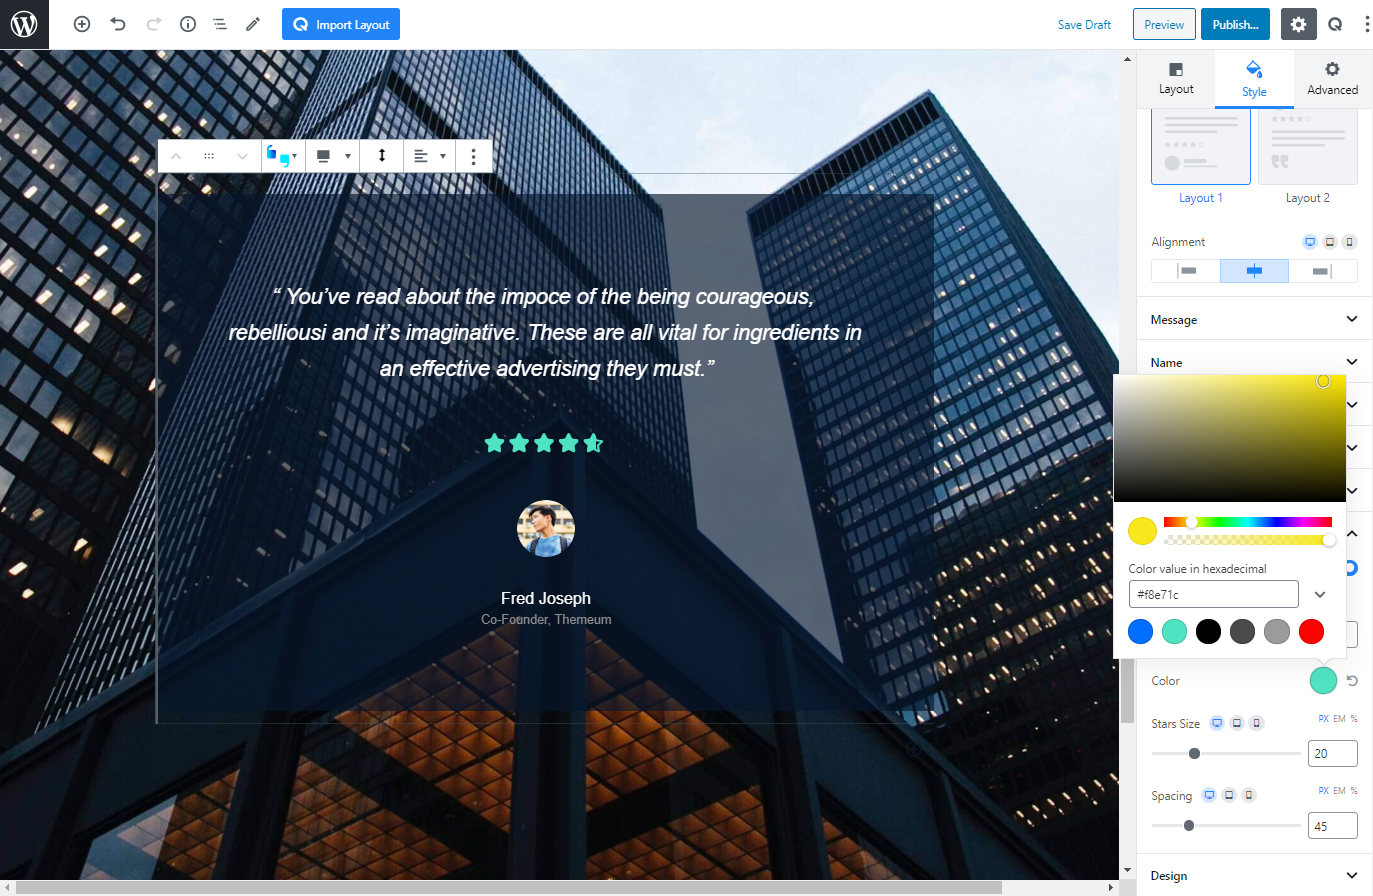
To add new custom colors, all you need to do is to click on the “+” icon, and you can use the RGBA color picker to choose a new color.
Similarly, to add new typography styles, you can click on “Add new typography“. You can also change the style of the headings, paragraph, and button text by modifying the corresponding typography style.
Step 2: Activate the Preset
On each preset context menu, you will find an option called “Activate”. You can also use “Save as New”, which will duplicate all the settings from this preset and create a new one. To have a fresh start, you can also create a new one.
Step 3: Use Global Settings While Designing
While designing with Qubely blocks, you will now notice something different in both color pickers and during typography selection. All kinds of color pickers will now fetch all the global colors from the “Active” preset, and you can simply pick them to create a uniform color palette. This means you no longer have to note down color codes!
Similarly, for typography, we’ve added a new field called “Source” which lets you decide whether you want to use Global typography or Custom ones. The Global tab has a drop-down containing all styles from the preset as well as a “Theme” style which fetches the typography CSS from your active WordPress Theme. But if you don’t want to use the theme’s typography, you can simply pick one from your global preset!
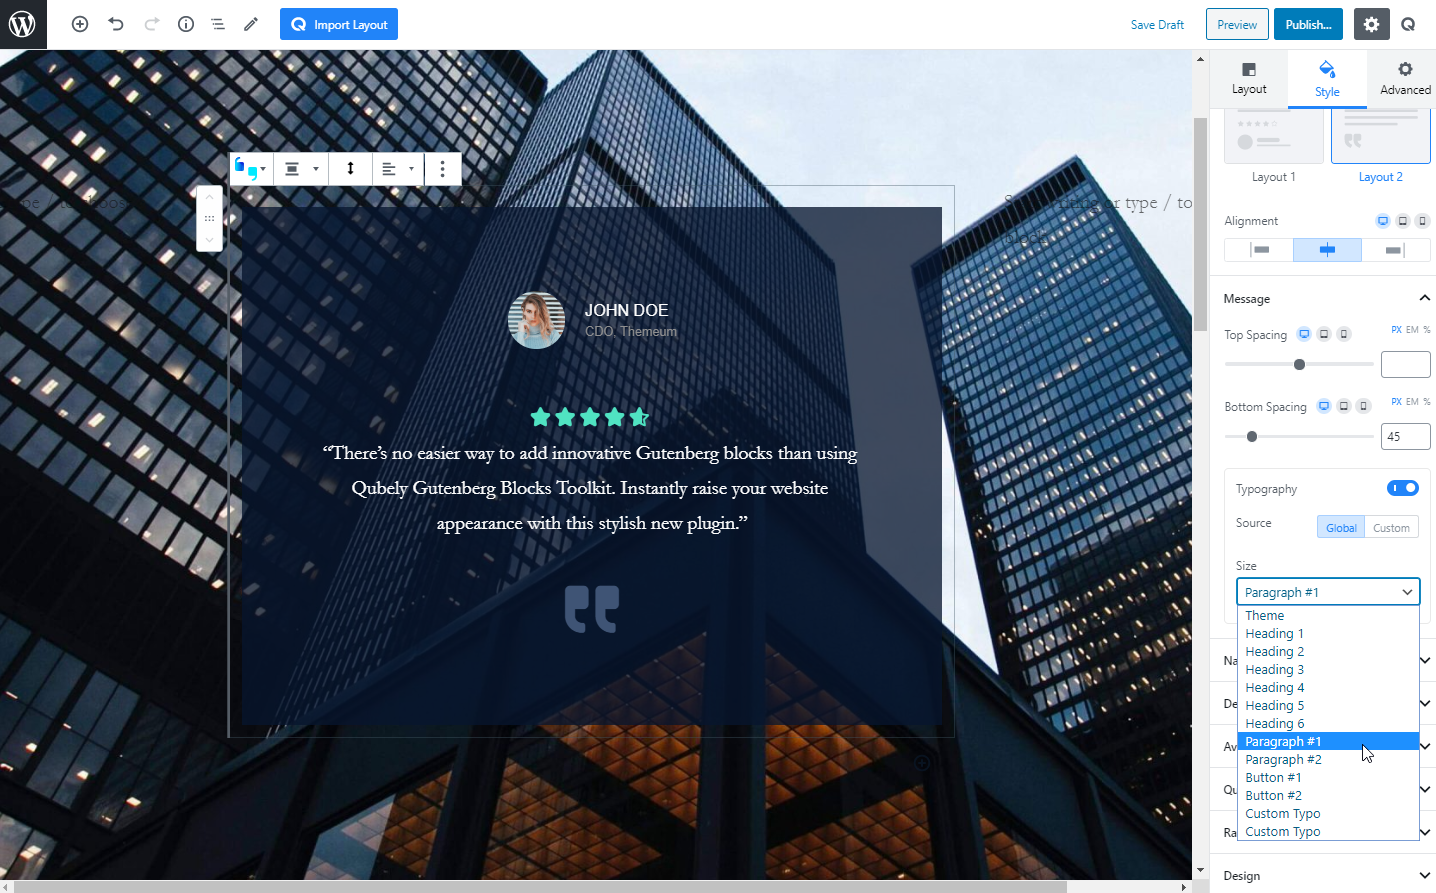
But, what if you’re working on a heading, and you want just this heading to be 1 font size bigger. Well, we’ve got your back here too! Pick the most similar heading, and then go to “Custom”. This will copy all of its CSS values from the preset to the fields in the “Custom” tab, and all you need to do is to increase the font size by 1.
Step 4 (Bonus): Changing Presets or Modifying Active Presets
There are some things that you must keep in mind while using global presets to design a WordPress website:
- All settings work retroactively; for instance, if you change a color value in an active preset, all color fields where it was used will change to the new value.
- If you change the active preset to a different one, all settings will be fetched from the newly activated preset. Therefore, all colors, as well as typography, will shift to the new one. For instance, if you switch from Preset 1 to Preset 2, then all places where you used Color 1 will switch from Color 1 Preset 1 to Color 1 Preset 2.
Qubely Settings Restructured
Some settings have also been moved to enhance user experience. We’ve moved the Google Maps API key, and the reCaptcha keys to Qubely’s General settings panel. We’ve also moved the CSS Location setting to the Advanced tab.
Final Thoughts
Qubely’s global settings are one of the ways we aim to take this plugin to the next level. We genuinely think that Qubely has the potential to become a one-stop-shop for WordPress web designers and developers alike. And to do that, we need to add features like this that will help you, the developer, to achieve your goals as efficiently as possible. So keep building with Qubely’s Gutenberg blocks, and we assure you, you will not be disappointed.
Update your Qubely now. Do share your experience in the comments!


Chane Cullens
Very impressive addition! I’ve been using the global styles on several new pages and this has made my workflow a lot more efficient. Thank you!
kawshar
Thank you. Glad to know that the feature made your workflow easier.
EasyNotes4U
But as i noticed, quebly is not supports wpforms dropdown menus, when we insert wpforms which dropdown fields, then the fields populated so long .. and the icon of dropdown is displaced and it takes space as much as long the dropdown list, instead of 1 single box, it shows blank space or all dropdown list up to the end.. you need to fix it, because mostly using wpforms.. please check it, may be you will get more chance to improve and update quebly. Just try it..then you will see that bug which i told u.
kawshar
We will investigate the issue.
Thanks