If you just put a little effort and follow a simple to understand tutorial, you can easily create your fundraising website.
Organizations such as the WHO or other big ones can easily hire a full-scale team to build their fundraising site but those who have limited resources are not. That’s where this blog comes in. We are here to prove to you that you don’t need a full team or much money to create a fund-raising site of your own.
In this article, we’ll show you how to create a charity site using WordPress with a step by step guide. Having an online presence for your fund-raising initiative, and that too with WordPress can be beneficial for you. Such as:
So, without wasting any time let’s get started.
Even though there are multiple options available, why would you opt-in for WordPress as your default choice. Well, there are several reasons. WordPress is an open-source platform that is maintained by the community (people who rely on it), meaning any security issue will surely be solved in the fastest time. Other than that, new features are being added with every core release. As a non-profit/individual fundraiser, you will also be able to take advantage of the huge number of professional “themes” and “plugins”. And dare we say there is almost a plugin for everything.
If you are looking for WordPress tips & tricks then definitely check out Themeum’s specific blog section.
Before we get started, make sure you have all the basics in place. Although we know these are the most elementary requirements, we want to be confirmed that you are fully covered before starting.
If you don’t have these three set up yet, please check out the following references.
? How to Choose Your domain (site address of your Charity platform)
? Best Solution for Your hosting ( we suggest you use a WordPress-ready hosting)
As for installing WordPress with your hosting storage, please check in with your hosting provider. Nowadays there is an easy WordPress installation available almost everywhere.
WordPress themes are designed website structures that can be installed on your site. They are a very easy option to get a professional-quality look on your site without paying a lot or hiring a full design team.
This is a perfect solution for the non-profit/individuals out there. And to make it easier, you can get our premium fundraising theme Caritas.
You will find an overview of the Caritas theme in the following image and subsequent descriptions.
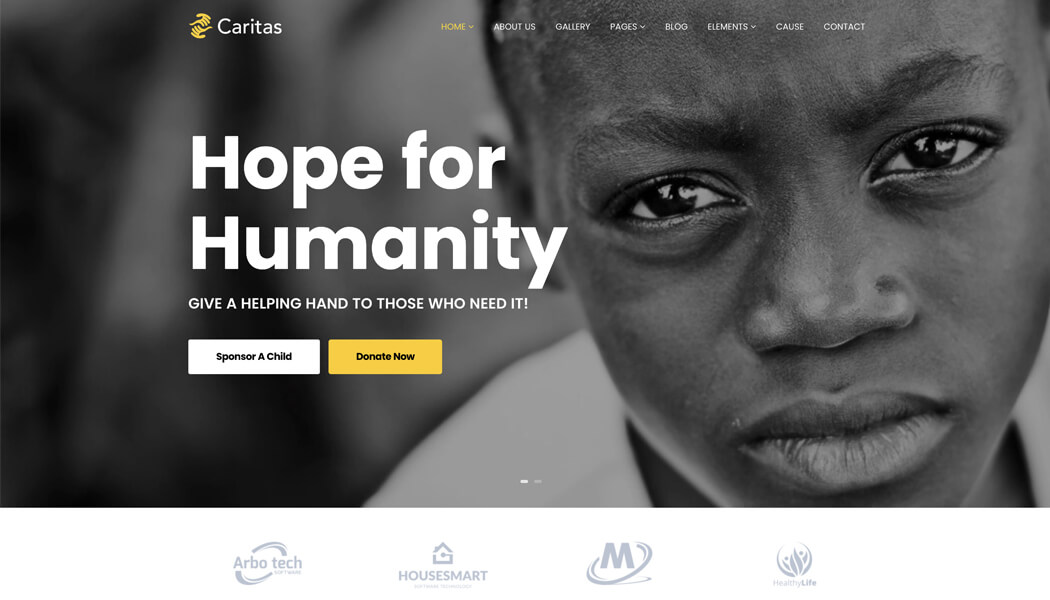
The charity theme you choose should come with the homepage that is built for charity purposes. That’s why in our opinion you should avoid general multi-purpose themes and rather stick with a fund-raising theme. Caritas offers 2 homepage variations with different layouts.
Caritas has a dedicated volunteer page. You can easily use it to recruit volunteers for your charity cause.
You will be able to keep your contributors up to date with the latest news & updates about your operation through the dedicated blog section that comes with the Caritas charity theme.
These pages along with other features make sure that you don’t miss out on the most important features of your charity site.
For reference, we are gonna show you how you can install the Caritas theme in your WordPress site. The process is identical to other theme installations. Once you download it from your Themeum dashboard, you will find the .zip format file in your local environment.

Simply unzip it and you will find the theme installer file inside. Upload it to your WordPress site. If you are confused or don’t know how to install the theme, we made this documentation for you.
Once you have installed the theme, you will now see a notice asking you to install the required plugins. Installing them will allow you to take full advantage of your charity site. You don’t even need to separately install them.

With Caritas, you will find a dedicated section that will show you all the required plugins. And a one-click option is there to install them all. The theme uses multiple capable plugins to make the most out of your charity site. Check out this documentation for more information. Finally, activate these plugins.
To take payments to your charity site we recommend WooCommerce. Here You will find almost all types of payment method support.

You will be receiving money from a lot of donors using your charity site, so you should properly set up your payment channels to avoid future problems. Set the following payment methods for your charity site as they are supported by WooCommerce.
If you want to see the full list of supported payment methods, head over to this link. For all the dedicated payment methods you will need their own designated plugins from the WordPress plugin directory.
As for the configuration, all you need to do is go to the Payment section of your WooCommerce settings. There you will have all the available configuration and setup processes for your preferred payment methods. Click on the payment configuration of your choice and you will find the settings.
To make it simple for you, our Caritas theme comes with a built-in demo content import option. All you need to do is install the Demo Importer plugin that comes with the theme.

Once you install it, you will see the One Click Demo Install option in your dashboard. Go there and you will get the easiest demo content import option in the market. Click and wait for it to finish. Once the process is done you will see a complete charity site with necessary pages, content, visuals, etc.
Note: The imported contents are for testing purposes only.
Now you just need to replace the demo content with your own. Your charity site will be ready to go public as soon as you do these final touches.
If you are looking for the best bang for your bucks, then this is one of the best offers you will get. Every available theme from Themeum, only at the price of $199.

If you have made it this far then you are convinced how easy and simple it was to create your very own charity site with the least amount of effort. The right tools make the whole process easier so that you can concentrate on growing your charity initiative!
Do share the experience of creating your charity site with us. Also don’t forget to tell us what you want to see next, in the comment section below.
© 2026 All Rights Reserved. An Ollyo company